Add Organizations
Follow the steps to add an organization.
Step 1 – On the Netwrix 1Secure Website, on the Home page, select the Add organization icon to add an organization.
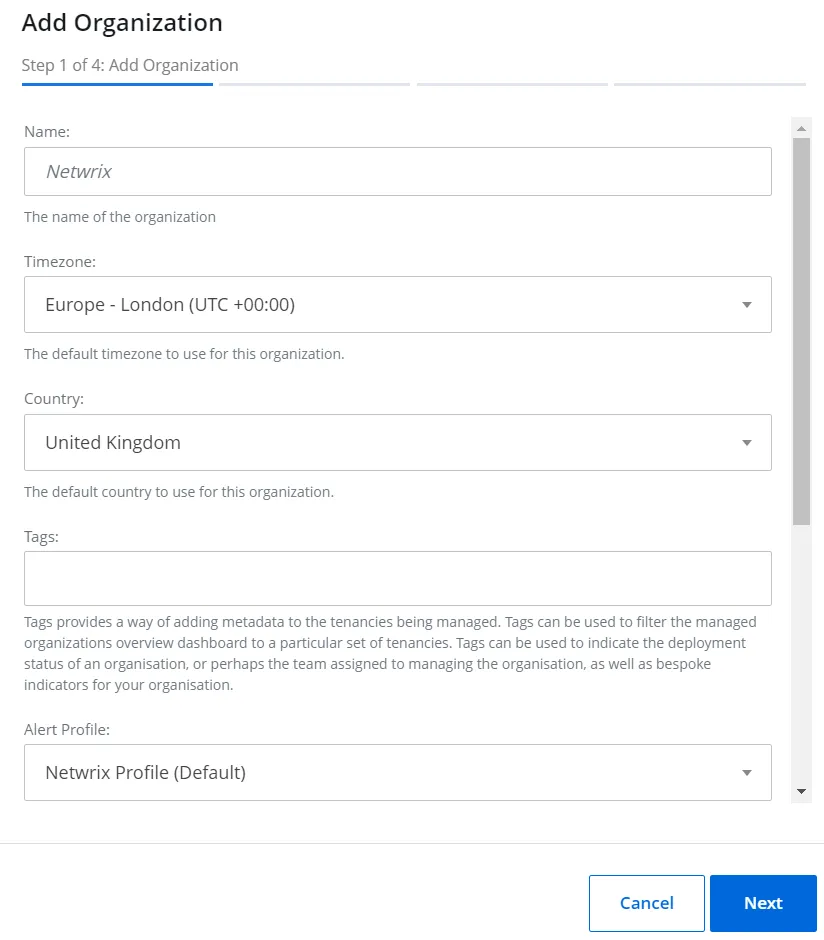
Step 2 – On the Add Organization (Step 1 of 4) window, specify the following:
- Name – Specify a name for the organization
- Timezone – Select a timezone for the organization
- Country – Select a country for the organization
- Tags – Select tag(s) for the organization. Tags provide a way of adding metadata to the tenancies being managed. To specify multiple tags, select them one by one from the dropdown menu.
- Alert profile – Select an alert profile for the organization. Alert profiles enable you to group alert configurations and delivery notification settings together.
- Risk Profile – Select a risk profile for the organization. Risk profiles enable you to group thresholds together.
- Groups – Select a group for the organization. To assign an organization to multiple groups, select the groups one by one from the drop-down menu.
Click Next.

Step 3 – On the Select Data Source (Step 2 of 4) window, add a preferred data source to your organization:
- Active Directory
- Azure AD (now Microsoft Entra ID)
- Computer
- Exchange Online
- SharePoint Online
NOTE: See the Sources and Connectors topic for detailed information.
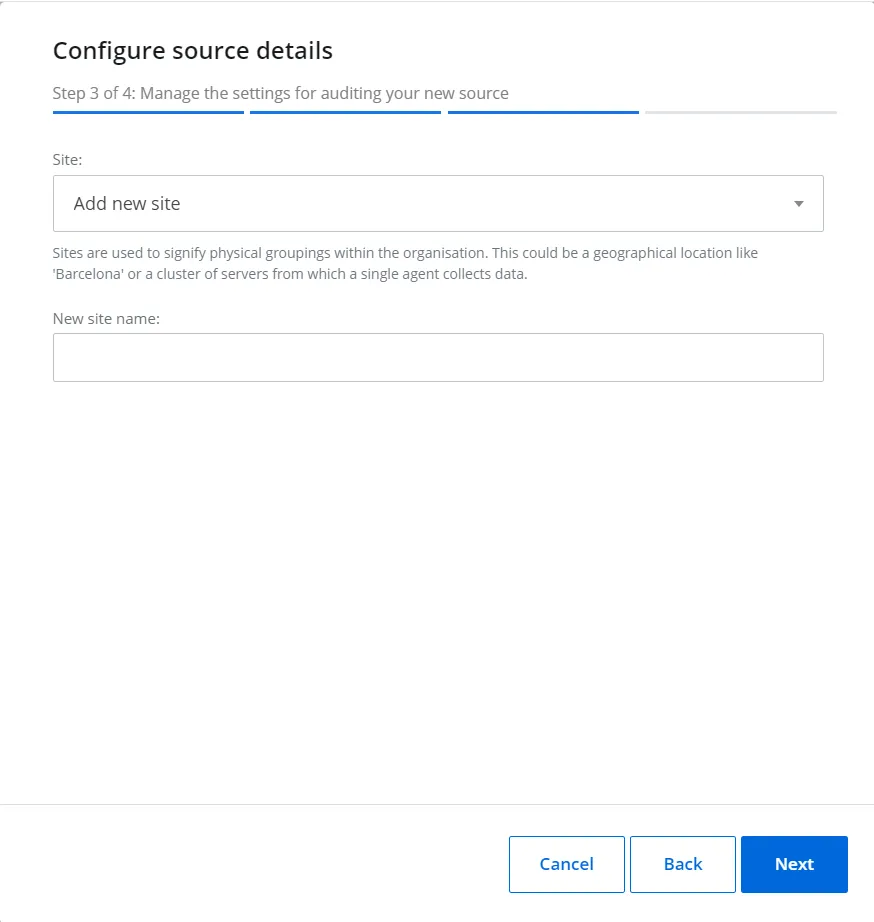
Step 4 – On the Configure source details (Step 3 of 4) window, add a site for your organization. Sites are used to signify physical groupings within the organization. Click Next.
NOTE: This step is displayed only when adding Active Directory and Computer sources.
See the Add Sites to an Organization topic for additional information.
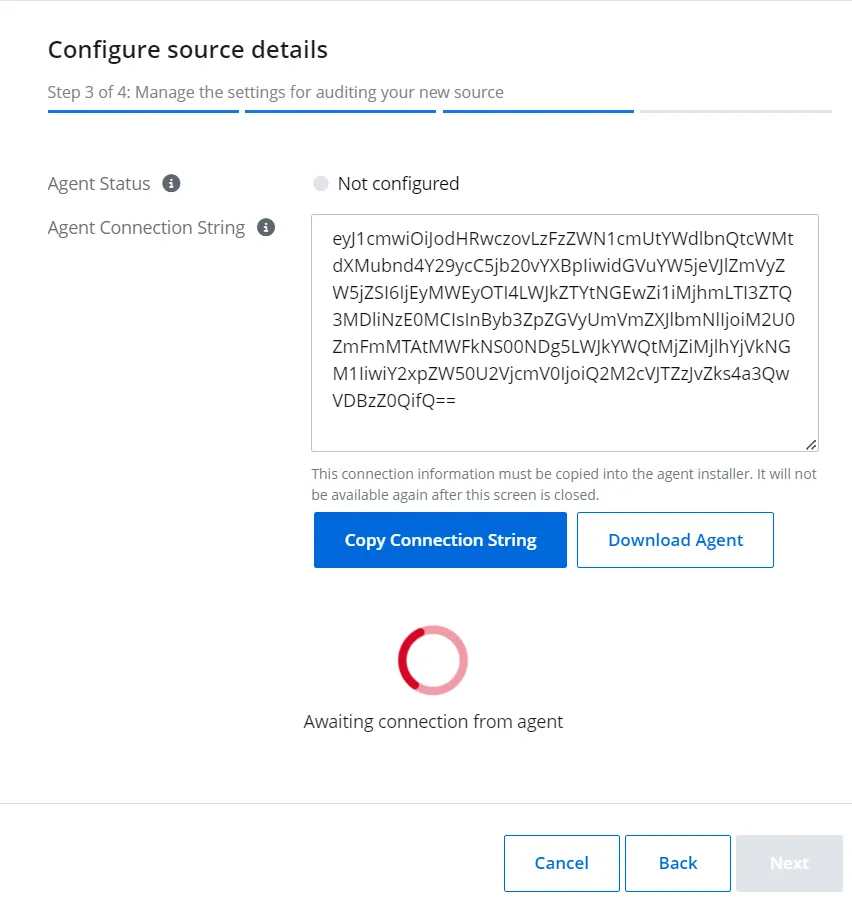
Step 5 – On the Configure source details (Step 3 of 4) window, follow the instructions to install the agent. Please go to the Install Agent topic of the online help. Click Next.
NOTE: Install the agent only for on-prem sources - Active Directory and Computer. This step is displayed only when adding these sources.
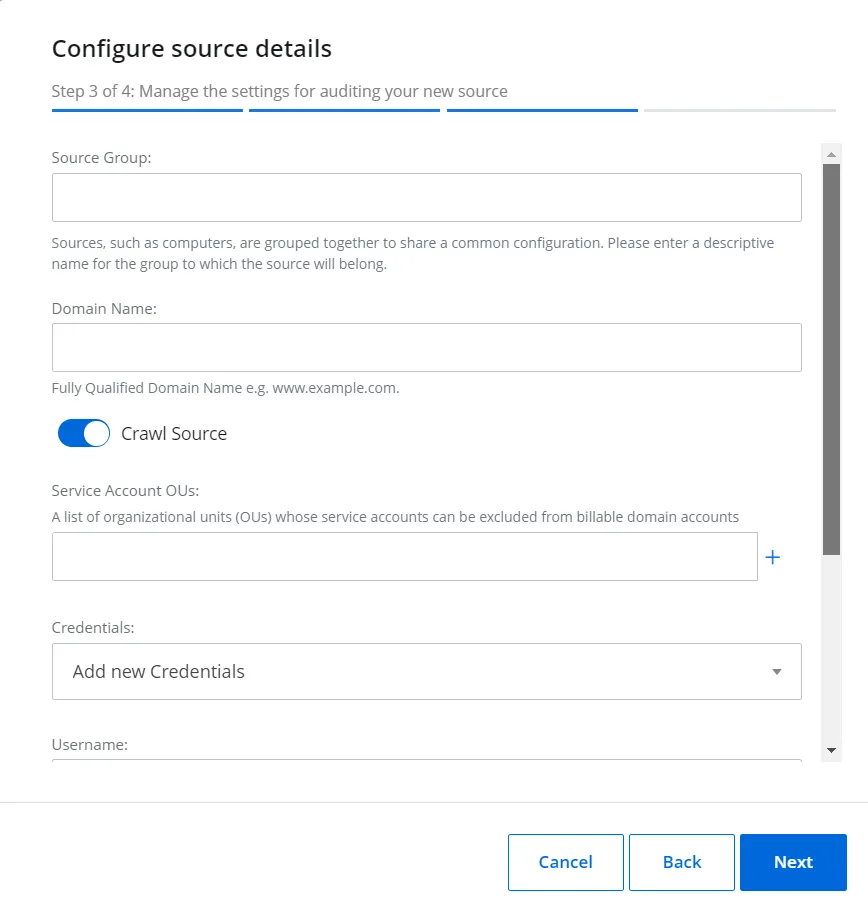
Step 6 – On the Configure source details (Step 3 of 4) window, specify your source settings. See the Sources and Connectors topic for additional information.
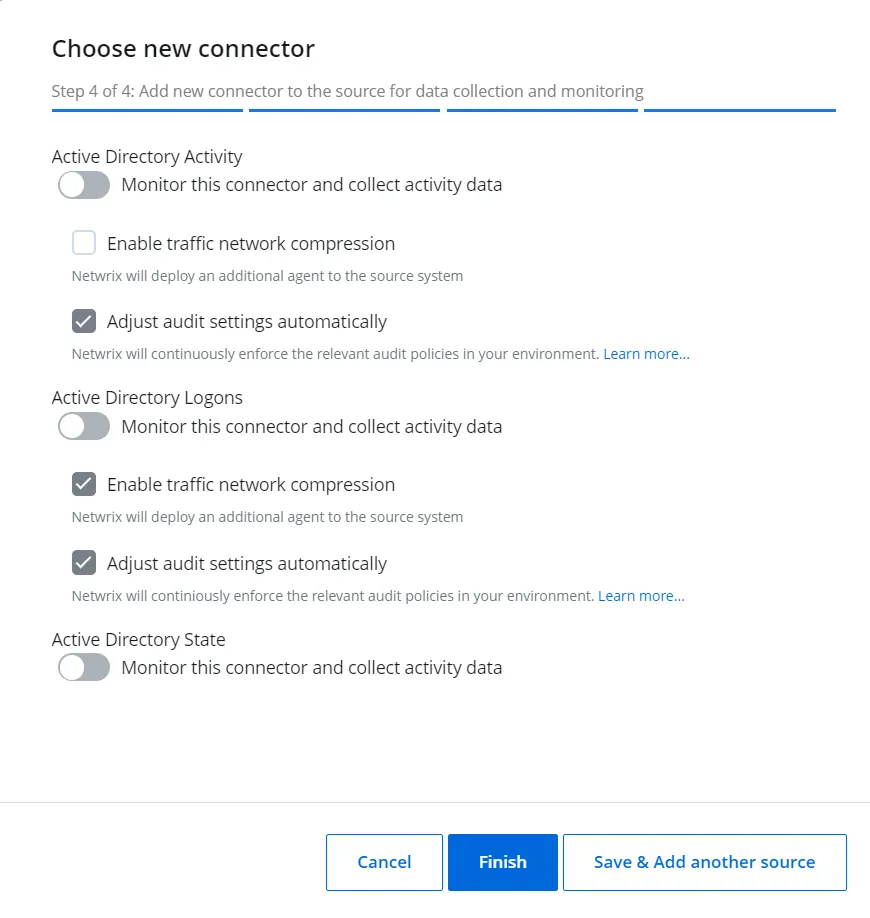
Step 7 – On the Choose new connector (Step 4 of 4) window, add the connectors for your sources on. See the Sources and Connectors topic for additional information.
Step 8 – Click Finish or Save & Add another source to add a source for your organization.
The organization is now added.
Manage My Organization
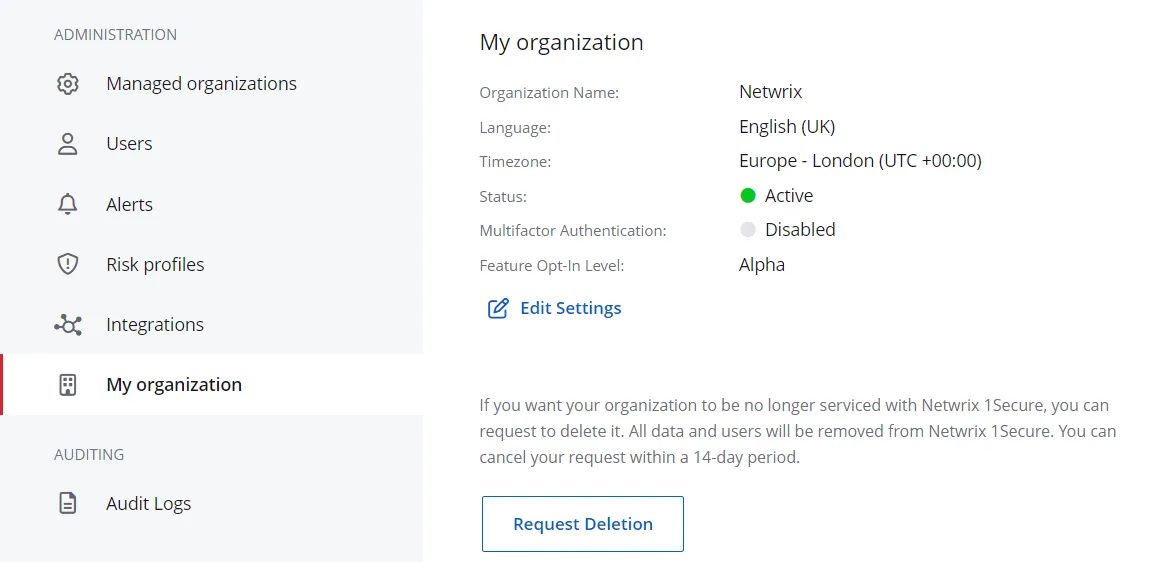
After you added your organization, you can review or edit your profile on Configuration > My Organization page.
-
Optionally, specify Edit settings or Request Deletion for your Organization.
NOTE: If you are a Managed Service Provider or a parent tenant, your organization will be deleted within 14 days. If you are a child tenant, your organization will be deleted within 2 days.
-
You can enable MFA, configure reports branding and adjust other settings for your organization on this page.
-
You can also delete your organization and wipe all of the data here.