Billable Users Report
A Billable Users report provides information on the billable accounts – the enabled Active Directory/Microsoft Entra ID (formerly Azure AD) accounts for your organization. See the Billable Accounts topic for additional information.
| Icon | Description |
|---|---|
| Lock Icon. It shows that the business users cannot view the report. See the Add Users topic for additional information on the business users. |
Review a Report
Follow the steps to review a billable users report.
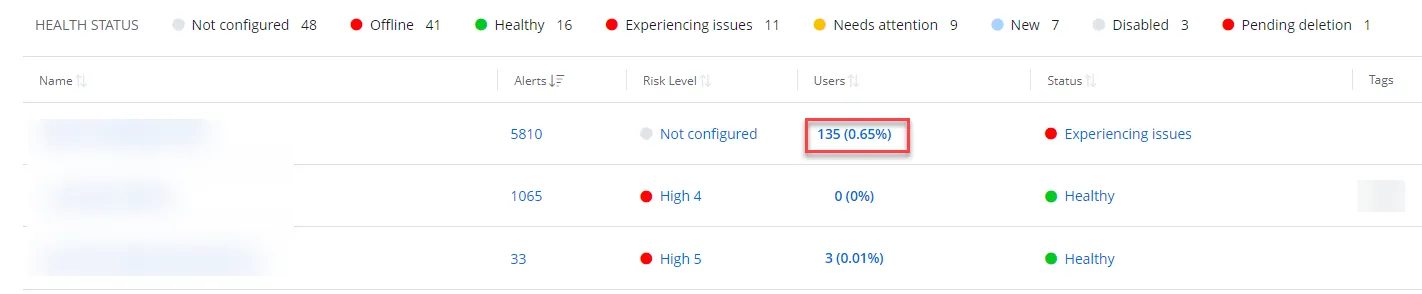
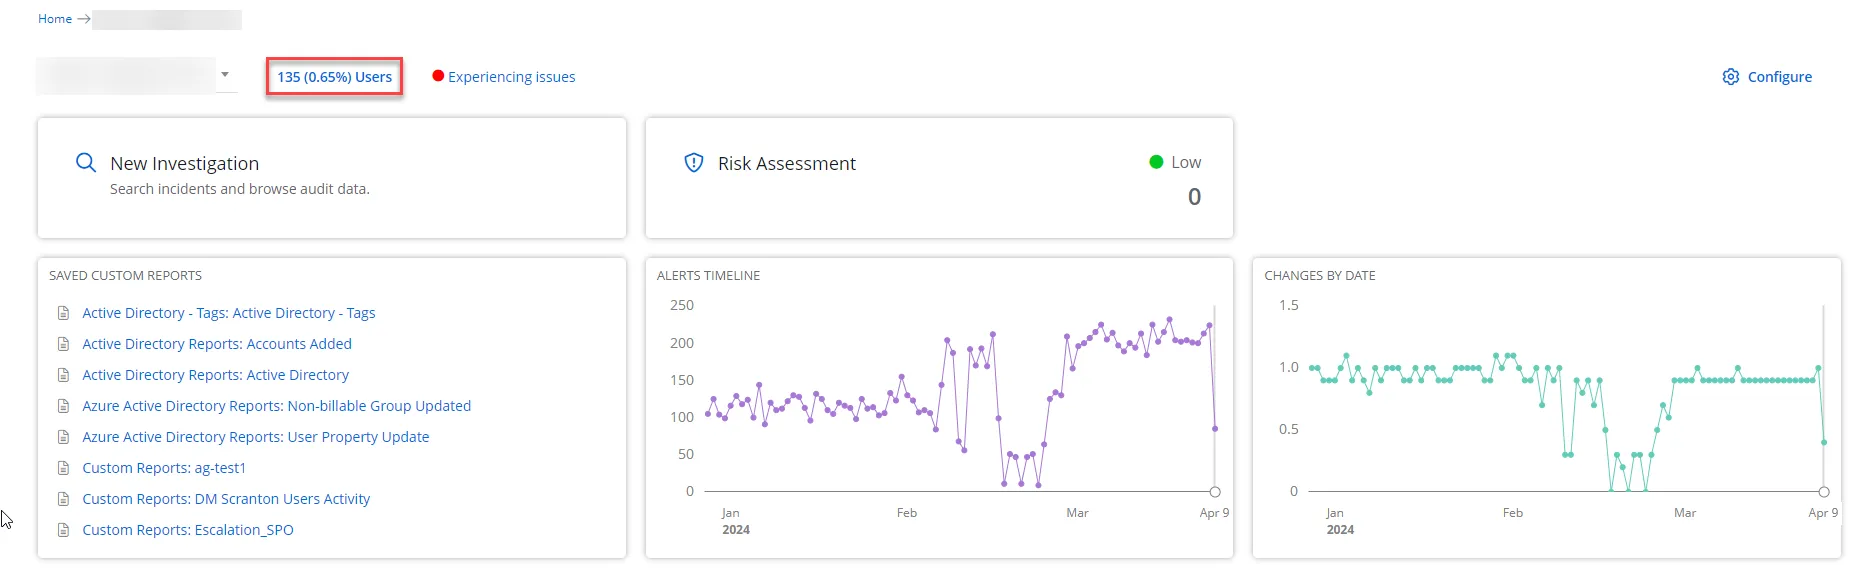
Step 1 – On the Home page, click the Users of your organization. The System > Billable Users page opens. By default, it populates the data with the Users of your organization.
- Dashboard for Managing Organization
- Dashboard for Managed Organization
NOTE: You can also access the report by navigating to the Reports > System page.
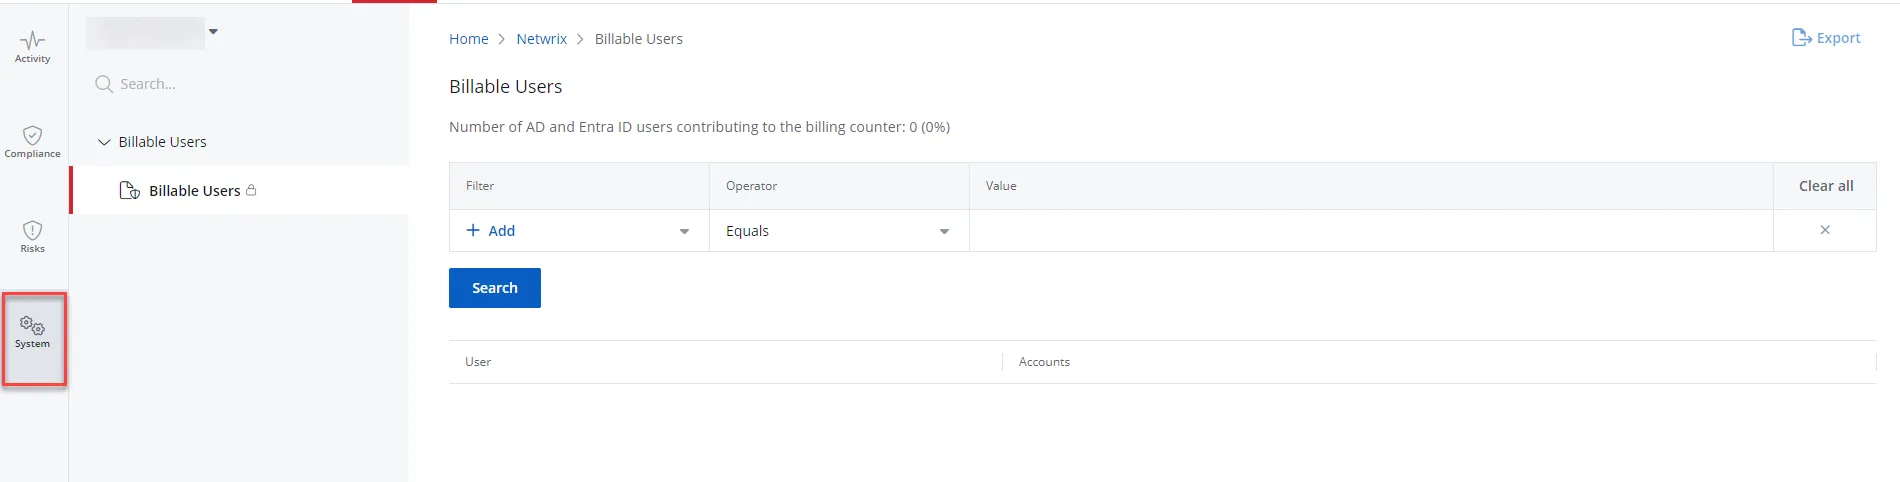
Step 2 – If necessary, you can filter the provided data. Select a filter, operator, and value from the Filter, Operator, and Value drop-down menus respectively.
NOTE: You must specify three columns: Filter, Operator, and Value. You may also select more than one filter. To review the Operator filter options, see the Filter Operators topic for additional information.
Step 3 – Click Search.
NOTE: You can also export a report to your email by clicking Export in the upper right corner of the page. You shall receive a report in XLSX to your login email.
Filter Descriptions
This table provides a list of filters and descriptions.
| Filter | Description |
|---|---|
| Account | Limits your search to a specific account. Account is an instance of a user, specific to a source. For example: User = John.Smith Account = AD User: John.Smith / Azure User: John.Smith |
| User | Limits your search to a specific user. |
| Source Type | Specify the source type of the user: - AD User - Azure User - Windows Local User |