Creating a Report
Creating and customizing reports allows you to design outputs uniquely crafted to your requirements. Reports can vary by section order, sourced data, file format, and other elements within the reports configuration.
You can add additional reports by the following methods:
NOTE: It is important to consider whether a report should be added to an existing job, or a new job created to generate the report. Contact Netwrix Support for additional information on report outputs.
Create a Custom Report
You can create a new custom report for an existing job from the job’s Reports node. Follow the steps to create a new report.
Step 1 – Navigate to Jobs > [Job] > Configure and select the Reports node.
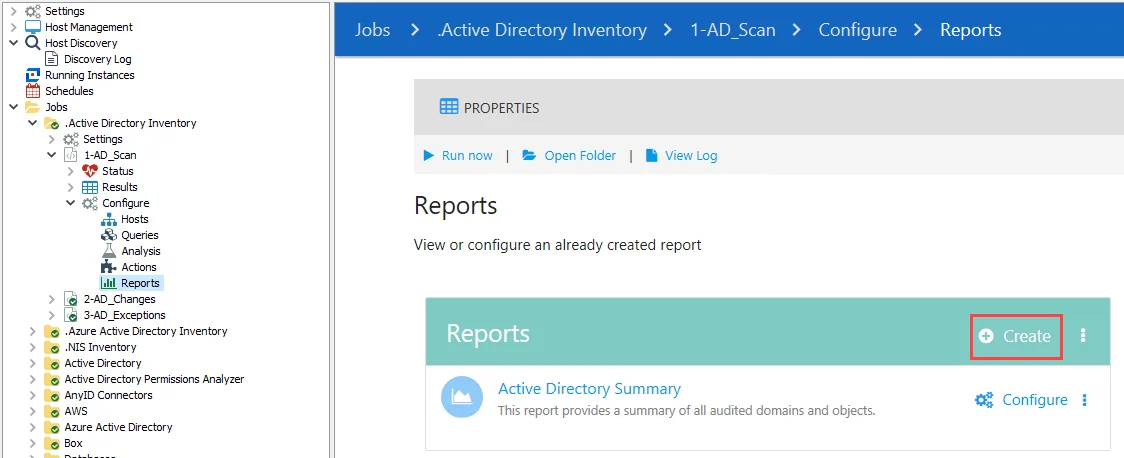
Step 2 – On the Reports page, click Create.
Step 3 – The Report Configuration wizard is automatically launched. Use the wizard to configure the new report as required, see the Report Configuration Wizard topic for instructions. Click Finish on the final page of the wizard to create the report.
The new report is added to the Reports table.
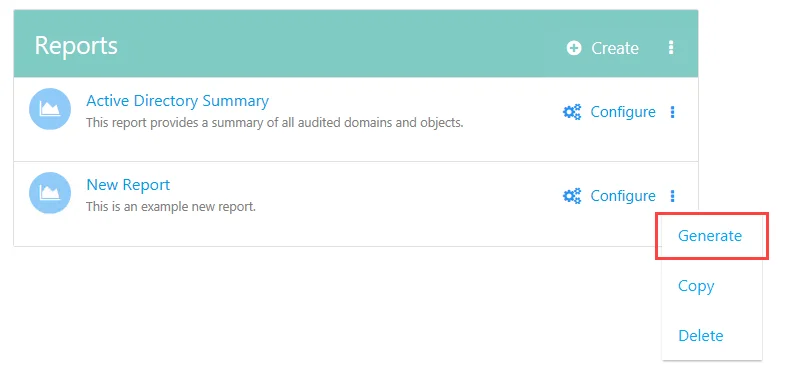
Step 4 – Click the vertical ellipsis menu next to the report and select Generate.
The report is now created. To access the new report, see the Viewing Generated Reports topic.
Copy an Existing Report
You can create a new report by copying an existing report and pasting it in a job’s Reports node. You can then optionally customize the report as required. Follow the steps to create a copy of an existing report.

Step 1 – Navigate to the Reports node where the desired report to copy is located. Click the vertical ellipsis menu next to the report and select Copy.

Step 2 – Navigate to the Reports node in the desired destination for the new report. Click the vertical ellipsis menu in the header row of the Reports table and select Paste.
The copy of the report is added to the Reports table. Reports that are copied maintain the same configuration settings as the original report.
NOTE: If the report copied to the job’s Reports node has the same name as an existing report,
the copied report adds a numerical value to the name sequentially. For example if the existing
report is named Exceptions Summary, then the new report is named Exceptions Summary1.
Step 3 – (Optional) Click the Configure button next to the report. Use the Report Configuration wizard to modify the reports settings. See the Report Configuration Wizard topic for instructions.
Step 4 – Click the vertical ellipsis menu next to the report and select Generate.
The report is now created. To access the new report, see the Viewing Generated Reports topic.