Active Directory Action Operations
Use Operations page to select one or more operations for the action to perform on the targeted Active Directory objects. Some operations have wizard pages to specify the configuration settings.
The Operations drop-down menu contains the following operations:
- Clear/Set SID History
- Computer Details
- Disable/Enable Computers
- Create Groups
- Create Users
- Delete Objects
- Disable/Enable Users
- Group Details
- Group Membership
- Groups Remove All Members
- Move Objects
- Set/Reset Users Password
- Unlock Users
- Users Details
Select an operation from the drop-down list and then click Add. The selection appears in the Selections pane as well as the navigation pane if there is an associated configuration page. If performing multiple operations, the action executes the operations in the order in which they appear here. To change the order, select an operation and use the Down and Up buttons.
Delete Objects
CAUTION: Once deleted, objects from Active Directory cannot be restored.
Select this operation to delete objects from Active Directory, such as users, groups, or computers. The source table determines which objects are deleted from the Active Directory. Therefore, this operation does not possess its own wizard window.
Groups Remove All Members
Select this operation to remove all members from groups located in the source table. There is not a wizard window associated with this operation. No configuration is required.
Unlock Users
Select this operation to unlock the account of the specified users in the source table. There is not a wizard window associated with this operation. No configuration is required.
Computer Details
Use the Computers Details page to select computer attributes to change.
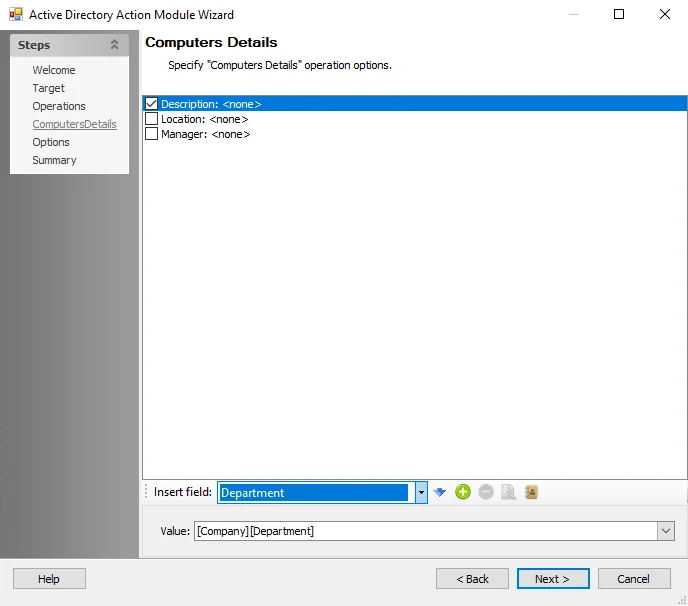
Highlight the attribute to edit:
- Insert field – Use the drop-down list to select a field (column) from the source table. Then click the blue arrow to insert the item into the Value box. The executed action replaces the AD Object property with the specified value from the source table.
- Add Attribute – Adds a custom attribute to the Computer Details attribute list
- Remove Attribute – Removes a selected attribute Computer Details attribute list
- Edit Attribute – Click this icon to change the name of the selected custom attribute
- Import Attribute – Opens the Import Custom Attributes Import Wizard where one or more custom attributes can be imported. See the Custom Attribute Import Wizard topic for additional information.
- Value – This field contains selections from the Insert field. If the Manager attribute is selected, click the ellipsis (…) to access the Select User, Contact, or Group window to populate this field.
- Select the checkboxes next to the computer attributes to enable them for editing when running the action.
Custom Attribute Import Wizard
The Custom Attributes Import Wizard is used to import a list of custom attributes. Follow the steps to use the Custom Attributes Import Wizard.
Step 1 – On the Computer Details page of the Active Directory Action Module Wizard, click Import. The Custom Attribute Import Wizard opens.
Step 2 – On the Credentials page, identify a domain either by entering one manually or selecting one from the Domain Name drop-down menu which displays a list of domains trusted by the one in which the Enterprise Auditor Console server resides. Then set the credentials for reading the attributes list from the domain:
- Authenticate as the logged in user – Applies the user account running Enterprise Auditor
- Use the following credentials to authenticate – Applies the account supplied in the User Name and Password fields.
Step 3 – Click Next.
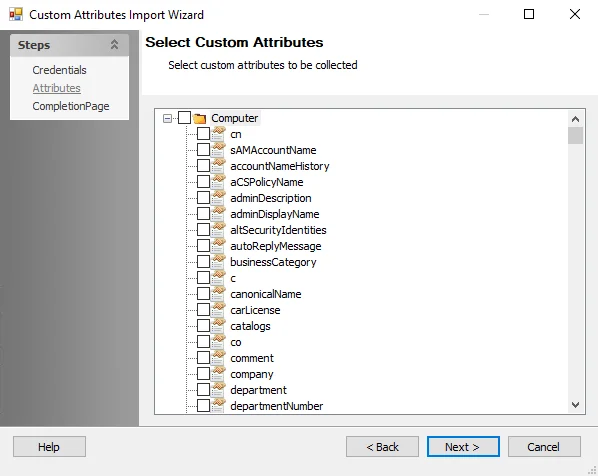
Step 4 – The wizard populates available attributes from the domain specified on the Attributes page. Expand the desired object class and select the checkboxes for the custom attributes to be imported. Then click Next.

Step 5 – On the Completion page, click Finish.
The selected attributes have been added to the attribute list on the Computer Details page.
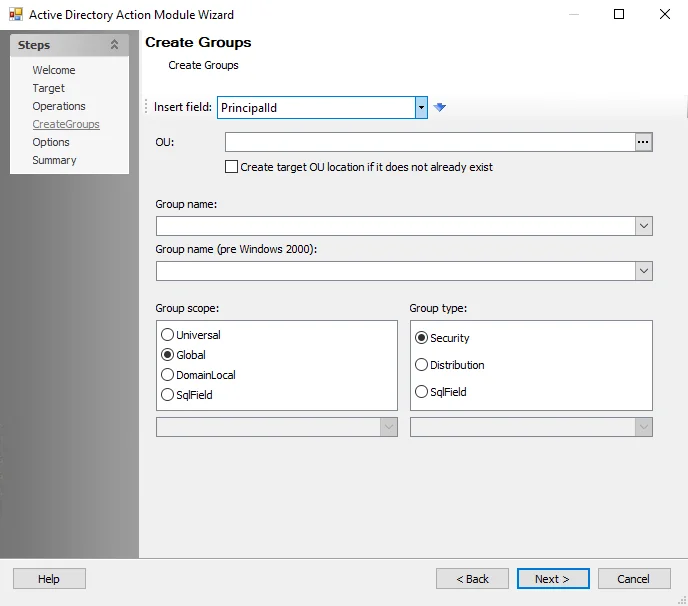
Create Groups
Use the Create Groups page to configure the action to create groups on the selected target.
Use the following options to configure the action:
-
Insert field – Use the drop-down list to select a field (column) from the source table. Then, click the blue arrow to insert the item into the OU, Group name, or Group name (pre Windows 2000) boxes.
-
OU – The organizational unit that contains the group
- Create target OU location if it does not already exist – Select this checkbox to create the target OU
-
Group Name – The name of the group that being created. This field is required.
-
Group name (pre Windows 2000) – The name of the group being created
-
Group scope – The scope of the group being created. Select from the following:
- Universal
- Global
- DomainLocal
- SqlField – Enter a value from the drop-down list
-
Group type – The type of group being created. Select from the following:
- Security
- Distribution
- SqlField – Enter a value from the drop-down list
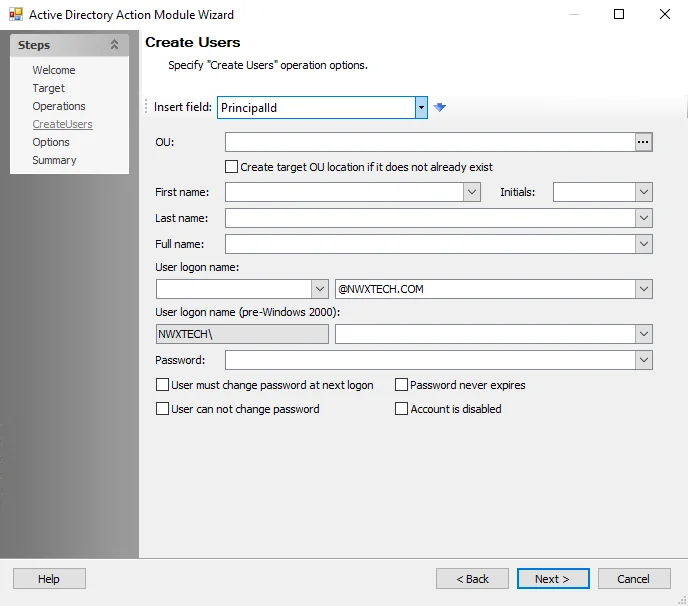
Create Users
Use the Create Users page to create users on the selected target.
Use the following options to configure the action:
-
Insert field – Use the drop-down list to select a field (column) from the source table. Then, click the blue arrow to insert the item into the selected box.
-
OU – The organizational unit in which to create the user
- Create target OU location if it does not already exist - Select this checkbox to create the target OU.
-
First Name – The first name of the user being created
-
Initials – The initials of the user being created
-
Last Name – The last name of the user being created
-
Full Name – The full name of the user being created. This field is required.
-
User logon name – The user logon name and domain for the user being created
-
User logon name (pre Windows 2000) – The domain and user logon name for the user being created
-
Password – The password for the user being created. This field is required.
Optionally, select from the following checkboxes:
- User must change password at next logon – Require the user to change the password at the next logon
- User cannot change password
- Password never expires
- Account is disabled
Disable/Enable Computers
Use the (Disable/Enable Computers page to configure the action to enable or disable users' operation options on target computers.
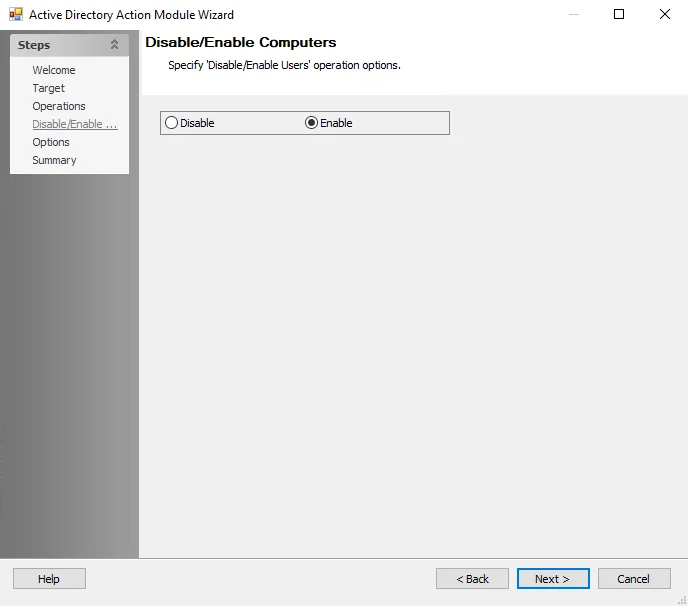
Select the radio button for the desired option:
- Enable – Enables users' operation options
- Disable – Disables users' operation options
Disable/Enable Users
Use the Disable/Enable Users page to enable or disable target users.
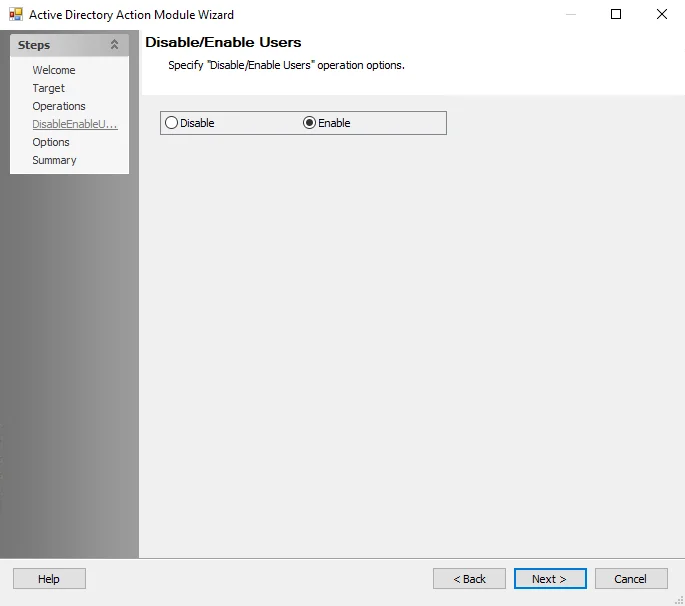
Select the radio button for the desired option:
- Disable – Select this radio button to disable users' operation options
- Enable – Select this radio button to enable users' operation options
Group Details
Use Groups Details page to edit selected group attributes.
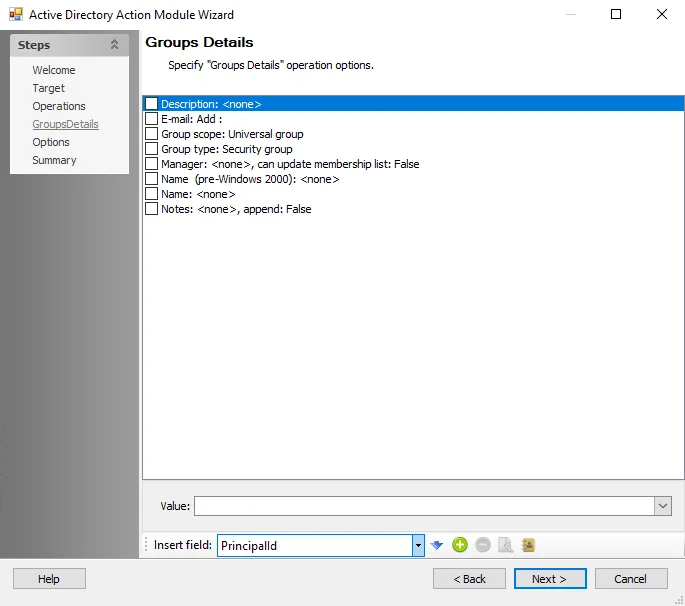
Highlight the attribute to edit. Add or delete attributes using the buttons to the right of Insert field.
NOTE: The options at the bottom of the page vary based on the highlighted attribute.
- Insert field – Use the drop-down list to select a field (column) from the source table. Then, click the blue arrow to insert the item into the Value box.
- Add Attribute – Adds a custom attribute to the Computer Details attribute list
- Remove Attribute – Removes a selected attribute from the action
- Edit Attribute – Click this icon to change the name of the selected custom attribute
- Import Attribute – Opens the Import Custom Attributes Import Wizard where current attributes for an object is viewed and can be imported for editing. See the Custom Attribute Import Wizard topic for additional information.
- Value/Name – This field derives its name from selections made on the page. It can contain selections from the Insert field or you can click the ellipsis (…) to access the Select User, Contact, or Group window, via which you can populate this field.
Select the checkboxes next to the group details attributes to enable them for editing when running the action.
Custom Attribute Import Wizard
The Custom Attributes Import Wizard is used to import a list of custom attributes. Follow the steps to use the Custom Attributes Import Wizard.
Step 1 – On the Group Details page of the Active Directory Action Module Wizard, click Import. The Custom Attribute Import Wizard opens.
Step 2 – On the Credentials page, identify a domain either by entering one manually or selecting one from the Domain Name drop-down menu which displays a list of domains trusted by the one in which the Enterprise Auditor Console server resides. Then set the credentials for reading the attributes list from the domain:
- Authenticate as the logged in user – Applies the user account running Enterprise Auditor
- Use the following credentials to authenticate – Applies the account supplied in the User Name and Password fields.
Step 3 – Click Next.
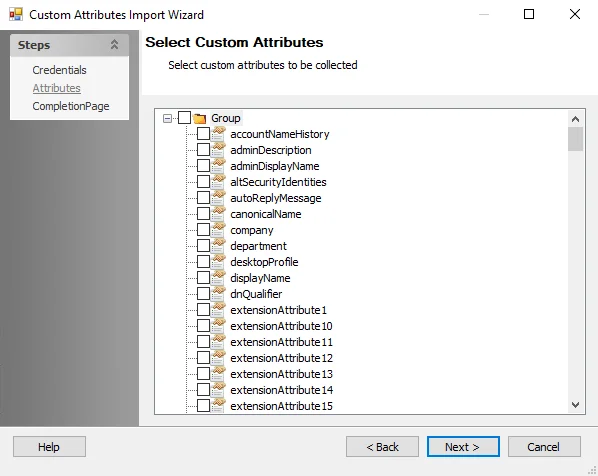
Step 4 – The wizard populates available attributes from the domain specified on the Attributes page. Expand the desired object class and select the checkboxes for the custom attributes to be imported. Then click Next.
Step 5 – On the Completion page, click Finish. On the Completion page, click Finish.
The selected attributes have been added to the attribute list on the Group Details page.
Group Membership
Use the Groups Membership page to add or remove group members. Values from the source table can also be used to specify if the object will be added or removed.
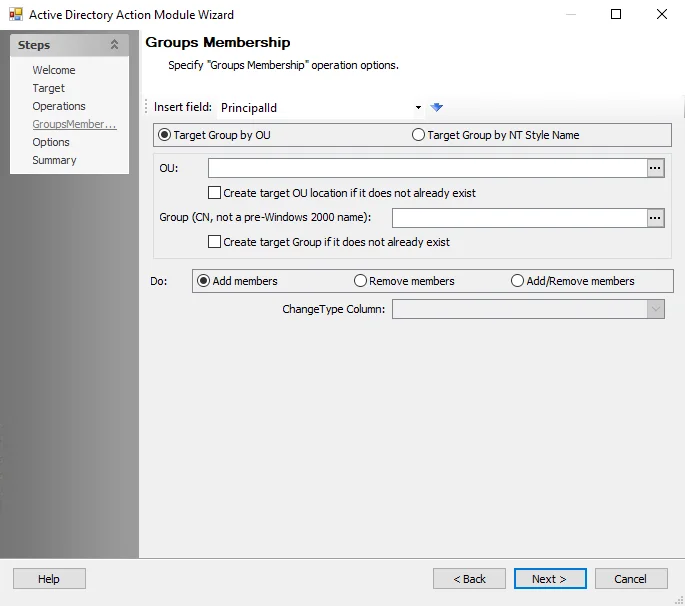
Use the following options to configure the action:
-
Insert field – Use the drop-down list to select a field (column) from the source table. Then, click the blue arrow to insert the item into the selected box.
-
Select one of the following:
- Target Group by OU
- Target Group by NT Style Name
-
OU – The organizational unit that contains the group. This field is required.
- Create target OU location if it does not already exist – Select this checkbox to create the target OU.
-
Group (CN, not a pre-Windows 2000 name) – The group to create. This field is required.
- Create target Group if it does not already exist
-
Select one of the following:
- Add members
- Remove members
- Add/Remove members – Enables the ChangeType Column drop down list
-
ChangeType Column – The value to use from the source table to specify if the object is added or removed. The contents of the ChangeType column should be a 0 for Add or a 1 for Remove.
Move Objects
Use the Move Objects page to specify the OU in which to move objects.
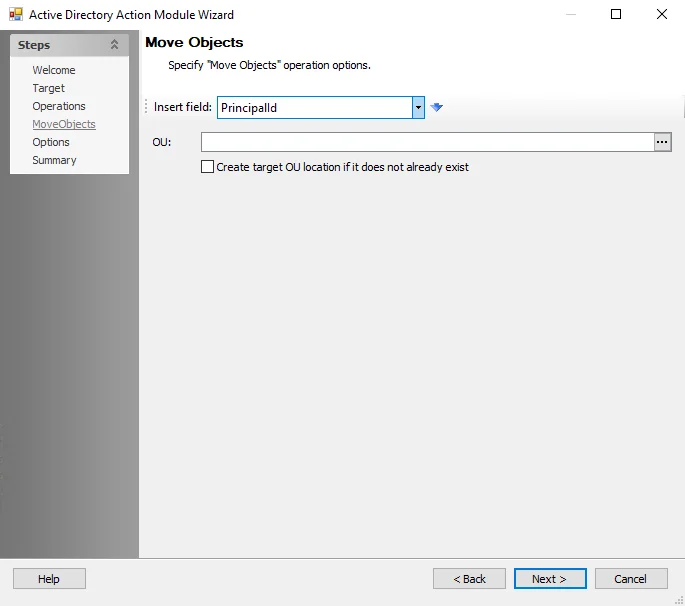
Use the following options to configure the action:
-
Insert Field – Contains available values from populated from the source table
-
OU – Use the drop-down list to select a field (column) from the source table. Then, click the blue arrow to insert the item into the OU box.
- Create target OU location if it does not already exist – Select this checkbox to create the target OU
Set/Reset Users Password
Use the Set/Reset Users Password page to set or reset user passwords with the specified value.
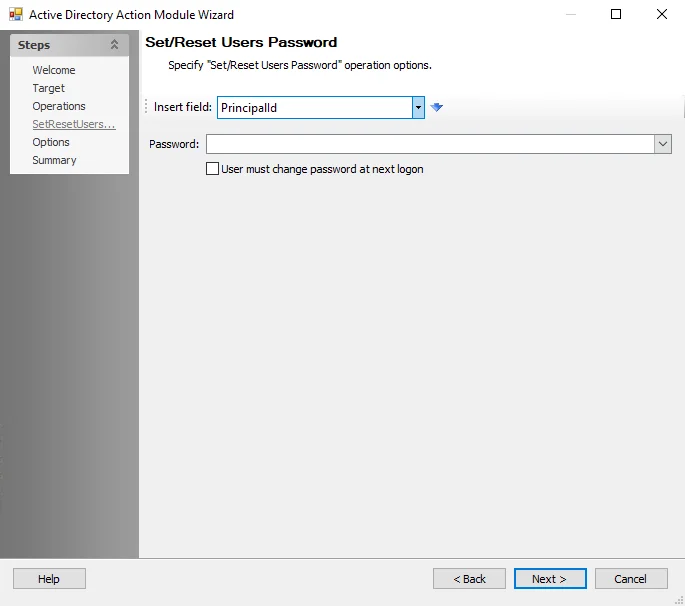
Use the following options to configure the action:
-
Insert field – Use the drop-down list to select a field (column) from the source table. Then, click the blue arrow to insert the item into the Password box.
-
Password – The field with the passwords to set or reset. This field is required.
- User must change password at next logon – Select this checkbox to require the user to change the password at the next logon
Clear/Set SID History
Use the Clear/Set SID History page to overwrite or append to the SID history for targeted objects. Please review the restrictions for this operation in the Notes box.
The source table used for this operation must contain a column with the following information:
- SID History data
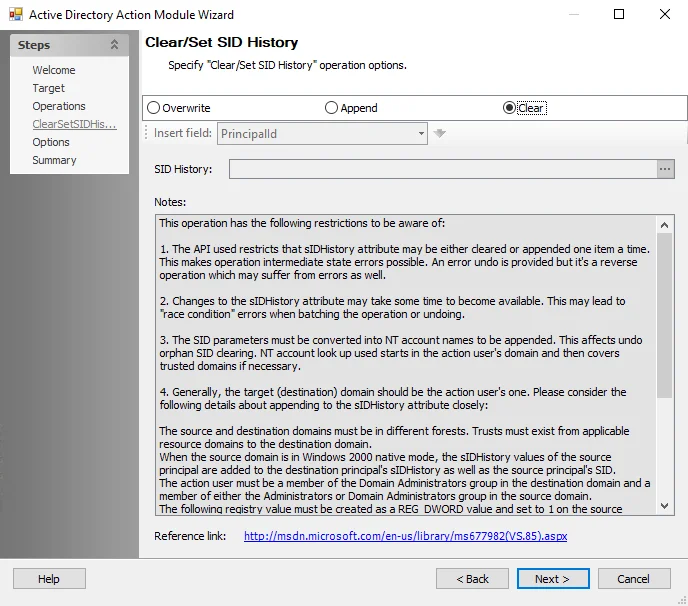
Configure the action with the following options:
-
Overwrite – Overwrites the SID History
-
Append – Adds to the SID History
-
Clear – Clears the SID History
-
Insert Field – This drop-down list is enabled when the Overwrite or Append radio buttons are selected. Use the drop-down list to select a field (column) from the source table. Then, click the blue arrow to insert the item into the SID History box. The SID history is overwritten with the selected fields or appended to with the selected fields depending on the selected radio button.
-
SID History – This box is enabled by selecting the Overwrite or Append radio buttons. The SID history is overwritten or appended to with the inserted fields, depending on the selected radio button. Populate the SID History box using either of the following methods:
- Select one or more fields at the Insert Field drop-down menu
- Click the ellipsis (…) to access the Select Users or Groups window to populate this field
-
Reference link – Accesses a Microsoft web page called Using DsAddSidHistory containing important information on SID history
Users Details
Use the Users Details page to edit user attributes.
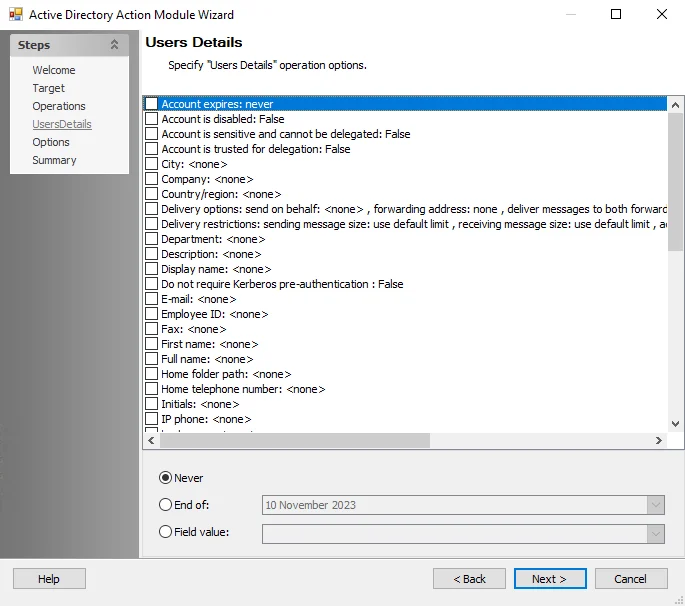
Highlight the attribute to edit. The highlighted user attribute in the Selections pane determines the configuration options available at the bottom of the page.
Select the checkboxes next to the user details attributes to enable them for editing when running the action.
Active Directory Action Options
The Options page provides the option to select to use the default domain or specific a domain to use.
Use the following options to configure the action:
- Insert field – Use the drop-down list to select a field (column) from the source table. Then, click the blue arrow to insert the item into the Specify domain (controller) to use box.
- Use default domain (controller) – Use the default domain controller for the action
- Specify domain (controller) to use – Click the ellipsis to open the Browse for Domain window and select a domain for the action
Active Directory Action Module
Use the Active Directory Action Module to make bulk changes to objects in Microsoft Active Directory (AD) such as deleting users or changing group memberships. It is available with a special Enterprise Auditor license.
CAUTION: Be careful when using this action module. Make sure that only the changes required are applied and only to those target systems desired. Actions perform their functions on all rows in a table.
Enterprise Auditor action modules contain one or more selectable operations. Each operation performs its function on a single object per row from the source table defined in the action.
Source Table Configuration
Individual action modules, including the Active Directory Action Module, may have their own requirements for the type of data contained in the columns in the source table. To take action on an Active Directory object, group, user, or computer, the source table columns must contain values that uniquely identify each Active Directory object referenced. Active Directory objects correspond to rows in a Enterprise Auditor source table. Active Directory object attributes correspond to columns. Once the source table has been scoped, use the Target page to specify the field that identifies the target objects along with the field type to indicate the type of data contained in the field.
The Operations page lists the operations that may be performed by the Active Directory Action Module. Each operation may have its own source table column requirements as follows:
| Operation | Requirements |
|---|---|
| Clear/Set SID History | Column containing SID History information |
| Computer Details | No specific columns required |
| Disable/Enable Computers | No specific columns required |
| Create Groups | No specific columns required |
| Create Users | Column containing the user logon name RECOMMENDED: It is recommended that the source table has columns containing the following information: - First Name - Last name - Initials - Full name - Password - OU in which to create the user (This can also be created on the Create Users page) |
| Delete Objects (Users, Groups, Computers, etc.) | No specific columns required |
| Disable/Enable Users | No specific columns required |
| Group Details | No specific columns required |
| Group Membership | Column containing the target group OU or the target group NT style name |
| Groups Remove All Members | No specific columns required |
| Move Objects | Column containing an OU (Alternatively, type in the OU or click the ellipsis (…) to select an OU) |
| Set/Reset Users Password | No specific columns required |
| Unlock Users | No specific columns required |
| User Details | No specific columns required |
Configuration
The Active Directory Action module is configured through the Active Directory Action Module Wizard, which contains the following wizard pages:
- Welcome
- Active Directory Action Target
- Active Directory Action Operations
- Active Directory Action Options
- Active Directory Action Summary
The Welcome page displays first in the Active Directory Action Module Wizard. Review the introductory and caution information about the Active Directory Action Module.
The navigation pane contains links to the pages in the wizard. Note that the operations added on the Operations page will affect the list of pages in the navigation pane. Several operations have associated configuration pages.
Active Directory Action Summary
The Summary page displays a summary of the configured settings for the action.
Click Finish to save configuration changes. If no changes were made, it is a best practice to click Cancel to close the Active Directory Action Module Wizard to ensure that no accidental clicks are saved.
Active Directory Action Target
Use the Target (Identification Criteria) page to select one or more fields (columns) in the Enterprise Auditor source table that uniquely identifies the target Active Directory objects upon which to perform the action. This process enables Enterprise Auditor to locate those objects within Active Directory. Added fields are displayed in the textbox.

Use the following options to configure the action:
-
Add – Adds the selected field and field type to the Selections pane
-
Delete – Removes the highlighted operation from the Selection pane
-
Field – The name of the column in the Enterprise Auditor source table. Select the field that uniquely identifies the target AD objects (represented by rows in the Enterprise Auditor table). The drop-down list displays the fields from the source data table specified on the Action Properties page. The list excludes any default fields such as HOSTSTATUS, on which actions cannot be performed.
-
Field Type – The type of data contained in the specified field. Enterprise Auditor must know the data type of the field selected above. Otherwise, errors may appear upon execution of the action and report results may be incomplete. The drop-down list contains the following field types:
- Distinguished Name or DN
- GUID
- SID
- WindowsID
- Employee (employeeID)
NOTE: While one field is usually sufficient to identify AD objects, if specifying multiple fields, each field type can only be used once.