File System Action: Action
On the Action page, select the type of action to be configured, define a new action, and additional capabilities.

The following options are available:
- Define a new action – Enables the Operation page where operations are selected on which the action is based
- Rollback a previously executed action – Enables the Prior Actions page where lists of previously executed actions and rollback actions can be selected. Not all operations support rollback. Enable the Support Rollback option prior to execution for the action in order to perform a rollback.
- Remove the applet service from a host – If an executed action installs an applet service on a host from a Enterprise Auditor Console, it remains installed after the action is completed for other Enterprise Auditor consoles to perform actions using the same applet service. This setting removes the action’s applet service from that host.
File System Action: Applet Settings
Use the Applet Settings page to specify the machines on which to execute the selected operation.
Specify how the operations will be executed:
-
Automatic – Get host data from the Host Management
-
Local Enterprise Auditor server
-
Specific remote server:
- Fields – Use the drop-down list to select a field (column) from the source table, then click the blue arrow to insert the item into the Remote server field
- Environment Variables – Select an item from the drop-down list, then click the blue arrow to insert the item into the Remote Server field
- Remote Server – Enter the path to the server
- Click the ellipsis (…) to browse for server
- Click the tick icon to show a preview of the path
- Click the Help icon for additional information
-
Preview – Shows what the compound path specified will be resolved in to. The text here is used to initialize the path specification selection dialog.
-
Specific remote servers – Click the ellipsis (…) to browse for servers
- Click Add to add the server
- Click Remove to remove the server
-
Fall back to the local Enterprise Auditor server if an applet cannot start – Check to enable this option
File System Action: Destination
The Destination page is available only if the following operations are selected:
- Copy
- Move
- Rename
Define the destination location of the files that will be copied, moved, or renamed by building the destination path using the Fields and Environment Variables options as needed.
Use the fields provided to select destination items and hosts from the drop-down lists and populate the Destination field, or edit the field manually. The Preview field updates based on the contents of the Destination field.
-
Fields – Use the drop-down list to select a field (column) from the source table, then click the blue arrow to insert the item into the Destination field
-
Environment Variables – Select an item from the drop-down list, then click the blue arrow to insert the item into the Destination field
-
Target Items – Enter the path to the target file or folder
- Click the ellipsis (…) to browse for pattern path specification
- Click the tick icon to show a preview of the specified path
- Click the Help icon for additional information
-
Host – Select the field that identifies the systems or manually type the host destination
-
Use path type – Choose from the following options:
- Local – Uses the local path
- UNC – Uses the UNC path
-
Preview – Shows what the compound path specified will be resolved in to. The text here is used to initialize the file specification selection dialog.
File System Action: Environment
The Environment (Environment Variables) page is available only if the selected operation requires the selection of a sample host.
Use this page to select and connect to a sample host, via which a set of remote environment variables for use in scoping the action are loaded. Then, on the Target page, use the environment variables to build dynamic file path locations for the selected operation.
NOTE: The environment variables from the local system load by default.
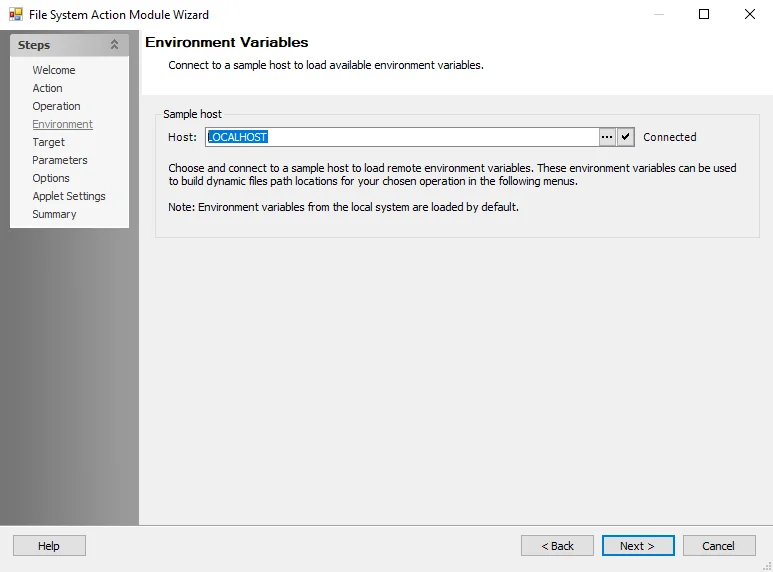
The connection status displays next to the Host field. To browse for another host, click the ellipsis (…) to open the Browse for Computer window. Once a host name appears in the field, click the check mark button to attempt to connect to the selected host.
File System Action: Operation
The Operation page is available when Define a new action is selected on the Action page. On the Operation page, define the action by selecting an operation from the drop-down list.
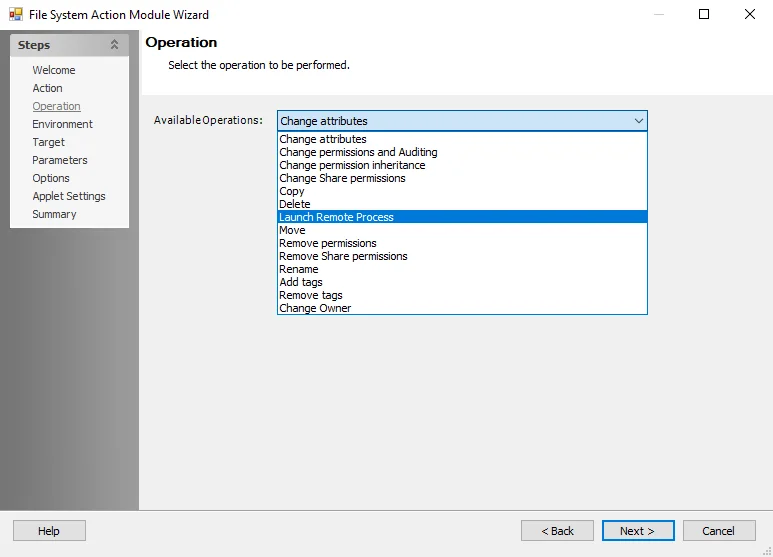
At the Available Operations drop-down selection list, choose the operation for the action to perform. The selection determines which pages are available in the wizard. The following operations are available:
- Change attributes
- Change permissions and Auditing
- Change permission inheritance
- Change Share permissions
- Copy
- Delete
- Launch Remote Process
- Move
- Remove permissions
- Remove Share permissions
- Rename
- Add tags
- Remove tags
- Change Owner
File System Action: Options
The Options page provides access to additional options for the action. Based on the selection on the Operation page and other choices made within the wizard, not all options on this page may be available.
Select from the following additional operations:
-
Delete locked files on reboot – Files that are locked can be queued to be deleted at the next system start up
-
Overwrite existing files – Files in the destination location are overwritten. This action cannot be undone.
-
Terminate associated process – Files that are locked cannot be actively moved, renamed or deleted without stopping the associated process. If selected, this may cause an interruption to any users of that target system and service.
-
Create shortcuts to the moved files in the source directory – A shortcut will be created in the source directory that points to the new location of a moved file
-
Preserve file access – Copy the file ACL from the source directory to the destination to preserve file access. Child objects, with inherited permissions or broken inheritance, targeted by copy or move actions retain their permissions. Parent folders with inherited permissions are changed to explicit.
-
Enable SACL modification – Request system security access when opening files in order to make SACL changes
-
Retry failed rows – Enter the following information:
- Number of times to retry
- Do not retry error codes – Rows of data with error codes listed within this textbox are excluded from the action performed. Common errors are included for certain actions, and may be customized to add or remove error codes. See the Microsoft System Error Codes article for additional information.
- Delay between retries
-
Enable batching – (For big data sets) Enabling batching breaks the data set into batches so the action does not attempt to execute all lines at once. Actions performed on tables with a large number of input rows may fail due to network failure, and it is difficult to determine the actions that were executed before the failure.
- Batch size – Specify the batch size.
Start Process
Select the desired start process.
CAUTION: Due to system security limitations, some applications and programs cannot be restarted or run remotely using this option. Additionally, starting interactive processes (such as Word, Excel, and so on) will load them into memory, but may not make them available for interaction by the end user.
Use the fields provided to select target items and hosts from the drop-down lists and populate the Set working directory field, or edit the field manually. The Preview field updates based on the contents of the Set working directory field.
File System Action Module
The File System Action Module allows Enterprise Auditor Administrators to automate the process of remediating and modifying Windows file system attributes and properties. The File System Action Module provides options for changing attributes and permissions, as well as copying, deleting, moving, and renaming file system contents. It is available with a special Enterprise Auditor license.
CAUTION: Be careful when using this Action Module. Make sure that only the changes required are applied and only to those target systems desired. Actions perform their functions on all rows in a table.
Enterprise Auditor action modules contain one or more selectable operations. Each operation performs its function on a single object per row from the source table defined in the action.
Permissions
The File System Action Module requires a Enterprise Auditor connection profile and privileged access to file system devices. The Enterprise Auditor connection profile may be configured to have a Task account type. The following are the least privileged access model required for Share Permission Changes:
-
Windows – User credential must be member of Power Users group
-
NetApp Data ONTAP 7-Mode Device – User credential must be member of Power Users group
-
NetApp Data ONTAP Cluster-Mode Device – User credential must have role on SVM that has permission to modify share permissions
NOTE: Enter the following syntax to create role:
‑security login role create ‑role [DESIRED_ROLE_NAME] ‑cmddirname “vserver cifs share access-control” ‑vserver [VSERVER_NAME] ‑access allReplace the
[DESIRED_ROLE_NAME]and[VSERVER_NAME]variables with the required information. For example:‑security login role create ‑role netwrix ‑cmddirname “vserver cifs share access-control” ‑vserver testserver ‑access all
Applet Deployment
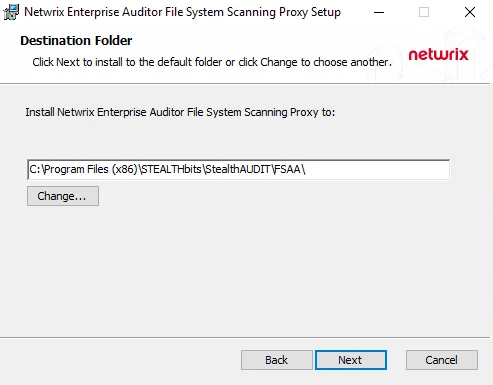
The File System Action Module deploys an applet the first time an action is executed. Applets are
installed within the Enterprise Auditor Installation Directory if the %SAInstallDir% environment
is present. Otherwise, applets are deployed to C:\Program Files (x86)\STEALTHbits\StealthAUDIT.
Source Table Configuration
Individual action modules, including File System Action Module, may have their own column requirements. To take action on a file system resource, the source table must contain a column with values to uniquely identify it. File System resources correspond to rows in a Enterprise Auditor table. File System attributes correspond to columns. Once the source table has been scoped, use the Target page to specify the field that identifies the target attribute along with any environmental variables.
These columns are required to use the File System Action Module. Otherwise, errors may occur upon execution of the action and with analysis and reports downstream.
| Required Columns | Description |
|---|---|
| rowGUID | Identifies each data row as unique. The datatype in the table is uniqueidentifier (GUID). |
| RowKey | Identifies each data row as unique. Sometimes the value is a GUID, but the datatype in the table is a varchar (text string). |
Remember, the individual File System actions may have their own column requirements in addition to the above. These columns are made available through the File System Action Module wizard.
The Operations page lists the operations that may be performed by the File System Action Module. Each operation has its own source table column requirements as follows:
| Operation | Column requirements |
|---|---|
| Change attributes | Columns containing: - Object to change attributes for - UNC path or local path (files or folders) |
| Change permissions and Auditing | Columns containing: - Object to change permissions for - UNC path or local path - (Optional) Permission values to change (files or folders) |
| Change permission inheritance | Columns containing: - Object to change permission inheritance for - UNC path or local path (files or folders) |
| Change Share permissions | Columns containing: - Share to change permissions for - UNC path or local path (shares) |
| Copy | Columns containing: - Object to copy - Location to copy the object to - UNC path or local path |
| Delete | Columns containing: - Object to delete - UNC Path or local path |
| Launch Remote Process | No specific columns required |
| Move | Columns containing: - Object to move - Location to move the object to - UNC path or local path |
| Remove permissions | Columns containing: - Object to remove permissions for - UNC path or local path (files or folders) |
| Remove Share permissions | Columns containing: - Object to remove Share permissions for - UNC path or local path (shares) |
| Rename | Columns containing: - Object to rename - New name of the object - UNC path or local path |
| Add tags | Columns containing: - Object to add tags to - UNC path or local path (files) |
| Remove tags | Columns containing: - Object to remove tags from - UNC path or local path (files) |
| Change Owner | Columns containing: - Object to change ownership for - UNC path or local path (folders) |
Configuration
The File System Action module is configured through the File System Action Module Wizard, which contains the following wizard pages:
NOTE: Depending on the selections on the various pages, not all pages may be accessible.
- Welcome
- File System Action: Action
- File System Action: Operation
- File System Action: Prior Actions
- File System Action: Environment
- File System Action: Target
- File System Action: Parameters
- File System Action: Destination
- File System Action: Rollback
- File System Action: Options
- File System Action: Applet Settings
- File System Action: Summary
The Welcome page displays first and gives an overview of the action module. The navigation pane contains links to the pages in the wizard, which may change based on the Action selected on the Action page.
To proceed, click Next or use the Steps navigation pane to open another page in the wizard.
File System Action: Parameters
The Parameters page is available for some of the selections on the Operation page. The list of operations below provides access to the operation-specific versions of the Parameters page for this wizard. Click on an operation to view its associated Parameters page.
- Change Attributes
- Change Permissions and Auditing
- Change Permission Inheritance
- Change Share Permissions
- Remove File Permissions
- Remove Share Permissions
- Add Tags
- Remove Tags
- Change Owner
The Navigation pane will list this as the Parameters page, but the title for each version indicates the type of parameter to be configured.
Add Tags
Use the Parameters page to specify the file tags the action adds.

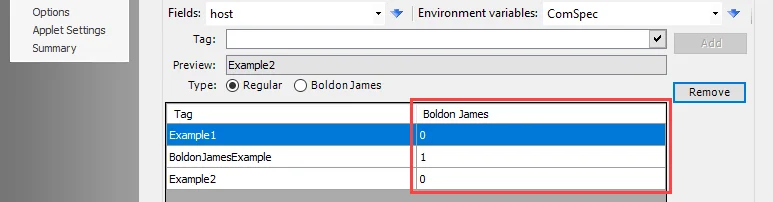
Use the fields provided to select tags from the drop-down lists and populate the Tag field, or edit the field manually. The Preview field updates based on the contents of the Tag field.
-
Add Mode:
- Append to existing tags - Adds new tags to the existing list of tags
- Overwrite existing tags - Removes all existing tags before adding newly configured tags
NOTE: If choosing the option to overwrite tags, the action module will clear out both normal tags and Boldon James tags and then proceed to apply the tags configured for overwrite. If choosing the option to remove all tags, the action module will clear out both normal tags and Boldon James tags.
- Fields – Use the drop-down list to select a field (column) from the source table, then click the blue arrow to insert the item into the Tag field
- Environment Variables – Select an item from the drop-down list, then click the blue arrow to insert the item into the Tag field
- Preview – Shows what the compound path specified will be resolved in to
- Click Add to add the tag field to the list
- Click Remove to remove the tag field from the list
-
Type - Select which type of tag to add. The two types of tags that can be added are:
-
Regular - Configure new tag as a regular tag
-
Boldon James - Configure new tag as a Boldon James tag
NOTE: The Boldon James column indicates whether a file tag is a regular tag or a Boldon James tag. Regular tags will be identified with 0. Boldon James tags will be identified with 1.
-
A list of supported file types appears at the bottom of the page.
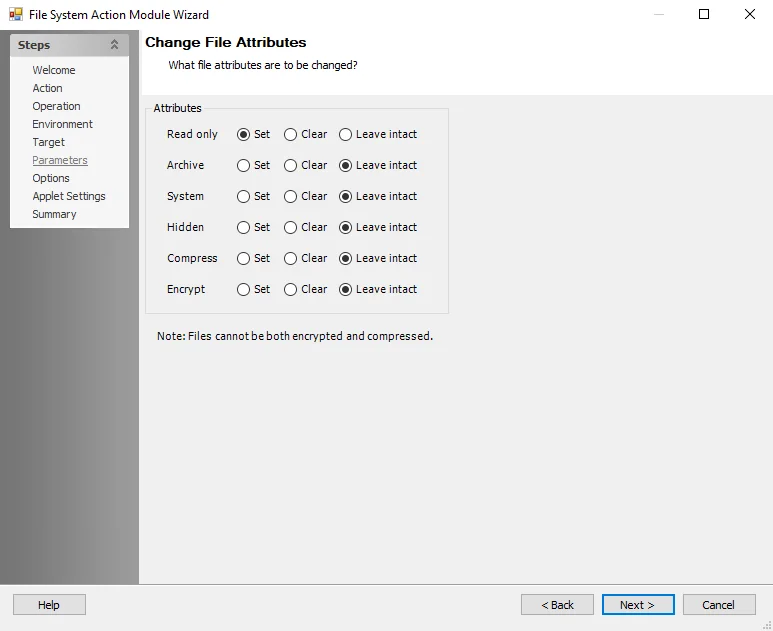
Change Attributes
Use the Change File Attributes Parameters page to change the attribute for one or more of the target systems or data.
Select from the following options:
- Read-only – Set the file / folder to read only
- Archive – Archive the file / folder
- System – Stop / start a system process
- Hidden – Set the file / folder to hidden
- Compress – Compress the file / folder
- Encrypt – Encrypt the file / folder
Attribute change options are:
- Set – Applies the attribute
- Clear – Removes the attribute
- Leave intact – Leaves the attribute unchanged
Change Owner
Use the Change Owner Parameters page to select a trustee to be the new owner.
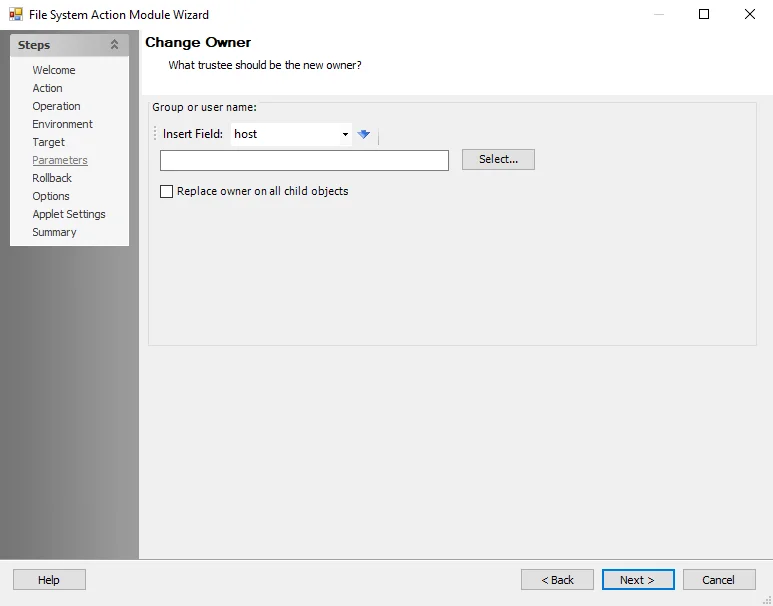
Use the options to enter the trustees:
- Insert field – Use the drop-down list to select a field (column) from the source table, then click the blue arrow
- Alternatively click Select to select a user or group object
- Replace owner on all child objects – Check to enable
Change Permission Inheritance
Use the Change Permission Inheritance Parameters page to specify how to change inherited permissions.
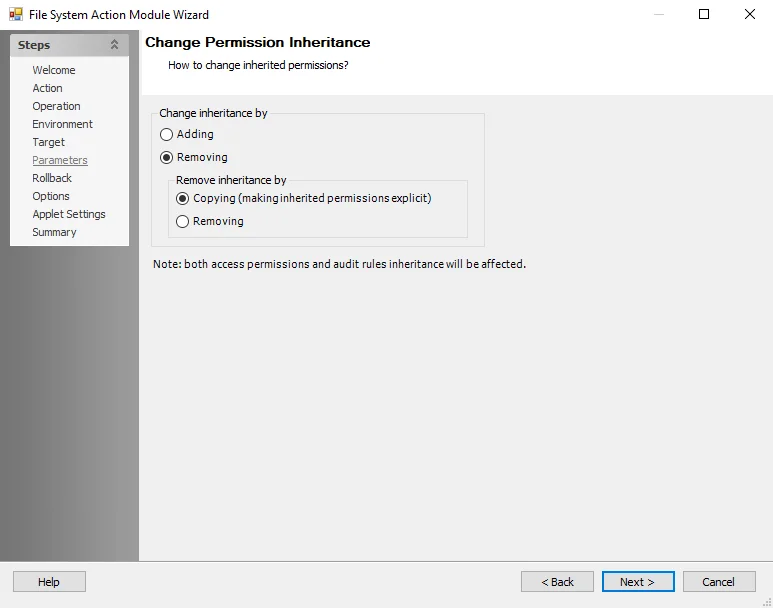
Select the desired options for adding or removing inheritance.
Change Permissions and Auditing
Use the Change Permissions and Auditing Parameters page to specify the permissions and auditing settings the action changes.
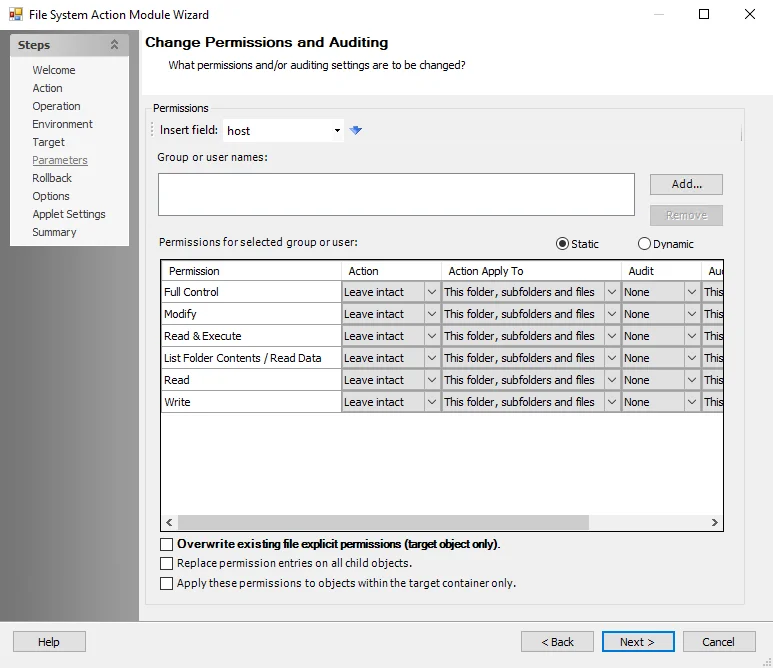
Use the following options to enter the Permissions:
-
Insert field – Use the drop-down list to select a field (column) from the source table, then click the blue arrow
-
Group or user names:
- Click Add to select a user or group object
- Click Remove to remove a user or group object
- Dynamic – Uses the host id to retrieve the applicable permissions
In the table, select from the following options:
- Permission – Permissions for the selected user or group object
- Action – Modify the attribute for the selected permission
- Action Apply To – Select the files or folders to apply the action to.
- Audit – Report the status of the change to the attribute
- Audit Apply To - Select the files or folders to report the status on
Select from the following options (Multiple options can be selected):
- Overwrite existing file explicit permissions (target object only)
- Replace permission entries on all child objects
- Apply these permissions to objects within the target container only
Change Share Permissions
Use the Change Share Permissions Parameters page to specify the permission status for what group or users are to be changed.
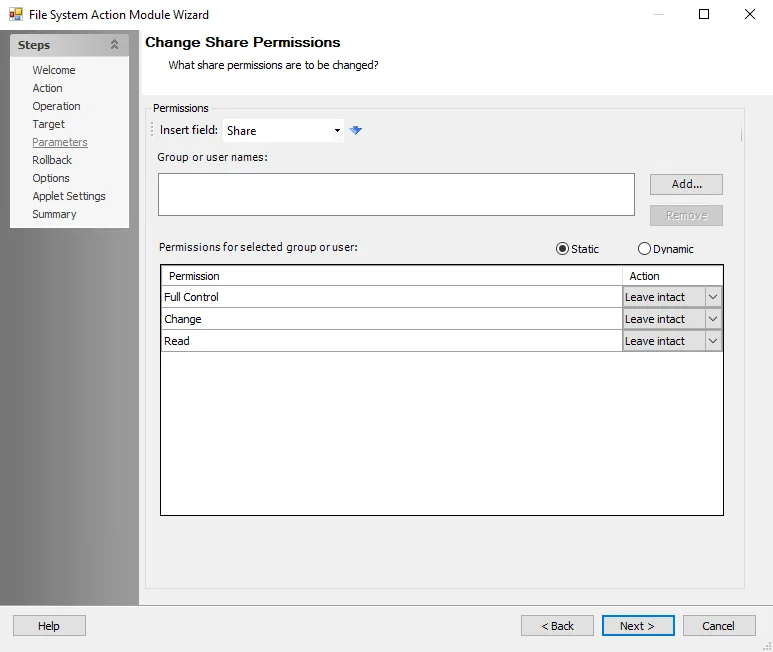
Select the desired options for changing the permissions control of the selected group or users.
Remove File Permissions
Use the Remove File Permissions Parameters page to specify whose file permissions the action removes.
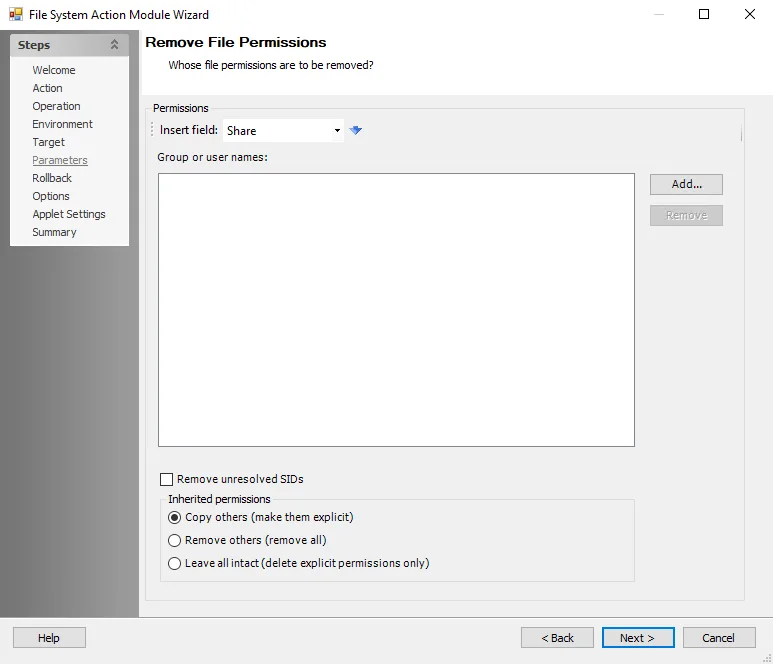
Use the options to enter the Permissions:
- Insert field – Use the drop-down list to select a field (column) from the source table, then click the blue arrow
- Group or user names:
- Click Add to select a user or group object
- Click Remove to remove a user or group object
Specify how to change inherited permissions Select from the following options:
- Copy others – Make them explicit
- Remove others – Remove all
- Leave all intact – Delete explicit permissions only
Remove Share Permissions
Use the Remove Share Permissions Parameters page to specify whose share permissions the action removes.
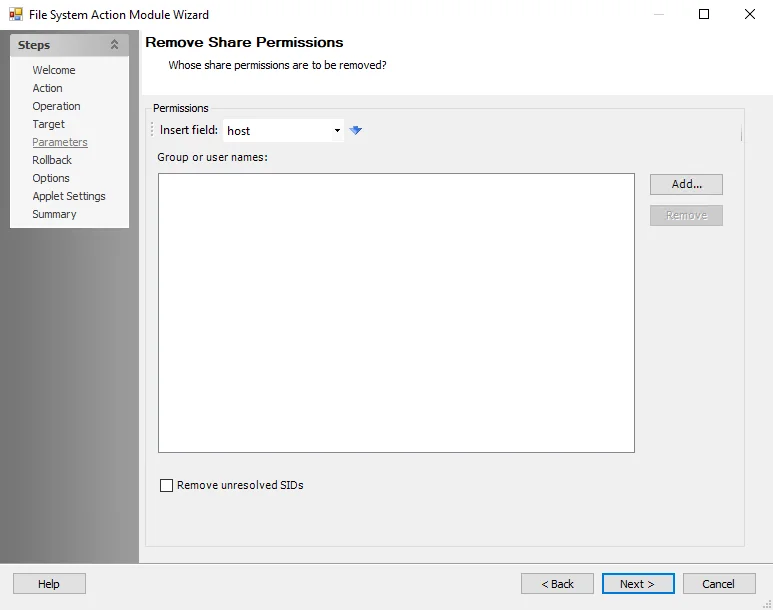
Use the options to enter the Permissions:
-
Insert field – Use the drop-down list to select a field (column) from the source table, then click the blue arrow
-
Group or user names:
- Click Add to select a user or group object
- Click Remove to remove a user or group object
Remove Tags
Use the Parameter page to specify the file tags the action removes.
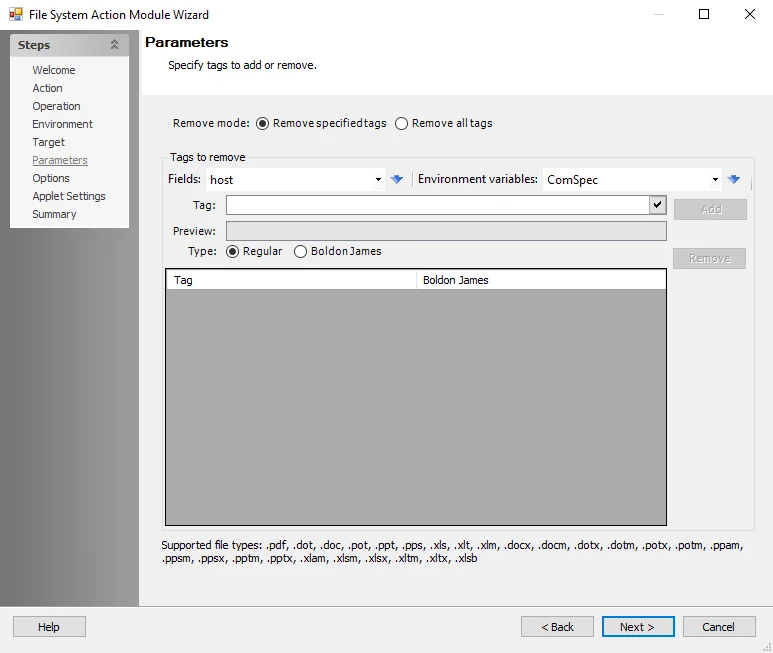
Use the fields provided to select tags from the drop-down lists and populate the Tag field, or edit the field manually. The Preview field updates based on the contents of the Tag field.
-
Remove Mode:
- Remove specified tags - Remove specified tags from the existing list of tags
- Remove all tags - Remove all existing tags
NOTE: If choosing the option to overwrite tags, the action module will clear out both normal tags and Boldon James tags and then proceed to apply the tags configured for overwrite. If choosing the option to remove all tags, the action module will clear out both normal tags and Boldon James tags.
- Fields – Use the drop-down list to select a field (column) from the source table, then click the blue arrow to insert the item into the Tag field
- Environment Variables – Select an item from the drop-down list, then click the blue arrow to insert the item into the Tag field
- Preview – Shows what the compound path specified will be resolved in to
- Click Add to add the tag field to the list for removal
- Click Remove to remove the tag field from the list for removal
-
Type - Select which type of tag to remove. The two types of tags that can be removed are:
-
Regular - Specify a regular tag for removal
-
Boldon James - Specify a Boldon James tag for removal
NOTE: The Boldon James column indicates whether a file tag is a regular tag or a Boldon James tag. Regular tags will be identified with 0. Boldon James tags will be identified with 1.
-
A list of supported file types appears at the bottom of the page.
File System Action: Prior Actions
The Prior Actions page is available when Rollback a previously executed action is selected on the Action page .

Any previously executed actions appear in the table.
File System Action: Rollback
Use the Rollback page to apply rollback support to the action. This option provides the ability to undo failed actions and reapply the original action settings when the action continues from where it left off.
NOTE: Not all actions support Rollback.
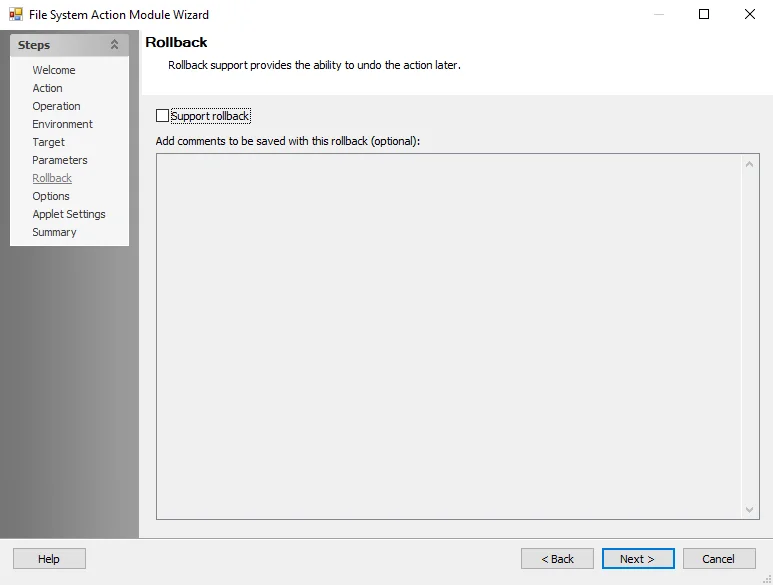
Use the following options:
- Support rollback – Check to enable rollback of this action
- Add comments to be saved with this rollback – Enter a brief description to identify this rollback
File System Action: Summary
The Summary page displays a summary of the configured action.
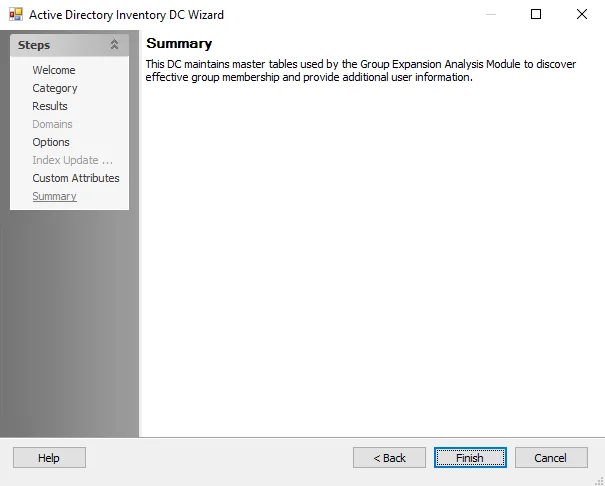
Click Finish to save configuration changes. If no changes were made, it is a best practice to click Cancel to close the File System Action Module Wizard to ensure that no accidental clicks are saved.
File System Action: Target
Use the Target page to point the action module towards a file path on the specified host. Environmental variables (for example, Program Files, SystemRoot, SAInstallDir, and so on) can be used when creating a path as well as fields in the raw table output to populate the Target items field.

Use the fields provided to select target items and hosts from the drop-down lists and populate the Target items field, or edit the field manually. The Preview field updates based on the contents of the Target items field.
-
Fields – Use the drop-down list to select a field (column) from the source table, then click the blue arrow to insert the item into the Target items field
-
Environment Variables – Select an item from the drop-down list, then click the blue arrow to insert the item into the Target items field
-
Target items – Enter the path to the target file or folder
- Click the ellipsis (…) to browse for pattern path specification
- Click the tick icon to show a preview of the specified path
- Click the Help icon for additional information
-
Host – Select the field that identifies the systems or manually type the host to take action against
-
Use path type – Choose from the following options:
- Local – Uses the local path
- UNC – Uses the UNC path
-
Preview – Shows what the compound path specified will be resolved in to. The text here is used to initialize the file specification selection dialog.