Registry: Operations
Use the Operations page to select the operations to apply to the target hosts. See the Registry: Target Hosts topic for additional information.
Select and configure the operations using the following options:
-
Add operation – Use the drop-down menu to select an operation to perform on the target host. This opens a corresponding window for configuration. Operations include:
NOTE: Window options vary based on the operation selected from the drop-down menu.
- New Registry Value – Used to add a new registry value to the list
- Modify registry value – Used to modify an existing registry value in the list
- Delete registry value – Used to delete an existing registry value
- New registry key – Used to add a new registry key to the list
- Rename registry key – Used to rename a registry key in the list
- Delete registry key – Used to delete a registry key from the list
- Change registry permissions – Used to alter registry permissions
-
Edit – Accesses the editing window for the selected operation
-
Up – Moves the selected operation up in the list
-
Down – Moves the selected operation up in the list
-
Delete – Deletes the selected operation
Registry Browser Window
Use the Registry Browser window to navigate a computer’s registry and select a key.
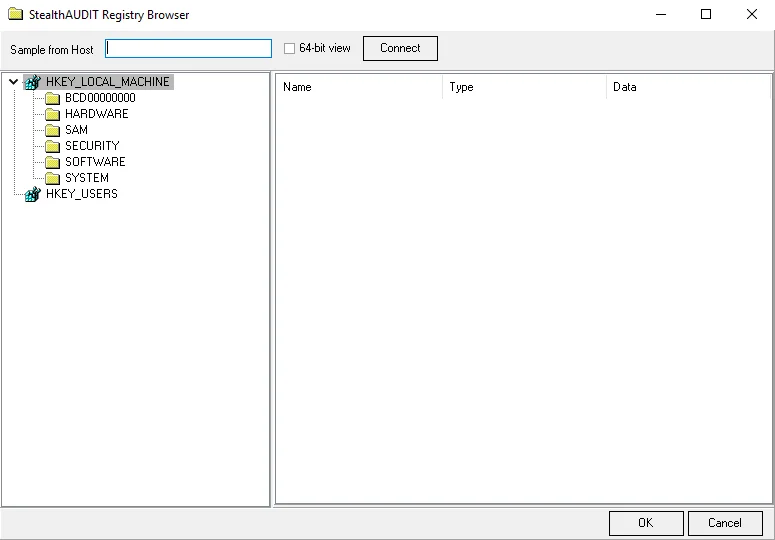
Select a key using the following options:
-
Computer name – By default, the Registry browser connects to the local machine
-
If the desired registry item is on the local machine, browse the registry, and select the item
-
To connect to the registry of another machine:
- Enter the hostname in the Computer name textbox
- Click Connect, then browse the registry of that machine
- Select the desired registry item
-
-
Connect – Attempts to connect to the registry of the machine specified in the Computer name field
-
64-bit view – The default view is 32-bit. Select the 64-bit view checkbox to switch to a 64-bit view.
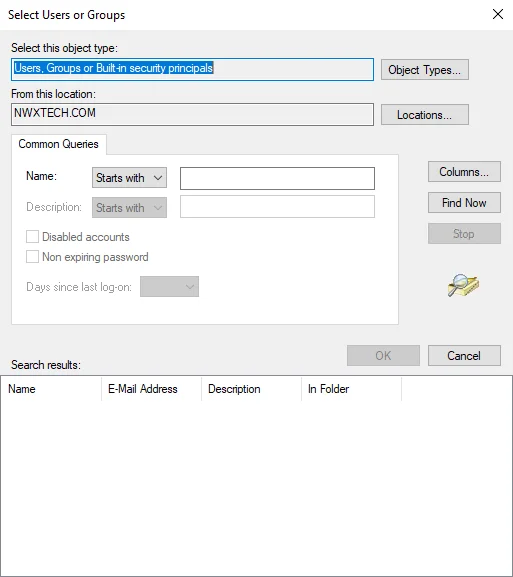
Select Users or Groups Window
Use the Select Users or Groups window to select a user, group, or built-in security principal.

The options are:
-
Select this object type – Displays types that are queried against
- Click Object Types to open the Object Types window and select the types to query against. See the Object Types Window topic for additional information.
-
From this location – Displays the location the intended objects are found
- Click Locations to open the Locations window and set the location to be queried. See the Locations Window topic for additional information.
-
Enter the object names to select – Select names of objects to query
- Click Check Names to confirm the selected manually-entered object name is viable
-
Advanced – Click Advanced to open an advanced version of the Select Users and Groups Window and further configure the query. See the Advanced Select Users and Groups Window topic for additional information.
Object Types Window
Use the Object Types window to select which types of objects to query.

Select any of the following objects:
- Built-in security principals
- Groups
- Users
Locations Window
Use the Locations window to select a location.

Select a location using the explorer.
Advanced Select Users and Groups Window
Use the Advanced Select Users and Groups window to search for items with a finer focus.
This window contains the same options as the main Select Users or Groups window, but with the following additional options:
-
Common Queries
-
Name – Select a name of a user, group, or security principal to search for
-
Select a qualifier from the dropdown
- Starts with
- Is exactly
-
Manually enter the name
-
-
-
Columns – Click Columns to open the Choose Columns window. See the Choose Columns Window topic for additional information.
-
Find now – Click Find Now to search for objects matching the selected criteria
-
Stop – While a search is running , the Stop button is available. Click Stop to halt the search before it is completed.
-
Search Results – Displays results from a search
Choose Columns Window
Use this window to select columns. The columns available varies based on the source table originally selected.
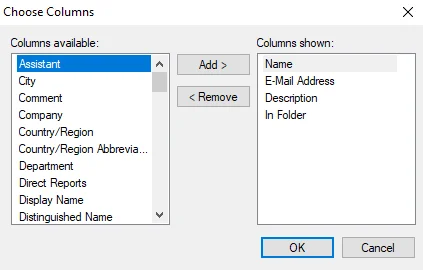
Choose columns using the following options:
- To add an available column, select it in Columns available and click Add to place it in Columns shown
- To remove a column, select it in Columns shown and click Remove to place it in Columns available
Registry Action Module
The Registry action module allows users to make bulk changes to the Microsoft Windows Registry. Use the Registry Action Module Wizard to choose the data table column that identifies the folders and to configure the operations performed against the selected folders. The Registry action module requires a column containing the hosts to be targeted.
Prior to configuring the Registry Action Module Wizard, scope the source data table to ensure the actions apply only to the desired hosts.
CAUTION: Unexpected values in the registry can cause major system failures when deleting or modifying registry items.
RECOMMENDED: Backup the system registry before making changes using the Registry action module.
Registry Action Source Table Configuration
All data tables used in Enterprise Auditor action modules require the presence of certain data columns. In addition, individual action modules including Registry may have their own column requirements. The Registry action module requires a column containing the hosts that are going to be targeted.
Configuration
The Registry action module is configured through the Registry Action Module Wizard, which contains the following wizard pages:
The Welcome page gives an overview of the Registry Action Module Wizard. The steps navigation pane contains links to the pages in the wizard. Review the introductory and caution information about the Registry Action Module before proceeding.
To proceed, click Next or use the Steps navigation pane to open another page in the wizard.
Registry: Summary
The Summary page summarizes the configuration of the action.
When done configuring the action, click Finish. If no changes were made, it is a best practice to click Cancel to close the Registry Action Module Wizard to ensure that no accidental clicks are saved.
Registry: Target Hosts
Use the Target Hosts page to identify the target hosts whose registries the action examines or alters.
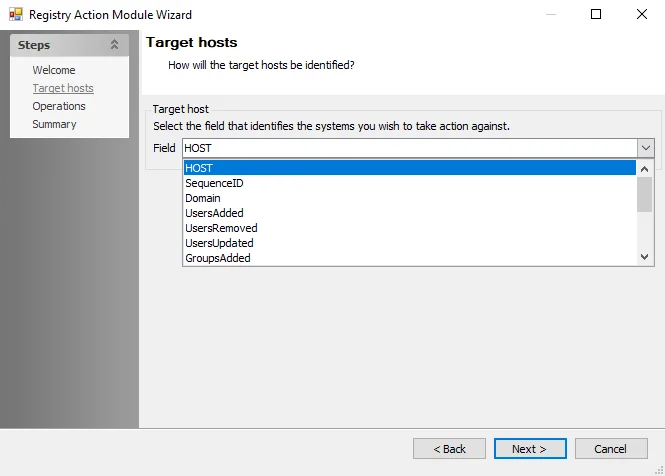
Use the drop-down menu to select the field that identifies the systems to be targeted. The list displays columns from the specified source table. The action applies the specified operations to all systems in the field.