Survey HTML Style
Choose an HTML style from the HTML Styles list. The Sample pane displays a preview of the style.
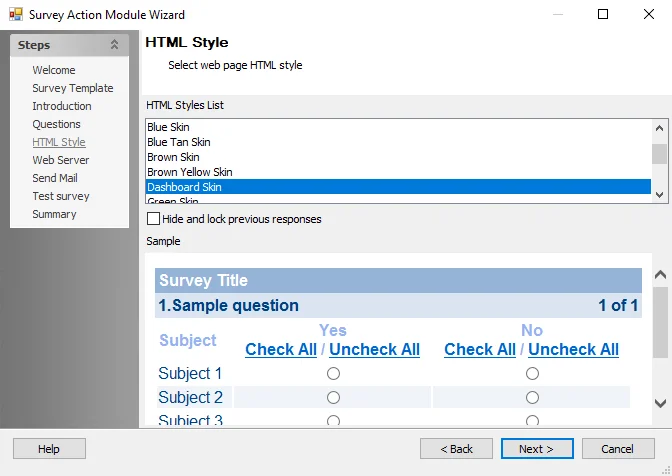
The configurable options are:
- HTML Style List – Select which HTML Style is used for Surveys using the HTML Style list. An example of the style shows in the Sample box at the bottom of the wizard.
- Hide and Lock Previous Responses – Select the checkbox to prevent users from changing their survey responses once they exit the survey
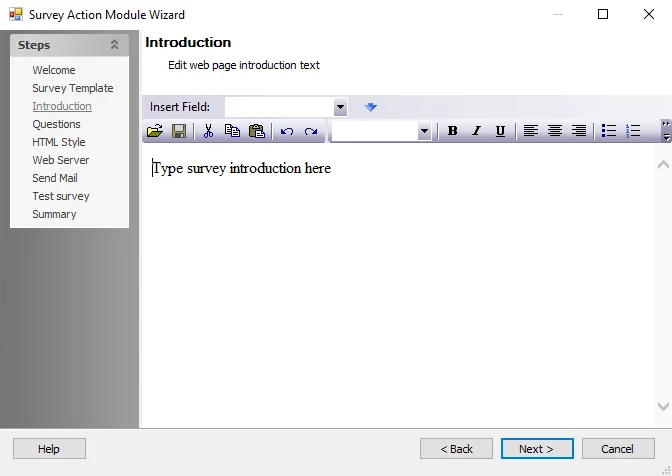
Survey: Introduction
Use this page to specify web page introductory text (if any) for the web page specified on the Web Server page. See the Survey: Web Server topic for additional information. The introductory text appears on the landing page when recipients click on the survey link in the email.
The configurable options are:
-
Insert Field – Inserts a dynamic field into the message content. Dynamic fields such as username can personalize the survey for each recipient. The options available at this field are limited to data from the SQL table specified at the Source Table field on the Action Properties page.
Place the cursor in the text where a field should appear. Next, click on the drop-down and select a field from the list. When a selection appears in the field, click the blue down arrow. The field appears in the text.
Text Entry Box
Use the Text Entry box to compose an introductory message. Above the text box is a tool bar containing various Microsoft Word-style editing tools. Use the editor to personalize the content and appearance of each message. Use the Insert field option to insert dynamic text from the specified data table.
Survey: Mail – Message
Use this page to specify the text of the email. When first accessing this page, the cursor appears in the Load from template field. Survey templates are a legacy feature and Netwrix recommends not using them.
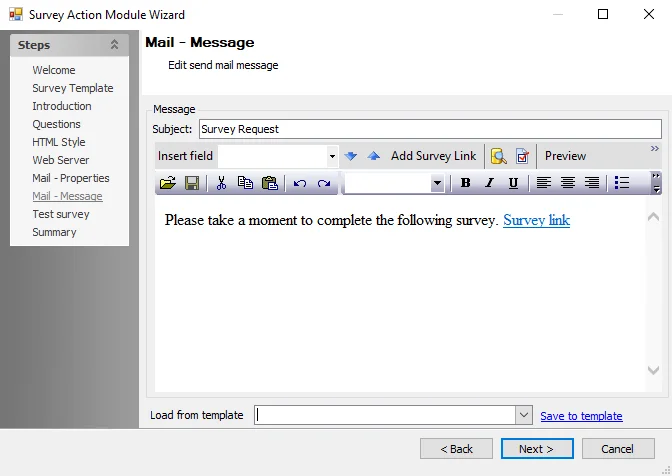
Placeholder text displays in the Message box. This text includes a hyperlink to the web page hosting the survey. Placeholder text can be modified but the link cannot be removed. The link does not activate until the message is sent.
Use the following fields to specify the text of the email:
-
Subject – Specify subject text for the email. The contents of this field displays as the Subject line of the delivered email. Enter text directly and use the Insert field to insert one or more data fields. This is a required field.
-
Insert Field – Inserts a data field into the subject or body of the email. The drop-down menu displays a list of available fields. Once a selection displays in the field, click on the blue Down and Up arrows to insert the field into the body or the subject, respectively. This field is optional.
-
The following are buttons appearing on a bar below the Subject field:
- Show sample input source data – To display a table of sample source data, click the icon next to the blue arrows
- Show dialog to set SMTP options – To override the global SMTP settings, click the icon next to the blue arrows to display the SMTP Options dialog box
- Preview – Displays the Messages Preview window containing a preview of the current email message. Click Send to send a single message to the addresses in the Recipient field in the Message Preview window. The Preview button is active only if the Recipients field is populated. See the Messages Preview Window topic for additional information.
- Clear Template – Clears any content from the Subject and Text Entry box
-
Load from template – Survey templates are a legacy feature. It is strongly recommended not use templates when creating surveys.
-
Save to template – Saves the current email subject and content to a template. If an existing template name appears in the Load from template field, clicking this button updates that template. If the Load from template field is empty or contains a name other than one of the existing templates, clicking this button accesses the Save SendMail Template window and changes can be saved to a new template. Templates reside locally on the host computer as XML files, in the
Actions/SM_Templatesfolder.
Messages Preview Window
The Messages preview window opens when you click Preview on the Mail – Message page of the Survey Action Module Wizard. This window displays a preview of the email, including any dynamic fields.
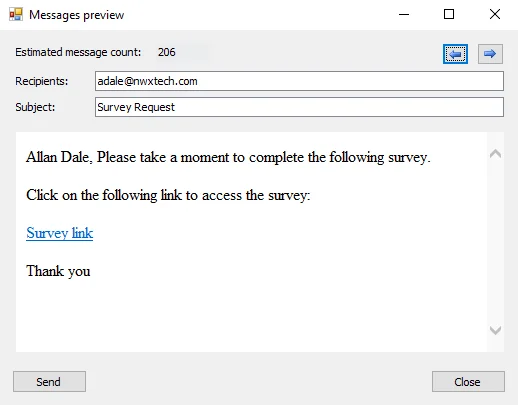
The window has the following options:
- Blue arrow buttons – Click to view other recipients
- Send – Sends a single message to the addresses in the Recipients field
Survey: Mail – Properties
Use this page to specify the email recipients.
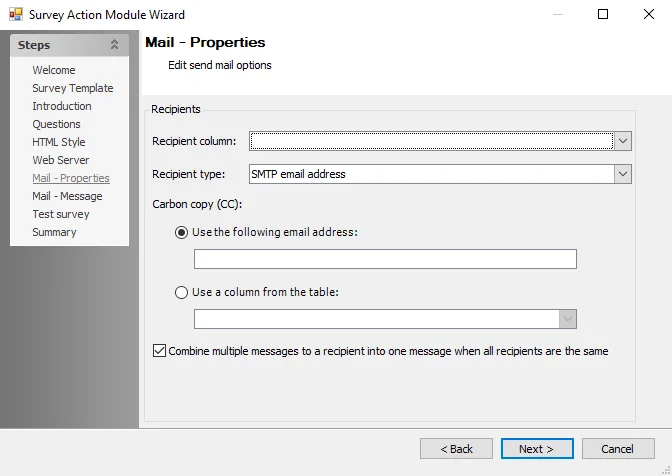
Use the following fields to specify the recipient information:
-
Recipient column – Specify the data table columns containing intended recipient information
- For example, a column containing email addresses. The drop-down menu displays a list of possible column types.
-
Recipient type – Specify the data type of the Recipient column. The drop-down menu displays a list of recipient types, for example SMTP email address.
-
Carbon copy (CC) – (Optional) Specify one or more additional email addresses to receive a carbon-copy of the SendMail message, for example an address not included in the source table. Separate multiple address with a semi-colon and a space.
-
Combine multiple messages to a recipient into one message when all recipients are the same – Select this option to send only one message to each recipient as a result of this action (even recipients who appear more than once in the job results)
Survey Action Module
Use this action module to create surveys and make them available to targeted recipients via email. For example, a survey can solicit feedback from clients or poll employees on company issues.
The Survey Action Module Wizard builds customizable, web-based surveys containing questions created by the user. Once the survey is defined, a list of recipients can then be specified. When executing the action, the process simultaneously sends an email to the recipients containing a link to the survey and creates a web page to host the survey.
CAUTION: This module sends one or more electronic messages to a selected audience. Prior to executing the action, ensure the audience consists of only the desired members. Netwrix recommends using this and all other Enterprise Auditor actions with caution.
Survey Action Source Table Configuration
All data tables used in Enterprise Auditor action modules require the presence of certain data
columns. In addition, individual action modules including Survey may have their own column
requirements. The Survey action module requires a column containing well-formatted email addresses
(for example, hfinn@netwrix.com) for your recipients.
Survey Action Module Wizard
The Survey action module is configured through the Survey Action Module Wizard, which contains the following wizard pages:
- Welcome
- Survey: Template (Legacy feature)
- Survey: Introduction
- Survey: Questions
- Survey HTML Style
- Survey: Web Server
- Survey: Mail – Properties
- Survey: Mail – Message
- Survey: Test Survey
- Survey: Summary
The Welcome page displays first and gives an overview of the action module. The navigation pane contains links to the pages in the wizard.
To proceed, click Next or use the Steps navigation pane to open another page in the wizard.
Survey: Questions
Use this page to specify the questions on the survey. Configure the following for each question:
-
The text of the question
- Example:
Are you the owner of the following stale AD objects?
- Example:
-
The subject of the question – The subject is the object to which the question is directed, such as a user who has access to AD objects. Specify the subject via a dynamic field.
- Example: UserName
- The data table must contain a column with the subject of each question on the survey
-
A name for the answer column in the result table. This column stores the answers to the survey question.
-
The question type (Yes/No, Text, or Multiple Choice)
-
Any additional descriptive text to include for the question

The configurable options are:
-
Questions List – Any existing questions appear in the Question List box. The following buttons are available:
- Add new question – Adds a new question to the Questions list. Use the Question Details section to customize the question.
- Remove question – Remove selected question from the Questions list
- Up and Down arrows – Re-order questions
-
Question Details – Use this section to define your survey questions. The following options are available:
-
Text – Specify the survey question
-
Subjects – Click on the ellipses (…) to open the Select subjects window. Specify the object to which a question is directed. The selected subjects show in the Subjects field. See the Select Subjects Window topic for additional information.
-
Answer Column Name – The Survey action module inserts the results of the survey directly into the SQL table on which a survey is based, creating an answer column for each question in the survey. Give each column a unique name that corresponds to the associated survey question.
-
Question type – Specify a question type. The options are:
- Yes/No
- Text
- Multiple Choice – If this option is selected, the Answers button activates. Click this button to open the Answers window and specify the response options to the multiple choice question via the Add button.
-
Answers – This button activates if Multiple Choice in the Question Type field is selected. Click to access the Answers window.
-
Description – Specify any additional explanation of the survey question. The text appears on the survey below the associated question.
-
Select Subjects Window
Select which subjects to use for the Survey question using the Select subjects window.
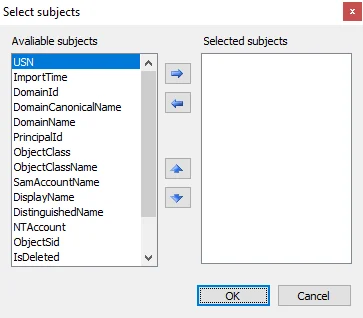
Select a subject from the Available subjects list, then click the Right Arrow to move it into the Selected Subjects list. Remove a subject from the Selected Subjects list by selecting a subject and clicking the Left Arrow. Change the priority of the subjects in the Selected Subjects list by using the Up and Down Arrows.
Survey: Summary
A summary of the survey configuration displays.
Click Save Template to access the Save Survey Template window.

Specify a name for the survey for future use. Click OK to return to the Summary page.
When done, click Finish to finalize survey configurations.
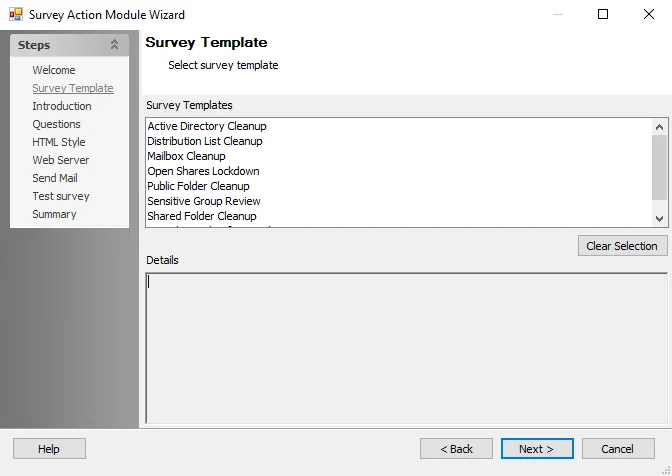
Survey: Template
Survey templates require customization to meet the customer's business needs. Contact Netwrix Support for additional information.
Survey: Test Survey
Use this page to test a survey and verify proper configuration.
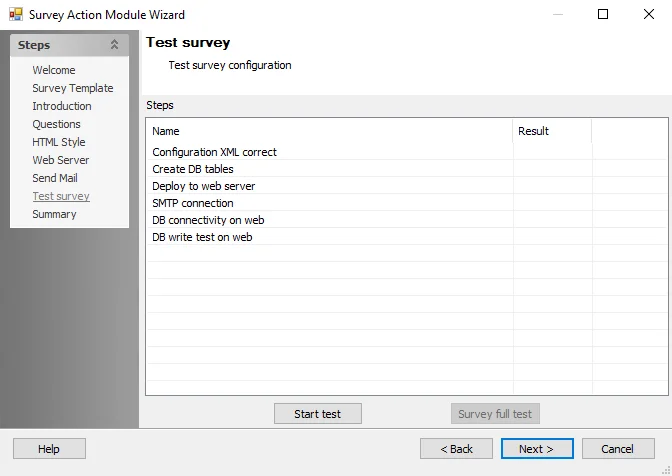
The configurable options are:
- Start test – Click to test your survey configuration
- Survey full test – Once the survey configuration test passes inspection, a full survey can be tested against a single user (for example, your own email account) to verify a survey matches design criteria
Survey: Web Server
Use this page to specify information about the web server hosting the survey website.
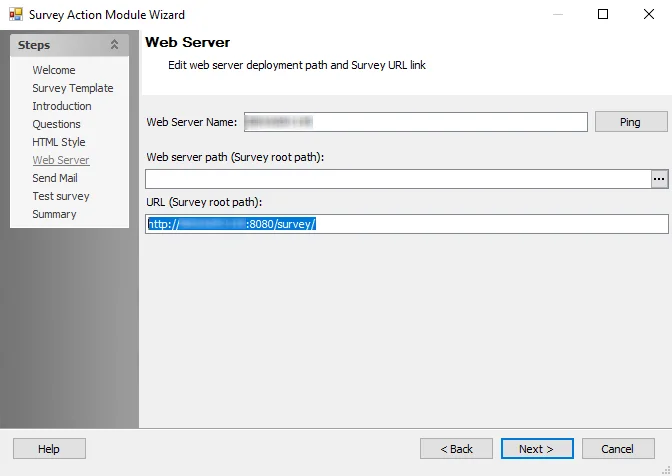
The configurable options are:
-
Web Server Name – Specify the name of the server hosting the survey
-
Web server path (Survey root path) – Specify the root path to the folder on the web server containing the scripts used to build and operate the survey web page
- Click the ellipses (...) to open the Browse For Folder window to navigate to the folder on the web server containing the scripts used to build and operate the survey web page
-
URL (Survey root path) – Specify the root path of the web page location