0.Collection Job Group
The Redshift Solution Collection group collects high level summary information from targeted Redshift Servers. Other jobs in the Redshift Solution Set use this information for further analysis and for producing respective reports.
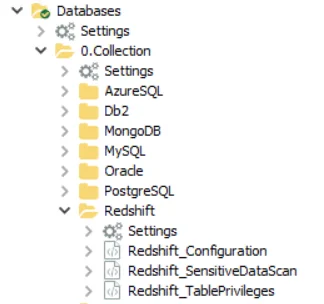
The jobs in the 0.Collection Job Group are:
- Redshift_Configuration Job — Returns additional configuration settings from Redshift servers
- Redshift_SensitiveDataScan Job — Discovers sensitive data in PostgreSQL databases based on pre-defined or user-defined search criteria
- Redshift_TablePrivileges Job - Designed to collect Redshift table privileges from all the targeted servers.
Redshift_Configuration Job
The Redshift_Configuration job returns additional configuration settings from Redshift servers.
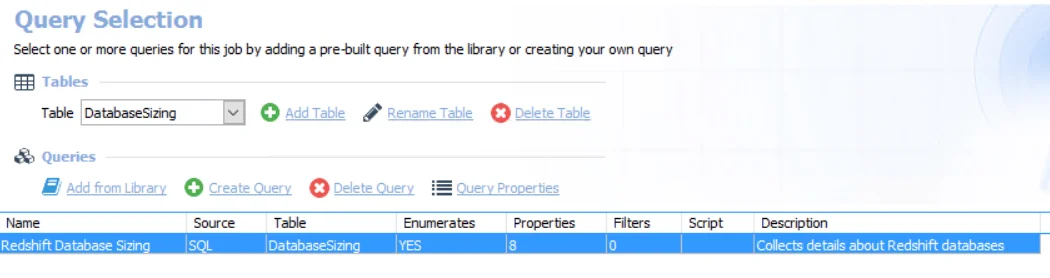
Queries for the Redshift_Configuration Job
The Redshift_Configuration Job uses the SQL Data Collector for queries.
CAUTION: Do not modify the query. The query is preconfigured for this job.
The query is:
- Redshift Database Sizing — Provides details about Redshift databases and overall database size
Redshift_SensitiveDataScan Job
This job discovers sensitive data in PostgreSQL databases on pre-defined or user-defined criteria.
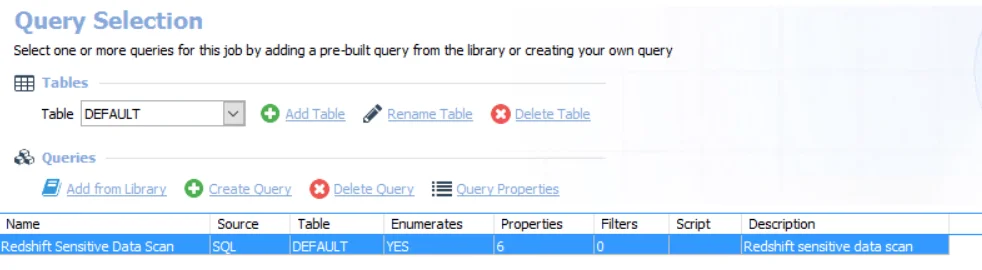
Queries for the Redshift_SensitiveData Scan Job
The Redshift_SensitiveDataScan Job uses the SQL Data Collector for queries.
The query is:
- Redshift Sensitive Data Scan — Provides information on all the sensitive data that was discovered in the targeted Redshift servers based on the selected scan criteria.
Recommended Configuration for the SensitiveDataScan Query
The Redshift_SensitiveDataScan Job is preconfigured to run using the default settings for the Sensitive Data Collection category. It is necessary only to set up the connection for the Redshift- SensitiveDataScan Job. Once the connection is established, it applies to any other 0.Collection job query. Follow the steps to customize configurations.
Step 1 – Navigate to the Databases > 0.Collection > Redshift > Redshift_SensitiveDataScan > Configure node and select Queries.
Step 2 – In the Query Selection view, select the Redshift Sensitive Data Scan query click on Query Properties. The Query Properties window appears.
Step 3 – Select the Data Source tab, and click Configure. The SQL Data Collector Wizard opens with Sensitive Data Collection category selected.
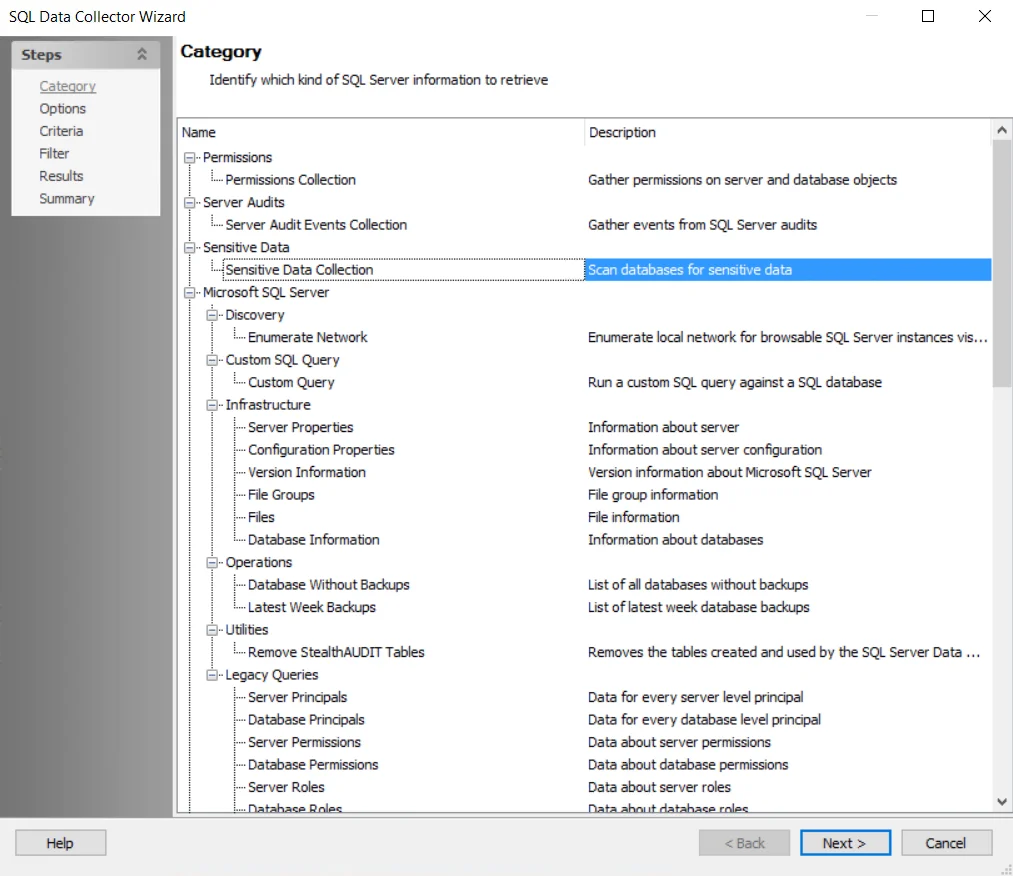
Step 4 – Click Next. The Sensitive Data Scan Settings view appears.
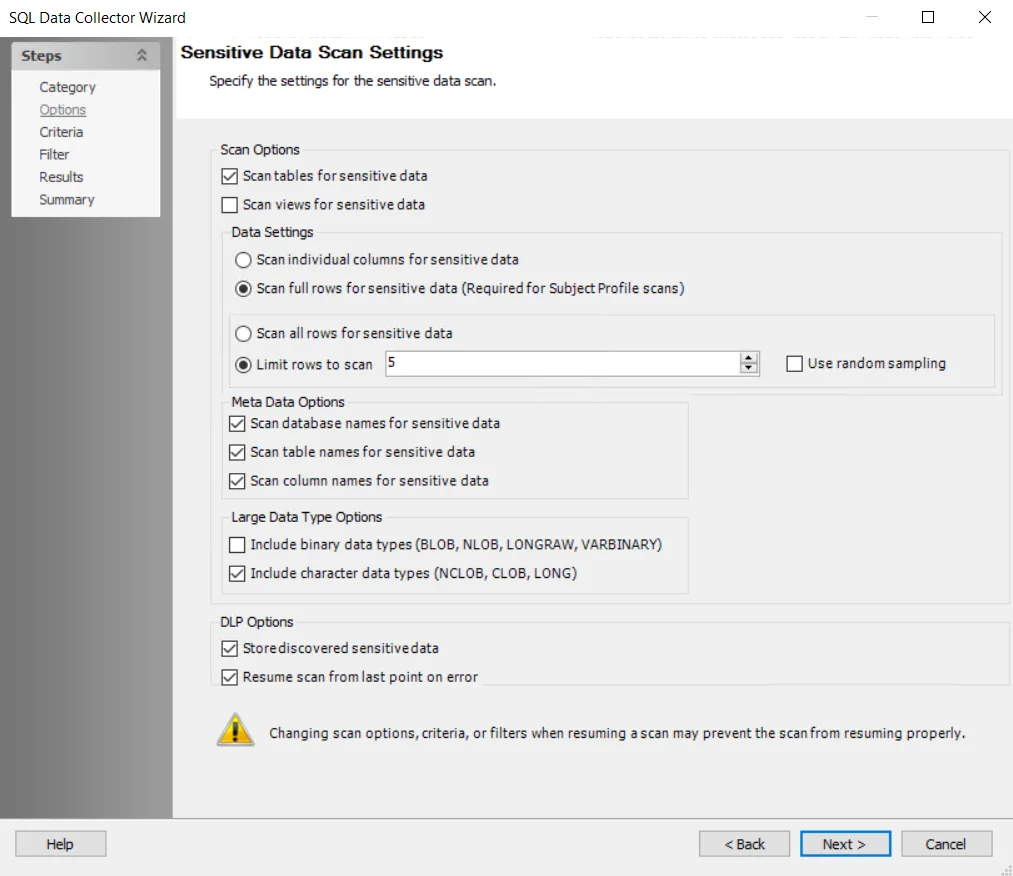
Step 5 – To modify sensitive data scan options, select the desired scan options. See the SQL: Options page for additional information.
NOTE: The Sensitive Data Scan Settings are preconfigured for optimal performance for a high-level table scan. Configuring these settings to increase the scope of the sensitive data scan may significantly increase scan time.
Step 6 – Click Next. The Select Criteria view appears.
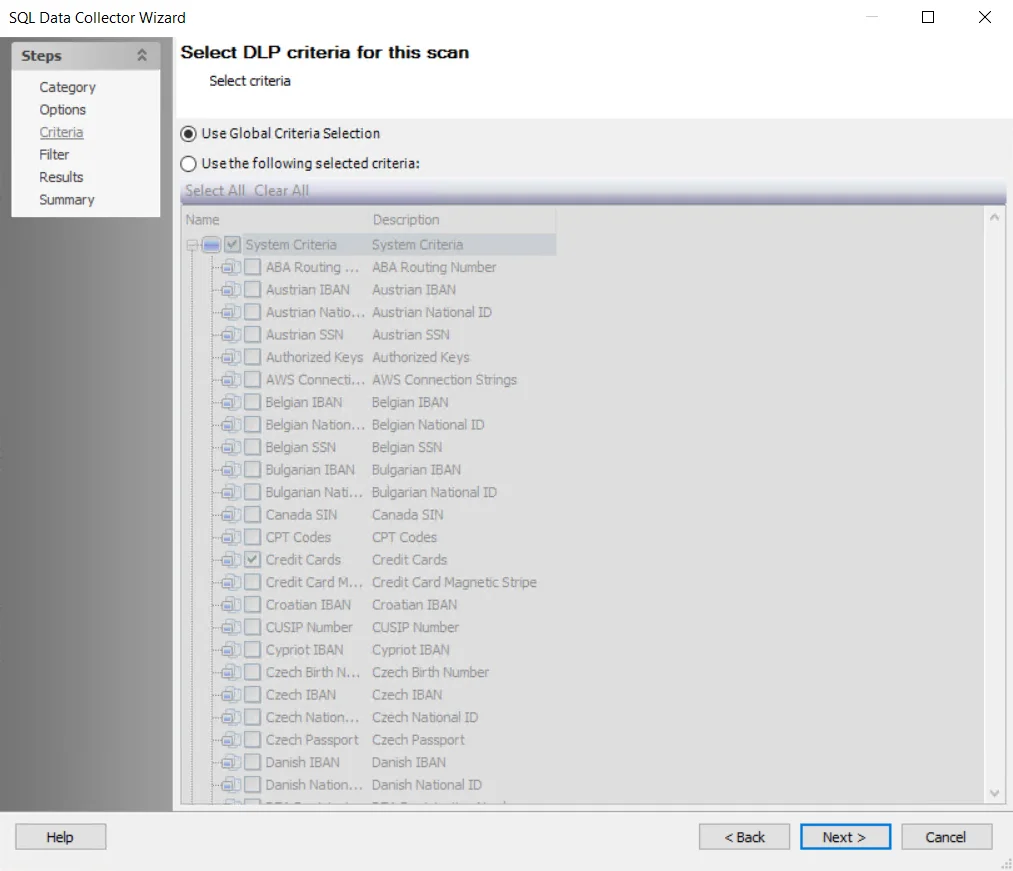
Step 7 – To modify criteria, click on Use the following selected criteria: and select your choices. By default, the Sensitive Data Scan job is set to Use Global Criteria. Also by default, the following System Criteria have been selected:
- Credit Cards
- Tax Forms
- US SSN
- User ID
- Password
NOTE: For more information on adding or deleting criteria, navigate to the SQL: Criteria page or See the Sensitive Data Criteria Editor topic for additional information.
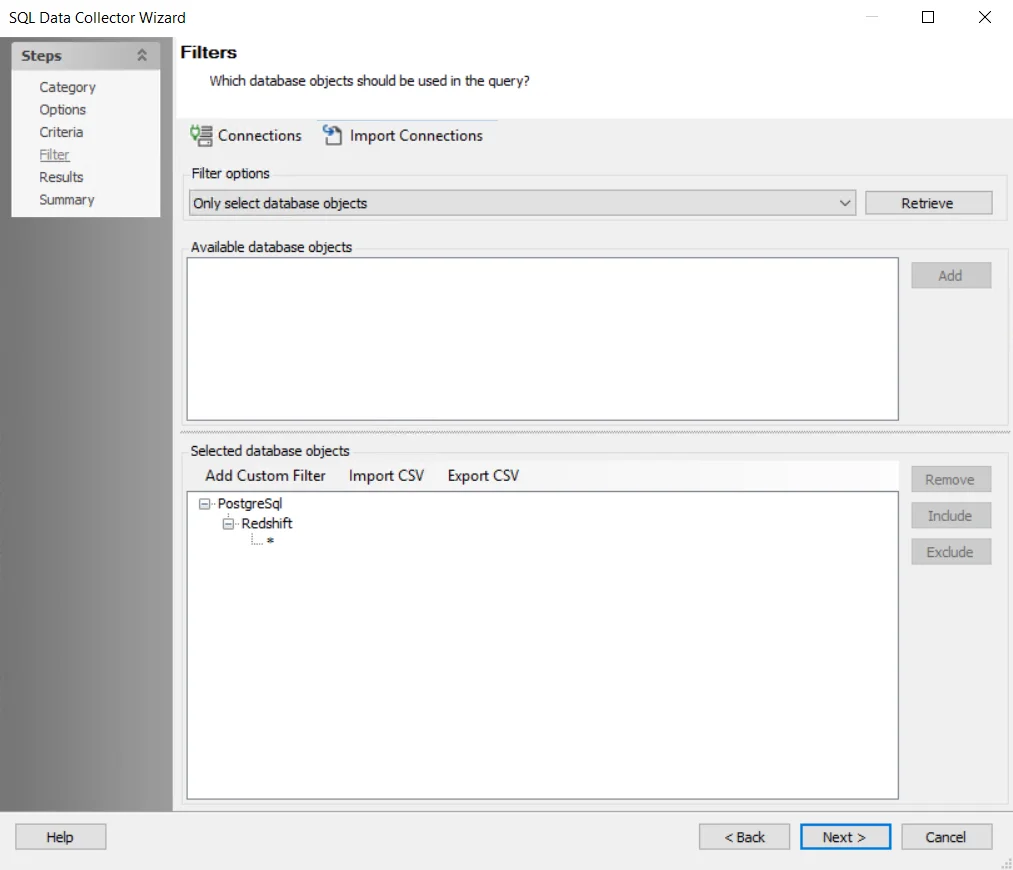
Step 8 – Click Next. The Filters view appears.
Step 9 – Click Connections to open the Manage Connections window.
NOTE: SQL databases must be added to the query before they can be scanned. Before you can add a query, you must establish a connection to the database.
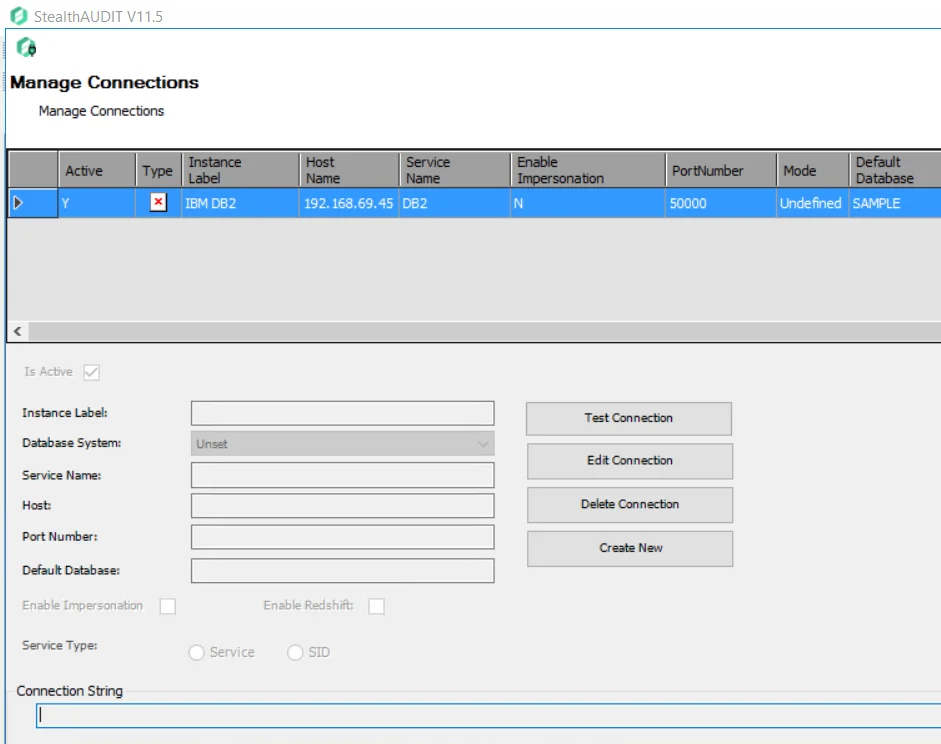
Step 10 – In the Manage Connections window, click Create New Connection and add the following information:
- Instance Label — The name of the instance
- Database System — Unique identifier for the database. Select the server to connect to from the dropdown list.
- Service Name — Unique identifier for the service. Enter a Service Name.
- Host — Name or IP address of the host where the database is located
- Port Number — Port number for the selected database
- Default Database — Default Database
Step 11 – Exit the Manage Connections window to return to the Filter page.
Step 12 – Select Only select database objects. or All database objects. The query is configured by default to target Only select database objects.
NOTE: For more information on filtering, see the SQL: Filter page.
Step 13 – Click Retrieve. The Available database objects box will populate.
Step 14 – Add the Databases and instances to be audited. Databases and instances can be added in the following ways:
- Select the desired database objects and click Add.
- Use the Import CSV button to import a list from a CSV file, if desired.
- Optionally use the Add Custom Filter button to create and apply a custom filter.
The selected database objects to be audited display.
Step 15 – Click Next and navigate to the Summary page, click Finish to save any setting modifications or click Cancel if no changes were made. Then click OK to close the Query Properties window.
The 1-Db2_SensitsveDataScan Job is now ready to run with the customized settings.
Analysis Tasks for the Redshift_SensitiveDataScan
Navigate to the _**_Databases > 0.Collection >**Redshift >__ Redshift_SensitiveDataScan > Configure node and select Analysis to view the Analysis Tasks. The Analysis tasks do not require any configuration as they just populate the reports with the collected information and do not collect data themselves.
CAUTION: Do not modify or deselect the selected analysis tasks. The analysis tasks are preconfigured for this job.
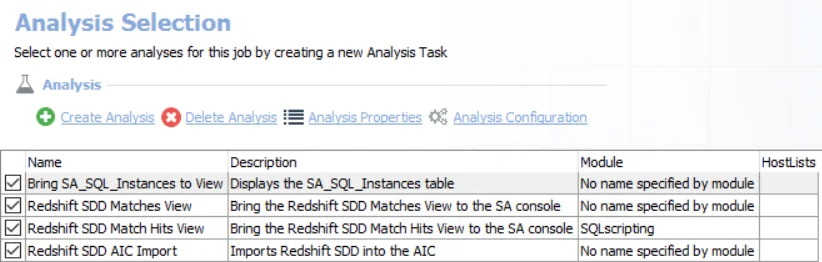
The default analysis tasks are:
- Bring SA_SQL_Instances to View — Displays the SA_SQL_Instances table
- Redshift SDD Matches View — Brings the Redshift SDD Matches View to the Enterprise Auditor console
- Redshift SDD Matches Hits View — Brings the SA_SQL Match Hits View to the Enterprise Auditor console
- Redshift ADD AIC Import —Imports Redshift SDD into the AIC
Redshift_TablePrivileges Job
The Redshift_TablePrivileges job is designed to collect Redshift table privileges from all the targeted servers.
Queries for the Redshift_TablePrivileges Job
The Redshift_TablePrivileges Job uses the SQL Data Collector for queries.
CAUTION: Do not modify the query. The query is preconfigured for this job.
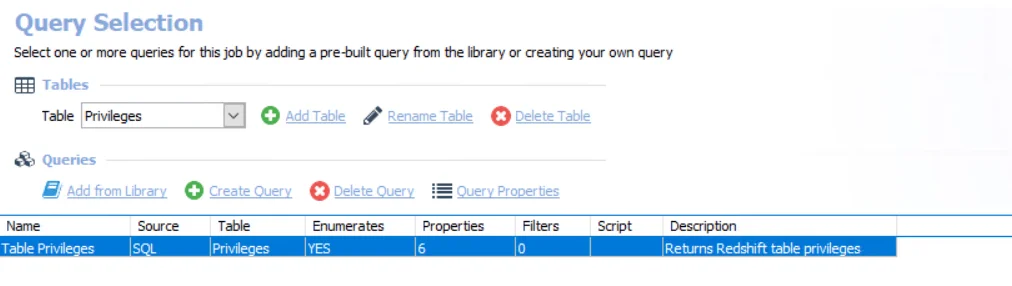
The query is:
- Table Privileges - Returns table privileges from all the targeted servers.
Analysis Task for the Redshift_TablePrivileges Job
Navigate to the Databases > 0.Collection > Redshift > Redshift_TablePrivileges > Configure node and select Analysis to view the analysis tasks.
CAUTION: Do not modify or deselect the selected analysis task. The analysis task is preconfigured for this job.
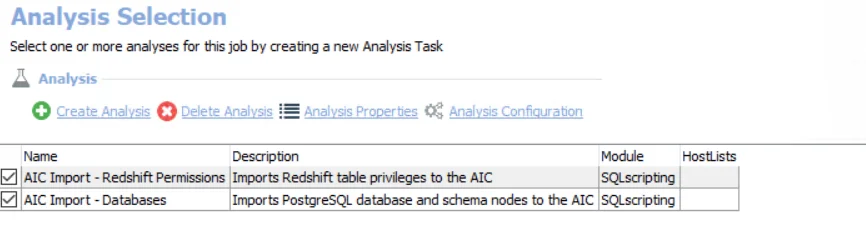
The default analysis task is:
- AIC Import - Redshift Permissions – Imports Redshift table privileges to the AIC.
- AIC Import - Databases – Imports Redshift database and schema nodes to the AIC.
Redshift Solution
The Enterprise Auditor Redshift Solution Set is a comprehensive set of pre-configured audit jobs and reports that provide visibility into various aspects of Redshift: Data Collection, Configuration, and Sensitive Data.
The Redshift Solution requires a special Enterprise Auditor license. Additionally, the Sensitive Data Discovery Add-On enables the solution to search Redshift and AWS content for sensitive data.
Supported Platforms
- Amazon AWS Redshift
- AWS Redshift Cluster
Requirements, Permissions, and Ports
See the Target Redshift Requirements, Permissions, and Ports topic for additional information.
Sensitive Data Discovery Considerations
The Sensitive Data Discovery Add-On must be installed on the Enterprise Auditor Console server, which enables Sensitive Data criteria for scans. If running Sensitive Data Discovery (SDD) scans, it will be necessary to increase the minimum amount of RAM. Each thread requires a minimum of 2 additional GB of RAM per host. For example, if the job is configured to scan 8 hosts at a time , then an extra 16 GB of RAM are required (8x2=16).
By default, the job is configured to use 10 threads, which can be adjusted based on available resources on the Enterprise Auditor server.
NOTE: The Sensitive Data Discovery Add-on installation package installs the appropriate JDK (Java) version on the server. The JDK deployed is prepackaged and does not require any configuration; it has been preconfigured to work with Enterprise Auditor and should never be customized through Java. It will not conflict with other JDKs or Java Runtimes in the same environment.
Location
The Redshift Solution requires a special Enterprise Auditor license. It can be installed from the Enterprise Auditor Instant Job Wizard. Once it has been installed in the Jobs tree, navigate to the solution: Jobs > Databases > Redshift Solution.
The 0.Collection Job Group discovers SQL instances on the target hosts, and collects the data. The other job groups analyze the collected data and generate reports.
The Database Solution license includes all supported database platforms supported by Enterprise Auditor. Additionally, the Sensitive Data Discovery Add-On enables the solution to search database content for sensitive data.
Redshift Job Group
The Enterprise Auditor Redshift Solution Set is a set of preconfigured audit jobs and reports that provides visibility into Redshift Sensitive Data.
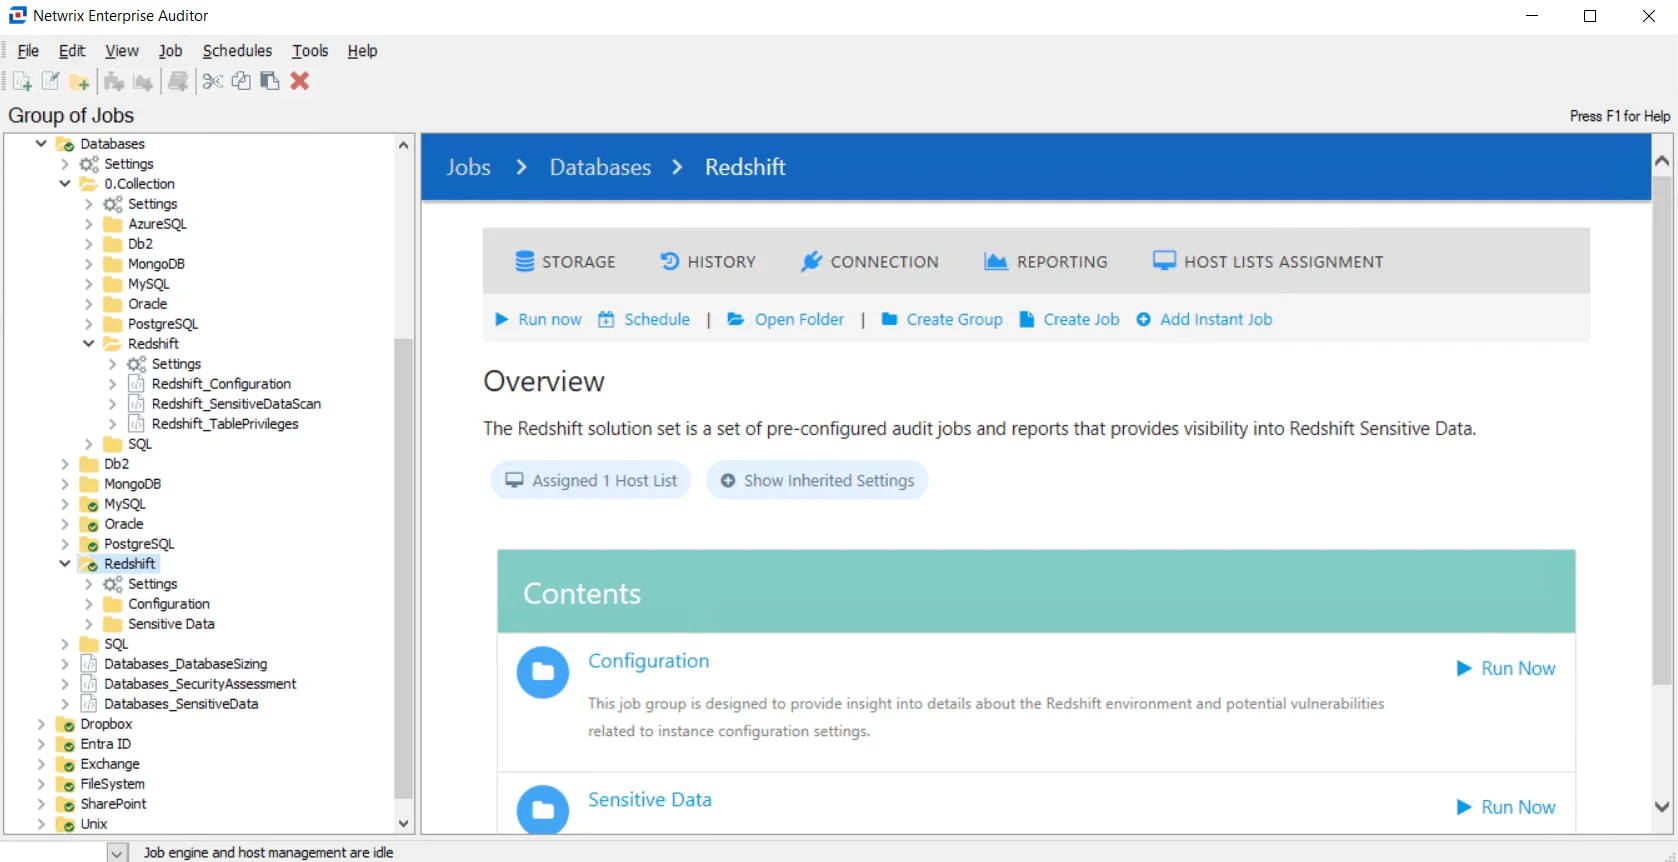
The following job groups comprise the Redshift Job Group:
-
0.Collection Job Group — Collects high level summary information from targeted Redshift Servers. Other jobs in the Redshift Solution Set use this information for further analysis and producing respective report. This Job Group is comprised of the following jobs(s)
-
Configuration > Redshift_DatabaseSizing Job — Provides insight into details about the Redshift environment and potential vulnerabilities relating to instance configuration settings.
-
Sensitive Data Job Group — Provides insight into where sensitive data exists and who has access to it across all the targeted Redshift databases.This Job Group is comprised of the following job(s):
Recommended Configuration for the Redshift Solution
The Redshift Solution is configured to inherit settings from the global Settings node. However, it is best practice to assign the host list and the Connection Profile at the data collection level, the 0.Collection Job Group. Once these are assigned to the job group, it can be run directly or scheduled.
Dependencies
- For Sensitive Data Discovery Auditing – Sensitive Data Discovery Add-On installed on the Enterprise Auditor Console server
Targeted Host(s)
The Redshift Job Group has been configured to inherit the host list assignment from the collection group level.
The host list assignment should be assigned under the Redshift > 0.Collection > Settings > Host List Assignment node. The Local host box is checked by default.
Connection Profile
The SQL Data Collector requires a specific set of permissions. See the Permissions section for necessary permissions. The account used can be either an Active Directory account or a SQL account. Once the account has been provisioned, create a custom Connection Profile containing the credentials for the targeted environment. See the SQL Custom Connection Profile & Default Dynamic Host List topic for additional information.
The Connection Profile should be assigned under the Redshift > 0.Collection > Settings > Connection node. It is set to Use the Default Profile, as configured at the global settings level. However, since this may not be the Connection Profile with the necessary permissions for the assigned hosts, click the radio button for the Select one of the following user defined profiles option and select the appropriate Connection Profile drop-down menu.
See the Connection topic for additional information.
Schedule Frequency
This job group can be scheduled to run as desired.
Run Order
The 0.Collection Jobs must be run first and in order. The other Redshift sub-job groups can be run in any order, together or individually, after running the 0.Collection Job Group.
RECOMMENDED: Run the solution at the top level.
Configuration > Redshift_DatabaseSizing Job
This group provides insight into details about the Redshift environment and potential vulnerabilities related to instance configuration settings.

The job(s) in the Configuration Job Group are:
- Redshift_DatabaseSizing Job — Provides details about Redshift databases and overall database size.
Analysis Tasks for the Redshift_DatabaseSizing Job
Navigate to the Jobs > Databases> Redshift > Configuration > Redshift_DatabaseSizing > Configure node and select Analysis to view the Analysis Tasks.
CAUTION: Do not modify or deselect the selected analysis tasks. The analysis tasks are preconfigured for this job.
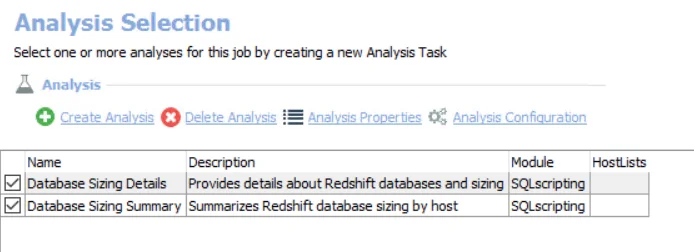
The default analysis tasks are:
- Database Sizing Details — Provides details about Redshift databases and sizing
- Database Sizing Summary — Summarizes Redshift database sizing by host
Report for the Redshift_Database Sizing Job
In addition to the tables and views created the analysis task, the Redshift_DatabaseSizing Job produces the following preconfigured reports.
| Report | Description | Default Tags | Report Elements |
|---|---|---|---|
| Database Sizing | This report highlights the size of databases in Redshift. | None | This report is comprised of three elements: - Bar Chart – Displays top databases by size (MB) - Bar Chart – Displays sizes by host (GB) - Table – Provides database details |
Sensitive Data Job Group
This job provides insight into where sensitive data exists and who has access to it across all the targeted Redshift databases.

The job(s) in the Sensitive Data Job Group are:
- Redshift_SensitiveData Job - Provides information on all the data that was discovered in the targeted Redshift database servers based on the selected scan criteria
- Redshift_SensitiveDataPermissions Job - Designed to provide information on all types of permissions on database objects containing sensitive data across all the targeted PostgreSQL servers based on the selected scan criteria.
Redshift_SensitiveData Job
This job provides information on all the sensitive data discovered in the targeted Redshift servers based on the selected scan criteria.
Analysis Tasks for the Redshift_SensitiveData Job
Navigate to the Jobs > Databases > Redshift > Sensitive Data > Redshift_SensitiveData > Configure node and select Analysis to view the Analysis Tasks.
CAUTION: Do not modify or deselect the selected analysis tasks. The analysis tasks are preconfigured for this job.

The default analysis tasks are:
- Sensitive Data Details — Returns details around sensitive data in Redshift
- Database Summary — Summarizes Redshift sensitive data by database
- Enterprise Summary — Summarizes Redshift sensitive data for the organization
Reports for the for the Redshift_SensitiveData Job
In addition to the tables and views created the analysis task, the Redshift_SensitiveData Job produces the following preconfigured reports.
| Report | Description | Default Tags | Report Elements |
|---|---|---|---|
| Enterprise Summary | This report shows a summary of the criteria matches found in the Enterprise. | None | This report is comprised of two elements: - Bar Chart - Displays exceptions by Match Count - Table - Displays Exception Details |
| Sensitive Data Overview | This report highlights objects which contain sensitive data criteria. | Sensitive Data | This report is comprised of three elements: - Bar Chart - Displays top databases by Sensitive Data Hits - Table - Provides details on top databases with Sensitive Data - Table - Provides Sensitive Data Details |
Redshift_SensitiveDataPermissions Job
The Redshift_SensitiveDataPermissions Job is designed to provide information on all types of permissions on database objects containing sensitive data across all the targeted Redshift servers based on the selected scan criteria.
Analysis Tasks for the Redshift_SensitiveData Job
Navigate to the Jobs > Databases > Redshift > Sensitive Data > Redshift_SensitiveDataPermissions > Configure node and select Analysis to view the analysis tasks.
CAUTION: Do not modify or deselect the selected analysis tasks. The analysis tasks are preconfigured for this job.
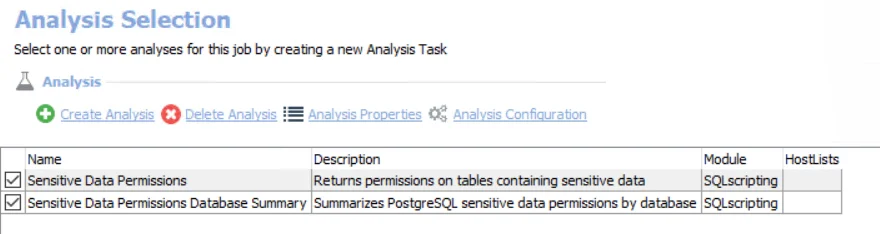
The default analysis tasks are:
- Sensitive Data Permission Details – Creates the Redshift_SensitiveDataPermissions_Details table accessible under the job’s Results node
- Sensitive Data Permissions Database Summary – Creates the Redshift_SensitiveDataPermissions_DatabaseSummary table accessible under the job’s Results node
In addition to the tables and views created by the analysis tasks, the Redshift_SensitiveDataPermissions Job produces the following pre-configured report.
| Report | Description | Default Tags | Report Elements |
|---|---|---|---|
| Sensitive Data Permissions | This report highlights sensitive data permissions in the audited environment. | None | This report is comprised of three elements: - Bar Chart – Displays top databases by permission count - Table – Provides details on database permission summary - Table – Provides details on sensitive data permission details |