FS_ShareAudit Job
The FS_ShareAudit Job is designed to report on shares from targeted file servers based on user input.
Analysis Tasks for the FS_ShareAudit Job
View the analysis tasks by navigating to the FileSystem > Ad Hoc Audits > FS_ShareAudit > Configure node and select Analysis.
CAUTION: Do not modify or deselect the last three selected analysis tasks. The analysis tasks are preconfigured for this job.
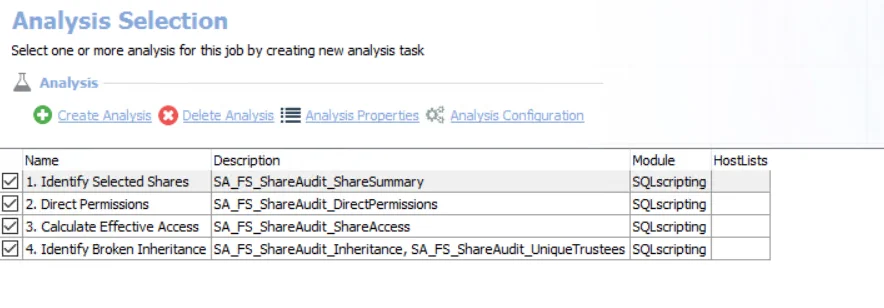
The following analysis tasks are selected by default:
-
- Identify Selected Shares – Creates the SA_FS_ShareAudit_ShareSummary table accessible under the job’s Results node
- Parameter is blank by default.
- #UNC parameter must be configured by clicking Analysis Configuration with this task selected
then selecting the #UNC table in the SQL Script Editor window and clicking Edit Table.
- This brings up the Edit Table window where the user can manually enter UNC paths of each share to be audited or upload a CSV file containing one row for each share to be audited. See the SQLscripting Analysis Module section for additional information.
- List one shared folder per row, using the format: \HOST\SHARE.
-
- Direct Permissions – Creates the SA_FS_ShareAudit_DirectPermissions table accessible under the job’s Results node
-
- Calculate Effective Access – Creates the SA_FS_ShareAudit_ShareAccess table accessible under the job’s Results node
-
- Identify Broken Inheritance
- Creates a temporary table in the database for use by downstream analysis and report generation.
- Creates the SA_FS_ShareAudit_UniqueTrustees table accessible under the job’s Results node.
In addition to the tables and views created by the analysis tasks, the FS_ShareAudit Job produces the following pre-configured report:
| Report | Description | Default Tags | Report Elements |
|---|---|---|---|
| Share Audit | This report displays permission information for the selected shares. | None | This report is comprised of four elements: - Table – Provides details on selected shares - Table – Provides details on permissions - Table – Provides details on effective access - Table – Provides details on broken inheritance |
FS_TrusteePermissions Job
The FS_TrusteePermissions Job is designed to report on trustees from targeted file servers based on user input.
Analysis Tasks for the FS_TrusteePermissions Job
View the analysis tasks by navigating to the FileSystem > Ad Hoc Audits > FS_TrusteePermissions > Configure node and select Analysis.
CAUTION: Do not modify or deselect the second selected analysis task. The analysis task is preconfigured for this job.
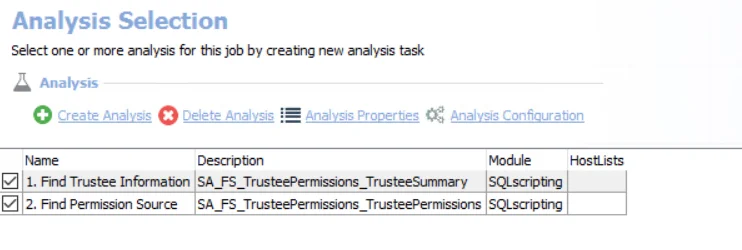
The following analysis tasks are selected by default:
-
- Find Trustee Information – Creates the SA_FS_TrusteePermissions_TrusteeSummary table accessible under the job’s Results node.
- Parameter is blank by default.
#Trusteesparameter must be configured using the Edit Table option.- List one trustee per row, using the format: DOMAIN\Name.
- See the Customize Analysis Parameters topic for additional information.
-
- Find Permission Source – Creates the SA_FS_ShareAudit_TrusteePermissions table accessible under the job’s Results node.
In addition to the tables and views created by the analysis tasks, the FS_TrusteePermissions Job produces the following pre-configured report:
| Report | Description | Default Tags | Report Elements |
|---|---|---|---|
| Trustee Permissions Audit | This report provides an overview of the access sprawl across the environment for the select trustee(s). | None | This report is comprised of two elements: - Bar Chart – Displays summary of trustees - Table – Provides details on trustee permissions |
Ad Hoc Audits Job Group
The Ad Hoc Audits Job Group is designed to report on resources and trustees that have been provided by the user from targeted file servers.
The Ad Hoc Audits Job Group tables and reports are blank if the CSV file is not modified to contain the required information before job execution.
RECOMMENDED: Run these jobs independently of the solution.
The Ad Hoc Audits Job Group is comprised of:
- FS_ShareAudit Job – Designed to report on shares from targeted file servers based on user input
- FS_TrusteePermissions Job – Designed to report on trustees from targeted file servers based on user input
For both of these jobs, the host list is set to Local host at the job level. The assigned Connection Profile needs to have rights on the Enterprise Auditor Console server to access the CSV file saved in the job's directory. The Connection Profile can be set at either the Ad Hoc Audits > Settings > Connection node (applies to both jobs) or in the job's Properties window on the Connection tab.
0-Create Schema Job
The 0-Create Schema job within the 0.Collection job group creates and updates the schema for the tables, views, and functions used by the rest of the File System Solution. This job needs to run prior to the other jobs in the 0.Collection job group for both new installations and upgrades. The job can be scheduled with any of the collections. Do not delete the job from the job tree.
RECOMMENDED: This job does not need to be moved. Leave it to run as part of the 0.Collection job group.
Analysis Tasks for the 0-Create Schema Job
View the analysis task by navigating to the FileSystem > 0.Collection > 0-Create Schema > Configure node and select Analysis.
CAUTION: Do not modify or deselect the selected analysis tasks. The analysis tasks are preconfigured for this job.
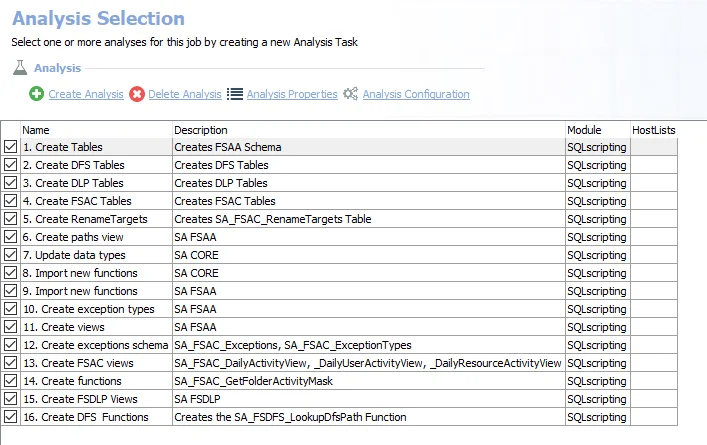
The following analysis tasks are selected by default:
-
- Create Tables – Creates all tables prefaced with SAFSAA
-
- Create DFS Tables – Creates all tables prefaced with SAFSDFS
-
- Create DLP Tables – Creates all tables prefaced with SAFSDLP
-
- Create FSAC Tables – Creates all tables prefaced with SAFSAC
-
- Create Rename Targets – Creates the SA_FSAC_Rename Targets tables
-
- Create Paths View – Creates the SA_FSAA_Paths view
-
- Update data types – Enterprise Auditor uses custom SQL data types to render data. This analysis creates updates to those data types.
-
- Import new functions – Creates functions used in the File System Solution that only reference the .Active Directory Inventory job group data
-
- Import new functions – Creates the FSAA functions used in the File System Solution that reference the 0.Collection job group data
-
- Create exception types – Creates the SA_FSAA_ExceptionTypes table
-
- Create views – Creates the SA_FSAA_DirectPermissionsView
-
- Create Exceptions Schema – Creates the SA_FSAC_Exception table and the SA_FSAC_ExceptionTypes table
-
- Create FSAC Views – Creates all views prefaced with SAFSAC
-
- Create Functions – Creates the FSAC functions used in the File System Solution that reference the 0.Collection job group data
-
- Create FSDLP Views – Creates all views prefaced with SAFSDLP
-
- Create DFS Functions – Creates the FSDFS functions used in the File System Solution that reference the 0.Collection job group data
0-FS_Nasuni Job
The 0-FS_Nasuni job is required in order to target Nasuni Edge Appliances. The job can be added from the Enterprise Auditor Instant Job Library. See the Instant Job Wizard topic to add this instant job to the 0.Collection job group.
CAUTION: It is necessary to rename the job after it has been added to the 0.Collection job group from FS_Nasuni to 0-FS_Nasuni, so that it runs immediately after the 0-Create Schema job.
Remember, the 0-FS_Nasuni job must be assigned a custom host list containing all on-premise Nasuni Edge Appliances and cloud filers, and a custom Connection Profile containing the API Access Key and Passcode for each on-premise Nasuni Edge Appliance and cloud filer in the target environment. Nasuni API key names are case sensitive. When providing them, ensure they are entered in the exact same case as generated.
Queries for the 0-FS_Nasuni Job
The queries for the 0-FS_Nasuni job use the PowerShell Data collector to gather system information, volume data, and share data from the Nasuni environment.
CAUTION: Do not modify the queries. The queries are preconfigured for this job.
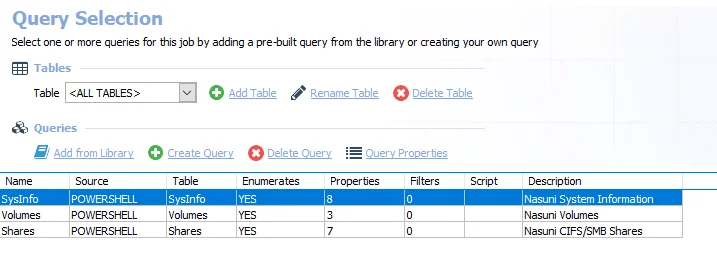
The queries for the 0-FS_Nasuni job are:
- SysInfo – Collects Nasuni system information
- Volumes – Collects Nasuni volume information
- Shares – Collects Nasuni CIFS/SMB share information
0-FSDFS System Scans Job
The 0-FSDFS System Scans job enumerates a list of all root and link targets in the distributed file system and creating a dynamic host list that will be used by the components.
Query for the 0-FSDFS System Scans Job
The DFS System Scan Query uses the FSAA Data Collector and has been preconfigured to use the DFS Scan Category.
CAUTION: Do not modify the query. The query is preconfigured for this job.
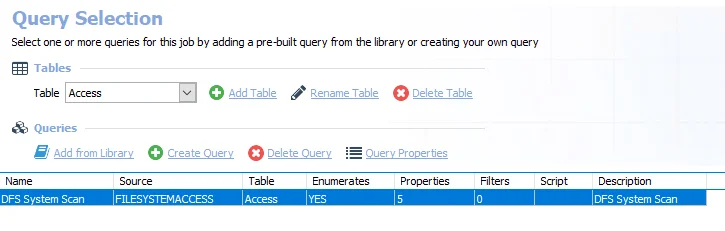
- DFS System Scan – Scans the DFS System
Analysis Tasks for the 0-FSDFS System Scans Job
View the analysis tasks by navigating to the FileSystem > 0.Collection > 0-FSDFS System Scans > Configure node and selecting Analysis.
CAUTION: Do not modify or deselect the selected analysis tasks. The analysis tasks are preconfigured for this job.
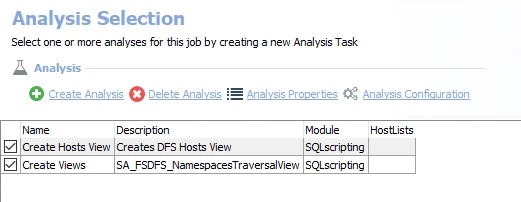
The following analysis tasks are selected by default:
- Create Hosts View – Creates the 0-FSDFS_System_HostView visible through the Results node that contains the dynamic host list
- Create Views – Creates the FSDFS_NamespacesTraversalView visible through the Results node that contains expansion of all the scanned namespaces
1-FSAA System Scans Job
The 1-FSAA System Scans job is designed to collect access information from the targeted file servers.
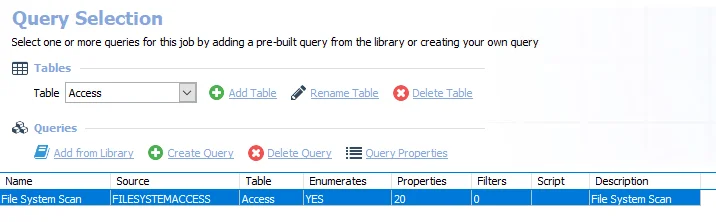
Query for the 1-FSAA System Scans Job
The File System Scan query uses the FSAA Data Collector.
The following default configurations are commonly customized:
-
Default Scoping Options page > File Properties (Folder Summary) tab:
- Set to limit the Scan for Probable Owners, with Limit maximum number of probable owners to return per folder set to 5
- Set to Scan for file types, with Limit maximum number of file types to return per folder set to 5
-
Scan Server Selection page:
- Set to Local Server, or local mode scans
-
Default Scoping Options page > Scan Settings tab:
- Set to Limit subfolder scan depth to 2 level(s)
See the Recommended Configuration for the File System Solution topic for a complete list of customizable settings. See the Configure the (FSAA) File System Scan Query topic for additional information.
Configure the (FSAA) File System Scan Query
The 1-FSAA System Scans job has been preconfigured to run with the default settings with the category of File system access/permission auditing Scan. Follow the steps to set any desired customizations.
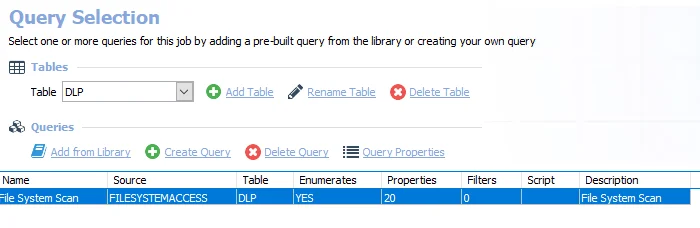
Step 1 – Navigate to the FileSystem > 0.Collection > 1-FSAA System Scans > Configure node and select the Queries node.
Step 2 – In the Query Selection view, click Query Properties. The Query Properties window opens.
Step 3 – Select the Data Source tab, and click Configure. The File System Access Auditor Data Collector Wizard opens.
CAUTION: Do not make changes to other wizard pages as they have been pre-configured for the purpose of this job.

Step 4 – The Applet Settings page applies to the applet and proxy mode scans. If employing proxy servers, see the FSAA: Applet Settings topic for configuration instructions.

Step 5 – On the Scan Server Selection page, select the server that will execute the scan. See the FSAA: Scan Server Selection topic for additional information.
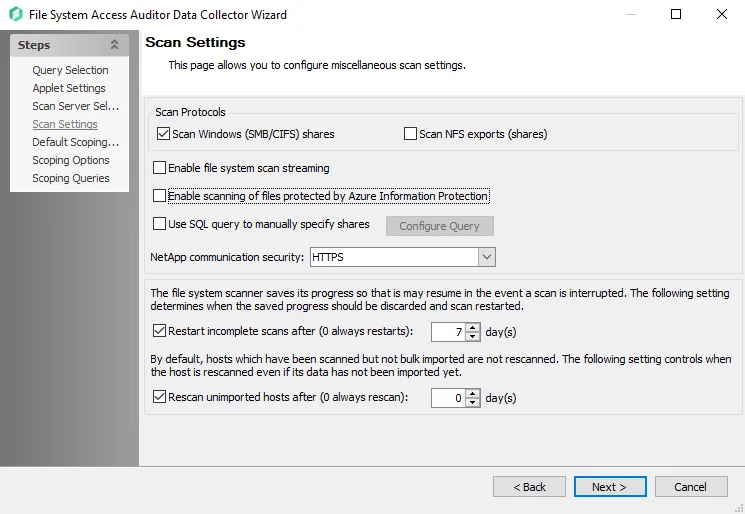
Step 6 – On the Scan Settings page, you can enable streaming. See the FSAA: Scan Settings topic for additional information.
NOTE: If streaming is enabled, the 2-FSAA Bulk Import job is no longer needed as part of the 0.Collection job group.
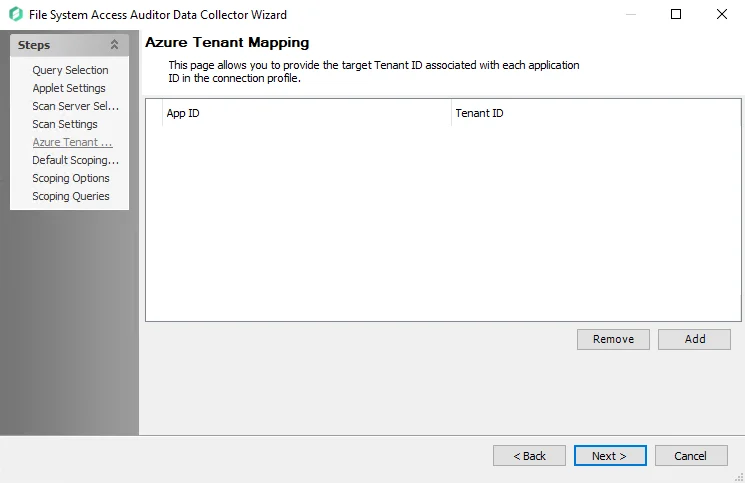
Step 7 – On the Azure Tenant Mapping page, add the AppPrincipalID (App ID) and Tenant ID. See the FSAA: Azure Tenant Mapping topic for additional information.
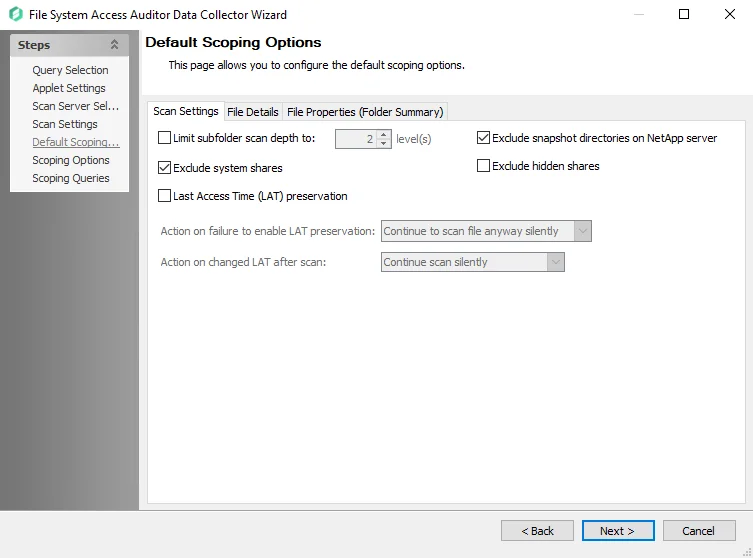
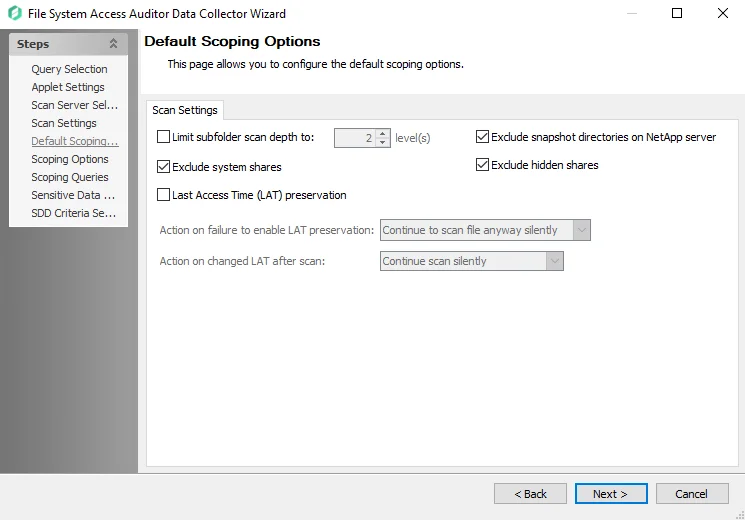
Step 8 – On the Default Scoping Options page, configure the following on the Scan Setting tab:
-
Limit subfolder scan depth to – Select this checkbox and use the arrow buttons to modify the subfolder scan depth
-
Exclude snapshot directories on NetApp server – Select this checkbox to exclude snapshot directories on NetApp server
-
Exclude system shares – Select this checkbox to exclude system shares
-
Exclude hidden shares – Select this checkbox to exclude hidden shares
-
Specify action on Last Access Time (LAT) preservation as follows:
-
Action on failure to enable LAT Preservation – Before scanning each file, FSAA attempts to enable an operating system feature to preserve the LAT when accessing the file. This operation may fail for a variety of reasons, which include but are not limited to: the operating system or file system where the file is located does not support LAT preservation, or insufficient permissions from the service account trying to access the file. The following configuration addresses a failure to enable the LAT preservation mode:
- Continue to scan file silently – FSAA scans the file with the possibility that LAT preservation is not possible. No warning will be shown.
- Continue to scan file with warning – FSAA scans the file with the possibility that LAT will not be preserved. A warning will be shown for this file.
- Skip file silently – FSAA will not scan the file. No warning will be shown.
- Skip file with warning – FSAA will not scan the file. A warning will be shown indicating the file was skipped.
- Abort the scan – FSAA will abort the scan. No further files will be processed.
-
Action on changed LAT After scan – Before scanning each file, the LAT of the current file is recorded. After scanning, it is verified whether the LAT has changed since then (likely scenarios are either that the LAT preservation mechanism failed to function as intended, or that the file was accessed by someone while the scan was occurring). The following configuration addresses a changed LAT:
- Continue scan silently – The scan will move on to the next file while updating the LAT for the processed file. No warning will be shown.
- Continue scan with warning – The scan will continue on to the next file. LAT will be updated for the processed file. A warning will be shown.
- Force-reset file LAT silently – The scan will reset the file's LAT to its original state before processing. No warning will be shown. The scan will proceed to the next file.
- Force-reset file LAT with warning – The scan will Reset the file's LAT to its original state before processing. A warning will be shown. The scan will proceed to the next file.
- Abort the scan – FSAA will abort the scan. LAT will be updated for the processed file. No other files will be processed
-
See the Scan Settings Tab topic for additional information.
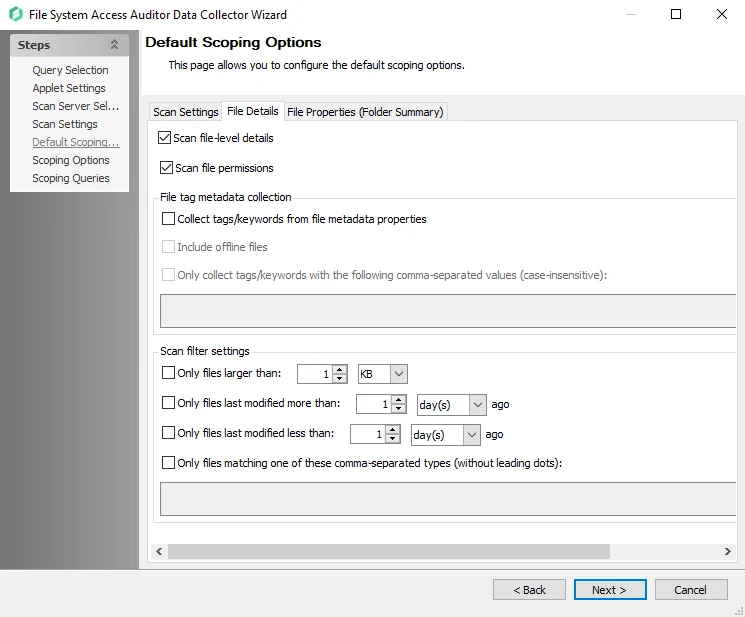
Step 9 – On the File Details tab of the Default Scoping Options page, you can enable file-level scans. See the File Details Tab
RECOMMENDED: Carefully consider configuring the following settings. Applying filters when file detail scanning has been enabled reduces the impact on the database.
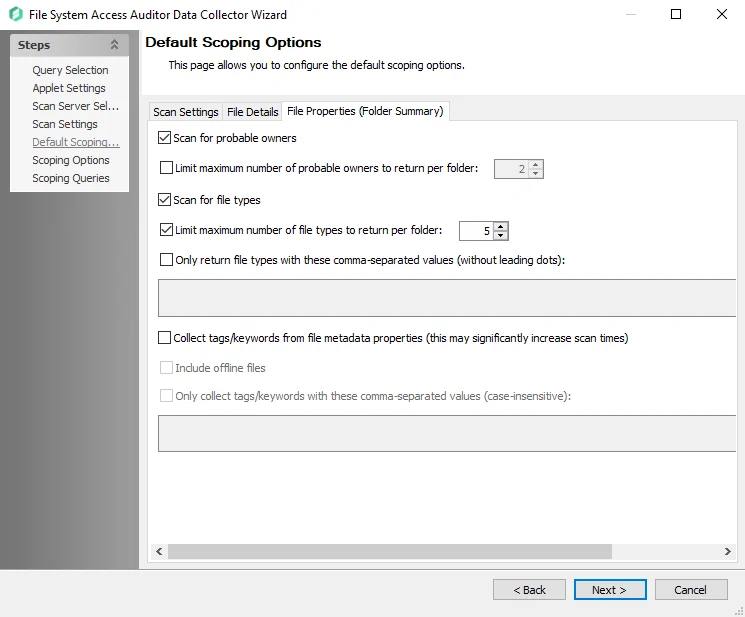
Step 10 – On the File Properties (Folder Summary) tab of the Default Scoping Options page, you can configure the following:
- Enable scan for probable owners
- Add a limit to the number of probable owners returned
- Scope file types to scan
- Add collection of tags and keyword
- Enable return of files with only comma-separated values (CSV files).
See the File Properties (Folder Summary) Tab topic for additional information.
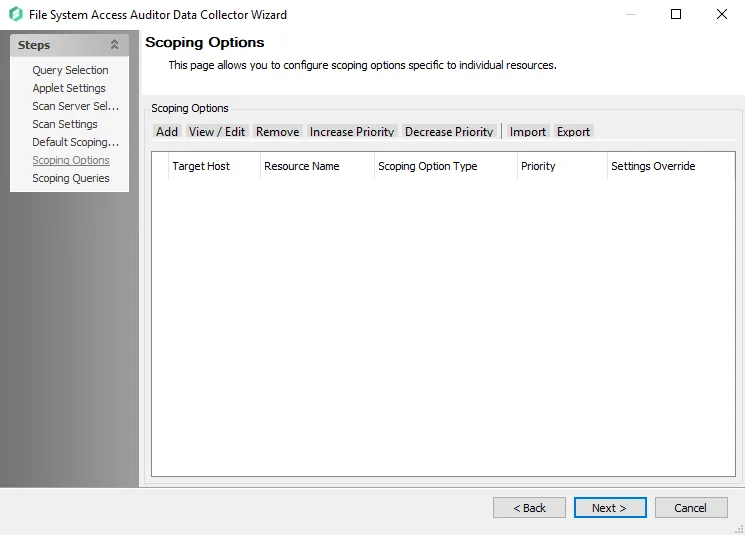
Step 11 – On the Scoping Options page, add share/folder inclusions and exclusions. See the FSAA: Scoping Options topic for additional information.
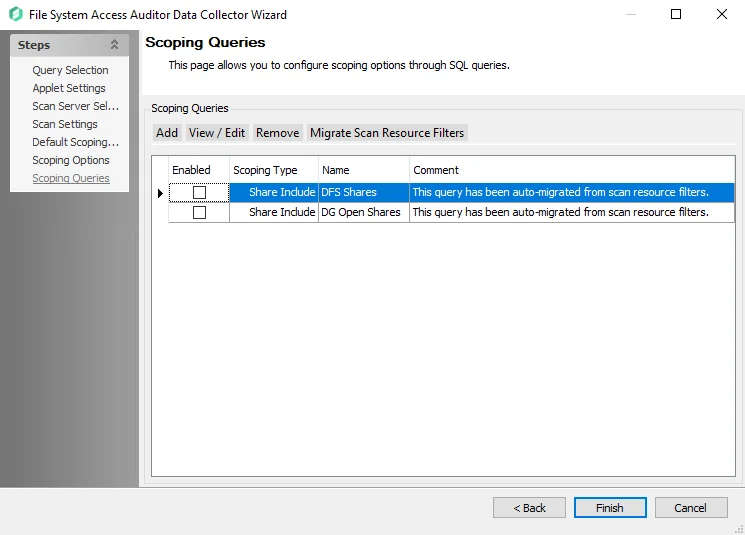
Step 12 – On the Scoping Queries page:
- Add folder/share inclusions
- Add folder/share exclusions
- Restrict scans to DFS shares or Open shares
See the FSAA: Scoping Queries topic for additional information.
Step 13 – Click Finish to save any setting modifications or click Cancel if no changes were made. Then click OK to close the Query Properties window.
If changes were made, the 1-FSAA System Scans job is now customized.
Analysis Task for the 1-FSAA System Scans Job
View the analysis task by navigating to the FileSystem > 0.Collection > 1-FSAA System Scans > Configure node and selecting Analysis.
CAUTION: Do not modify or deselect the selected analysis task. The analysis task is preconfigured for this job.
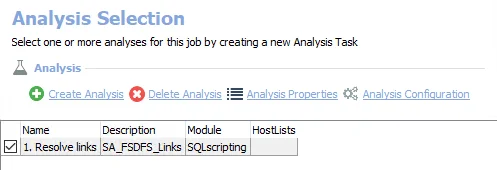
The following analysis task is selected by default:
-
- Resolve links – Resolves DFS links in standard tables
1-FSAC System Scans Job
The 1-FSAC System Scans job is designed to collect activity events from the targeted file servers.
Query for the 1-FSAC System Scans Job
The Activity Scan query uses the FSAA Data Collector and has been preconfigured to use the File system activity Scan category.
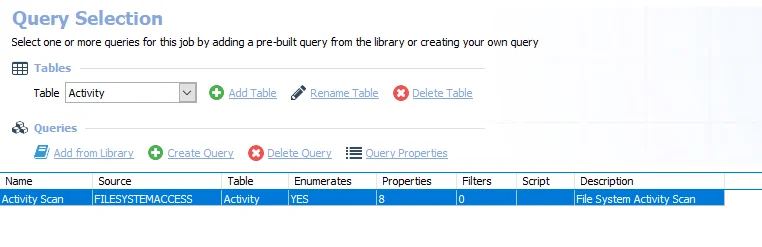
- Activity Scan – Scans for File System Activity
The following default configurations are commonly customized:
-
Scan Server Selection page:
- Set to Local Server, or local mode scans
-
Activity Settings page:
- Set scan filter for detailed activity 60 days
- Set filter for statistics of activity 120 days
See the Recommended Configuration for the File System Solution topic for a complete list of customizable settings. See the Configure the Activity Scan Query topic for instructions.
Configure the Activity Scan Query
The 1-FSAC System Scans job has been preconfigured to run with the default settings with the category of File system activity Scan. Follow the steps to set any desired customizations.
Step 1 – Navigate to the FileSystem > 0.Collection > 1-FSAC System Scans > Configure node and select the Queries node.
Step 2 – In the Query Selection view, click Query Properties. The Query Properties window opens.
Step 3 – Select the Data Source tab, and click Configure. The File System Access Auditor Data Collector Wizard opens.
CAUTION: Do not make changes to other wizard pages as they have been pre-configured for the purpose of this job.
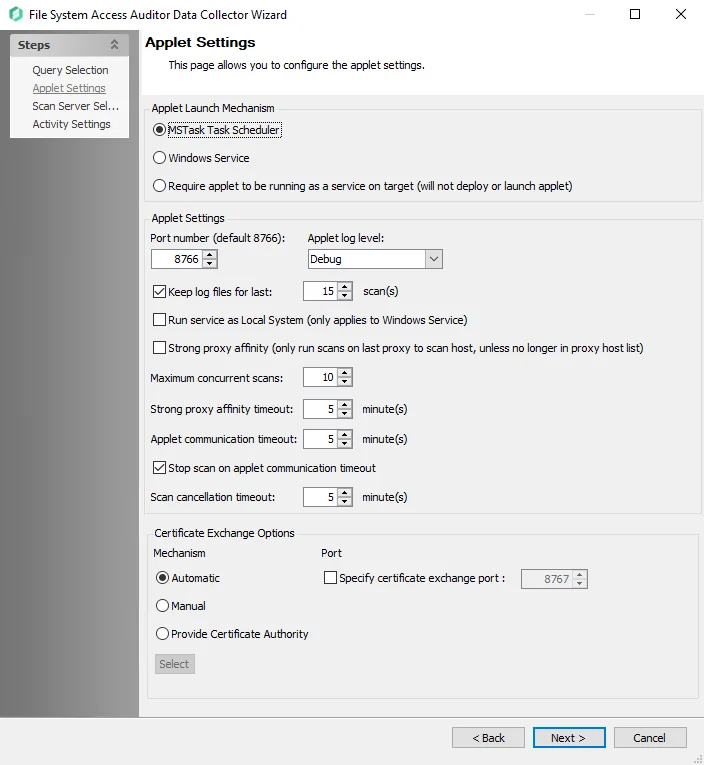
Step 4 – The Applet Settings page applies to the applet and proxy mode scans which are selected on the Scan Server Level Page. If employing proxy servers, see the FSAA: Applet Settings topic for configuration instructions.
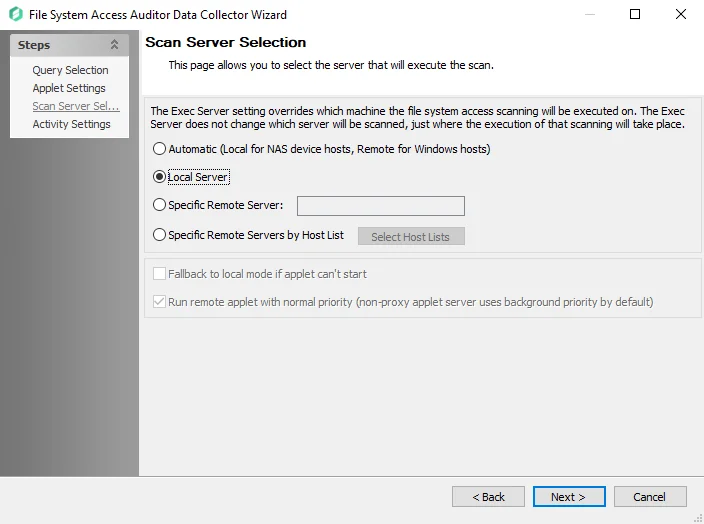
Step 5 – The Scan Server Selection page applies to the applet and proxy mode scans. Remember, each mode has different provisioning requirements. See the FSAA: Scan Server Selection topic for additional information.
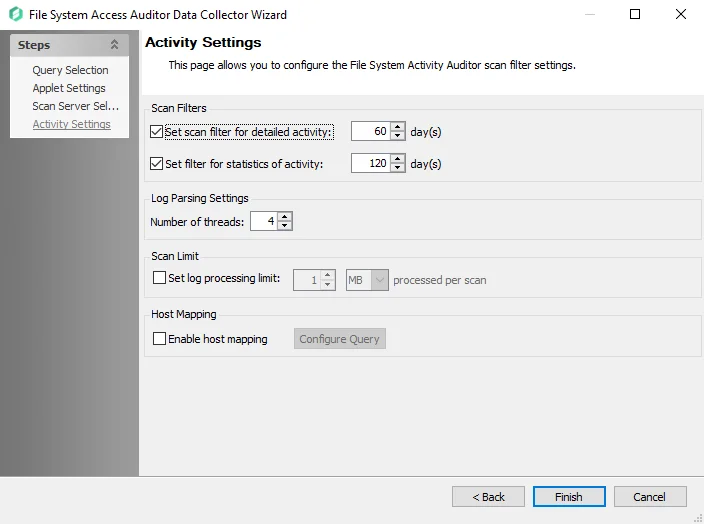
Step 6 – On the Activity Settings page:
- Modify the number of days detailed activity is kept
- Modify the number of days activity statistics are kept
- Modify log parsing limits
See the FSAA: Activity Settings topic for additional information.
Step 7 – Click Finish to save any setting modifications or click Cancel if no changes were made. Then click OK to close the Query Properties window.
If changes were made, the 1-FSAC System Scans job is now customized.
1-SEEK System Scans Job
The 1-SEEK System Scans job is designed to collect sensitive data from the targeted file servers.
Query for the 1-SEEK System Scans Job
The File System Scan query uses the FSAA Data Collector and has been preconfigured to use the Sensitive data Scan category.
- File System Scan – Scans the File System
The following default configurations are commonly customized:
-
Scan Server Selection page:
- Set to Local Server, or local mode scans
-
Default Scoping Options page > Scan Settings tab:
- Set to Limit subfolder scan depth to 2 level(s)
- Set to Exclude system shares
-
Scoping Options
- Add share and folder inclusions
- Add share and folder exclusions
-
Sensitive Data Settings page:
- Set to Don’t process files larger than 2 MB
- Set to Store discovered sensitive data
- Set to scan typical documents
-
SDD Criteria Settings page:
-
Set to the following System Criteria:
- Credit Cards
- Passwords
- Tax Forms
- US SSN
-
See the Recommended Configuration for the File System Solution topic for a complete list of customizable settings. See the Configure the (SEEK) File System Scan Query topic for instructions.
Configure the (SEEK) File System Scan Query
The 1-SEEK System Scans job has been preconfigured to run with the default settings with the category of Sensitive data Scan. Follow these steps to set any desired customizations.
Step 1 – Navigate to the FileSystem > 0.Collection > 1-SEEK System Scans > Configure node and select the Queries node.
Step 2 – In the Query Selection view, click Query Properties. The Query Properties window opens.
Step 3 – Select the Data Source tab, and click Configure. The File System Access Auditor Data Collector Wizard opens.
CAUTION: Do not make changes to other wizard pages as they have been pre-configured for the purpose of this job.
Step 4 – The Applet Settings page applies to the applet and proxy mode scans which are selected on the Scan Server Level page. If employing proxy servers, see the FSAA: Applet Settings topic for configuration instructions.
Step 5 – The Scan Server Selection page applies to the applet and proxy mode scans. Remember, each mode has different provisioning requirements. In addition to changing the type of scan mode, you can modify the scan restart settings. See the FSAA: Scan Server Selection topic for additional information.
Step 6 – On the Scan Settings page, you can enable streaming. See the FSAA: Scan Settings topic for additional information.
NOTE: If streaming is enabled, the 2-SEEK Bulk Import job is no longer needed as part of the 0.Collection job group.
Step 7 – On the Azure Tenant Mapping page, enable Azure Information Protection (AIP). See the FSAA: Azure Tenant Mapping topic for additional information.
Step 8 – On the Default Scoping Options page, configure the following on the Scan Setting tab:
-
Limit subfolder scan depth to – Select this checkbox and use the arrow buttons to modify the subfolder scan depth
-
Exclude snapshot directories on NetApp server – Select this checkbox to exclude snapshot directories on NetApp server
-
Exclude system shares – Select this checkbox to exclude system shares
-
Exclude hidden shares - Select this checkbox to exclude hidden shares
-
Last Access Time (LAT) preservation – Select this checkbox to specify action on Last Access Time (LAT) preservation as follows:
-
Action on failure to enable LAT Preservation – Before scanning each file, FSAA attempts to enable an operating system feature to preserve the LAT when accessing the file. This operation may fail for a variety of reasons, which include but are not limited to: the operating system or file system where the file is located does not support LAT preservation, or insufficient permissions from the service account trying to access the file. The following configuration addresses a failure to enable the LAT preservation mode:
- Continue to scan file silently – FSAA scans the file with the possibility that LAT preservation is not possible. No warning will be shown.
- Continue to scan file with warning – FSAA scans the file with the possibility that LAT will not be preserved. A warning will be shown for this file.
- Skip file silently – FSAA will not scan the file. No warning will be shown.
- Skip file with warning – FSAA will not scan the file. A warning will be shown indicating the file was skipped.
- Abort the scan – FSAA will abort the scan. No further files will be processed.
-
Action on changed LAT After scan – Before scanning each file, the LAT of the current file is recorded. After scanning, it is verified whether the LAT has changed since then (likely scenarios are either that the LAT preservation mechanism failed to function as intended, or that the file was accessed by someone while the scan was occurring). The following configuration addresses a changed LAT:
- Continue scan silently – The scan will move on to the next file while updating the LAT for the processed file. No warning will be shown.
- Continue scan with warning – The scan will continue on to the next file. LAT will be updated for the processed file. A warning will be shown.
- Force-reset file LAT silently – The scan will reset the file's LAT to its original state before processing. No warning will be shown. The scan will proceed to the next file.
- Force-reset file LAT with warning – The scan will Reset the file's LAT to its original state before processing. A warning will be shown. The scan will proceed to the next file.
- Abort the scan – FSAA will abort the scan. LAT will be updated for the processed file. No other files will be processed
-
See the Scan Settings Tab topic for additional information.
Step 9 – On the Scoping Options page, add share/folder inclusions and exclusions. See the FSAA: Scoping Options topic for additional information:
Step 10 – On the Scoping Queries page:
- Add share and folder inclusions
- Add share and folder exclusions
- Scope to scan only Open shares
NOTE: This option only works in conjunction with File System Access Auditing.
See the FSAA: Scoping Queries topic for additional information.
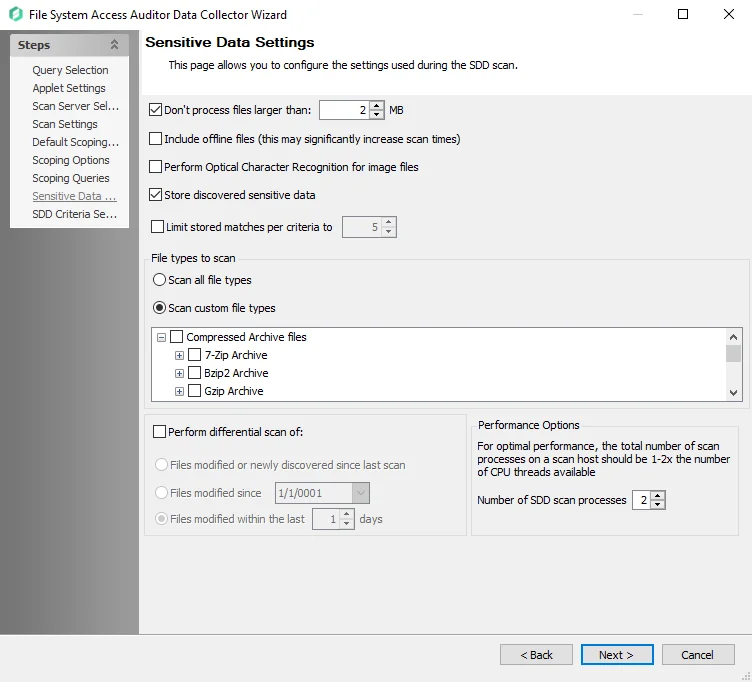
Step 11 – On the Sensitive Data Settings page:
-
Modify maximum file size to be scanned
-
Add scanning offline files
-
Modify file types to be scanned
-
Enable differential scanning
-
Modify the number of SDD scan processes
RECOMMENDED: For optimal performance, the total number of scan processes on a scan host should be 1 to 2 times the number of CPU threads available.
-
Enable Optical Character Recognition (OCR) scans
NOTE: The OCR option is intended to work for clear scanned physical documents or documents directly converted to images, with standard fonts. It will not work for scanning photos of documents and may not be able to recognize text on images of credit cards, driver's licenses, or other identity cards.
See the FSAA: Sensitive Data Settings topic for additional information.
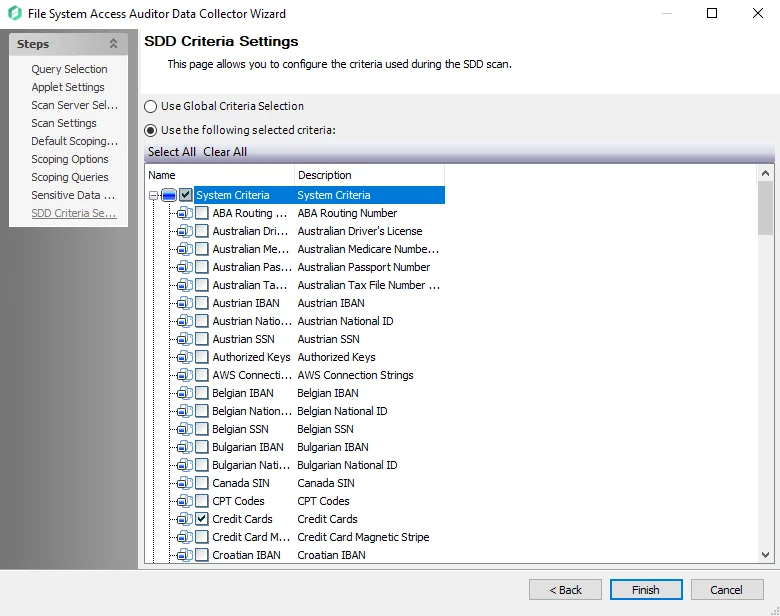
Step 12 – On the SDD Criteria Settings page, add or remove criteria as desired. See the FSAA: SDD Criteria Settings topic for additional information.
- (Optional) To create custom criteria, see the Sensitive Data Criteria Editor topic for additional information
NOTE: By default, discovered sensitive data strings are not stored in the Enterprise Auditor database.
Step 13 – Click Finish to save any setting modifications or click Cancel if no changes were made. Then click OK to close the Query Properties window.
If changes were made, the 1-SEEK System Scans Job has now been customized.
2-FSAA Bulk Import Job
The 2-FSAA Bulk Import job is designed to import collected access information from the targeted file servers.
Query for the 2-FSAA Bulk Import Job
The Bulk import query uses the FSAA Data Collector and has been preconfigured to use the File system access/permission auditing Bulk import category.
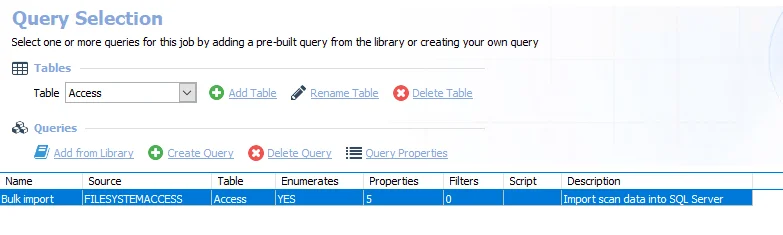
-
Bulk import – Imports scan data into SQL Server
- Typically, this query is not modified. See the FileSystemAccess Data Collector topic for information on when this query should be modified.
Analysis Tasks for the 2-FSAA Bulk Import Job
View the analysis tasks by navigating to the FileSystem > 0.Collection > 2-FSAA Bulk Import > Configure node and selecting Analysis.
CAUTION: Do not modify or deselect the selected analysis tasks. The analysis tasks are preconfigured for this job.
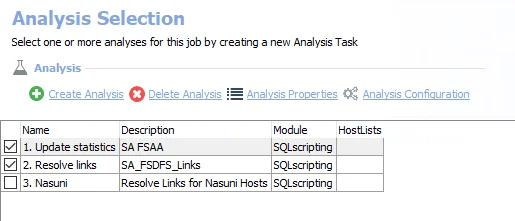
The following analysis tasks are selected by default:
- Update Statistics – Improves performance on the FSAA tables
- Resolve links – Resolves DFS links in standard tables
The following analysis task is deselected by default:
- Nasuni – Resolves links for Nasuni Hosts
2-FSAC Bulk Import Job
The 2-FSAC Bulk Import job is designed to import collected access information from the targeted file servers.
Query for the 2-FSAC Bulk Import Job
The Bulk Import query uses the FSAA Data Collector and has been preconfigured to use the File system activity Bulk import category.
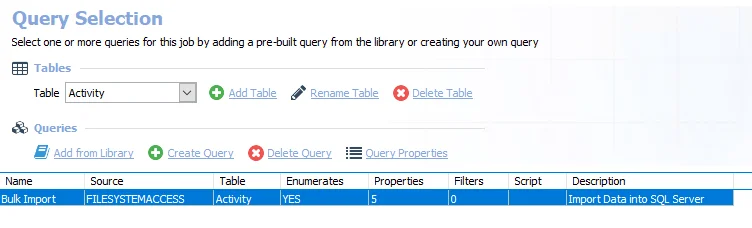
-
Bulk Import – Imports data into SQL Server
- Typically this query is not modified. See the FileSystemAccess Data Collector topic for information on when this query should be modified.
2-SEEK Bulk Import Job
The 2-SEEK Bulk Import job is designed to import collected sensitive data information from the targeted file servers.
Query for the 2-SEEK Bulk Import Job
The Bulk Import query uses the FSAA Data Collector and has been preconfigured to use the Sensitive data Bulk import category.
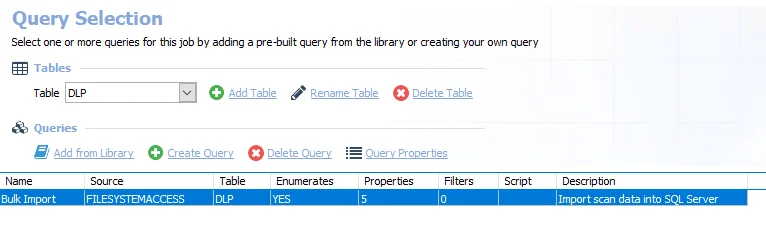
-
Bulk Import – Imports data into SQL server
- Typically this query is not modified. See the FileSystemAccess Data Collector topic for information on when this query should be modified.
3-FSAA Exceptions Job
The 3-FSAA Exceptions job does not use the FSAA Data Collector. Instead it runs analysis on the data returned by the Access Auditing collection jobs to identify potential security concerns.
Parameter Configuration
The Configuration section on a Job's overview page allows you to easily modify any customizable parameters used by analysis tasks in the job. See the Parameter Configuration topic for instructions on how to edit parameters on a job overview page.
The 3-FSAA Exceptions job has the following customizable parameter:
- Well Known high risk SIDS – Add any additional custom SIDS, but do not remove the default SIDS.
See the Analysis Tasks for the 3-FSAA Exceptions Job topic for additional information.
Analysis Tasks for the 3-FSAA Exceptions Job
View the analysis tasks by navigating to the FileSystem > 0.Collection > 3-FSAA Exceptions > Configure node and select Analysis.
CAUTION: Most of these analysis tasks are preconfigured and should not be modified and or deselected. While it is possible to deselect particular tasks as specified, it is not recommended.
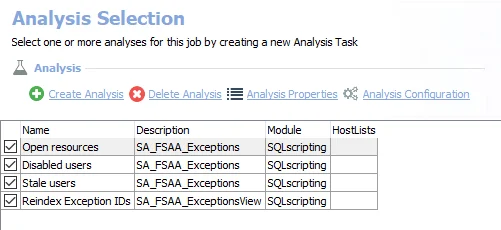
The following analysis tasks are selected by default:
-
Open resources – Any folders that are openly accessible through file shares. Can be deselected if open resource information is not desired.
- Well known high risk SIDS have been set in the
#SIDSparameter. Do not remove these, but additional custom SIDS can be added. See the Configure the Customizable Parameters in an Analysis Task topic for additional information.
- Well known high risk SIDS have been set in the
-
Disabled users – Any folders where disabled users have been granted access
- Can be deselected if disabled user information is not desired
-
Stale users – Any folders where stale users have been granted access. Stale users are user who have not logged in for more than 120 days.
- Can be deselected if stale user information is not desired
-
Reindex Exception IDs – Displays views within the Results node of the Enterprise Auditor Console
3-FSAC Exceptions Job
The 3-FSAC Exceptions job is designed to analyze collected access information for exceptions.
Parameter Configuration
The Configuration section on a Job's overview page allows you to easily modify any customizable parameters used by analysis tasks in the job. See the Parameter Configuration topic for instructions on how to edit parameters on a job overview page.
The 3-FSAC Exceptions job has many customizable parameters. See the Customizable Analysis Tasks for the 3-FSAC Exceptions Job topic for information on these.
Analysis Tasks for the 3-FSAC Exceptions Job
View the analysis tasks by navigating to the FileSystem > 0.Collection > 3-FSAC Exceptions > Configure node and select Analysis.
CAUTION: Do not modify or deselect the selected analysis tasks. The analysis tasks are preconfigured for this job.
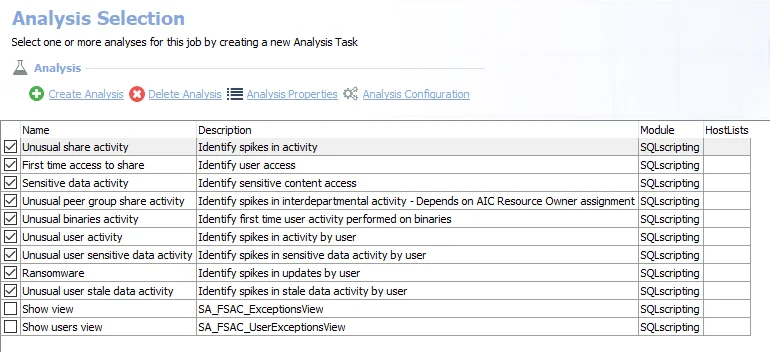
The following analysis tasks are selected by default:
- Unusual share activity – Share exceptions for unusual volumes (spikes) of activity
- First time access to share – Recent share access by users for the first time
- Sensitive data activity – Recent access to sensitive content
- Unusual peer group share activity – Spikes in interdepartmental activity
- Unusual binaries activity – First time user activity performed on binaries
- Unusual user activity – Spikes in activity by user
- Unusual user sensitive data activity – Spikes in sensitive data activity by user
- Ransomware – Spikes in updates by user
- Unusual user stale data activity – Spikes in stale data activity by user
While it is possible to deselect particular tasks as specified, it is not recommended. The following analysis tasks are deselected by default:
- Show view – Displays the SA_FSAC_ExceptionsView within the Results node of the Enterprise Auditor Console
- Show users view – Displays the SA_FSAC_UserExceptionsView within the Results node of the Enterprise Auditor Console
Customizable Analysis Tasks for the 3-FSAC Exceptions Job
Customizable parameters enable users to set the values used for classification during the job’s analysis. The 3-FSAC Exceptions job contains the following customizable parameters:
| Analysis Task | Customizable Parameter Name | Default Value | Value Indicates |
|---|---|---|---|
| Unusual share activity | @WEEKS | 3 | Minimum data points required for analysis |
| Unusual share activity | @THROWAWAY | 1 | When calculating averages throw away the top N% |
| Unusual share activity | @EVENTS | 10 | Minimum amount of events for operations exception |
| Unusual share activity | @PEOPLE | 10 | Minimum amount of people for user activity exception |
| Unusual share activity | @FILES | 10 | Minimum amount of files for resource count exception |
| Unusual share activity | @DAYS | 7 | Amount of days to generate exceptions for from today |
| Unusual share activity | @EVENTSTDDEVS | 3 | Multiples of standard deviation required to be an operation count exception |
| Unusual share activity | @TRUSTEESTDDEVS | 3 | Multiples of standard deviation required to be a user volume exception |
| Unusual share activity | @FILESTDDEVS | 3 | Multiples of standard deviation required to be a file activity volume exception |
| First time access to share | @DAYS | 7 | Amount of days to generate exceptions for from today |
| First time access to share | @MINDAYS | 30 | minimum amount of days a share needs to determine access |
| Sensitive data activity | @DAYS | 7 | Amount of days to generate exceptions for from today |
| Unusual peer group share activity | @WEEKS | 3 | Minimum data points required for analysis |
| Unusual peer group share activity | @THROWAWAY | 1 | When calculating averages throw away the top N% |
| Unusual peer group share activity | @EVENTS | 10 | Minimum amount of events for operations exception |
| Unusual peer group share activity | @FILES | 10 | Minimum amount of files for resource count exception |
| Unusual peer group share activity | @DAYS | 7 | Amount of days to generate exceptions for from today |
| Unusual peer group share activity | @EVENTSTDDEVS | 3 | Multiples of standard deviation required to be an operation count exception |
| Unusual peer group share activity | @FILESTDDEVS | 3 | Multiples of standard deviation required to be a file activity volume exception |
| Unusual binaries activity | @DATE_CUTOFF | 7 | From the current time, how many days to look back when considering exceptions |
| Unusual user activity | @WEEKS | 3 | Minimum data points required for analysis |
| Unusual user activity | @THROWAWAY | 1 | When calculating averages throw away the top N% |
| Unusual user activity | @EVENTS | 10 | Minimum amount of events for operations exception |
| Unusual user activity | @SHARES | 10 | Minimum amount of shares for share activity exception |
| Unusual user activity | @FILES | 10 | Minimum amount of files for resource count exception |
| Unusual user activity | @DAYS | 7 | Amount of days to generate exceptions for from today |
| Unusual user activity | @EVENTSTDDEVS | 3 | Multiples of standard deviation required to be an operations exception |
| Unusual user activity | @GATESTDDEVS | 3 | Multiples of standard deviation required to be a share exception |
| Unusual user activity | @FILESTDDEVS | 3 | Multiples of standard deviation required to be a resource count exception |
| Unusual user sensitive data activity | @WEEKS | 3 | Minimum data points required for analysis |
| Unusual user sensitive data activity | @THROWAWAY | 1 | When calculating averages throw away the top N% |
| Unusual user sensitive data activity | @EVENTS | 10 | Minimum amount of events for operations exception |
| Unusual user sensitive data activity | @SHARES | 10 | Minimum amount of shares for share activity exception |
| Unusual user sensitive data activity | @FILES | 10 | Minimum amount of files for resource count exception |
| Unusual user sensitive data activity | @DAYS | 7 | Amount of days to generate exceptions for from today |
| Unusual user sensitive data activity | @EVENTSTDDEVS | 3 | Multiples of standard deviation required to be an operations exception |
| Unusual user sensitive data activity | @GATESTDDEVS | 3 | Multiples of standard deviation required to be a share exception |
| Unusual user sensitive data activity | @FILESTDDEVS | 3 | Multiples of standard deviation required to be a resource count exception |
| Ransomware | @WEEKS | 3 | Minimum data points required for analysis |
| Ransomware | @THROWAWAY | 1 | When calculating averages throw away the top N% |
| Ransomware | @EVENTS | 10 | Minimum amount of events for operations exception |
| Ransomware | @SHARES | 10 | Minimum amount of shares for share activity exception |
| Ransomware | @FILES | 10 | Minimum amount of files for resource count exception |
| Ransomware | @DAYS | 7 | Amount of days to generate exceptions for from today |
| Ransomware | @EVENTSTDDEVS | 3 | Multiples of standard deviation required to be an operations exception |
| Ransomware | @GATESTDDEVS | 3 | Multiples of standard deviation required to be a share exception |
| Ransomware | @FILESTDDEVS | 3 | Multiples of standard deviation required to be a resource count exception |
| Unusual user stale data activity | @WEEKS | 3 | Minimum data points required for analysis |
| Unusual user stale data activity | @THROWAWAY | 1 | When calculating averages throw away the top N% |
| Unusual user stale data activity | @EVENTS | 10 | Minimum amount of events for operations exception |
| Unusual user stale data activity | @SHARES | 10 | Minimum amount of shares for share activity exception |
| Unusual user stale data activity | @FILES | 10 | Minimum amount of files for resource count exception |
| Unusual user stale data activity | @DAYS | 7 | The amount of days to generate exceptions for from today |
| Unusual user stale data activity | @EVENTSTDDEVS | 3 | Multiples of standard deviation required to be an operations exception |
| Unusual user stale data activity | @GATESTDDEVS | 3 | Multiples of standard deviation required to be a share exception |
| Unusual user stale data activity | @FILESTDDEVS | 3 | Multiples of standard deviation required to be a resource count exception |
| Unusual user stale data activity | @STALETHRESHOLD | 365 | Number of days after which resources are considered stale |
See the Configure the Customizable Parameters in an Analysis Task topic for additional information on modifying analysis parameters.
0.Collection Job Group
The 0.Collection job group is designed to collect information from targeted file servers. Information collected includes access control information, activity events, and sensitive data.
The 0.Collection job group has the following collection components:
- File System Access Auditing (FSAA) component – The primary component of this group. Collects file system information, such as permissions and content metadata. It employs the 1-FSAA System Scans job, the 2-FSAA Bulk Import job, and the 3-FSAA Exceptions job. See the File System Access Auditing topic for additional information.
- File System DFS Auditing (FSDFS) component – Collects Distributed File System (DFS) mappings from Active Directory or self-hosted DFS servers and compares them to the file system information. It works in conjunction with the FSAA component and employs the 0-FSDFS System Scans job. The results from this component are only available through the Access Information Center. See the File System DFS Auditing topic for additional information.
- File System Activity Auditing (FSAC) component – Collects event information logged by the Activity Monitor. This component requires an additional installer package before data collection will occur. It should be run in conjunction with the FSAA component and employs the 1-FSAC System Scans job, the 2-FSAC Bulk Import job, and the 3-FSAC Exceptions job. See the File System Activity Auditing topic for additional information.
- File System Sensitive Data Discovery Auditing (SEEK) component – Searches file content for sensitive data. It can work independently or in conjunction with the FSAA component and employs the 1-SEEK System Scans job and the 2-SEEK Bulk Import job. This component requires an additional installer package before data collection will occur. See the File System Sensitive Data Discovery Auditing (SEEK) topic for additional information.
These jobs are numbered to keep them in the necessary run order. Not all jobs need be run. See the appropriate auditing topic for specific job relationships and recommended workflows. The 0-Create Schema job ensures the database schema is properly configured for the current version of the data collector. See the 0-Create Schema Job topic for additional information.
Remember, the relationship between system scans and bulk import jobs requires the following considerations:
- A system scans job executed from a Enterprise Auditor Console must be followed by the corresponding bulk import job from the same Enterprise Auditor Console with the same version of Enterprise Auditor
- Two system scans processing the same information, for example two 1-FSAA System Scans jobs, cannot be executed consecutively against the same target host. The corresponding bulk import job, for example 2-FSAA Bulk Import job, must be executed in between.
The system scans job collects the data and creates a Tier-2 database, or SQLite database, on the local host, target host, or proxy host (according to the Applet Gathering Settings configured). The corresponding bulk import job gathers the information from the Tier-2 database, and pulls it into the Tier-1 database, or Enterprise Auditor SQL backend database, thus completing the collection process. The collection does not include a bulk import job, as it streams the collected data directly into the Tier-1 database.
File System Access Auditing
Access Auditing (FSAA) is the primary component of the 0.Collection job group. It collects file
system permission, content metadata, and additional file system information. The jobs, tables, and
views specifically incorporated into this component are prefixed with FSAA. See the
Standard Reference Tables & Views for the FSAA Data Collector
topic for additional information on the data collected.
The 0.Collection jobs that comprise this auditing component are:
-
1-FSAA System Scans Job – Collects access information from the targeted file servers
-
2-FSAA Bulk Import Job – Imports collected access information from the targeted file servers
- The 2-FSAA Bulk Import job does not need to be run when streaming is enabled
-
3-FSAA Exceptions Job – Analyzes collected access information for exceptions
The following job groups and jobs in the File System solution depend on data collected by these jobs to generate reports:
- 1.Open Access > FS_OpenAccess Job
- 2.Direct Permissions Job Group
- 3.Broken Inheritance > FS_BrokenInheritance Job
- 4.Content Job Group
- 5.Activity Job Group (also requires Activity Auditing)
- 6.Probable Owner > FS_ProbableOwner Job (also requires Activity Auditing)
- 7.Sensitive Data > FS_DLPResults Job (also requires Activity Auditing and Sensitive Data Discovery Auditing)
- Ad Hoc Audits Job Group
- FileSystemOverview Job
- FS_SecurityAssessment Job
The File System Access Reports in the Access Information Center are also populated by this data. See the File System Reports topics in the Netwrix Access Information Center Documentation for additional information.
It is more efficient to streamline the collection jobs to those desired. Remember, it is a best practice to scope the 0.Collection job group to only include the collection components desired by disabling the undesired collection jobs. Disabling them allows the solution to run more efficiently. It is not recommended to delete any jobs. The required collection jobs are listed for the following workflow.
Workflow (for Access Auditing only)
The recommended workflow for Access Auditing only is as follows:
Step 1 – Run the 1-FSAA System Scans job.
Step 2 – If necessary, run the 2-FSAA Bulk Import job:
-
If streaming is not enabled in the 1-FSAA System Scans job, run the 2-FSAA Bulk Import job.
-
If streaming is enabled in the 1-FSAA System Scans job, do not run 2-FSAA Bulk Import job.
RECOMMENDED: It is best practice to disable undesired Bulk Import jobs.
Step 3 – Run the 3-FSAA Exceptions job.
Step 4 – Run the desired corresponding analysis and reporting sub-job groups.
NOTE: Please see the Recommended Configuration for the File System Solution topic before continuing with this workflow.
See the other auditing sections for workflows which include multiple auditing types.
File System DFS Auditing
DFS Auditing (FSDFS) is the component of the 0.Collection job group which collects Distributed File
System (DFS) mappings from Active Directory or self-hosted DFS servers and compares them to the file
system information. It works in conjunction with the Access Auditing component. The jobs, tables,
and views specifically incorporated into this component are prefixed with FSDFS. See the
Standard Reference Tables & Views for the FSAA Data Collector
topic for additional information on the data collected.
The 0.Collection jobs that comprise the DFS auditing component are:
-
0-FSDFS System Scans Job – This job is responsible for enumerating a list of all root and link targets in the distributed file system and creating a dynamic host list that will be used by the other 0.Collection jobs
-
The Connection Profile and required permissions for the 0-FSDFS System Scans job are the same as those required for collecting system data from supported Windows operating systems. They are dependent on the file system scan option being used. See the File System Scan Options topic for additional information.
-
The target host you should assign to the 0-FSDFS System Scans job depends on the type of DFS namespace being audited:
- For domain-based DFS namespaces, assign a host list containing the default domain controllers for the domains hosting the DFS namespaces
- For standalone DFS namespaces, assign a host list containing the servers hosting the namespaces
-
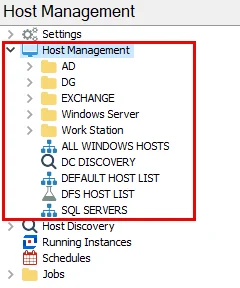
When run successfully, the 0-FSDFS System Scans job automatically creates a dynamic host list called DFS HOST LIST. This is added to the Host Management node. You should assign this DFS HOST LIST to other 0.Collection jobs as outlined in the recommended workflows below.
-
The components depend on data collected by these jobs to collect within a file system using DFS mappings.
It is more efficient to streamline the collection jobs to those desired. Remember, it is a best practice to scope the 0.Collection job group to only include the collection components desired by disabling the undesired collection jobs. Disabling them allows the solution to run more efficiently. It is not recommended to delete any jobs. The required collection jobs are listed for each of the following optional workflows.
CAUTION: The DFS Auditing component must always be run in conjunction with the Access Auditing component. Access audits are necessary to resolve the target shares and folders of DFS link destinations.
Recommended Workflow 1 (for AccessAuditing with DFS Auditing)
Step 1 – Run the 0-FSDFS System Scans job.
Step 2 – Run the 1-FSAA System Scans job (with the DFS HOST LIST assigned).
Step 3 – If necessary, run the 2-FSAA Bulk Import job (with the DFS HOST LIST assigned):
-
If streaming is not enabled in the 1-FSAA System Scans job, run the 2-FSAA Bulk Import job.
-
If streaming is enabled in the 1-FSAA System Scans job, do not run 2-FSAA Bulk Import job.
RECOMMENDED: It is best practice to disable undesired Bulk Import jobs.
Step 4 – Run the 3-FSAA Exceptions job (not specifically needed for DFS Auditing, but recommended for 0.Collection job group).
Step 5 – Run the desired corresponding analysis and reporting sub-job groups.
Recommended Workflow 2 (for AccessAuditing with DFS Auditing and Activity Auditing)
Step 1 – Install and configure monitoring with the Activity Monitor for targeted hosts (once only).
Step 2 – Run the 0-FSDFS System Scans job.
Step 3 – Run the 1-FSAA System Scans job (with the DFS HOST LIST assigned).
Step 4 – Run the 1-FSAC System Scans job (with the DFS HOST LIST assigned).
Step 5 – If necessary, run the 2-FSAA Bulk Import job (with the DFS HOST LIST assigned):
-
If streaming is not enabled in the 1-FSAA System Scans job, run the 2-FSAA Bulk Import job.
-
If streaming is enabled in the 1-FSAA System Scans job, do not run 2-FSAA Bulk Import job.
RECOMMENDED: It is best practice to disable undesired Bulk Import jobs.
Step 6 – Run the 2-FSAC Bulk Import job (with the DFS HOST LIST assigned).
Step 7 – Run the 3-FSAA Exceptions job.
Step 8 – Run the 3-FSAC Exceptions job.
Step 9 – Run the desired corresponding analysis and reporting sub-job groups.
Recommended Workflow 3 (for AccessAuditing with DFS Auditing, Activity, and Sensitive Data Discovery Auditing)
Step 1 – Install the Sensitive Data Discovery Add-On on the Enterprise Auditor Console (once only).
Step 2 – Install and configure monitoring with the Activity Monitor for targeted hosts (once only).
Step 3 – Run the 0-FSDFS System Scans job.
Step 4 – Run the 1-FSAA System Scans job (with the DFS HOST LIST assigned).
Step 5 – Run the 1-FSAC System Scans job (with the DFS HOST LIST assigned).
Step 6 – Run the 1-SEEK System Scans job (with the DFS HOST LIST assigned).
Step 7 – If necessary, run the 2-FSAA Bulk Import job (with the DFS HOST LIST assigned):
-
If streaming is not enabled in the 1-FSAA System Scans job, run the 2-FSAA Bulk Import job.
-
If streaming is enabled in the 1-FSAA System Scans job, do not run 2-FSAA Bulk Import job.
RECOMMENDED: It is best practice to disable undesired Bulk Import jobs.
Step 8 – Run the 2-FSAC Bulk Import job (with the DFS HOST LIST assigned).
Step 9 – If necessary, run the 2-SEEK Bulk Import job (with the DFS HOST LIST assigned):
-
If streaming is not enabled in the 1-SEEK System Scans job, run the 2-SEEK Bulk Import job.
-
If streaming is enabled in the 1-SEEK System Scans job, do not run the 2-SEEK Bulk Import job.
RECOMMENDED: It is best practice to disable undesired Bulk Import jobs.
Step 10 – Run the 3-FSAA Exceptions job.
Step 11 – Run the 3-FSAC Exceptions job.
Step 12 – Run the desired corresponding analysis and reporting sub-job groups.
NOTE: Please see the Recommended Configuration for the File System Solution topic before continuing with these workflows.
To scope the 0.Collection job group to only collect DFS information, see Step 9 of the Configure the (FSAA) File System Scan Query topic.
File System Activity Auditing
Activity Auditing (FSAC) is the component of the 0.Collection job group that imports event
information collected by the Activity Monitor. It can be run independently or in conjunction with
the FSAA component, though it is recommended to run them together. The jobs, tables, and views
specifically incorporated into this component are prefixed with FSAC. See the
Standard Reference Tables & Views for the FSAA Data Collector
topic for additional information on the data collected.
NOTE: The Activity Auditing component requires the Activity Monitor be deployed, configured, and have services running on the target hosts. See the Netwrix Activity Monitor Documentation for additional information.
Once the Activity Monitor is installed, the monitored host configuration tells it what to monitor and how long to retain the activity log files. The monitoring agent writes one log per day of activity for the host. Then, the FSAA Data Collector gathers the log files to report on file system activity for the targeted host. While the Activity Monitor can be configured to create multiple outputs, Enterprise Auditor can only collect one log file per host. Therefore, after the monitored host has been configured, it is necessary to identify the log file for Enterprise Auditor. See the Identify a Log File topic for additional information.
The data retention period needs to be coordinated between the Activity Monitor and Enterprise Auditor. The number of days theActivity Monitor is configured to retain log files must be higher than the number of days between Activity Auditing scans. The FSAA Data Collector can be customized on the Activity Settings page of the File System Access Auditor Data Collector Wizard. See the Configure the Activity Scan Query topic for additional information.
NOTE: Integration between Enterprise Auditor and Threat Prevention for Windows File System monitoring purposes requires the use of the SI Agent to generate the required logs. See the Netwrix Threat Prevention Documentation for information on the Enterprise Auditor Integration.
The 0.Collection jobs that comprise this auditing component are:
- 1-FSAC System Scans Job – Collects activity events from the targeted file servers
- 2-FSAC Bulk Import Job – Imports collected activity events from the targeted file servers
- 3-FSAC Exceptions Job – Analyzes the collected activity events for exceptions
The following job groups and jobs in the File System solution depend on data collected by these jobs to generate reports:
- 5.Activity Job Group (also requires Access Auditing)
- 6.Probable Owner > FS_ProbableOwner Job (also requires Access Auditing)
- 7.Sensitive Data > FS_DLPResults Job (also requires Access Auditing and Sensitive Data Discovery Auditing)
- FileSystemOverview Job
- FS_SecurityAssessment Job
The File System Activity Reports in the Access Information Center are also populated by this data. See the Netwrix Access Information Center Documentation for additional information.
It is more efficient to streamline the collection jobs to those desired. Remember, it is a best practice to scope the 0.Collection job group to only include the collection components desired by disabling the undesired collection jobs. Disabling them allows the solution to run more efficiently. It is not recommended to delete any jobs. The required collection jobs are listed for each of the following optional workflows.
Recommended Workflow 1 (for Access and Activity Auditing)
Step 1 – Install and configure monitoring with the Activity Monitor for targeted hosts (once only).
Step 2 – Run the 1-FSAA System Scans job.
Step 3 – Run the 1-FSAC System Scans job.
Step 4 – If necessary, run the 2-FSAA Bulk Import job:
-
If streaming is not enabled in the 1-FSAA System Scans job, run the 2-FSAA Bulk Import job.
-
If streaming is enabled in the 1-FSAA System Scans job, do not run 2-FSAA Bulk Import job.
RECOMMENDED: It is best practice to disable undesired Bulk Import jobs.
Step 5 – Run the 2-FSAC Bulk Import job.
Step 6 – Run the 3-FSAA Exceptions job.
Step 7 – Run the 3-FSAC Exceptions job.
Step 8 – Run the desired corresponding analysis and reporting sub-job groups.
Recommended Workflow 2 (for Access, Activity, and Sensitive Data Discovery Auditing)
Step 1 – Install the Sensitive Data Discovery Add-On on the Enterprise Auditor Console (once only).
Step 2 – Install and configure monitoring with the Activity Monitor for targeted hosts (once only).
Step 3 – Run the 1-FSAA System Scans job.
Step 4 – Run the 1-FSAC System Scans job.
Step 5 – Run the 1-SEEK System Scans job.
Step 6 – If necessary, run the 2-FSAA Bulk Import job:
-
If streaming is not enabled in the 1-FSAA System Scans job, run the 2-FSAA Bulk Import job.
-
If streaming is enabled in the 1-FSAA System Scans job, do not run 2-FSAA Bulk Import job.
RECOMMENDED: It is best practice to disable undesired Bulk Import jobs.
Step 7 – Run the 2-FSAC Bulk Import job.
Step 8 – If necessary, run the 2-SEEK Bulk Import job:
-
If streaming is not enabled in the 1-SEEK System Scans job, run the 2-SEEK Bulk Import job.
-
If streaming is enabled in the 1-SEEK System Scans job, do not run the 2-SEEK Bulk Import job.
RECOMMENDED: It is best practice to disable undesired Bulk Import jobs.
Step 9 – Run the 3-FSAA Exceptions job.
Step 10 – Run the 3-FSAC Exceptions job.
Step 11 – Run the desired corresponding analysis and reporting sub-job groups.
Recommended Workflow 3 (for Access, Activity, DFS, and Sensitive Data Discovery Auditing)
Step 1 – Install the Sensitive Data Discovery Add-On on the Enterprise Auditor Console (once only).
Step 2 – Install and configure monitoring with the Activity Monitor for targeted hosts (once only).
Step 3 – Run the 0-FSDFS System Scans job.
Step 4 – Run the 1-FSAA System Scans job.
Step 5 – Run the 1-FSAC System Scans job.
Step 6 – Run the 1-SEEK System Scans job.
Step 7 – If necessary, run the 2-FSAA Bulk Import job:
-
If streaming is not enabled in the 1-FSAA System Scans job, run the 2-FSAA Bulk Import job.
-
If streaming is enabled in the 1-FSAA System Scans job, do not run 2-FSAA Bulk Import job.
RECOMMENDED: It is best practice to disable undesired Bulk Import jobs.
Step 8 – Run the 2-FSAC Bulk Import job.
Step 9 – If necessary, run the 2-SEEK Bulk Import job:
-
If streaming is not enabled in the 1-SEEK System Scans job, run the 2-SEEK Bulk Import job.
-
If streaming is enabled in the 1-SEEK System Scans job, do not run the 2-SEEK Bulk Import job.
RECOMMENDED: It is best practice to disable undesired Bulk Import jobs.
Step 10 – Run the 3-FSAA Exceptions job.
Step 11 – Run the 3-FSAC Exceptions job.
Step 12 – Run the desired corresponding analysis and reporting sub-job groups.
Optional Workflow (for Activity Auditing data collection only )
While activity data can be collected independently, the Activity reports require the Access Auditing components.
Step 1 – Install and configure monitoring with the Activity Monitor for targeted hosts (once only).
Step 2 – Run the 1-FSAC System Scans job.
Step 3 – Run the 2-FSAC Bulk Import job.
Step 4 – Run the 3-FSAC Exceptions job.
Step 5 – Run the desired corresponding analysis and reporting sub-job groups.
NOTE: Please see the Recommended Configuration for the File System Solution topic before continuing with these workflows.
Identify a Log File
While the Activity Monitor can have multiple configurations per host, Enterprise Auditor can only read one of them. Therefore, after the Activity Monitor has been configured to monitor a host, it is necessary to indicate when that configuration is for Enterprise Auditor. Follow these steps to identify the Log file to be read by Enterprise Auditor.
Step 1 – Within the Activity Monitor Console on the Monitored Hosts tab, select the desired configuration and click Edit.
Step 2 – On the Log Files tab, select the This log file is for Enterprise Auditor option.
RECOMMENDED: Select the Comments tab and identify this output as being configured for Enterprise Auditor.
Step 3 – Click OK to save the setting.
Enterprise Auditor now reads that Log file when scanning the associated host.
File System Sensitive Data Discovery Auditing (SEEK)
Sensitive Data Discovery Auditing (SEEK) is the component of the 0.Collection job group that
searches file content for sensitive data. It can be run independently or in conjunction with the
Access Auditing component to limit searches to Open Shares. The jobs for this component are prefixed
with SEEK. The tables and views are prefixed with FSDLP. See the
Standard Reference Tables & Views for the FSAA Data Collector
topic for additional information on the data collected.
NOTE: The Sensitive Data Discovery Auditing (SEEK) component requires an additional installer package. Though the jobs are visible within the console, the Sensitive Data Discovery Add-on must be installed before data collection will occur. See the Sensitive Data Discovery Add-On Installation topic for additional information.
Customized search criteria can be created with the Criteria Editor accessible through the SDD Criteria Settings page of the File System Access Auditor Data Collector Wizard. See the Configure the (SEEK) File System Scan Query topic for additional information.
Remember, changes made in the Criteria Editor are global for Sensitive Data Discovery in Enterprise Auditor. See the Sensitive Data Criteria Editor topic for additional information.
Option to Enable Last Access Timestamp
The Last Access Timestamp (LAT) is disabled by default in Windows. This means the LAT does not get updated by any applications reading the file. As soon as the LAT feature is enabled in Windows, any attempt to read file contents updates the LAT. It stores the time of the last read operation.
Since files are read during the Sensitive Data Discovery Auditing scan,when the feature is enabled
in Windows the scan causes each file's LAT to update each time the file is scanned. Therefore, there
is a feature within the job XML file which enables the scan to call a special API in order to keep
each file's LAT from updating when it's scanned. This feature can be enabled by adding
<NoUpdateLastAccess> tag to the XML. See the
1-SEEK System Scans Job
topic for additional information and instructions.
This feature works for all scan modes when targeting Windows machines.
For additional information on preserving Last Access Time during SDD scans and Metadata tag collection, see the File System Supported Platforms topic.
File System Sensitive Data Discovery Auditing (SEEK) Jobs
The 0.Collection jobs that comprise this auditing component are:
-
1-SEEK System Scans Job – Collects sensitive data from the targeted file servers
-
2-SEEK Bulk Import Job – Imports collected sensitive data information from the targeted file servers
- The 2-SEEK Bulk Import job does not need to be run when streaming is enabled
The following job group and jobs in the File System solution depend on data collected by these jobs to generate reports:
- 7.Sensitive Data > FS_DLPResults Job (also requires Access Auditing and Activity Auditing)
- FileSystemOverview Job
- FS_SecurityAssessment Job
The File System Sensitive Data Discovery Reports in the Access Information Center are also populated by this data. See the Netwrix Access Information Center Documentation for additional information.
It is more efficient to streamline the collection jobs to those desired. Remember, it is a best practice to scope the 0.Collection job group to only include the collection components desired by disabling the undesired collection jobs. Disabling them allows the solution to run more efficiently. It is not recommended to delete any jobs. The required collection jobs are listed for the following workflows.
Recommended Workflow 1 (for Access and Sensitive Data Discovery Auditing data collection)
NOTE: While Sensitive Data Discovery data can be collected, the Sensitive Data reports require the Activity Auditing components.
Step 1 – Install the Sensitive Data Discovery Add-On on the Enterprise Auditor Console (once only).
Step 2 – Run the 1-FSAA System Scans job.
Step 3 – Run the 1-SEEK System Scans job.
Step 4 – If necessary, run the 2-FSAA Bulk Import job:
-
If streaming is not enabled in the 1-FSAA System Scans job, run the 2-FSAA Bulk Import job.
-
If streaming is enabled in the 1-FSAA System Scans job, do not run 2-FSAA Bulk Import job.
RECOMMENDED: It is best practice to disable undesired Bulk Import jobs.
Step 5 – If necessary, run the 2-SEEK Bulk Import job:
-
If streaming is not enabled in the 1-SEEK System Scans job, run the 2-SEEK Bulk Import job.
-
If streaming is enabled in the 1-SEEK System Scans job, do not run the 2-SEEK Bulk Import job.
RECOMMENDED: It is best practice to disable undesired Bulk Import jobs.
Step 6 – Run the 3-FSAA Exceptions job.
Step 7 – Run the desired corresponding analysis and reporting sub-job groups.
Recommended Workflow 2 (for Access, Activity, and Sensitive Data Discovery Auditing)
Step 1 – Install the Sensitive Data Discovery Add-On on the Enterprise Auditor Console (once only).
Step 2 – Install and configure monitoring with the Activity Monitor for targeted hosts (once only).
Step 3 – Run the 1-FSAA System Scans job.
Step 4 – Run the 1-FSAC System Scans job.
Step 5 – Run the 1-SEEK System Scans job.
Step 6 – If necessary, run the 2-FSAA Bulk Import job:
-
If streaming is not enabled in the 1-FSAA System Scans job, run the 2-FSAA Bulk Import job.
-
If streaming is enabled in the 1-FSAA System Scans job, do not run 2-FSAA Bulk Import job.
RECOMMENDED: It is best practice to disable undesired Bulk Import jobs.
Step 7 – Run the 2-FSAC Bulk Import job.
Step 8 – If necessary, run the 2-SEEK Bulk Import job:
-
If streaming is not enabled in the 1-SEEK System Scans job, run the 2-SEEK Bulk Import job.
-
If streaming is enabled in the 1-SEEK System Scans job, do not run the 2-SEEK Bulk Import job.
RECOMMENDED: It is best practice to disable undesired Bulk Import jobs.
Step 9 – Run the 3-FSAA Exceptions job.
Step 10 – Run the 3-FSAC Exceptions job.
Step 11 – Run the desired corresponding analysis and reporting sub-job groups.
Recommended Workflow 3 (for Access, Activity, DFS, and Sensitive Data Discovery Auditing)
Step 1 – Install the Sensitive Data Discovery Add-On on the Enterprise Auditor Console (once only).
Step 2 – Install and configure monitoring with the Activity Monitor for targeted hosts (once only).
Step 3 – Run the 0-FSDFS System Scans job.
Step 4 – Run the 1-FSAA System Scans job.
Step 5 – Run the 1-FSAC System Scans job.
Step 6 – Run the 1-SEEK System Scans job.
Step 7 – If necessary, run the 2-FSAA Bulk Import job:
-
If streaming is not enabled in the 1-FSAA System Scans job, run the 2-FSAA Bulk Import job.
-
If streaming is enabled in the 1-FSAA System Scans job, do not run 2-FSAA Bulk Import job.
RECOMMENDED: It is best practice to disable undesired Bulk Import jobs.
Step 8 – Run the 2-FSAC Bulk Import job.
Step 9 – If necessary, run the 2-SEEK Bulk Import job:
-
If streaming is not enabled in the 1-SEEK System Scans job, run the 2-SEEK Bulk Import job.
-
If streaming is enabled in the 1-SEEK System Scans job, do not run the 2-SEEK Bulk Import job.
RECOMMENDED: It is best practice to disable undesired Bulk Import jobs.
Step 10 – Run the 3-FSAA Exceptions job.
Step 11 – Run the 3-FSAC Exceptions job.
Step 12 – Run the desired corresponding analysis and reporting sub-job groups.
Optional Workflow (for Sensitive Data Discovery Auditing data collection only)
While Sensitive Data Discovery data can be collected, reports require the Access Auditing and Activity Auditing components.
Step 1 – Run the 1-SEEK System Scans job.
Step 2 – If necessary, run the 2-SEEK Bulk Import job.
-
If streaming is not enabled in the 1-SEEK System Scans job, run the 2-SEEK Bulk Import job.
-
If streaming is enabled in the 1-SEEK System Scans job, do not run the 2-SEEK Bulk Import job.
RECOMMENDED: It is best practice to disable undesired Bulk Import jobs.
Step 3 – Run the desired corresponding analysis and reporting sub-job groups.
NOTE: Please see the Recommended Configuration for the File System Solution topic before continuing with these workflows.
FS_DomainUserACLs Job
The FS_DomainUserACLs job is designed to report on domain users that have been granted direct permissions on resources from targeted file servers.
Analysis Tasks for the FS_DomainUserACLs Job
View the analysis tasks by navigating to the FileSystem > 2.Direct Permissions > FS_DomainUserACLs > Configure node and select Analysis.
CAUTION: Do not modify or deselect the selected analysis tasks. The analysis tasks are preconfigured for this job.
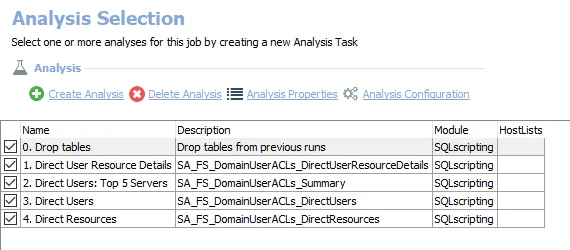
The following analysis tasks are selected by default:
-
- Drop tables – Drops tables from previous runs
-
- Direct User Resource Details – Creates the SA_FS_DomainUserACLs_DirectUserResourceDetails table accessible under the job’s Results node
-
- Direct Users: Top 5 Servers – Creates an interim processing table in the database for use by downstream analysis and report generation
-
- Direct Users – Creates an interim processing table in the database for use by downstream analysis and report generation
-
- Direct Resources – Creates an interim processing table in the database for use by downstream analysis and report generation
In addition to the tables and views created by the analysis tasks which displays all direct user permissions, the FS_DomainUserACLs job produces the following pre-configured report:
| Report | Description | Default Tags | Report Elements |
|---|---|---|---|
| Domain User ACLs | This report identifies all places where a domain user account has direct rights. | None | This report is comprised of three elements: - Bar Chart – Displays top 5 servers affected by folders - Table – Provides details on domain users - Table – Provides details on resources |
FS_HighRiskACLs Job
The FS_HighRiskACLs job is designed to report on high risk security principals that have been granted direct permissions on resources from targeted file servers.
Analysis Tasks for the FS_HighRiskACLs Job
View the analysis tasks by navigating to the FileSystem > 2.Direct Permissions > FS_HighRiskACLs > Configure node and select Analysis.
CAUTION: Do not modify or deselect the selected analysis tasks. The analysis tasks are preconfigured for this job.
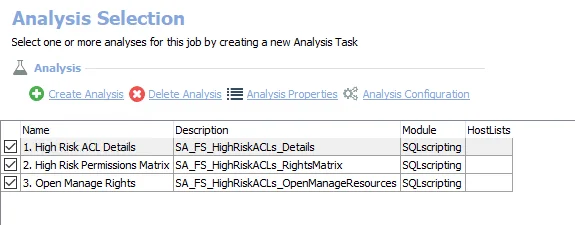
The following analysis tasks are selected by default:
-
- High Risk ACL Details – Creates the SA_FS_HighRiskACLs_Details table accessible under the job’s Results node
-
- High Risk Permissions Matrix – Creates an interim processing table in the database for use by downstream analysis and report generation
-
- Open Manage Rights – Creates an interim processing table in the database for use by downstream analysis and report generation
In addition to the tables and views created by the analysis task, the FS_HighRiskACLs job produces the following pre-configured report:
| Report | Description | Default Tags | Report Elements |
|---|---|---|---|
| High Risk ACLs | This report shows permissions of Authenticated Users, Anonymous Login, Everyone, or Domain Users. Applying these trustees to permissions may inadvertently open security holes. | GDPR SOX HIPAA PCI-DSS GLBA ITAR FERPA FISMA ISO27001 | This report is comprised of two elements: - Stacked Bar Chart – Displays high risk permission assignments - Table – Provides details on resources by open manage rights |
FS_LocalUsersAndGroups Job
The FS_LocalUsersAndGroups job is designed to report on local users and groups that have been granted direct permissions on resources from targeted file servers.
Analysis Tasks for the FS_LocalUsersAndGroups Job
View the analysis tasks by navigating to the FileSystem > 2.Direct Permissions > FS_LocalUsersAndGroups > Configure node and select Analysis.
CAUTION: Do not modify or deselect the selected analysis tasks. The analysis tasks are preconfigured for this job.

The following analysis tasks are selected by default:
-
- Local Groups Resource Details – Creates the SA_FS_LocalUsersAndGroups_LocalGroupResourceDetails table accessible under the job’s Results node
-
- Local Groups – Creates an interim processing table in the database for use by downstream analysis and report generation
-
- Local Group Details – Creates an interim processing table in the database for use by downstream analysis and report generation
In addition to the tables and views created by the analysis task, the FS_LocalUsersAndGroups job produces the following pre-configured report:
| Report | Description | Default Tags | Report Elements |
|---|---|---|---|
| Local Users And Groups | This report identifies at the server level, how many local users and groups have direct ACLs, followed by details at the share level. | None | This report is comprised of two elements: - Bar Chart – Displays top five servers with local users and groups by affected folders - Table – Provides details on local users and groups |
FS_MissingFullControl Job
The FS_MissingFullControl job is designed to report on resources from targeted file servers that have no Full Control rights granted to it.
Analysis Tasks for the FS_MissingFullControl Job
View the analysis tasks by navigating to the FileSystem > 2.Direct Permissions > FS_MissingFullControl > Configure node and select Analysis.
CAUTION: Do not modify or deselect the selected analysis tasks. The analysis tasks are preconfigured for this job.
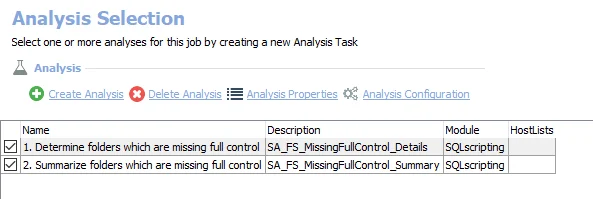
The following analysis tasks are selected by default:
-
- Determine folders which are missing full control – Creates an interim processing table in the database for use by downstream analysis and report generation
-
- Summarize folders which are missing full control – Creates an interim processing table in the database for use by downstream analysis and report generation
In addition to the tables and views created by the analysis task, the FS_MissingFullControl job produces the following pre-configured report:
| Report | Description | Default Tags | Report Elements |
|---|---|---|---|
| Missing Full Control Rights | This report identifies folders within the environment which currently do not have any trustee with Full Control rights, adding to administrative burden. | None | This report is comprised of three elements: - Bar Chart – Displays shares with missing full control rights - Table – Provides details on folder - Table – Provides details on shares with missing full control rights |
FS_NestedShares Job
The FS_NestedShares job is is designed to report on nested shares that have been granted direct permissions from targeted file servers.
Analysis Tasks for the FS_NestedShares Job
View the analysis tasks by navigating to the FileSystem > 2.Direct Permissions > FS_NestedShares > Configure node and select Analysis.
CAUTION: Do not modify or deselect the selected analysis tasks. The analysis tasks are preconfigured for this job.
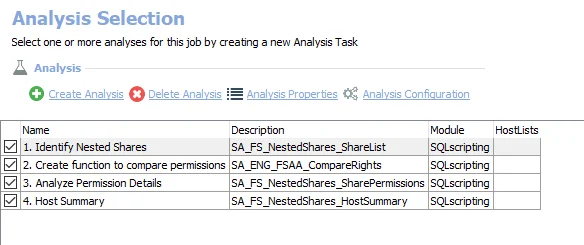
The following analysis tasks are selected by default:
-
- Identify Nested Shares
- Creates an interim processing table in the database for use by downstream analysis and report generation
- Creates the SA_FS_NestedShares_ShareDetails table accessible under the job’s Results node
-
- Create function to compare permissions
-
- Analyze Permission Details
- Creates the SA_FS_NestedShares_SharePermissions table accessible under the job’s Results node
- Updates the SA_FS_NestedShares_ShareDetails table accessible under the job’s Results node
-
- Host Summary – Creates the SA_FS_NestedShares_HostSummary table accessible under the job’s Results node
In addition to the tables and views created by the analysis tasks, the FS_NestedShares job produces the following pre-configured report:
| Report | Description | Default Tags | Report Elements |
|---|---|---|---|
| Nested Shares | This report identifies where folders are exposed through multiple shares. This may cause issues with unwanted access. | None | This report is comprised of two elements: - Bar Chart – Displays hosts by folder count - Table – Provides details on shares |
FS_SIDHistory Job
The 2.Direct Permissions > FS_SIDHistory job is designed to report on trustees that have a historical SID that has been granted direct permissions on resources from targeted file servers.
Analysis Tasks for the FS_SIDHistory Job
View the analysis tasks by navigating to the FileSystem > 2.Direct Permissions > FS_SIDHistory > Configure node and select Analysis.
CAUTION: Do not modify or deselect the selected analysis tasks. The analysis tasks are preconfigured for this job.
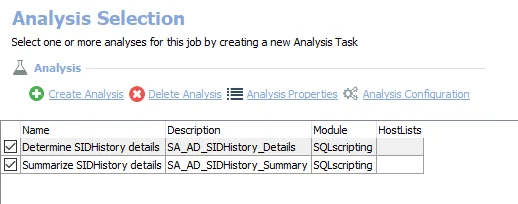
The following analysis tasks are selected by default:
-
- Find ACEs Through SID History
- Creates the SA_FS_SIDHistory_Details table accessible under the job’s Results node
- Creates the SA_FS_SIDHistory_TrusteeDetails table accessible under the job’s Results node
-
- Host Rollups – Creates the SA_FS_SIDHistory_HostSummary table accessible under the job’s Results node
-
- Expose SID Details View – Makes the SA_FS_SIDHistory_TrusteeDetails table visible under the job’s Results node
In addition to the tables and views created by the analysis tasks, the FS_SIDHistory job produces the following pre-configured report:
| Report | Description | Default Tags | Report Elements |
|---|---|---|---|
| SID History Overview | This report identifies any applied ACE which utilizes a trustee's SID history. | None | This report is comprised of three elements: - Bar Chart – Displays the top 5 hosts by affected folders - Table – Provides details on permissions - Table – Provides details on trustees |
FS_UnresolvedSIDs Job
The FS_UnresolvedSIDs job is designed to report on unresolved SIDs that have been granted direct permissions on resources from targeted file servers.
Analysis Tasks for the FS_UnresolvedSIDs Job
View the analysis tasks by navigating to the FileSystem > 2.Direct Permissions > FS_UnresolvedSIDs > Configure node and select Analysis.
CAUTION: Do not modify or deselect the selected analysis task. The analysis task is preconfigured for this job.
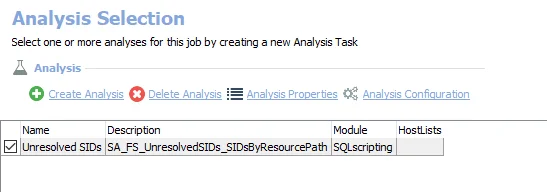
The following analysis task is selected by default:
- Unresolved SIDs – Creates the SA_FS_UnresolvedSIDs_SIDsByResourcePath table accessible under the job's Results node
In addition to the tables and views created by the analysis task, the FS_UnresolvedSIDs job produces the following pre-configured report:
| Report | Description | Default Tags | Report Elements |
|---|---|---|---|
| Unresolved SIDs | This report identifies where permissions are assigned for users which no longer exist. | None | This report is comprised of two elements: - Bar Chart – Displays top servers by affected folders - Table – Provides details on top unresolved SIDs - Table – Provides details on top servers by affected folders |
2.Direct Permissions Job Group
The 2.Direct Permissions job group is designed to report on Direct Permissions information from targeted file servers.
The 2.Direct Permissions job group is comprised of:
- FS_DomainUserACLs Job – Reports on domain users that have been granted direct permissions on resources from targeted file servers
- FS_HighRiskACLs Job – Reports on high risk security principals that have been granted direct permissions on resources from targeted file servers
- FS_LocalUsersAndGroups Job – Reports on local users and groups that have been granted direct permissions on resources from targeted file servers
- FS_MissingFullControl Job – Reports on resources from targeted file servers that have no Full Control rights granted to it
- FS_NestedShares Job – Reports on nested shares that have been granted direct permissions from targeted file servers
- FS_SIDHistory Job – Reports on trustees that have a historical SID that has been granted direct permissions on resources from targeted file servers
- FS_UnresolvedSIDs Job – Reports on unresolved SIDs that have been granted direct permissions on resources from targeted file servers
FileSystemOverview Job
The FileSystemOverview job provides insight into all targeted file servers. It is dependent on data collected by the File System Access Auditing components and the components of the 0.Collection Job Group. It also depends on the running of the sub-job groups within the solution. If only select sub-job groups have been run, there will be blank sections in the overview report.
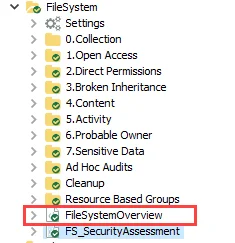
The FileSystemOverview job is designed to provide an overview of all relevant information from targeted file servers.
Analysis Tasks for the FileSystemOverview Job
View the analysis tasks by navigating to the FileSystem > FileSystemOverview > Configure node and select Analysis.
CAUTION: Do not modify or deselect the selected analysis task. The analysis task is preconfigured for this job.
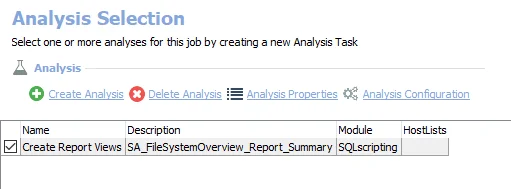
The following analysis task is selected by default:
- Create Report Views – Creates an interim processing table in the database for use by downstream analysis and report generation
In addition to the tables and views created by the analysis task, the FileSystemOverview job produces the following pre-configured report:
| Report | Description | Default Tags | Report Elements |
|---|---|---|---|
| File System Overview | This report provides an overview of all targeted file servers. | None | This report is comprised of one element: - Table – Provides summary of the targeted file system |
3.Broken Inheritance > FS_BrokenInheritance Job
The FS_BrokenInheritance job is designed to report on resources with Broken Inheritance from targeted file servers.
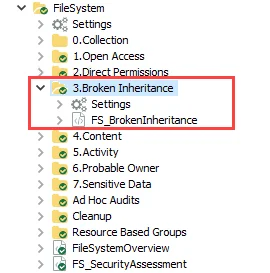
The FS_BrokenInheritance job is located in the 3.Broken Inheritance job group.
Parameter Configuration
The Configuration section on a Job's overview page allows you to easily modify any customizable parameters used by analysis tasks in the job. See the Parameter Configuration topic for instructions on how to edit parameters on a job overview page.
The FS_BrokenInheritance job has the following configurable parameter:
-
Only analyze folders with changed permissions – Set a value of
1or2to select if only folders with modified permissions are analyzed:- 1 – Only analyze resources with changed permissions from parent
- 2 – Analyze all resources regardless of permission changes between parent and child
See the Analysis Tasks for the FS_BrokenInheritance Job topic for additional information.
Analysis Tasks for the FS_BrokenInheritance Job
View the analysis tasks by navigating to the FileSystem > 3.Broken Inheritance > FS_BrokenInheritance > Configure node and select Analysis.
CAUTION: Most of these analysis tasks are preconfigured and should not be modified and or deselected. There are some that are deselected by default, as they are for troubleshooting purposes.
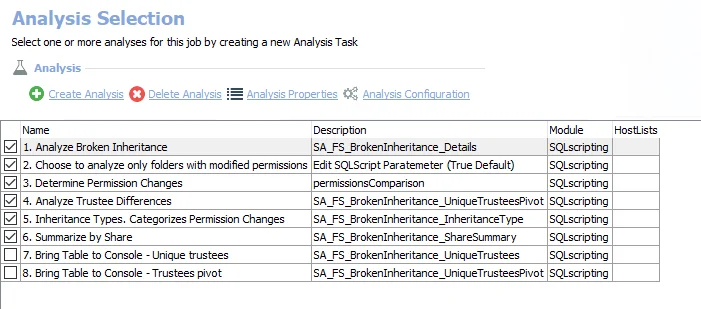
The following analysis tasks are selected by default:
-
- Analyze Broken Inheritance
- Creates an interim processing table in the database for use by downstream analysis and report generation
- Creates the SA_FS_BrokenInheritance_UniqueTrustees table accessible under the job's Results node
- Creates the SA_FS_BrokenInheritance_UniqueTrusteesPivot table accessible under the job's Results node
-
- Choose to analyze only folders with modified permissions – Creates an interim processing table in the database for use by downstream analysis and report generation
- By default set to only analyze resources with changed permissions from parent
- Can be modified to analyze all resources regardless of permission changes between parent and child. See the Parameter Configuration topic for additional information.
- Alternatively, this can be set by modifying the
@FILTER_TO_CHANGED_RESOURCESparameter. See the Configure the Customizable Parameters in an Analysis Task topic for additional information.
-
- Determine Permission Changes – Creates an interim processing table in the database for use by downstream analysis and report generation
-
- Analyze Trustee Differences – Creates an interim processing table in the database for use by downstream analysis and report generation
-
- Inheritance Types. Categorizes Permission Changes – Creates an interim processing table in the database for use by downstream analysis and report generation
-
- Summarize by Share – Creates an interim processing table in the database for use by downstream analysis and report generation
The following analysis tasks are deselected by default:
-
- Bring Table to Console - Unique trustees – Restores the SA_FS_BrokenInheritance_UniqueTrustees table to be visible under the job's Results node
-
- Bring Table to Console - Trustees pivot – Restores the SA_FS_BrokenInheritance_UniqueTrusteesPivot table to be visible under the job's Results node
In addition to the tables and views created by the analysis tasks, the FS_BrokenInheritance job produces the following pre-configured reports:
| Report | Description | Default Tags | Report Elements |
|---|---|---|---|
| Broken Inheritance by Share (Broken Inheritance Details) | Broken inheritance between resources can lead to incorrect access for users, either overprovisioning them, or locking them out of critical data. This report identifies the shares and folders with the most permission changes from the parent resource. | None | This report is comprised of three elements: - Bar Chart – Displays top five shares by permission changes - Table – Provides details on folders - Table – Provides details on shares |
| Unique Trustees | This report identifies permission changes between folders. These trustees have been either removed, added, or had their rights adjusted. | None | This report is comprised of one element: - Table – Provides details on unique trustees |
7.Sensitive Data > FS_DLPResults Job
The FS_DLPResults job is designed to report on resources that have been identified to contain sensitive data from targeted file servers. It is comprised of analysis and reports which use the data collected by the 0.Collection job group to provide information on where sensitive data is being shared. Best practices often dictate moving files with sensitive data out of open shares.

The FS_DLPResults job is located in the 7.Sensitive Data job group.
Analysis Tasks for the FS_DLPResults Job
View the analysis tasks by navigating to the FileSystem > 7.Sensitive Data > FS_DLPResults > Configure node and select Analysis.
CAUTION: Do not modify or deselect the selected analysis tasks. The analysis tasks are preconfigured for this job.
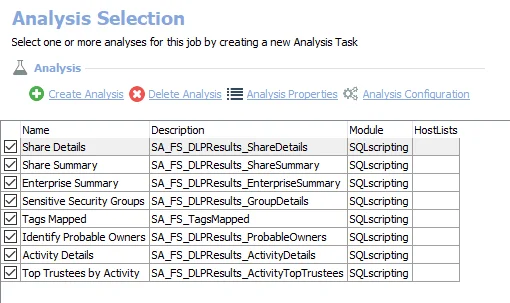
The following analysis tasks are selected by default:
- Share Details – Creates the SA_FS_DLPResults_ShareDetails table accessible under the job’s Results node
- Share Summary – Creates the SA_FS_DLPResults_ShareSummary table accessible under the job’s Results node
- Enterprise Summary – Creates an interim processing table in the database for use by downstream analysis and report generation
- Sensitive Security Groups – Creates the SA_FS_DLPResults_GroupDetails table accessible under the job’s Results node
- Identify Probable Owners – Creates the SA_FS_DLPResults_ProbableOwners table accessible under the job’s Results node
- Activity Details – Creates the SA_FS_DLPResults_ActivityDetails table accessible under the job’s Results node
- Top Trustees by Activity – Creates an interim processing table in the database for use by downstream analysis and report generation
In addition to the tables and views created by the analysis tasks, the FS_DLPResults job produces the following pre-configured reports:
| Report | Description | Default Tags | Report Elements |
|---|---|---|---|
| Enterprise Summary (Sensitive Content) | This report identifies the type and amount of sensitive content found on scanned machines. | GDPR SOX HIPAA PCI-DSS GLBA ITAR FERPA FISMA ISO27001 | This report is comprised of two elements: - Pie Chart – Displays exceptions by file count - Table – Provides details on exceptions by file count |
| File Ownership (Sensitive Data Ownership) | This report identifies the top 3 potential owners of files which have been found to contain sensitive content. | None | This report is comprised of one element: - Table – Provides details on top owners per file |
| Sensitive Data Access | This report shows who is accessing sensitive data. Emphasis is placed on activity within the last 30 days. | GDPR SOX HIPAA PCI-DSS GLBA ITAR FERPA FISMA ISO27001 | This report is comprised of two elements: - Bar Chart – Displays sensitive data access by top users - last 30 days - Table – Provides details on sensitive data access |
| Sensitive Security Groups | This report identifies groups which are used to provide access to sensitive data. Changes to membership should be closely monitored. | GDPR SOX HIPAA PCI-DSS GLBA ITAR FERPA FISMA ISO27001 | This report is comprised of two elements: - Bar Chart – Top groups by access to sensitive files - Table – Provides details on group access to sensitive files |
| Share Details (Shares with Sensitive Content) | This report identifies the location of sensitive data, and flags whether or not this data is accessible through open access. | GDPR SOX HIPAA PCI-DSS GLBA ITAR FERPA FISMA ISO27001 | This report is comprised of three elements: - Bar chart – Displays top shares by sensitive file count - Table – Provides details on files - Table – Provides details on top shares by sensitive file count |
1.Open Access > FS_OpenAccess Job
The FS_OpenAccess job is designed to report on Open Access information from targeted file servers. The definition of Open Access is when a security principal, such as Everyone, Authenticated Users, or Domain Users, have permissions on a resource.
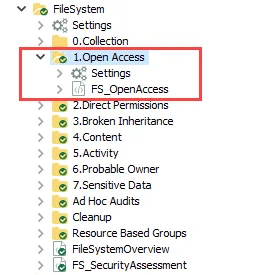
The FS_OpenAccess job is located in the 1.Open Access job group.
Analysis Tasks for the FS_OpenAccess Job
View the analysis tasks by navigating to the FileSystem > 1.Open Access > FS_OpenAccess > Configure node and select Analysis.
CAUTION: Do not modify or deselect the selected analysis tasks. The analysis tasks are preconfigured for this job.
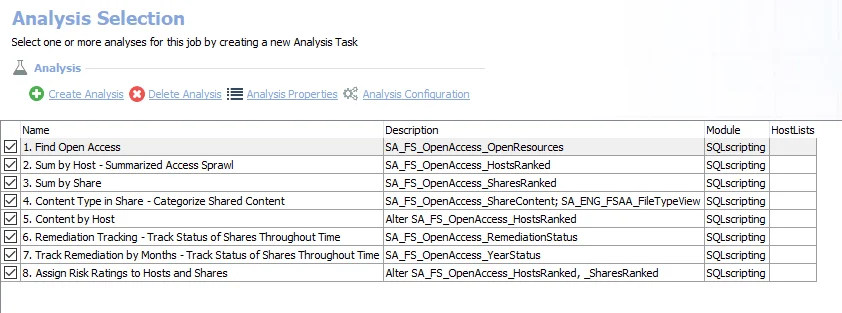
The following analysis tasks are selected by default:
-
- Find Open Access – Creates the SA_FS_OpenAccess_OpenResources table accessible under the job’s Results node
-
- Sum by Host - Summarized Access Sprawl – Creates the SA_FS_OpenAccess_HostsRanked table accessible under the job’s Results node
-
- Sum by Share – Creates the SA_FS_OpenAccess_SharesRanked table accessible under the job’s Results node
-
- Content Type in Share - Categorizes shared content:
- Creates an interim processing view in the database for use by downstream analysis and report generation
- Creates the SA_FS_OpenAccess_ShareContent view accessible under the job’s Results node
-
- Content by Host – Updates the SA_FS_OpenAccess_HostsRanked table accessible under the job’s Results node
-
- Remediation Tracking - Track Status of Shares Throughout Time – Creates an interim processing view in the database for use by downstream analysis and report generation
-
- Track Remediation by Months - Track Status of Shares Throughout Time – Creates an interim processing view in the database for use by downstream analysis and report generation
-
- Assign Risk Ratings to Hosts and Shares – Updates the SA_FS_OpenAccess_HostsRanked and the SA_FS_OpenAccess_SharesRanked tables accessible under the job’s Results node
In addition to the tables and views created by the analysis tasks, the FS_OpenAccess job produces the following pre-configured reports:
| Report | Description | Default Tags | Report Elements |
|---|---|---|---|
| Folder Details (Open Folder Details) | This report identifies all open folders within the targeted environment. | None | This report is comprised of one element: - Table – Provides details on open folders |
| Hosts with Open Access | This report identifies hosts with the highest number of open folders. | None | This report is comprised of two elements: - Bar Chart – Displays top hosts by open folder count - Table – Provides details on hosts with open folder access |
| Open Shares | This report identifies shares with open resources. The Open Access column shows the highest levels of access given to all users in any one resource inside the share. | GDPR SOX HIPAA PCI-DSS GLBA ITAR FERPA FISMA ISO27001 | This report is comprised of two elements: - Bar Chart – Displays largest open shares by folder count - Table – Provides details on open shares |
| Remediation Status | This report identifies the historical success of the organization's share management effort. | None | This report is comprised of two elements: - Column Chart – Displays the remediation status - Table – Provides details on remediation status |
6.Probable Owner > FS_ProbableOwner Job
The 6.Probable Owner Job Group is designed to report on probable owners of resources from targeted file servers.

The 6.Probable Owner Job Group is comprised of:
- FS_ProbableOwner Job – Designed to report on probable owners of resources from targeted file servers
Analysis Tasks for the FS_ProbableOwner Job
View the analysis tasks by navigating to the FileSystem > 6.Probable Owner > FS_ProbableOwner > Configure node and select Analysis.
CAUTION: Do not modify or deselect the first and third selected analysis tasks. The analysis tasks are preconfigured for this job.
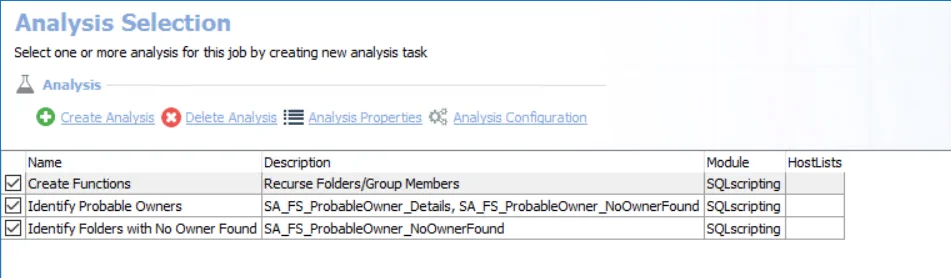
The following analysis tasks are selected by default:
- Create Functions – Creates functions in tier 1 SQL database that are required to calculate Probable Owners
- Identify Probable Owners – Creates the SA_FS_ProbableOwner_Details table accessible under the
job’s Results node
- Set to “Start listing ownership at the root share” which is
@minlevelparameter set to Value0. - Set to “List ownership as deep into the folder hierarchy as the root share” which is
@maxlevelparameter set to Value0. - Value0 = root share, Value1 = 1 folder deep, Value2 = 2 folders deep, etc.
- Set the variable #FILTERED_TRUSTEES to a CSV file that contains one row for each SID to be excluded. When the job is run, SIDs specified in the #FILTERED_TRUSTEES variable are excluded from the analysis and not reported as probable owners.
- See the Configure the Customizable Parameters in an Analysis Task topic for additional information.
- Set to “Start listing ownership at the root share” which is
- Identify Folders with no Owner Found – Creates the SA_FS_ProbableOwner_NoOwnerFound table accessible under the job’s Results node
In addition to the tables and views created by the analysis tasks, the FS_ProbableOwner Job produces the following pre-configured report:
| Report | Description | Default Tags | Report Elements |
|---|---|---|---|
| Probable Share Owners (A.K.A. Probable Owners) | This report identifies the number of shares owned by individuals, as determined by a weighted average of ownership of content, management, and level of activity. The top 2 owners per ownership criteria per share are displayed. | None | This report is comprised of one element: - Table – Provides details on probable owners |
File System Solution
The File Systems Solution is an auditing, compliance, and governance solution for Windows, NAS, Unix, and Linux file systems. Key capabilities include effective access calculation, data owner identification, governance workflows including entitlement reviews and self-service access requests, sensitive data discovery and classification, open access remediation, least-privilege access transformation, and file activity monitoring.
File systems and NAS devices contain the vast majority of an organization’s data. Each day, more data is created and stored in the nooks and crannies of the environment, beyond the sight of the people charged with managing it and keeping it safe. The File System Solution is designed to gather information from file systems and shared folders in order to answer questions around data access:
- Who has access to your data?
- Who is accessing your data?
- What sensitive data is being stored and accessed?
The File System Solution requires a special Enterprise Auditor license. It can be focused to only conduct Access Auditing (FSAA), including environments with a Distributed File System (DFS). It can be enhanced with the Netwrix Activity Monitor to also conduct Activity Auditing (FSAC). Additionally, the Sensitive Data Discovery Add-On enables the solution to search file content for sensitive data, or Sensitive Data Discovery Auditing (SEEK).
Supported Platforms
- See the File System Supported Platforms topic for a full list of supported platforms.
Requirements, Permissions, and Ports
-
Permissions vary based on the Scan Mode Option selected. See the File System Supported Platforms topic for additional information.
-
Ports vary based on the Scan Mode Option selected. See the File System Scan Options topic for additional information.
Sensitive Data Discovery Considerations
The Sensitive Data Discovery Add-On must be installed on the Enterprise Auditor Console server, which enables Sensitive Data criteria for scans. If running Sensitive Data Discovery (SDD) scans, it will be necessary to increase the minimum amount of RAM. Each thread requires a minimum of 2 additional GB of RAM per host. For example, if the job is configured to scan 8 hosts at a time , then an extra 16 GB of RAM are required (8x2=16).
NOTE: The Sensitive Data Discovery Add-on installation package installs the appropriate JDK (Java) version on the server. The JDK deployed is prepackaged and does not require any configuration; it has been preconfigured to work with Enterprise Auditor and should never be customized through Java. It will not conflict with other JDKs or Java Runtimes in the same environment.
Remember, if employing either of the File System Proxy Mode as a Service scan mode options, it is also necessary for the Sensitive Data Discovery Add-on to be installed on the server where the proxy service is installed.
Location
The File System Solution requires a special Enterprise Auditor license. It can be installed from the Instant Job Wizard. Once it has been installed into the Jobs tree, navigate to the solution: Jobs > FileSystem.
The 0.Collection Job Group collects the data. The other job groups run analysis on the collected data. The FileSystemOverview Job generates a statistical overview report of the targeted file systems.
NOTE: The Cleanup Job Group and the Resource Based Groups Job Group require additional licenses to function. See the Job Groups topic for additional information.
Job Groups
The File System Solution offers information on multiple aspects of an organization’s file system infrastructure. This solution is comprised of eleven job groups and an overview job which collect, analyze, and report on data as well as run action tasks for environmental remediation. The data collection is conducted by the FileSystemAccess (FSAA) Data Collector. See the Standard Reference Tables & Views for the FSAA Data Collector section for database table information.
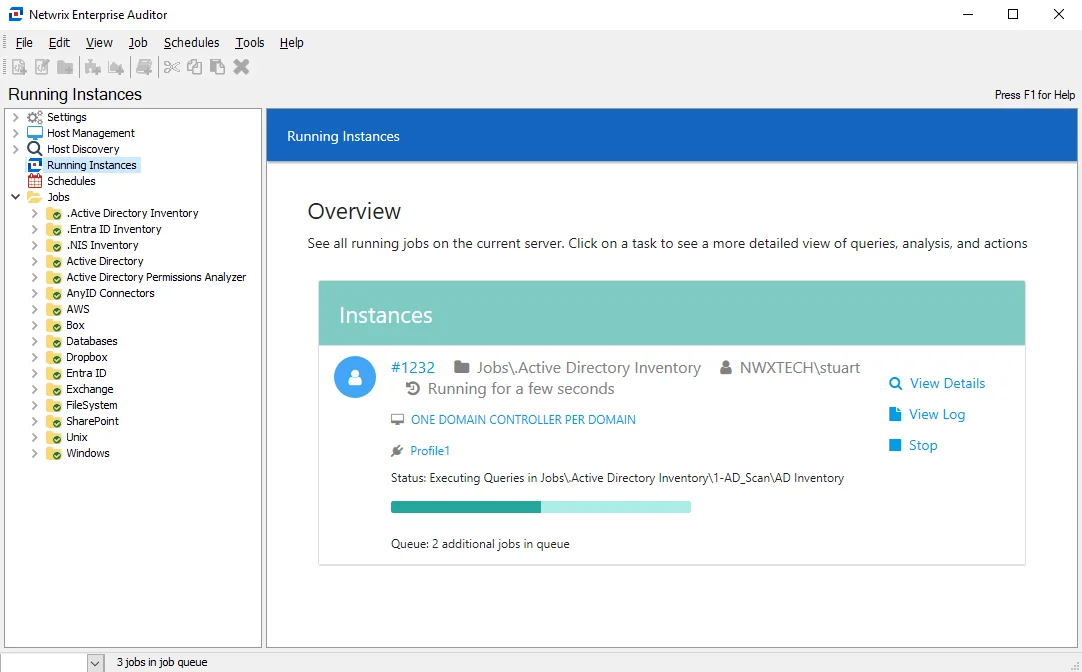
Each type of auditing depends on specific jobs within the 0.Collection Job Group to collect the data and its corresponding analysis and reporting job groups. The Access Auditing components represent the core of the File System Solution and are required by the other auditing options, with the exception of the Sensitive Data Discovery Auditing component which can be run independently. The data collection query options for each type are explained within the 0.Collection Job Group section. Additionally, the corresponding analysis and reporting job groups are listed for each auditing type.
If intending to run three or all auditing types, see each auditing type section within the 0.Collection Job Group section for information on query options and requirements. It is recommended to first run the 0.Collection Job Group components in the default order for the desired auditing types to ensure successful data collection, and then to run the desired sub-groups for reports.
See the Recommended Configuration for the File System Solution topic for additional information on run frequency and job group settings.
The File System Solution is available with the File System Reports license feature and is comprised of the following jobs:
- 0.Collection Job Group
– Designed to collect information from targeted file servers. Information collected includes
access control information, activity events, and sensitive data.
- This job group is available with the File System license feature.
- 1.Open Access > FS_OpenAccess Job – Designed to report on Open Access information from targeted file servers
- 2.Direct Permissions Job Group – Designed to report on Direct Permissions information from targeted file servers
- 3.Broken Inheritance > FS_BrokenInheritance Job – Designed to report on Broken Inheritance information from targeted file servers
- 4.Content Job Group – Designed to report on content information from targeted file servers. Key information reported on in this group is: File Types, File Sizing, Stale Content, and File Tags.
- 5.Activity Job Group
– Designed to report on activity event information from targeted file servers
- Requires the Activity Monitor
- 6.Probable Owner > FS_ProbableOwner Job – Designed to report on probable owners of resources from targeted file servers
- 7.Sensitive Data > FS_DLPResults Job
– Designed to report on resources that have been identified to contain sensitive data from
targeted file servers
- Requires the Sensitive Data Discovery Add-On
- Ad Hoc Audits Job Group
– Designed to report on resources and trustees that have been provided by the user from targeted
file servers
- Typically, this is run independently from the rest of the solution
- Cleanup Job Group
– Designed to report on and take action against resources from targeted file servers that can be
cleaned up
- Requires the File System Actions license feature to function
- This job group is run independently from the rest of the solution
- Resource Based Groups Job Group
– Designed to report on and take action against resources from targeted file servers that can be
have their permissions structure transformed to a resource-based group implementation
- Requires the File System Actions and Active Directory Actions license features to function
- This job group is run independently from the rest of the solution
- FileSystemOverview Job – Designed to provide an overview of all relevant information from targeted file servers
- FS_SecurityAssessment Job – Designed to provide a security assessment of all relevant information from targeted file servers
When targeting Nasuni Edge Appliances, it is necessary to add a job from the Instant Job Library (FS_Nasuni Job) which uses the PowerShell Data collector to gather system information, volume data, and share data from the Nasuni environment. This job should be added to the 0.Collection Job Group and should be renamed (0-FS_Nasuni) to run immediately after the 0-Create Schema Job. See the 0-FS_Nasuni Job topic for additional information.