Job Groups
Job groups are designed to manage related jobs and can contain sub-job groups to ensure that related jobs are executed in the correct order. To create a new job group, right-click on the desired location (Jobs tree or another job group) and select Create Group. Then provide a unique, descriptive name taking into consideration the alphanumeric ordering of the Jobs tree.
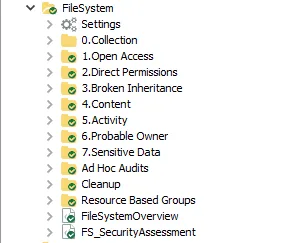
Job groups are organized similar to the Jobs tree, with the Settings node at the top, followed by sub-job groups (job group for collection first, if applicable), then followed by analysis and reporting jobs. Both are sorted in alphanumeric order. This is necessary because data collection jobs must run prior to the analysis and reporting jobs that rely on the collected data without consideration to the job’s name (alphanumeric order).
Job Group Description Page
The Job Group Description page displays shortcuts, links, and important information on the job group and the jobs contained within the Job Group. Depending on the type of job group, the description page will appear different and display information specific to the job group selected.
|  |
| -------------------------------------------------------------------------------------------------------------------------------------------- | ---------------------- |
| Pre-Configured Job Group | User-Created Job Group |
|
| -------------------------------------------------------------------------------------------------------------------------------------------- | ---------------------- |
| Pre-Configured Job Group | User-Created Job Group |
The two types of job groups in Access Analyzer are:
- Pre-configured – The job group description page provides a brief summary of the purpose of the job group, the jobs contained within, and special requirements if applicable
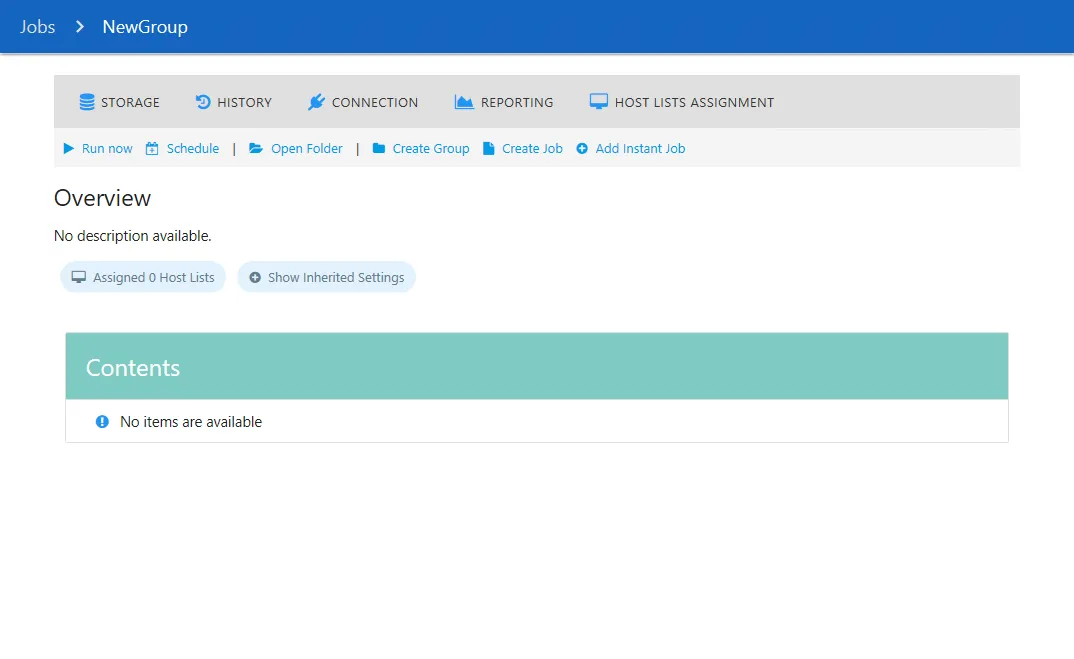
- User Created – Job group description of job description only provides generic information and options
NOTE: Every job group’s description includes options for creating a group, opening the Instant Job Library, and creating a job.
Pre-configured job group description pages provide users with shortcuts and links to many of the functions that can be accessed in the Jobs Tree in the Navigation Pane.
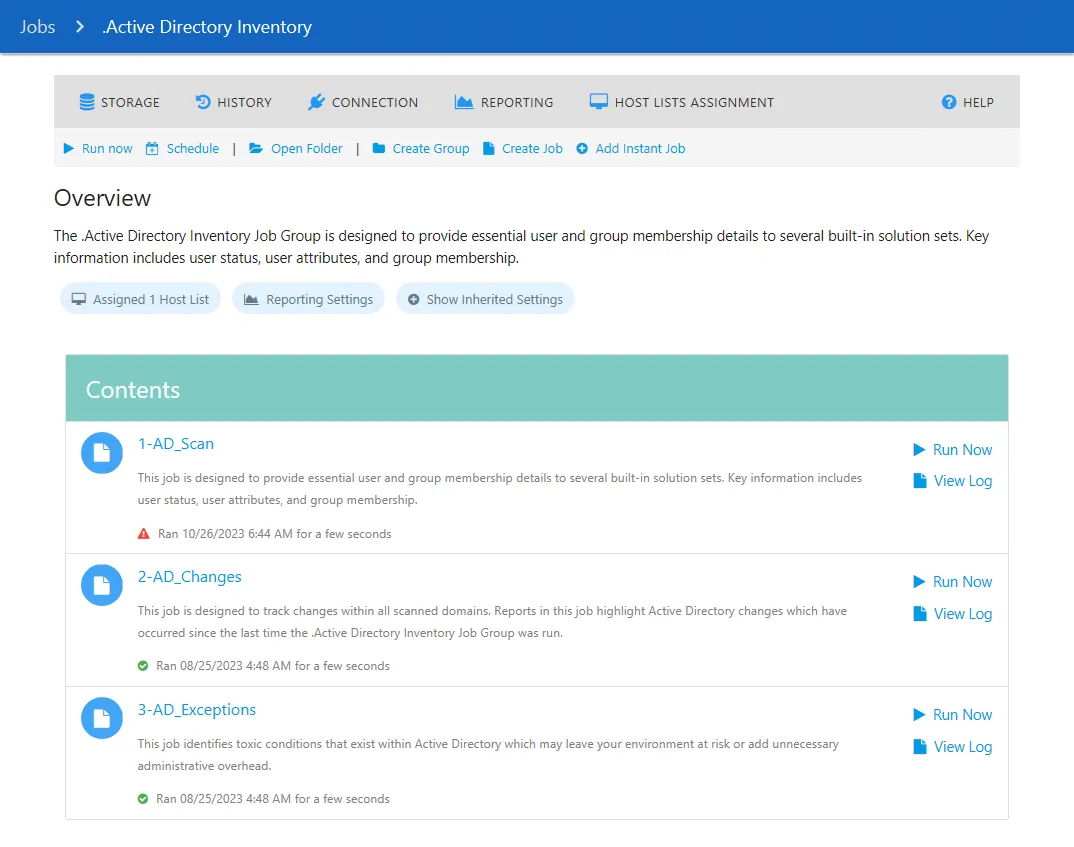
The sections of the job group description page are:
-
Job Group Settings Shortcuts – These pages can also be accessed through the job group Settings Nodes in the Navigation Pane. See the Job Groups Settings Node topic for additional information.
- Storage – Configure the job group’s Storage options
- History – Configure the job group’s History options
- Connection – Configure the job group’s Connection options
- Reporting – Configure the job group’s Reporting options
- Host Lists Assignment – Select the targeted host list in the job group’s Host Lists Assignment
-
Help – Opens the Netwrix Technical Knowledge Center in a browser to a relevant landing page for the job group
-
Run Now – Runs the currently selected job group
-
Schedule – Opens the Schedule page to schedule the job group
-
Open Folder – Opens the job group’s folder location with supporting files in the Windows Explorer
-
Create Group – Creates a job group within the currently selected job group
-
Create Job – Creates a job within the currently selected Job
-
Add Instant Job – Add an Instant Job using the Instant Job Wizard. See the Instant Job Wizard topic for additional information.

The Overview section provides summary information about the job group. This section includes the following information:
-
Assigned Host List – Hovering over the Assigned Host List button shows a tool-tip with information on the hosts lists are assigned to the job group
- Click on the Assigned Host List button to go to the Job Group's Host List Assignment node. See the Host Lists Assignment topic for additional information.
-
Show Inherited Settings – Click on the Show Inherited Settings button to view information on the following:
- Connection Profile
- Data Retention Period
- Log Retention Period
- Reporting Settings
- Storage Account
-
Contents – Shows the job groups and jobs contained within the currently selected job group
NOTE: If applicable, the page shows special instructions for which hosts need to be targeted for proper job group execution.
Job Settings: Inherited and Directly Applied
Job group settings can be applied directly or inherited. On the job group level, it is considered that all settings are applied directly.
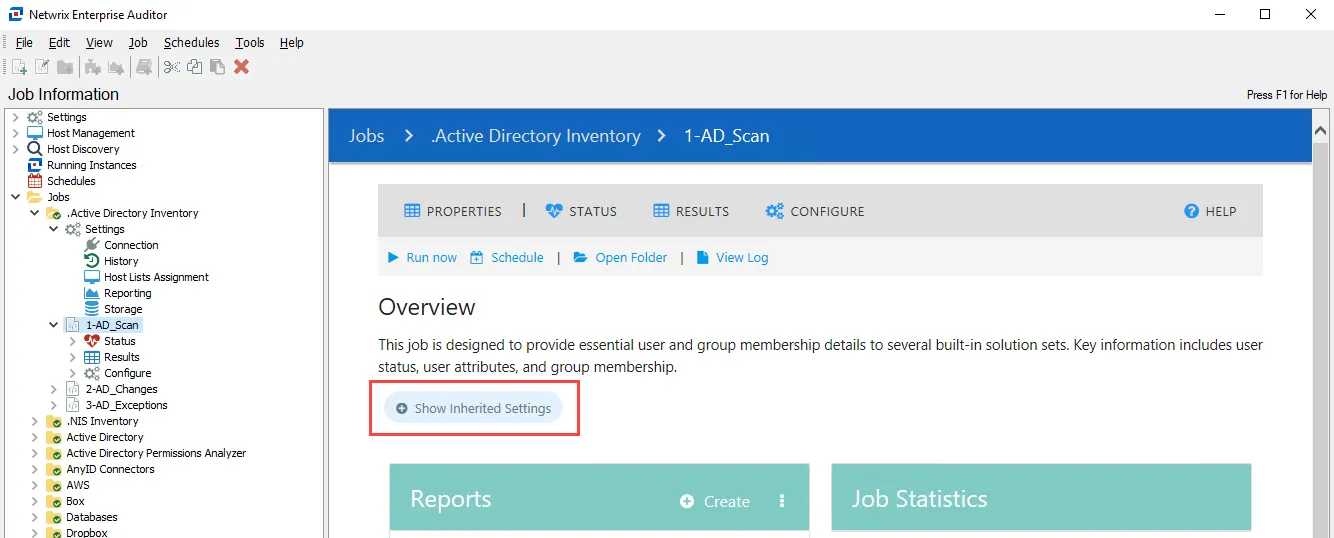
If not, click the Show inherited settings button to expand the inherited settings list (they are highlighted in blue).
The following inherited settings are available:
| Setting | Description |
|---|---|
| Connection profile | The tooltip shows the account name used in the connection profile. Clicking the button opens the parent Connection settings for the selected job group. See Connection Node for more information. Clicking the three dots menu on the right part of the button opens the Edit menu. The following options are available: - Edit the Profile – Clicking the link opens the Connection settings for the current profile - Use Default Profile – Clicking the link applies the connection profile set as default on a global level to a job. In this case, this setting is hidden under the Show Inherited Settings button. - List of profiles – Allows switching between existing connection profiles and apply a desired one to a job |
| Data Retention Period | The tooltip shows the current value for the data retention period (by default, Never retain previous job data). Clicking the button opens the parent History settings for the selected job group. See the History Node topic for additional information. |
| Log Retention Period | The tooltip shows the current value for log retention period (by default, Retain previous job log for 7 times). Clicking the button opens the parent History settings for the selected job group. See the History Node topic for additional information. |
| Hosts Lists | The tooltip shows the names of the host lists assigned to this job group. If you have more than three host lists assigned to a job group, the tooltip shows 3 hosts name and the number of other hosts lists assigned (for example, if 5 hosts are assigned it shows Host1, Host2, Host3 + 2 more). Clicking the button opens the parent Host Lists setting for the selected job group. See the Host Lists Assignment topic for additional information. |
| Reporting Settings | Clicking the Reporting Settings button opens the parent Reporting settings for the selected job group including publishing options, email settings, and roles. See the Reporting Node topic for additional information. |
| Storage Profile | The tooltip shows the current SQL Server instance, database name, user account, and authentication type used for the selected job group. See the Storage Nodes topic for additional information. Clicking the three dots menu on the right part of the button opens the Edit menu. The following options are available: - Edit This Profile – Clicking the link opens the Storage settings for the current profile - Use Default Profile – Clicking the link applies the storage profile set as default on a global level to a job. In this case, this setting is hidden under the Show Inherited Settings button - List of existing profiles – Allows switching between existing storage profiles and apply a desired one to a job |