Analysis Modules
The Access Analyzer analysis modules are capable of finding unique data and notifying users of its location from a variety of environments. Analysis modules are assigned to a job at the Configure > Analysis node. See the Analysis Node topic for information on the Analysis Selection view.
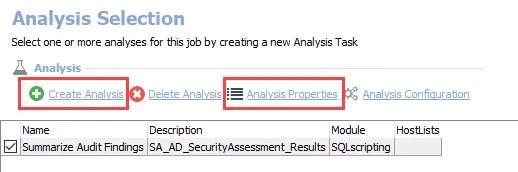
Analysis tasks are configured through the Analysis Properties page. Navigate to the job’s Configure > Analysis node. The Analysis Properties page is opened from the Analysis Selection page by either of the following options:
- Select Create Analysis to add a new analysis task to a job
- Select an existing analysis and click Analysis Properties to modify its configuration
See the Analysis Selection Page and Analysis Properties Page topics for additional information.
The following table provides brief descriptions of the analysis modules available in Access Analyzer.
| Analysis Module | Description |
|---|---|
| AutoAction Analysis Module | Performs a specified action at the conclusion of an analysis task’s execution |
| Business Rules Analysis Module | Finds data that does not match user expectations for the target environment |
| Change Detection Analysis Module | Notifies when a change occurs in the results of a job and identifies the location of the change |
| Notification Analysis Module | Sends notifications to specified recipients when a specified event occurs |
| SQLscripting Analysis Module | Executes free-form SQL scripts |
| SQLTrend | Legacy action module |
| SQLViewCreation Analysis Module | Provides a scripting wizard for creating SQL tables or views |
| VBscripting Analysis Module | Executes free-form VB scripts |
Executing Analyses
Analysis tasks execute automatically if enabled through the Analysis Selection page for jobs with analysis modules configured. Analysis tasks can be enabled or disabled by selecting the checkbox next to the analysis tasks. Analysis tasks execute in the order shown in the Analysis Selection window. Tasks can be manually executed without running the job by right-clicking on the task and selecting Execute Analyses from the dropdown menu.
Analysis Selection Page
Analysis tasks can be created, deleted, and configured through the Analysis Selection page. For jobs with existing analysis tasks, the Analysis Selection page is used to change the order in which tasks are run, as well as enabling or disabling tasks.
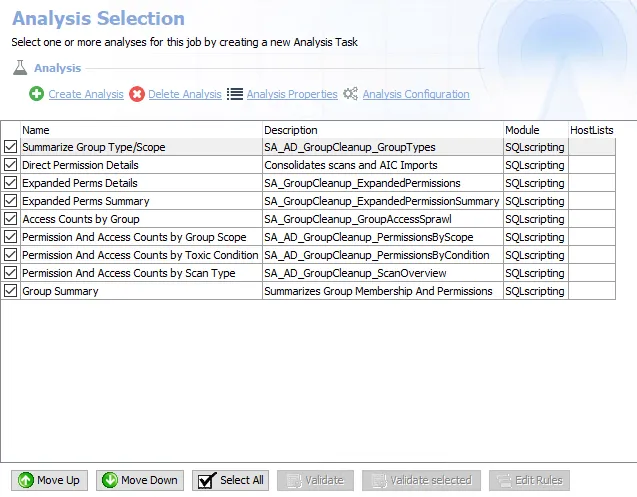
The Analysis Selection page has the following options:
-
Create Analysis – Opens the Analysis Properties page for a newly created task
-
Delete Analysis – Deletes the selected analysis task in the Analysis Selection list
-
Analysis Properties – Opens the Analysis Properties page for the selected existing analysis task
-
Analysis Configuration – Opens the configuration wizard for the analysis task
-
Select the checkbox next to an analysis task to enable it, or clear the checkbox to disable it
-
Move Up/Move Down – Moves the selected analysis tasks up or down the Analysis Selection task list. Moving tasks up or down the list changes the order in which the task is run when the job is executed.
NOTE: Tasks can be drag-and-dropped to change position in the list.
-
Select All – Enables/disables all tasks in the list
-
The Validate, Validate Selected, and Edit Rules buttons are specific to the Business Rules Analysis Module. See the Business Rules Analysis Module topic for additional information on these buttons.
Analysis Properties Page
Configure task properties through the Analysis Properties page. The Analysis Properties page is accessed through the Analysis Selection page.
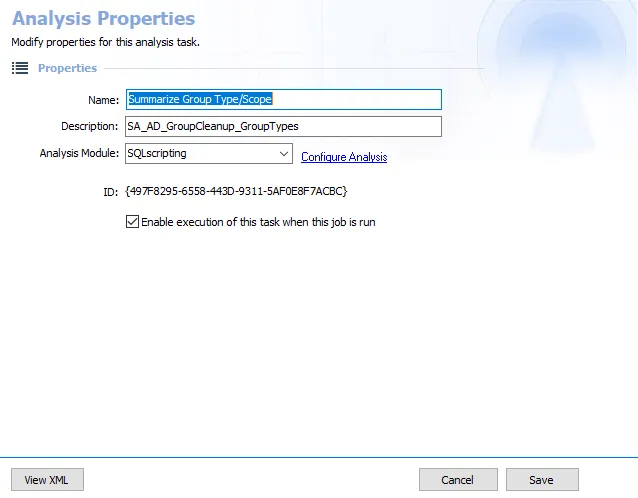
The Analysis Properties page has the following options:
- Name – Name of the analysis task. Default names can be changed.
- Description – Description of the analysis task. Analysis tasks for default solutions reference associate data tables. Descriptions for new tasks are blank by default.
- Analysis Module – Click the drop-down to select an analysis module for the task
- Configure Analysis – Click to access the configuration wizard for the selected analysis module
- ID – Unique identifying number of the analysis task. The database uses distinct IDs to distinguish between analysis tasks, even those with identical configurations.
- Enable execution of this task when the job is run – Select this option to automatically execute the task as part of the job execution. This box can also be selected through the Analysis Selection page.
- View XML – Opens the XML Text window to display the
DataAnalysisTasks.XMLfile for the selected job. The file is stored in the job’s directory. - Cancel – Return to the Analysis Selection page without saving changes
- Save – Save changes and return to the Analysis Selection page