SQLViewCreations: Columns
The Result Columns page lists the tables selected on the Input Select page.
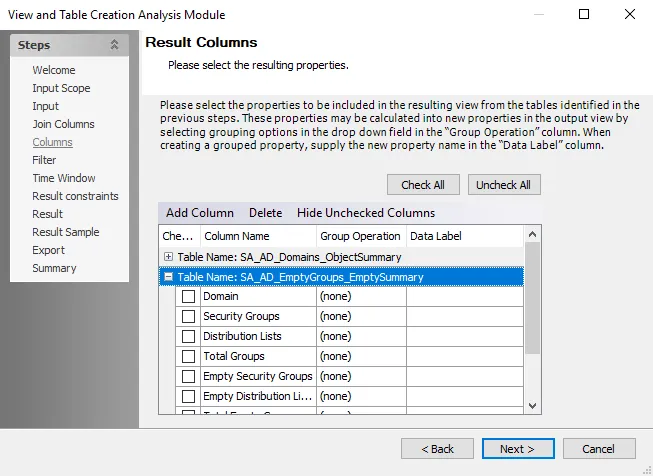
Expand the table to show its columns. Then, select the checkbox next to the column to include it in the resulting table or view. If two data tables are being joined, the resulting table displays at the bottom of the grid. Use the scroll bar to view any hidden tables or data points.
The grid provides the following options for formatting the resulting table or view:
-
Check All – Selects all checkboxes in the Checked column
-
Uncheck All – Clears all checkboxes in the Checked column
-
Add Column – Opens the New Trend Column window, where columns can be added to the table
-
Delete – Deletes a selected column
- Original columns cannot be deleted. Only columns that have been added by users can be deleted.
-
Show All Columns/Hide Unchecked Columns – Hides rows that are not currently selected ,or if columns are currently hidden, displays all columns in the table
-
Checked – Selects data columns for inclusion in the resulting table or view
-
Column Name – Displays the data column name
-
Group Operation – Accesses the available group operations that can be applied to individual data points. Click on a cell in this column to display the drop-down arrow. The following operations are available:
- (none)
- Average
- Count
- Maximum
- Minimum
- Sum
- Variance
-
Data Label – Displays any data label for the associated data point. Data labels override the column name on the materialized table or view. If applying a group operation, a default data label shows. To apply a custom label, click in the cell and enter the label.
-
Order By Operation – Accesses the available order-by operations that can be applied to individual data points. Click on a cell in this column to display the drop-down arrow. The following operations are available:
- None
- Ascending
- Descending
NOTE: If at least one columns is sorted by value, the With ties option is enabled on the Result Constraints page. See the SQLViewCreation: Result Constraints topic for additional information.
After selecting the columns to include in the resulting table or view, click Next to further filter the sourced data.