Configuring the Web Console to use ADFS
The Access Analyzer Webserver and Access Information Center are able to support Single-Sign-On (SSO) leveraging WSFederation with SAML tokens. This guide contains steps for implementing SSO using Active Directory Federation Services (ADFS).
Follow the steps to configure the Web Console to use ADFS authentication:
NOTE: A certificate from the ADFS server is required. Confer with a PKI administrator to determine which certificate method will conform to the organization's security policies.
Step 1 – Import the certificate for the ADFS server onto the hosting server using the Certificate Management MMC snap-in.
- If used, self-signed certificates will also need to be imported
Step 2 – On the ADFS server, open AD FS Management.
Step 3 – Navigate to Relying Party Trusts and click Add Relying Part Trust.... Use the Add Relying Party Trust Wizard to configure the relying party trust:
-
On the Welcome page, select Claims aware and click Start.
-
On the Select Data Source page, select Enter data about the relying party manually and click Next.
-
On the Specify Display Name page, enter a display name for the relying party trust. Click Next.
-
On the Configure URL page, do not select any options and click Next.
-
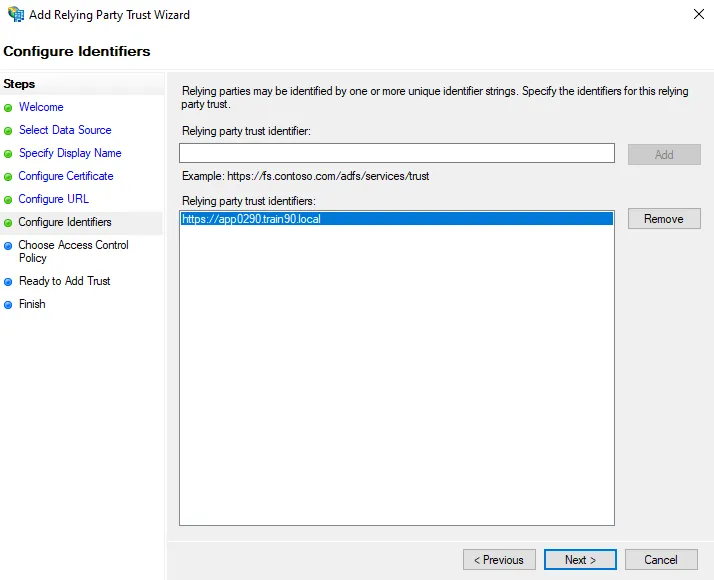
On the Configure Identifiers page, add an identifier of
https://followed by the fully qualified domain name (FQDN) of your ADFS server.- For example,
https://app0290.train90.local
- For example,
-
Click Next to proceed through the remaining wizard pages and complete the wizard.

Step 4 – Double-click on the newly added relying party trust to open it's Properties window.
Navigate to the Endpoints tab and click Add WS-Federation. On the Add an Endpoint window, add
https://`<FQDN of the web server>`:`<port number>`/federation as the Trusted URL, then click
OK.
- For example,
https://app0190.train90.local:8082/federation
Click OK to save the changes and close the properties window.
Step 5 – Select the relying party trust, and click Edit Claim Issuance Policy on the right-hand panel.
-
On the Edit Claim Issuance Policy window, click Add Rule.
-
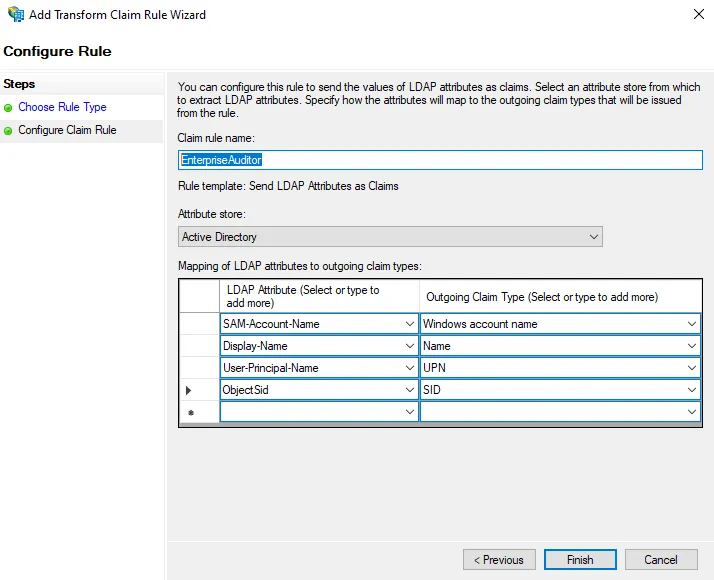
On the Choose Rule Type page of the Add Transform Claim Rule Wizard, select Send LDAP Attributes as Claims as the Claim rule template. Click Next.
-
On the Configure Claim Rule page, enter a name in the Claim rule name field.
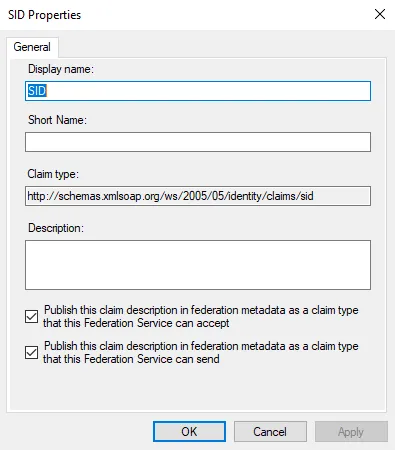
If the SID claim is not configured by default, add it to the Claim Description as follows:
Step 6 – Navigate to the Access Analyzer installation directory and open the
WebServer.exe.config file in a text editor.
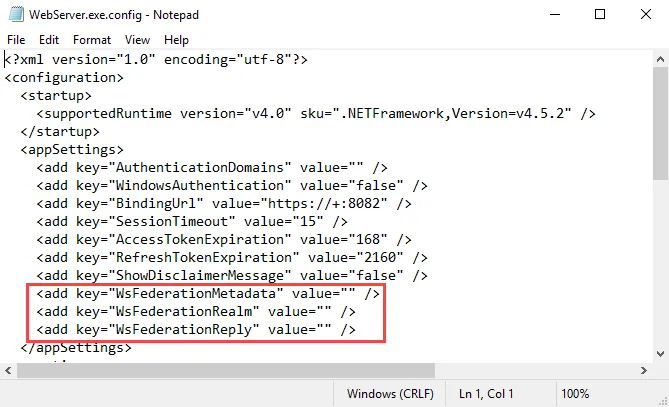
Step 7 – In the WebServer.exe.config file, change the following parameters:
-
WsFederationMetadata– Change the value to the following:<add key="WsFederationMetadata" value="https://ADFSServer.domain.com/FederationMetadata/2007-06/FederationMetadata.xml" /> -
WsFederationRealm– Replace the value text with the URL entered for the Relying Party Trust in Step 3:<add key="WsFederationRealm" value="INSERT VALUE HERE" />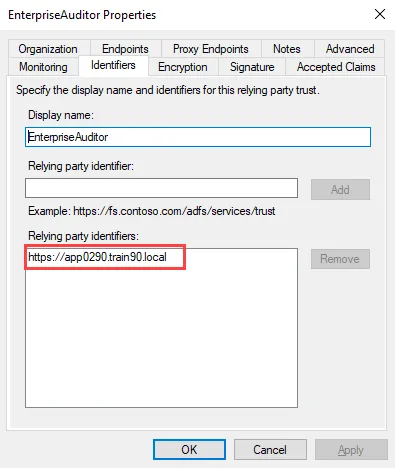
You can retrieve the URL value from the Identifiers tab of the relying party trust properties window.
-
WsFederationReply– Replace the value text with the Trusted URL entered for the Endpoint in Step 4:<add key="WsFederationReply" value="INSERT VALUE HERE" />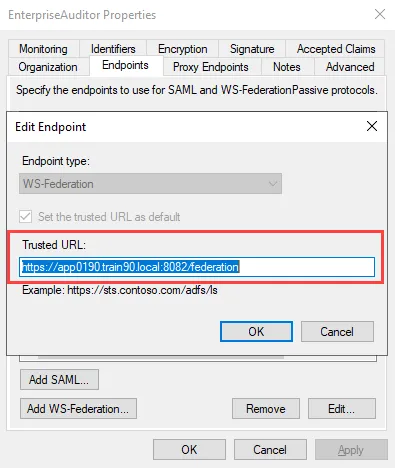
You can obtain the URL required for this parameter from the Endpoints tab of the relying party trust properties window. Select the endpoint and click Edit to open the Edit Endpoint window.
The following is an example of how the parameters should look when configured in the config file:
<add key="WsFederationMetadata" value="https://app0290.train90.local/FederationMetadata/2007-06/FederationMetadata.xml" />
<add key="WsFederationRealm" value="https://app0290.train90.local" />
<add key="WsFederationReply" value="https://app0190.train90.local:8082/federation" />
Step 8 – Save the changes in the WebServer.exe.config file.
Step 9 – Navigate to Services (services.msc). Restart the Access Analyzer Web Server
service.
ADFS authentication is now enabled for Access Analyzer.
Update the Published Reports URL for ADFS
If ADFS does not accept http://localhost:8082/ as an acceptable path, the path will need to be
updated in the Published Reports properties window. Follow the steps to configure the Published
Reports URL for ADFS:
Step 1 – Right-click the Published Reports shortcut on the desktop and select Properties.

Step 2 – Replace the URL with https://SAWebConsole.domain.com:8082.
Step 3 – Click Apply. Exit the window.
The Published Reports URL is now configured for ADFS.