Azure SQL Auditing Configuration
Access Analyzer for Azure SQL relies on the native Azure SQL auditing capabilities to collect and report on user activity, as well as successful or unsuccessful server or database logon activity. Azure SQL Auditing supports three different audit log destinations. At present Access Analyzer only supports storage as the audit log destination. This document describes the necessary permissions required to configure the Access Analyzer Azure SQL Job Group.
Access Analyzerfor Azure SQL enables users to create custom roles which allow for differential access to Access Analyzer.
Within Access Analyzer for Azure SQL, roles are created specifically to target Azure SQL Databases:
- Stand-Alone Databases
- Managed Instances
- Elastic Pools
Role can be largely defined by the scope that particular role possesses. A scope-defined role has access to, or is limited to all resources in a Management Group, Subscription, Resource Group or Resource. For example, if all SQL databases reside within a resource group, then the scope can be restricted to that resource group. If databases reside in different resource groups, then the scope for the custom role should be at the subscription level.
This will enable Access Analyzer to discover all the SQL databases present in the subscription.
Create a StealthAUDIT Custom Role
Follow the steps below to create an Azure SQL custom role at the subscription level.
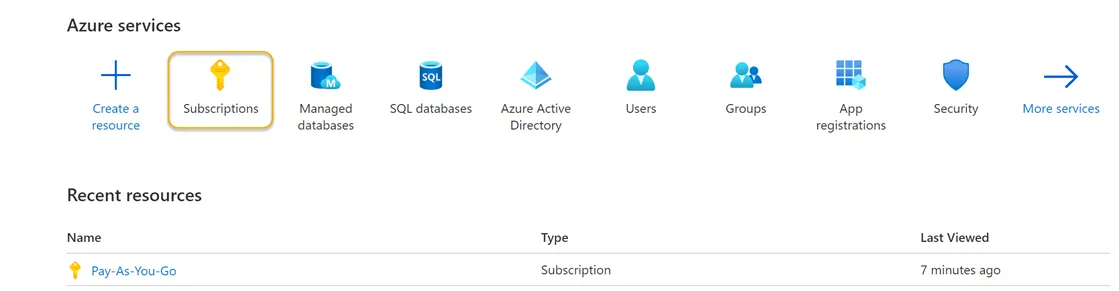
Step 1 – Sign in to Azure. Navigate to the Azure Services section and click Subscriptions. This will navigate you to the Pay-As-You-Go page of the Azure Portal.
Step 2 – Locate and click the Access Control (IAM) view option blade from the available subscriptions in the left-hand menu.

Step 3 – Click Add > Add Custom Role.
Step 4 – Create a JSON file using the subscription ID provided by Microsoft Azure (see the example below) and save it to a local directory.
{
  "properties": {
    "roleName": "StealthAUDIT Azure SQL Role",
    "description": "This is a custom role created for use by StealthAUDIT Azure SQL Job Group for Azure SQL Database discovery and auditing",
    "assignableScopes": ["/subscriptions/<Your Subscription ID goes here>"],
    "permissions": [
      {
        "actions": [
          "Microsoft.Authorization/*/read",
          "Microsoft.Network/virtualNetworks/subnets/joinViaServiceEndpoint/action",
          "Microsoft.Sql/locations/administratorAzureAsyncOperation/read",
          "Microsoft.Sql/managedInstances/databases/currentSensitivityLabels/*",
          "Microsoft.Sql/managedInstances/databases/recommendedSensitivityLabels/*",
          "Microsoft.Sql/managedInstances/databases/schemas/tables/columns/sensitivityLabels/*",
          "Microsoft.Sql/managedInstances/databases/securityAlertPolicies/*",
          "Microsoft.Sql/managedInstances/databases/sensitivityLabels/*",
          "Microsoft.Sql/managedInstances/databases/vulnerabilityAssessments/*",
          "Microsoft.Sql/managedInstances/securityAlertPolicies/*",
          "Microsoft.Sql/managedInstances/databases/transparentDataEncryption/*",
          "Microsoft.Sql/managedInstances/vulnerabilityAssessments/*",
          "Microsoft.Sql/servers/extendedAuditingSettings/read",
          "Microsoft.Sql/servers/databases/auditRecords/read",
          "Microsoft.Sql/servers/databases/currentSensitivityLabels/*",
          "Microsoft.Sql/servers/databases/dataMaskingPolicies/*",
          "Microsoft.Sql/servers/databases/extendedAuditingSettings/read",
          "Microsoft.Sql/servers/databases/read",
          "Microsoft.Sql/servers/databases/recommendedSensitivityLabels/*",
          "Microsoft.Sql/servers/databases/schemas/read",
          "Microsoft.Sql/servers/databases/schemas/tables/columns/read",
          "Microsoft.Sql/servers/databases/schemas/tables/columns/sensitivityLabels/*",
          "Microsoft.Sql/servers/databases/schemas/tables/read",
          "Microsoft.Sql/servers/databases/securityAlertPolicies/*",
          "Microsoft.Sql/servers/databases/securityMetrics/*",
          "Microsoft.Sql/servers/databases/sensitivityLabels/*",
          "Microsoft.Sql/servers/databases/transparentDataEncryption/*",
          "Microsoft.Sql/servers/databases/vulnerabilityAssessments/*",
          "Microsoft.Sql/servers/databases/vulnerabilityAssessmentScans/*",
          "Microsoft.Sql/servers/databases/vulnerabilityAssessmentSettings/*",
          "Microsoft.Sql/servers/devOpsAuditingSettings/*",
          "Microsoft.Sql/servers/firewallRules/*",
          "Microsoft.Sql/servers/read",
          "Microsoft.Sql/servers/securityAlertPolicies/*",
          "Microsoft.Sql/servers/vulnerabilityAssessments/*",
          "Microsoft.Sql/servers/azureADOnlyAuthentications/*",
          "Microsoft.Sql/managedInstances/read",
          "Microsoft.Sql/managedInstances/azureADOnlyAuthentications/*",
          "Microsoft.Security/sqlVulnerabilityAssessments/*",
          "Microsoft.Sql/managedInstances/administrators/read",
          "Microsoft.Sql/servers/administrators/read",
          "Microsoft.Storage/storageAccounts/blobServices/containers/read",
          "Microsoft.Sql/servers/auditingSettings/read",
          "Microsoft.Sql/servers/databases/auditingSettings/read"
        ],
        "notActions": [],
        "dataActions": [],
        "notDataActions": []
      }
    ]
  }
}
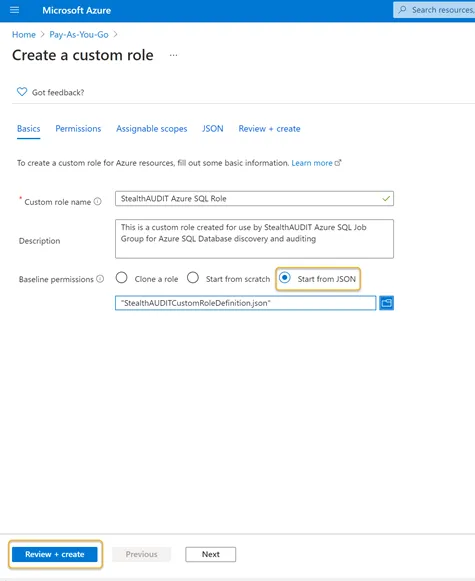
Step 5 – Once created, click Start from JSON in the Azure portal and select the JSON file. Once that file is chosen, the Review + Create button should be enabled.
Click Review + Create to create the role or click Next to review and edit the permissions. Once the JSON file is opened, the Custom Role Name and Description boxes will be populated automatically. The name and description of the custom role can be customized if required in this step.
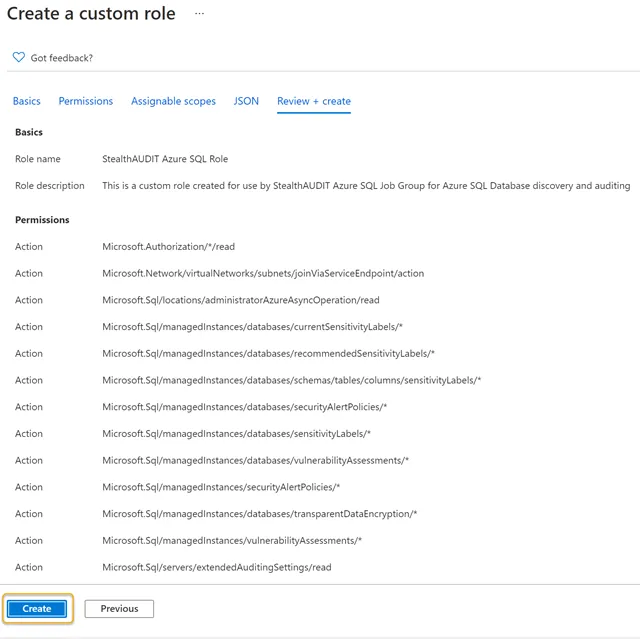
Step 6 – Click Create. This action will save and finalize a custom role entitled Access Analyzer Azure SQL Role.
Step 7 – Click OK on the final screen to complete the custom role creation process. The custom role can now be used to register the Access Analyzer application within the Azure portal.
NOTE: Depending upon the number of resources in the Azure tenancy, it might take some time for the role to be made available to the resources.
Register an Azure SQL Application
Follow the steps below to create an Azure SQL Application Registration in the Azure portal.
Step 1 – In the Azure portal under Azure Services, click the App Registration icon.

Step 2 – Click New Registration in the Register an application blade.
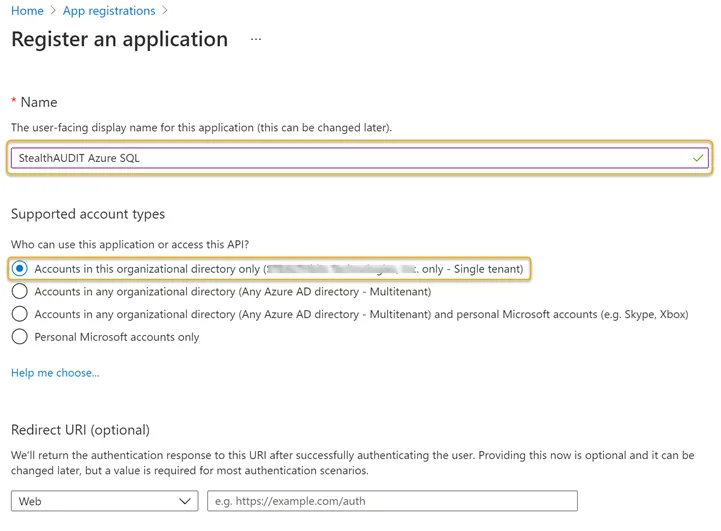
Step 3 – Enter a Name for the application and select an appropriate option from the Supported account types options.
Step 4 – Click Register at the bottom of the page when finished. Once the application has been registered, the App registration overview blade will appear. Take note of the Application (client) ID on this page.
NOTE: The Application (client) ID is required to create a Connection Profile within the Access Analyzer.
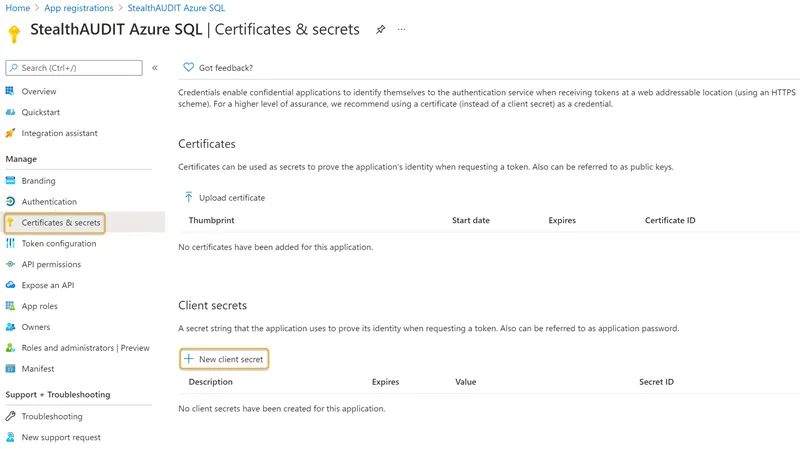
Step 5 – Click the Certificates & secrets blade in the left-hand menu. Click New Client secret.
Step 6 – Enter a unique identifier in the Description field of the Add a client secret window. Select a Expiration time frame from the drop down. Click Add when finished.
Remember, you will have to update the Access Analyzer Connection Profile once the expiration time frame is reached (within 24 months, for example).
Step 7 – Make note of the key under the Value column.
NOTE: The Value key on this paged will be used to create the Access Analyzer connection profile.
Add a Role Assignment
Follow the steps below to add a role assignment to the custom role and newly registered Access Analyzer Azure SQL application.
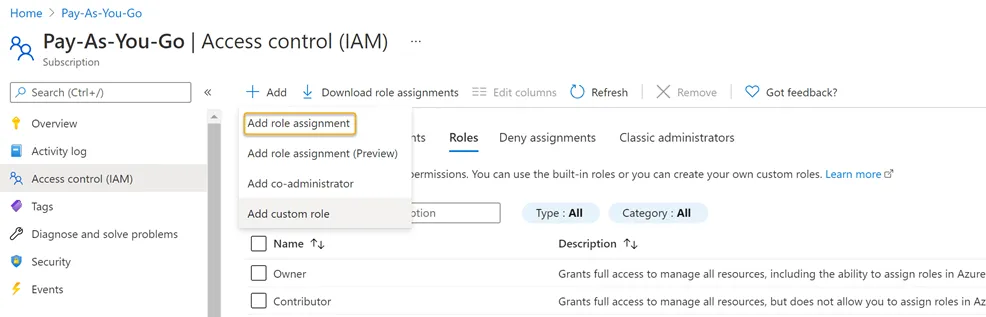
Step 1 – Navigate to the Subscriptions blade and click the Access Control (IAM) option. Click the Add drop down > Click Add role assignment.

Step 2 – Search for and click the recently created custom role from the Role drop down. See Create a StealthAUDIT Custom Role for steps required to create a custom role in the Azure portal.
Step 3 – Search for and select the recently registered Azure SQL application from the Select drop down. See Register an Azure SQL Application for steps required to register an Azure SQL application in the Azure portal. The registered application will be visible in the Selected members window. Click Save when finished.
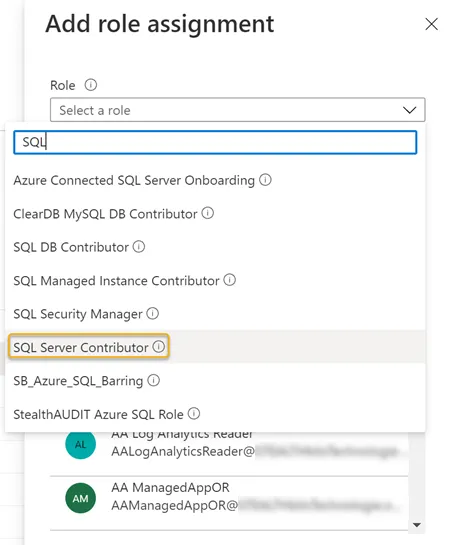
Step 4 – Search for and select the SQL Server Contributor role in the Role drop down.
Step 5 – Search for and select the recently registered Azure SQL application from the Select drop down. See Register an Azure SQL Application for steps required to register an Azure SQL application in the Azure portal. The registered application will be visible in the Selected members window. Click Save when finished.
Step 6 – Navigate to the Subscriptions blade. Click Access Control (IAM).
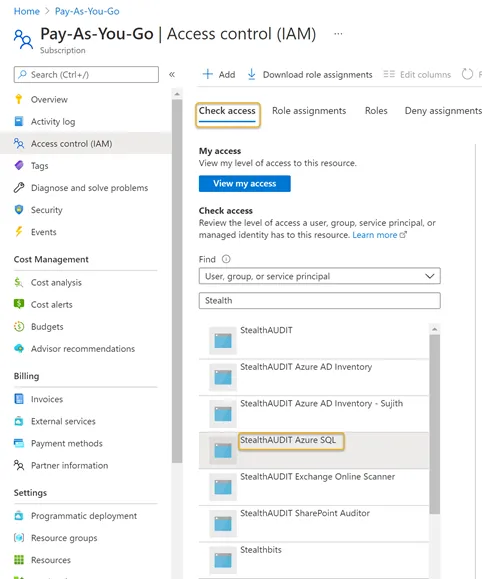
Step 7 – Click the Check access menu tab Search for and select the recently registered Azure SQL application from the drop down. See Register an Azure SQL Application for steps required to register an Azure SQL application in the Azure portal. A preview window will appear on the right-hand side of the window.