NIS Scan Job
The NIS Scan job collects data from the targeted NIS server and then analyzes that data to inventory users, groups, and group membership. This data can then be used by other built-in Access Analyzer solutions.
Query for the NIS Scan Job
The NIS Scan Job uses the NIS Data Collector for the following query:
CAUTION: This query must be modified. See the Configure the NIS Scan Query topic for additional information.
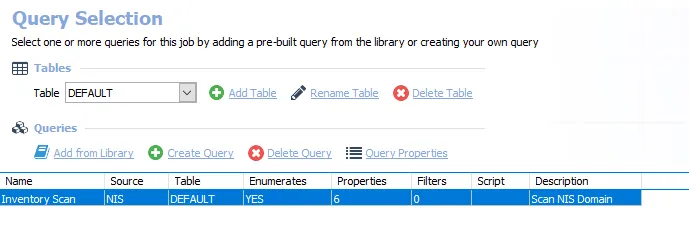
- Inventory Scan – Targets a NIS server to collect inventory data for user and group objects
Configure the NIS Scan Query
The NIS Scan job has been preconfigured to run with the default settings with the category of Scan NIS Users and Groups. However, it is necessary to configure the targeted NIS domain. Follow the steps to set the target NIS domain and any desired customizations.
Step 1 – Navigate to the .NIS Inventory > NIS Scan > Configure node and select Queries.
Step 2 – In the Query Selection view, click Query Properties. The Query Properties window opens.
Step 3 – Select the Data Source tab, and click Configure. The NIS Data Collector Wizard opens.
CAUTION: Do not make changes to other wizard pages as they have been pre-configured for the purpose of this job.
Step 4 – On the NIS Settings page, enter the NIS Domain Name for the targeted NIS domain. This step is required prior to running this query. See the NIS: NIS Settings topic for additional information.
- Optional: Test the connection to the domain using the Sample NIS Server section of the page
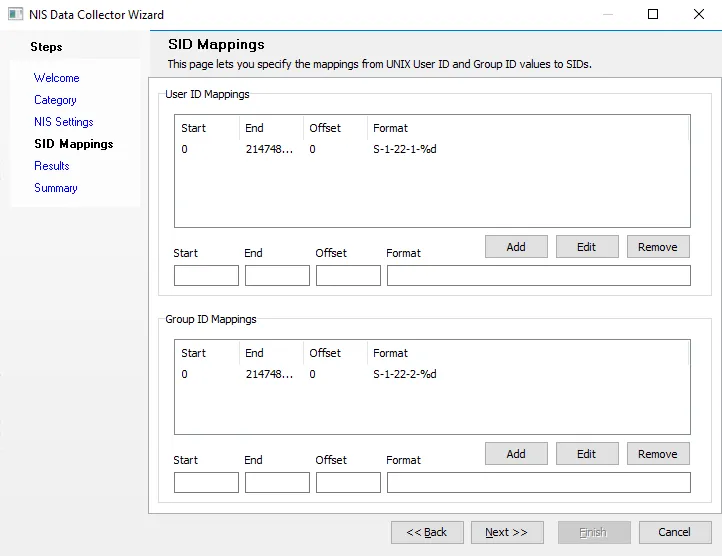
Step 5 – On the SID Mappings page, you can add multiple SID mapping entries. See the NIS: SID Mappings topic for additional information.
Step 6 – Navigate to the Summary page. Click Finish to save any setting modifications or click Cancel if no changes were made. Then click OK to close the Query Properties window.
The NIS Scan Job is now ready to run.
Analysis Tasks for the NIS Scan Job
View the analysis tasks by navigating to the .NIS Inventory > NIS Scan > Configure node and select Analysis.
CAUTION: Most of these analysis tasks are preconfigured and should not be modified or deselected. There is one that is deselected by default, as it is for troubleshooting purposes.
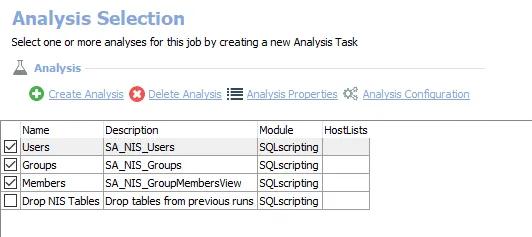
The following analysis tasks are selected by default:
- Users – Enables the SA_NIS_Users table to be accessible under the job’s Results node
- Groups – Enables the SA_NIS_Groups table to be accessible under the job’s Results node
- Members – Enables the SA_NIS_GroupMembersView to be accessible under the job’s Results node
The following analysis task only needs to be selected when there is a need to remove the tables from the database:
CAUTION: This analysis task is for troubleshooting and cleanup only. Data will be deleted from the database. Do not execute this task with the other analysis tasks, as that results in the deletion of data that was just collected.
-
Drop NIS Tables – Removes all tables and views created by this job from SQL Server database
- See the Remove NIS Tables topic for additional information
Remove NIS Tables
Sometimes when troubleshooting a NIS Data Collector issue, it becomes necessary to clear the standard reference tables. Follow these steps.
Step 1 – Navigate to the .NIS Inventory > NIS Scan > Configure node and select Analysis.
Step 2 – Clear all of the other analysis tasks and select only the Drop NIS Tables analysis task.
Step 3 – Use the right-click menu on the analysis data grid to Execute Analyses.
Step 4 – After the analysis task has completed execution, the tables have been cleared from the SQL database.
CAUTION: Do not forget to clear the Drop NIS Tables analysis task and reselect all of the other analysis tasks.
The next time the job is run, the standard reference tables are recreated in the database.