1-SPSEEK_SystemScans Job
This job is responsible for building the Tier2 SPDLP database repositories, which contain information regarding sensitive content that exists within SharePoint.
Queries for the 1-SPSEEK_SystemScans Job
The 1-SPSEEK SystemScans Job uses the SharePoint Access Data Collector for the following query:
The query for the 1-SPSEEK SystemScans Job is:
- SharePoint Scan – Scans SharePoint for sensitive content
Configure the Query for the 1-SPSEEK_SystemScans Job
The 1-SPSEEK_SystemScans Job has been preconfigured to run with the default settings using the SPAA Data Collector category of Scan for Sensitive Content, which is not visible within the SharePoint Access Auditor Data Collector Wizard when opened from within this job.
CAUTION: Users should not change scans in a way that would result in less data being returned on a subsequent scan (i.e. scanning fewer web applications, scanning fewer site collections, or a shallower depth scan). Those resources not included in a subsequent scan are marked as deleted in the Tier 2 database and subsequently removed from the Tier 1 database.
Follow the steps to set any desired customizations.
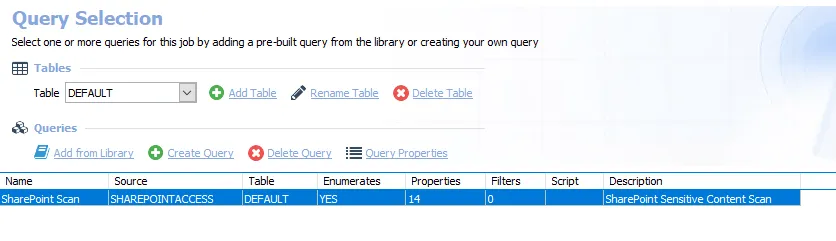
Step 1 – Navigate to the Jobs > SharePoint > 0.Collection > 1-SPSEEK_SystemScans > Configure node and select Queries.
Step 2 – In the Query Selection view, click Query Properties. The Query Properties window displays.
Step 3 – Select the Data Source tab, and click Configure.
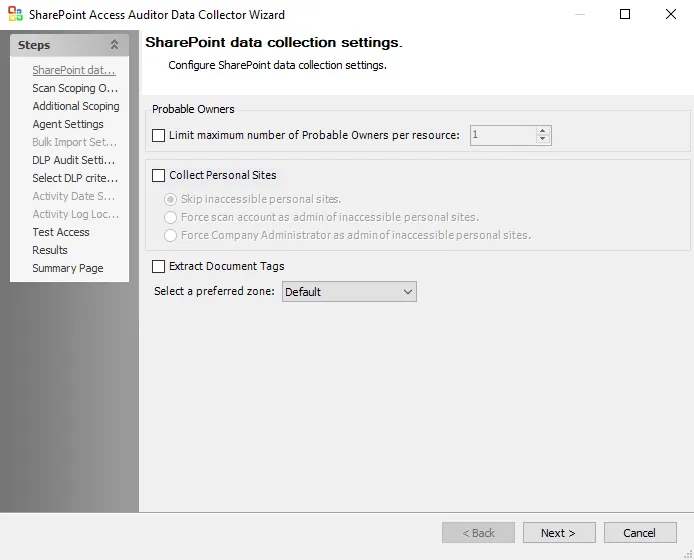
Step 4 – On the SPAA: SharePoint Data Collection Settings page, customize as desired and click Next.
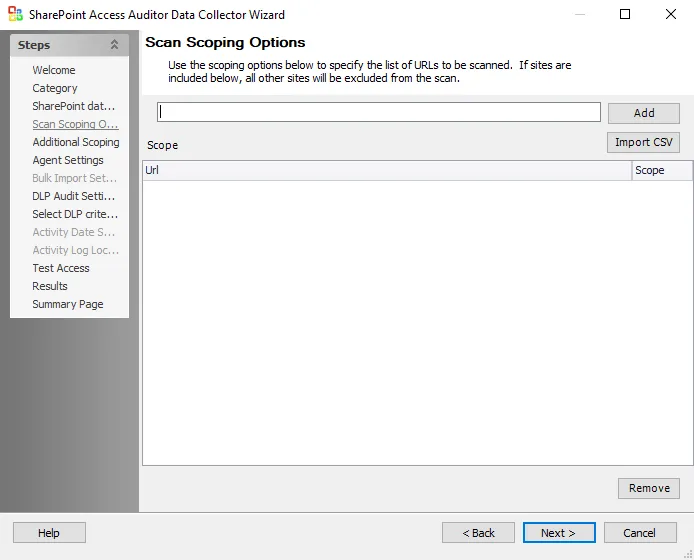
Step 5 – On the SPAA: Scan Scoping Options page, no web applications or site collections have been added. If desired, limit the scope of the scan to specific web applications or site collections. Click Next.
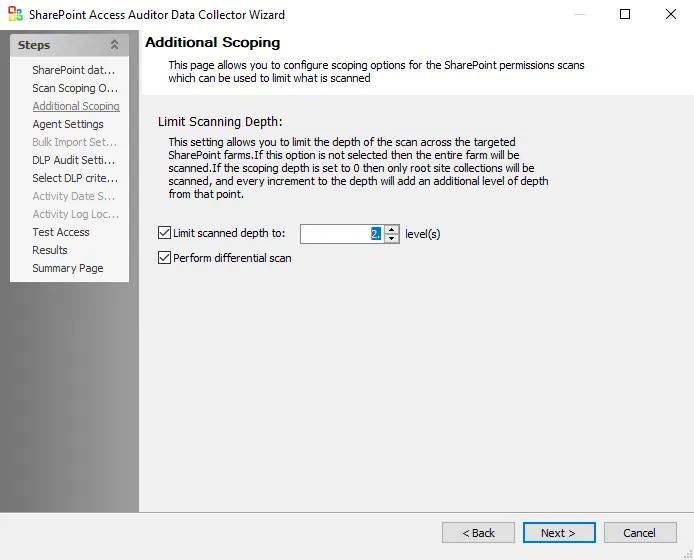
Step 6 – On the SPAA: Additional Scoping page, Limit scanned depth to: is selected with the default set at 2 levels. Customize this setting as desired and click Next.
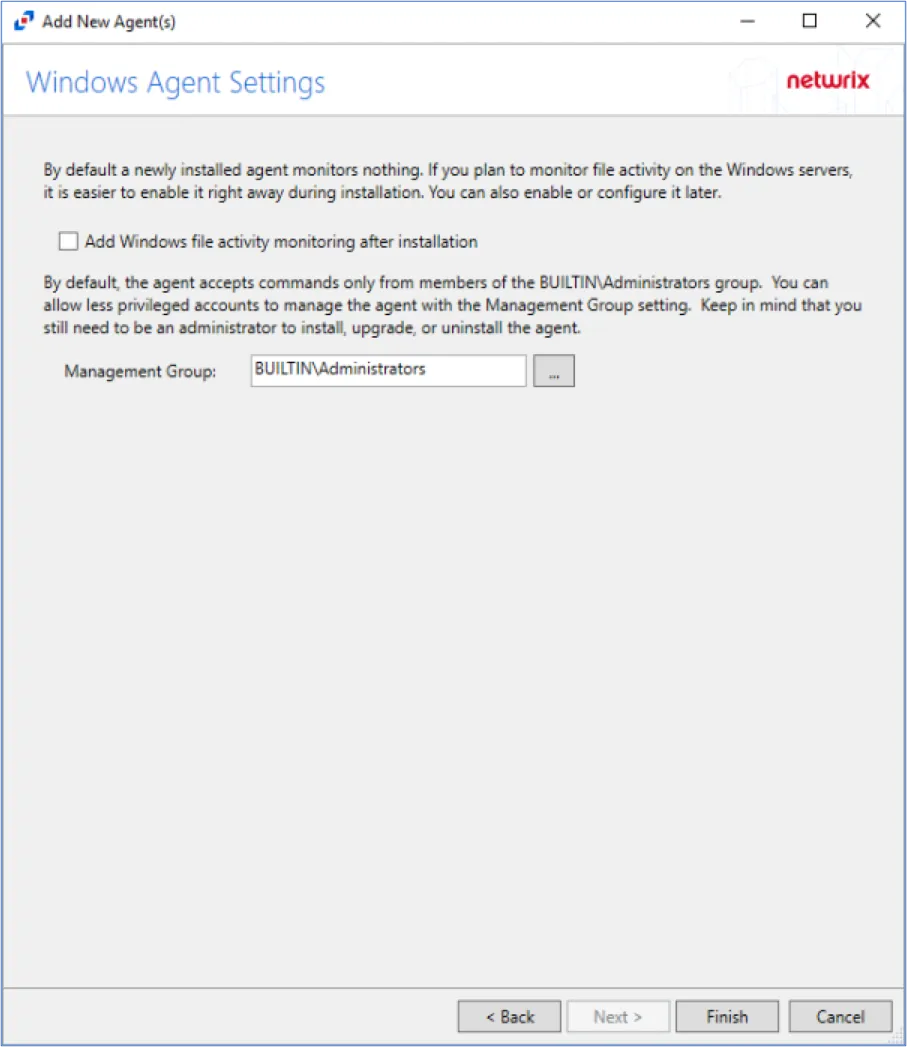
Step 7 – On the SPAA: Agent Settings page, use the default settings unless an agent scan mode is desired. Click Next.
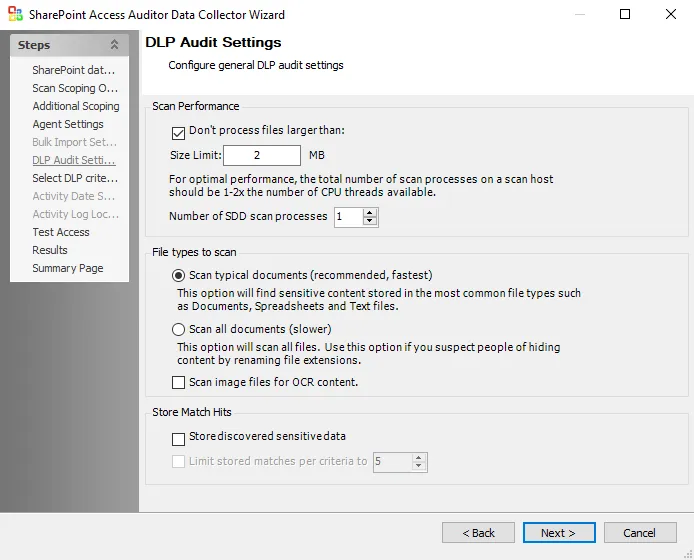
Step 8 – On the SPAA: DLP Audit Settings page, the default setting is to Don’t process files larger than: 2 MB and to Scan typical documents (recommended, fastest). These settings can be customized to adjust for scan time or database size. Click Next.
NOTE: The typical documents for this setting are files with the following extensions: .doc, .docx, .msg, .odt, .pages, .rtf, .wpd, .wps, .abw, .bib, .dotx, .eml, .fb2, .fdx, .gdoc, .lit, .sig, .sty, .wps, .wpt, .yml, .tex, .pdf, .csv, .xlr, .xls, .xlsx, .gsheet, .nb, .numbers, .ods, .qpw, .sdc, .wks, .xlsb, .xltm, .xltx, .aws, .fods, .ots, .rdf, .sxc, .uos, .xlsm, .txt
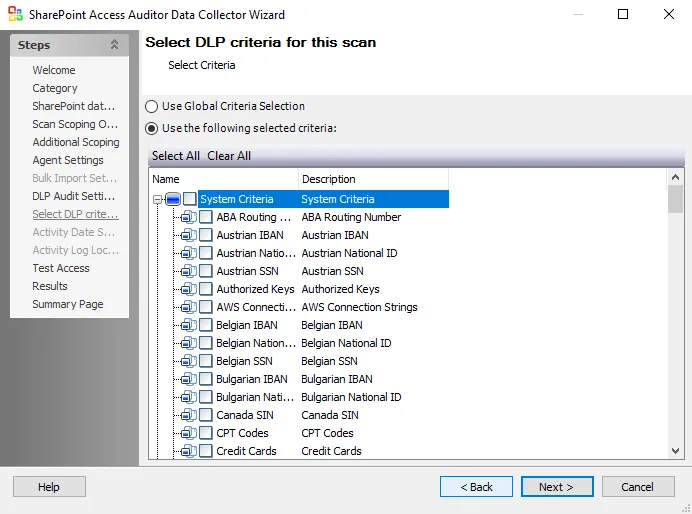
Step 9 – On the SPAA: Select DLP Criteria page, add or remove criteria as desired by either manually selecting criteria or using the Select All and Clear All buttons. Click Next. (Optional) To create custom criteria, see the Sensitive Data Criteria Editor topic for additional information.
CAUTION: Do not configure the options on the Results page.
Step 10 – On the Results page, all Available Properties are selected by default. Click Next.
Step 11 – On the Summary page, click Finish to save any setting modifications or click Cancel if no changes were made. Then click OK to close the Query Properties window.
If changes were made, the 1-SPSEEK_SystemScans Job has now been customized.