Model Changes in the AIC
To model resource access changes for a single trustee or multiple trustees:
Step 1 – Navigate to a desired file system resource and select the Effective Access report in the Reports pane.
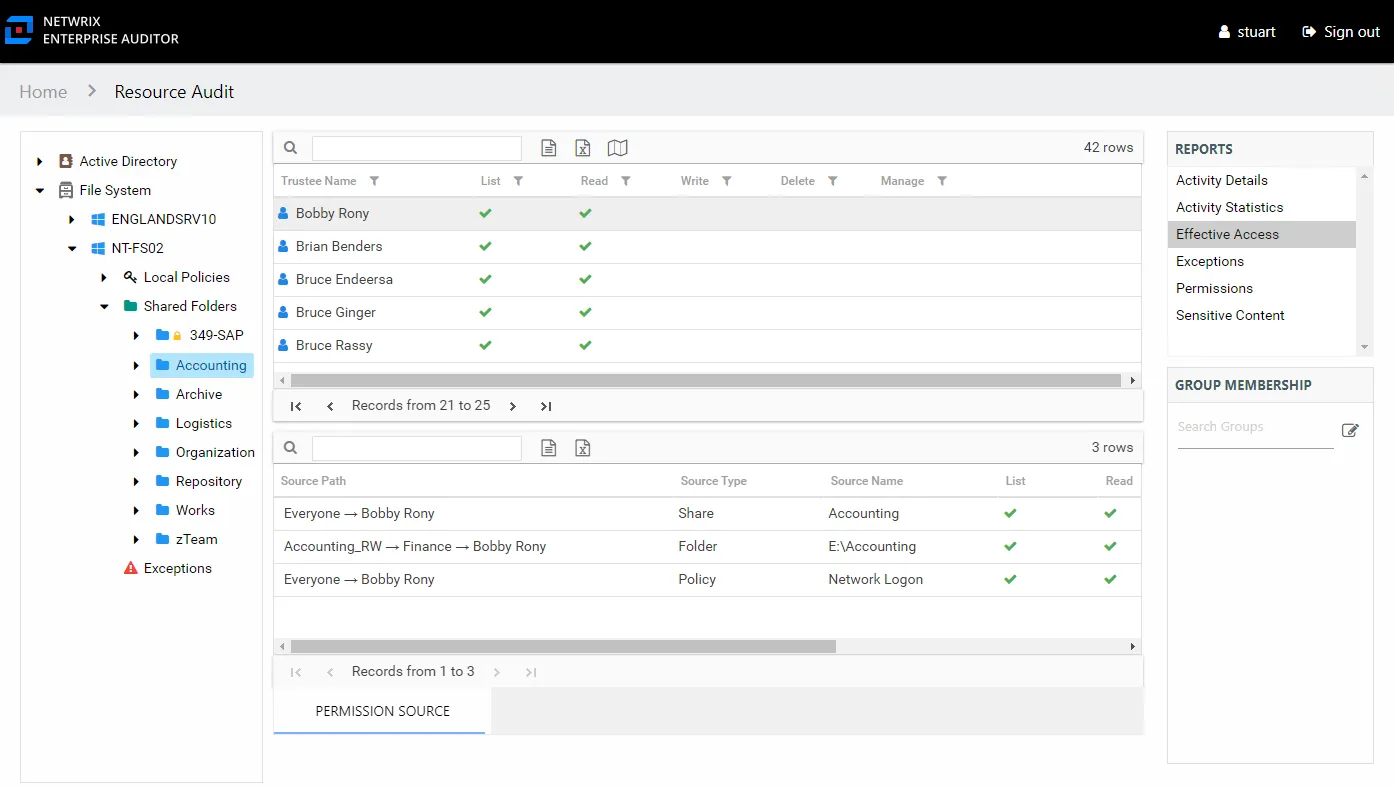
Step 2 – Select a trustee from the top table in the report. The Permission Source table displays the Source Path, or methods of access, to the selected resource. In this example, the trustee has access through three sources on policies, shares, and folders.
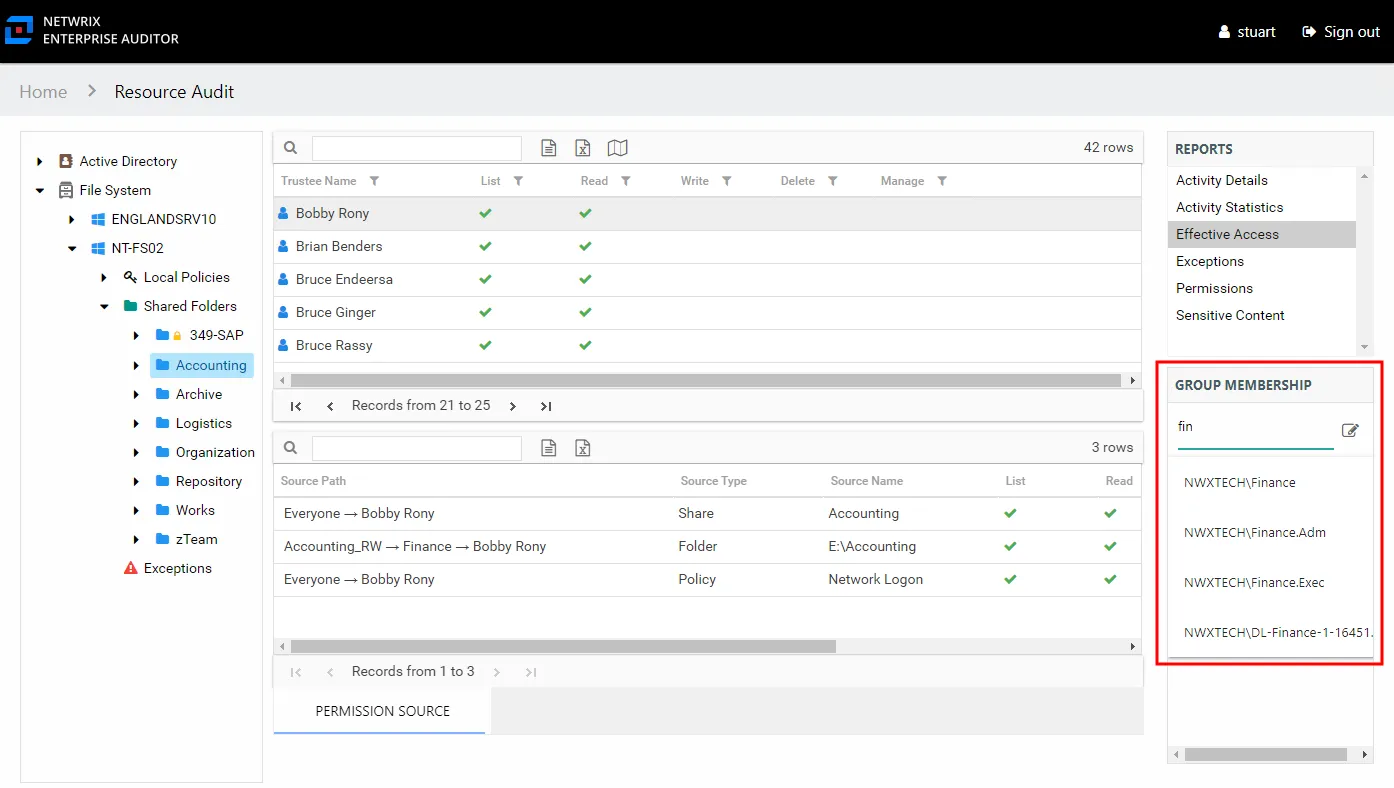
Step 3 – In the Group Membership pane, begin to enter the name of the group that grants the access to be changed. Select it from the list that shows in the dropdown menu. The group’s membership list opens.

Step 4 – Click the Change Group Membership button on the Group Membership pane. The Group Membership Changes window opens.

Step 5 – If this is the first change being modeled, the table is empty. If other changes are being modeled, the table lists them. Click Add to open the Add Membership Change wizard.

Step 6 – The Select Group page shows the selected group. You can search to select a different group. Click Next.
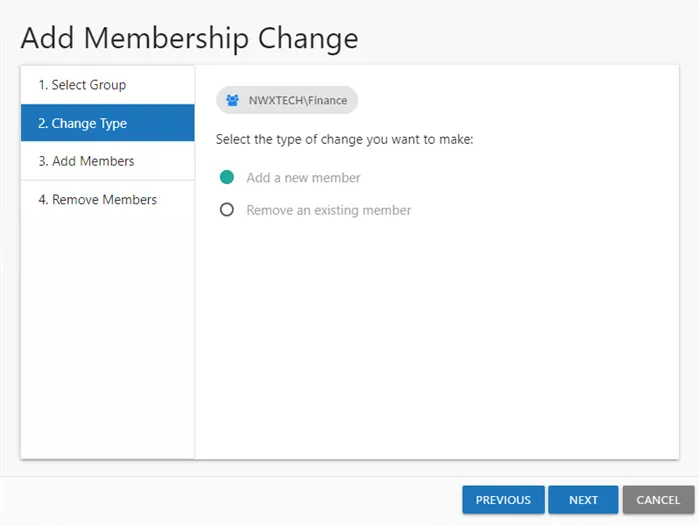
Step 7 – On the Change Type page, indicate the type of change to be modeled:
- Add a new member – Opens the Add Members page. If you select this option, proceed to Step 8.
- Remove an existing member – Opens the Remove Members page. If you select this option, skip to Step 10.
Click Next.
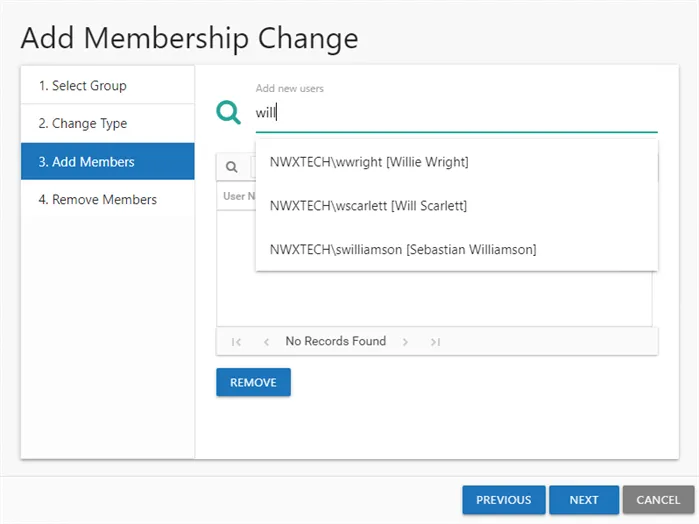
Step 8 – Begin to enter the trustee name in the search box. Available groups and users auto-populate in the dropdown menu. Select the trustee and the new member is added in the user list. Repeat to add multiple members.
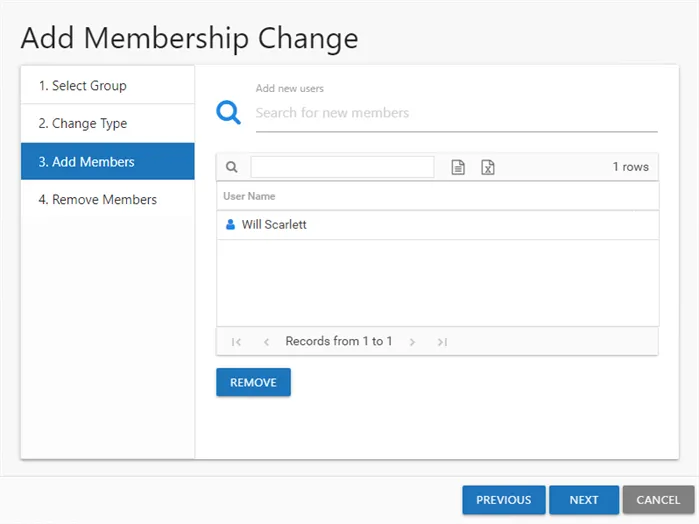
Step 9 – The User Name table displays the members to add. Click Next. The Add Membership Change wizard closes, and the Group Membership Changes window lists the new members. Skip to Step 12.
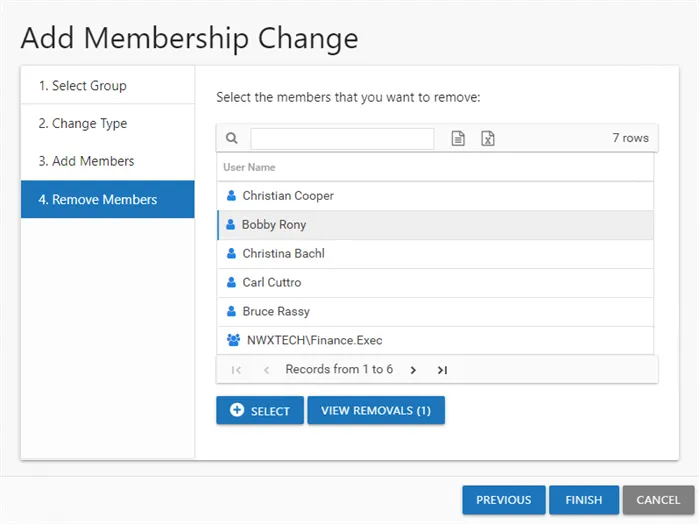
Step 10 – The Remove Members page lists the existing group members. Select the desired members and click Select.
The number on the View Removals button changes to reflect the number of users selected.

Step 11 – (Optional) Click View Removals to view the members selected for removal. To remove a member from this list, click Remove and then click OK.
Step 12 – The User Name table displays the members selected for removal. Click Finish. The Add Membership Change wizard closes, and the Group Membership Changes window lists the members to remove.
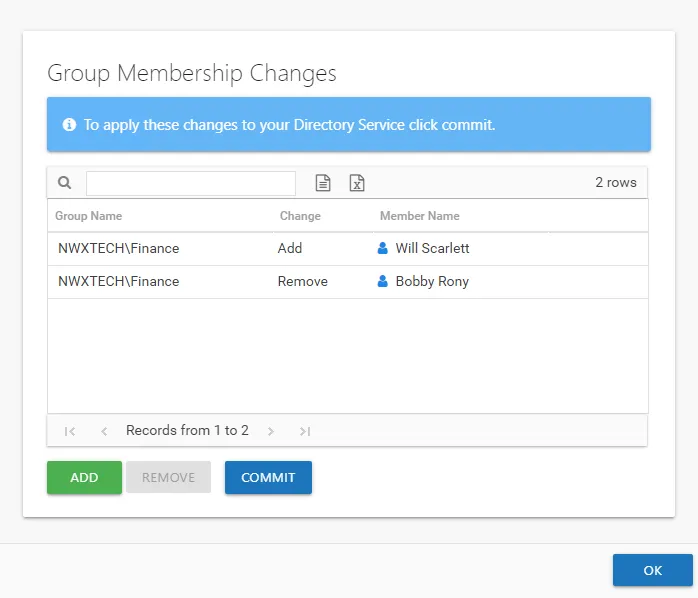
Step 13 – Repeat Steps 5-9 to model adding more members. Repeat Steps 5-7 and 10-11 to model removing more members. When you've set the changes as desired, click OK. The Group Membership Changes window closes.

When the modeled changes impact the effective access for a trustee, the report displays them in the top section of the Effective Access report selected in Step 1. An illustration shows exactly how the modeled changes would impact a trustee’s access to the selected resource. You may need to remove the trustee from multiple groups or add the trustee to another group before you modify access as desired. View the global impact these changes will have on the trustee’s access to all organizational resources in the Modeled Access Changes report at the File System node level. See the Modeled Access Changes Report topic for additional information.