Request Access Wizard
The Request Access wizard is opened with the Request Access button in the Your Access portal.
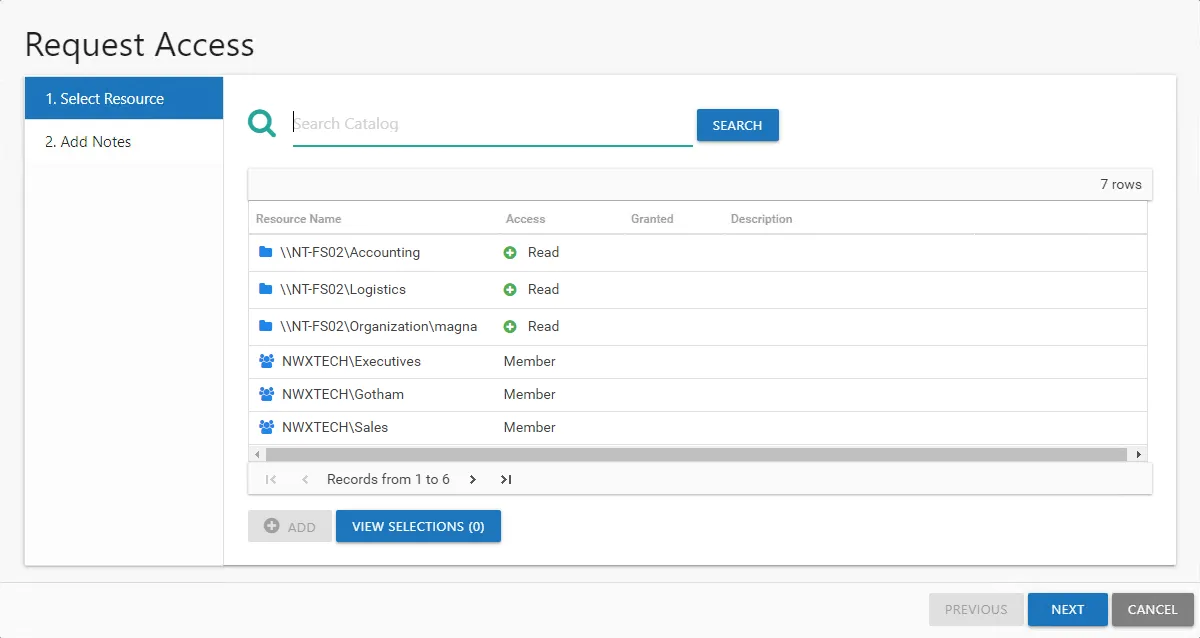
It contains two pages:
-
1. Select Resource — Select the resource or group
noteOnly those resources or groups being managed through the Access Information Center will be available for access requests.
-
2. Add Notes — Enter a note explaining why the request is being made
See the Submit a Request topic for additional information.
Submit a Request
To submit a resource request:
Step 1 – In the Your Access portal, click Request Access. The Request Access wizard opens.
Step 2 – On the Select Resource page, locate the resources you want using the Search Catalog and browse options.
-
Search Catalog – Begin typing the name of the resource:
- For File System, enter a share name or UNC path (starting with
\\) - For SharePoint, enter the site URL (
http://) - For groups and distribution lists, enter the group name. To focus on a particular domain or filter the search field to groups which reside in a particular domain, enter the domain name.
tipRemember, only resources managed by the Access Information Center appear in search results. Contact the Request Administrator if the resource you want doesn't appear.
- For File System, enter a share name or UNC path (starting with
-
Browse option – Navigate through the table to select the resource you want. The table will display the following information:
- Resource Name – The icon indicates the type of resource. The resource name includes its location, such as the UNC path for a file system resource, the URL for SharePoint resource, or Group name (e.g., [Domain][Group]).
-
Access – Level of access possessed. A green plus symbol indicates multiple access levels are available. Possible values include:
-
For file system and SharePoint resources: Full Control, Modify, or Read
-
For groups and distribution lists: Membership
-
Granted – Indicates your current access
-
Description – Resource description as provided by the resource owner
noteWhen there are more than 100 rows of resources available for access request, this page will only load 100 rows of data. You will be able to search for a specific resource that isn't showing in the current view.
-
Step 3 – Select the resource in the table. If there are multiple access levels available, as indicated by the green plus (+) button, click the button to rotate through and select the access level you want. Multiple resources can be selected using either the Ctrl or Shift key with mouse click combinations. Click Add to place a selected resource into your list.

Step 4 – Use the View Selections button to open the Selected Resources window. If an extra resource is in your list, select it and click Remove. Click OK to close the window.
Step 5 – When your selection list is set as desired, click Next.
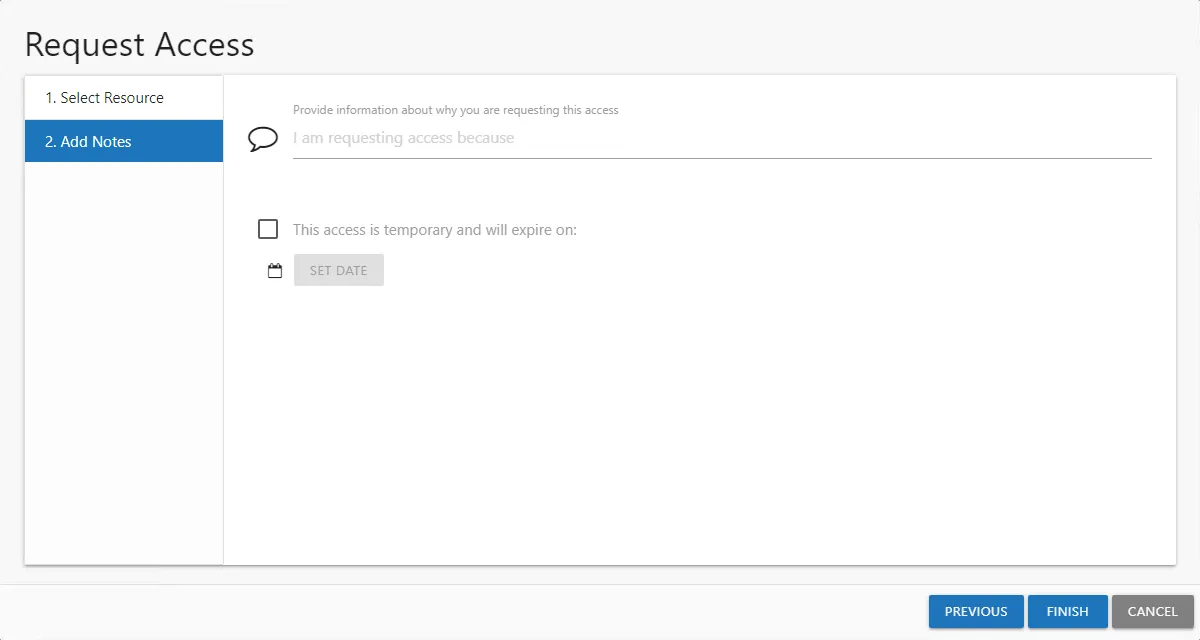
Step 6 – On the Add Notes page, enter the following information:
-
The reason for the request — This is included in the notification sent to the owner. The owner may decline the request if the reason is unknown.
-
Temporary Access — (Optional) If only temporary access is required, select the checkbox, click Set Date and select an expiration date. The owner of the resource can modify this date.
noteWhen a user has temporary access already granted to a resource, and then requests a different type of access to the same resource with a different expiration date, after the new access is granted, the new expiration date supersedes the old date.
Step 7 – Click Next and the Access Information Center starts the action.
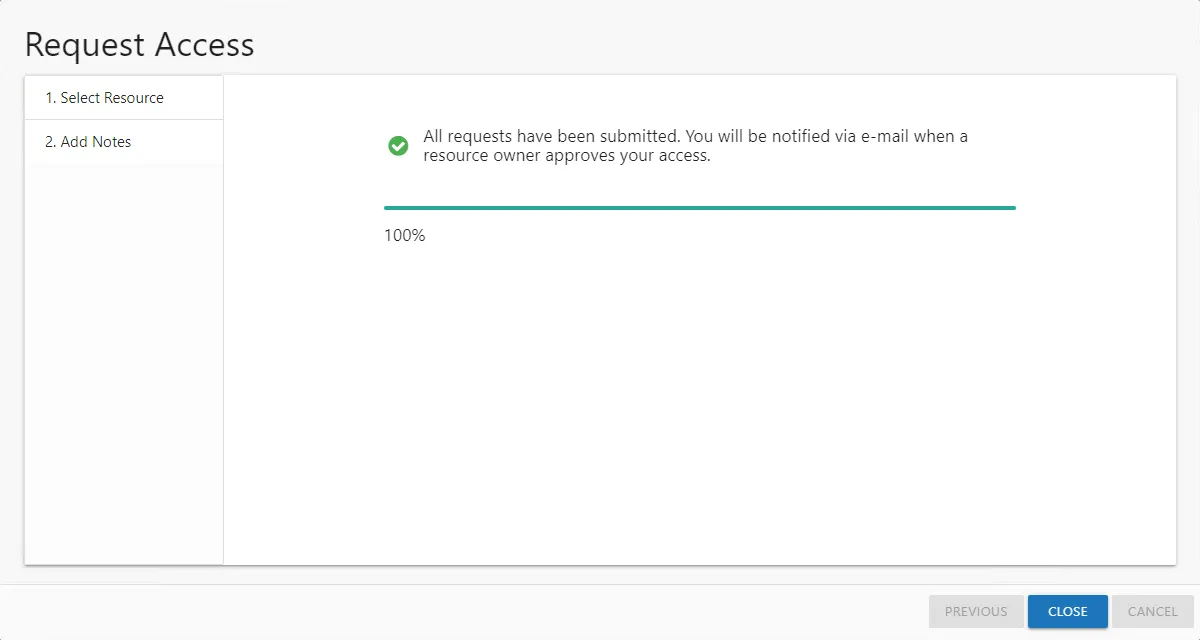
Step 8 – The action status displays on the page. When the action has completed (100%), click Finish. The Request Access wizard closes.
The Access Information Center sends an email to the owner containing the note you supplied. You also receive an email about the pending request. The access request is pending until the owner approves or denies it. You can check on the status of your request on the Request History Page.
When the request has been processed by the owner, you will be notified via email. See the Access Request Updated Email topic for additional information.