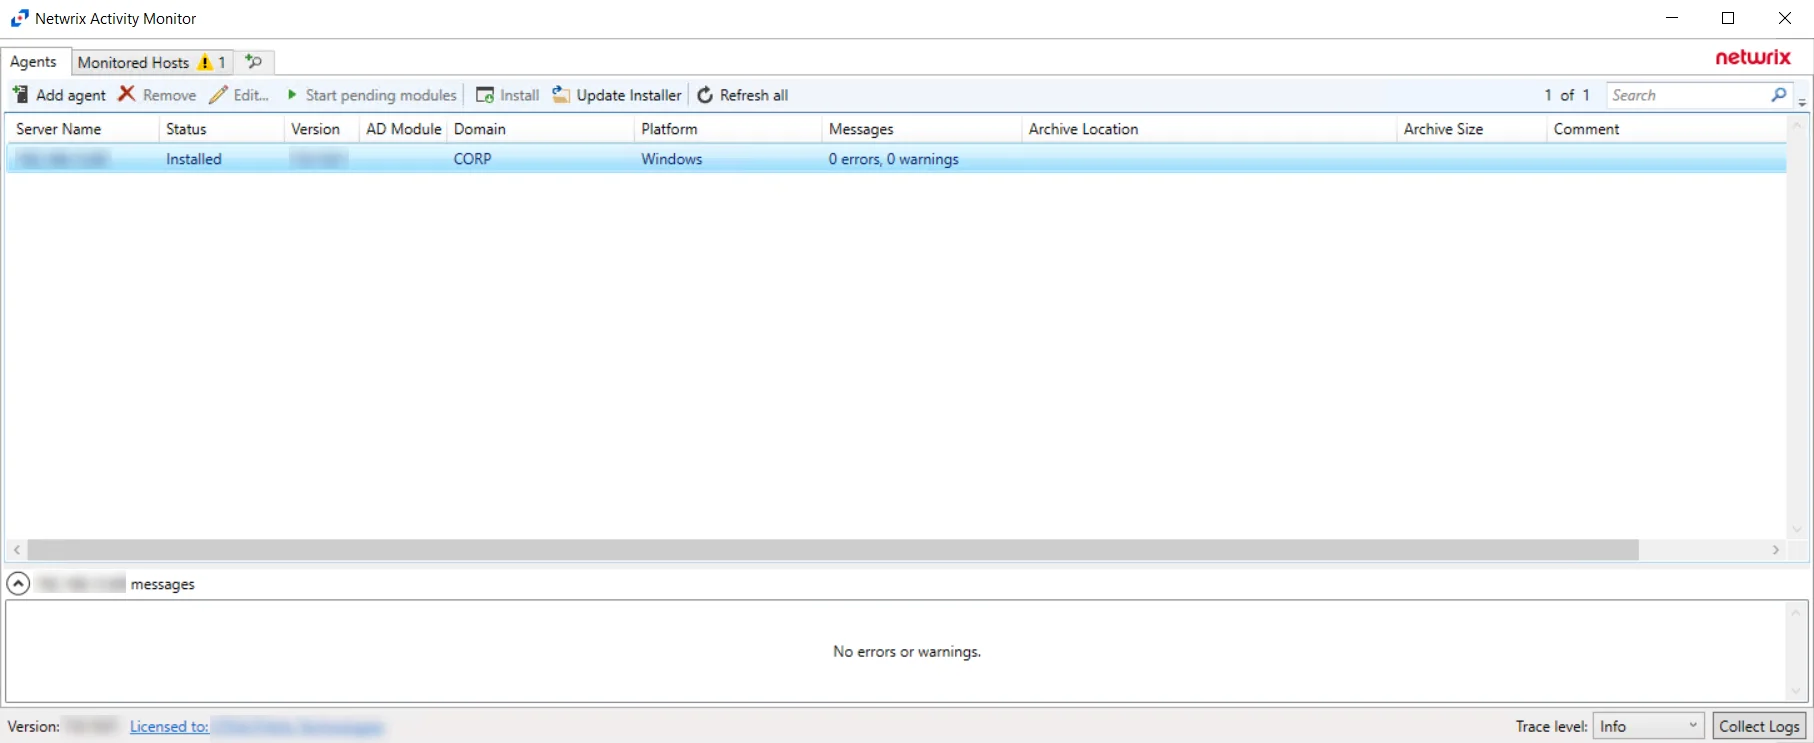
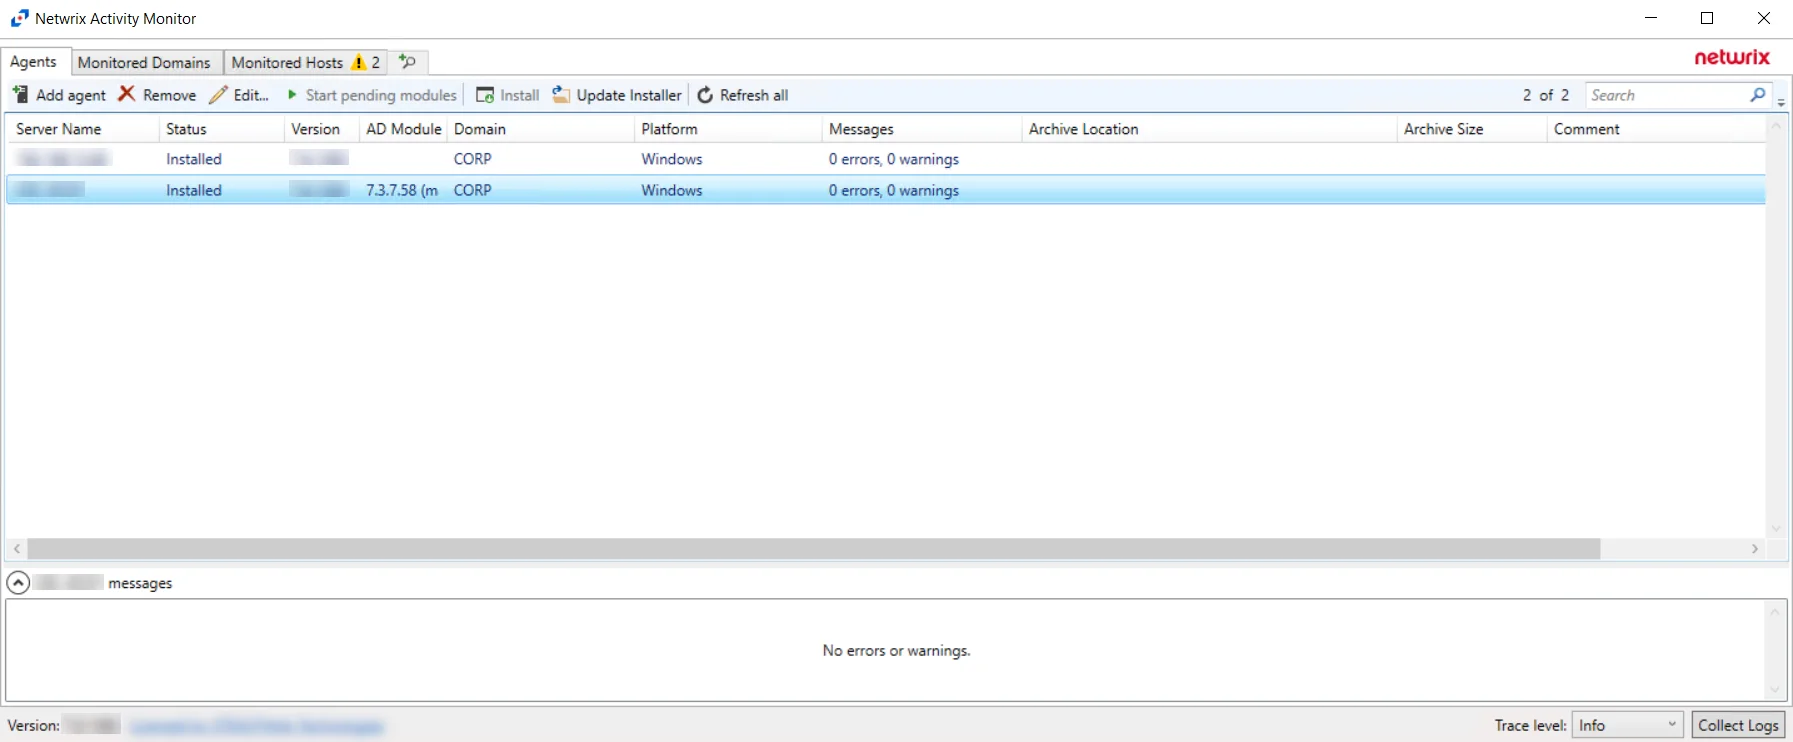
Agents Tab
The Agents tab is used to deploy activity agents and manage settings. This is the only tab available until an agent is installed.

The Agents tab is comprised of a button bar, a table of servers hosting activity agents, and an Agent Messages box. The button bar allows users to take the following actions:
-
Add Agent – Opens the Add New Agent(s) window to deploy the activity/AD agent to a single server or to multiple servers at the same time. The following sections provide additional information:
- Single Activity Agent Deployment
- Multiple Activity Agents Deployment
- Active Directory Agent Deployment
- Linux Agent Deployment
- Remove – Opens the Remove Agents window where users can choose to remove the hosting server from the activity agents table or uninstalling the activity agent from the hosting server before removing the activity agent from the table. See the Remove Agents topic for additional information.
-
Edit – Opens the selected server’s Properties window to modify the server name or credentials. See the Agent Properties Window topic for additional information.
-
Start pending modules – Starts AD agent monitoring modules which were not yet started
- Occasionally a Microsoft Security Bulletin impacting LSASS can interfere with the AD agent instrumentation resulting in LSASS shutting down. The AD agents are configured to monitor for an LSASS process termination shortly after a server reboot. The AD agent can be configured for Safe Mode to prevent the Windows AD events monitoring module from loading if the version of all DLLs SI hooks into have changed since the last restart.
-
Install – Deploy or upgrade an activity agent to the selected host
-
Upgrade – [When Agent Status is Outdated] Replaces outdated activity agent with current version
-
Update Installer – Opens a browser window to select the newer AD agent installer. A confirmation window then opens and identifies the new installer version. See the Update AD Agent Installer topic for additional information.
-
Refresh all – Refresh the status of all activity agents
The table of servers hosting activity agents provides the following information:
-
Server Name – Name or IP Address of the server hosting an activity agent
-
Status – Status of the deployed activity agent(s)
NOTE: If the AD agent has been deployed, a status of “outdated” could apply to either the activity agent or the AD agent installed on the domain controller.
-
Version – Version of the deployed activity agent
-
AD Module – Version of the deployed AD agent
-
Domain – Name or IP Address of the domain
-
Messages – Count of the number of error and warning messages for the selected server
-
Archive Location – If archiving is enabled for the activity agent, displays the archive file path
-
Archive Size – If archiving is enabled for the activity agent, displays the archive size
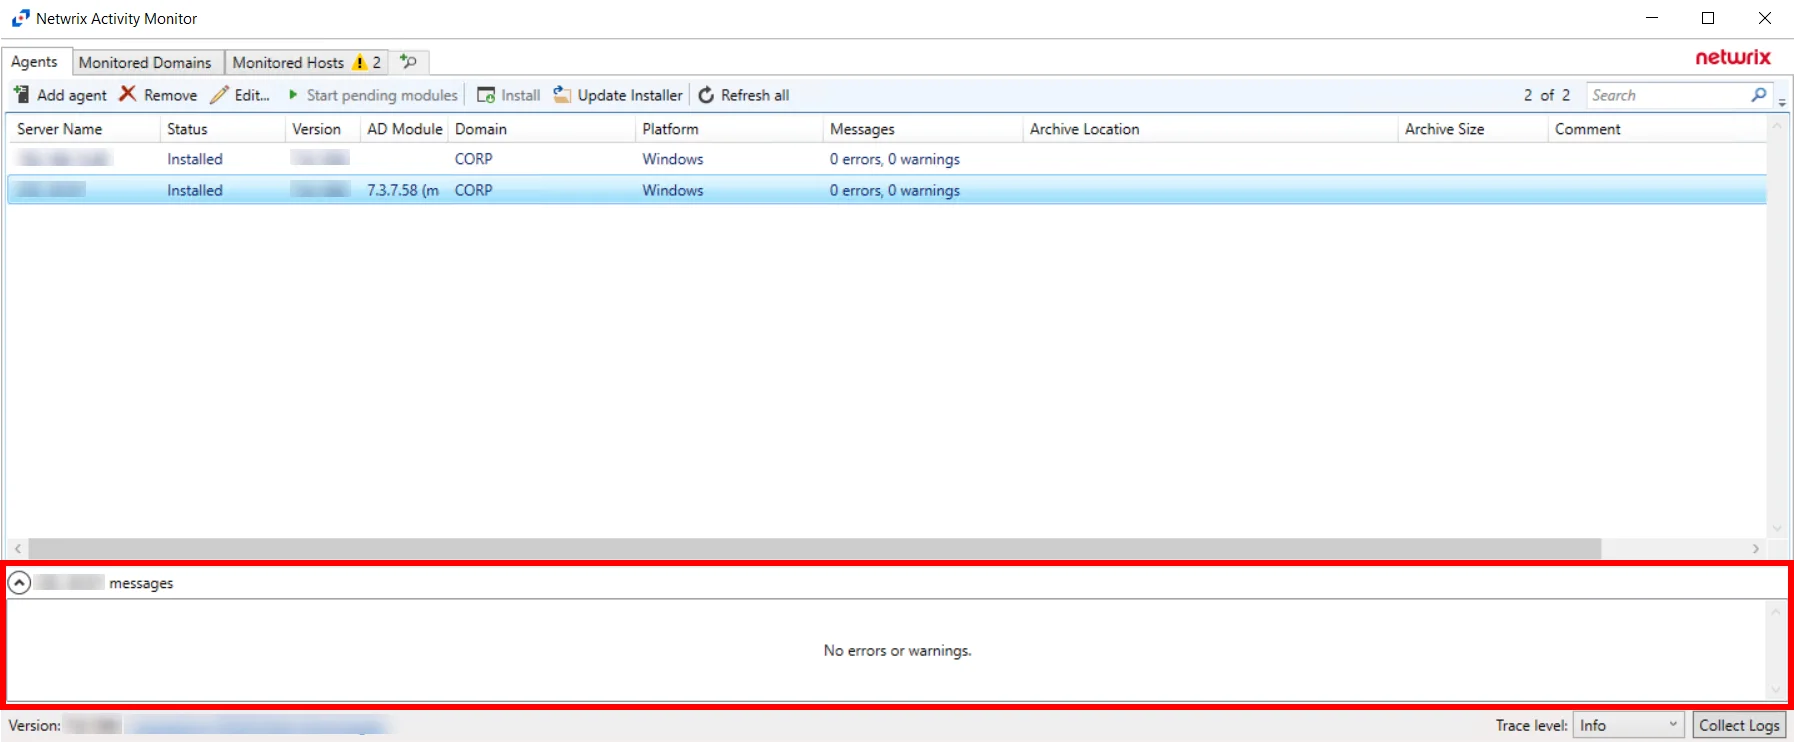
The Agent messages box displays any error or warning messages from the selected activity agent. These messages are related to deployment/installation, communication between the console and the activity/AD agent, and upgrade of an activity/AD agent.
NOTE: Activity agents from Activity Monitor v3.1+ can now be controlled by Activity Monitor v4.0+ Console.
For additional information on how to deploy agents manually, see the Agent Information topic.
Single Activity Agent Deployment
Before deploying the activity agent, ensure all Activity Agent Server Requirements have been met, including those for NAS devices when applicable. Follow the steps to deploy the activity agent to a single Windows server.
NOTE: These steps are specific to deploying activity agents for monitoring supported target environments.
Step 1 – On the Agents tab, click Add agent to open the Add New Agent(s) window.
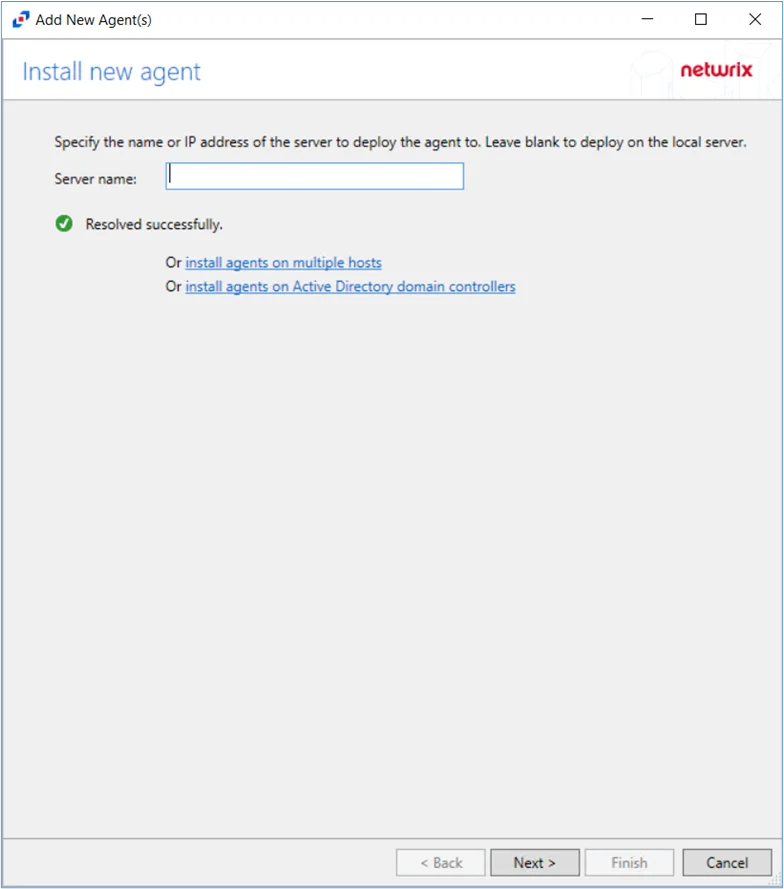
Step 2 – On the Install new agent page, enter the Server name (name or IP Address) to deploy to a single server. Leave the field blank to deploy the agent on the local server. Click Next.
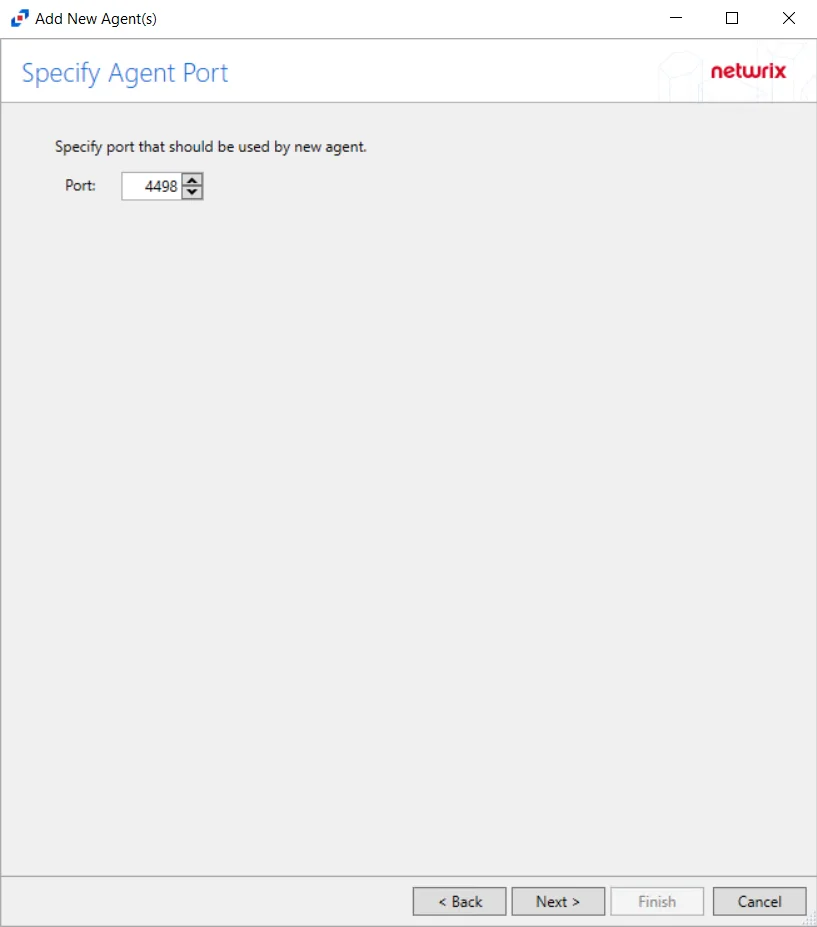
Step 3 – On the Specify Port page, specify the port that should be used by the new agent. The default port is 4498. Click Next.
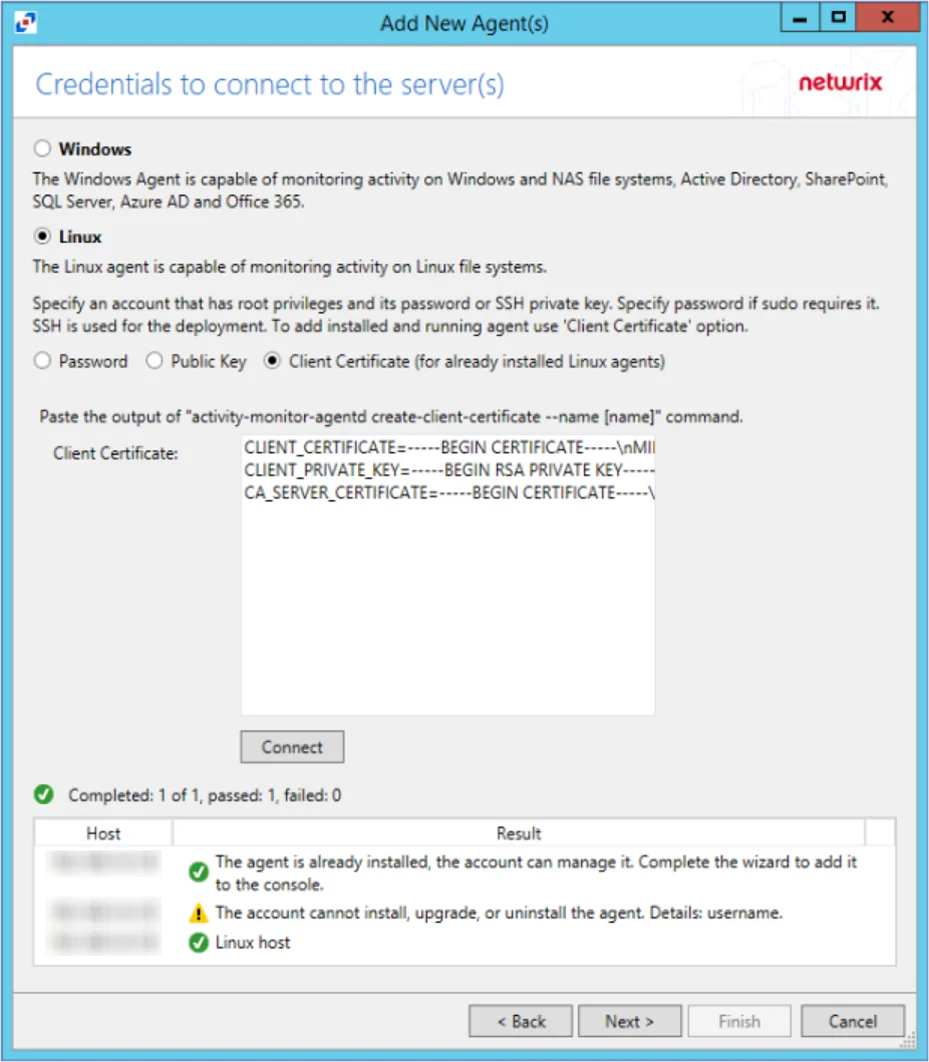
Step 4 – On the Credentials To Connect To The Server(s) page, select ether Windows or Linux file monitoring. Then, enter the User name and Password to connect to the API Server.

Step 5 – Click Connect to test the connection. If the connection is successful, click Next. If the connection is unsuccessful, see the status message that appears for information on the failed connection and correct the error to proceed.
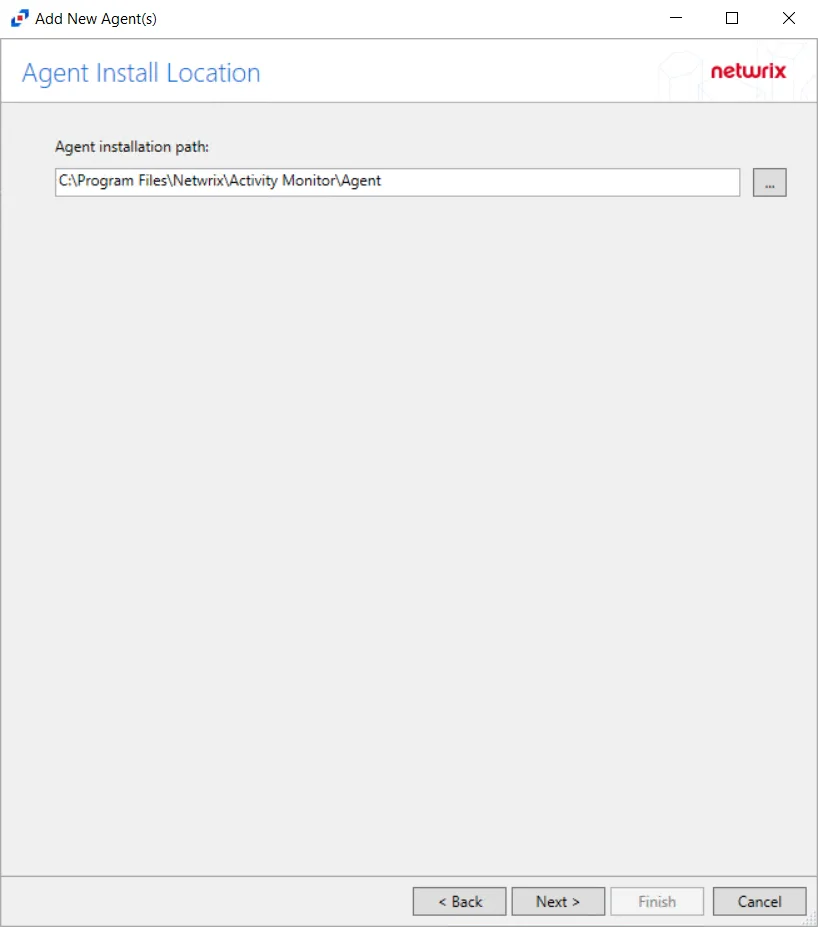
Step 6 – On the Agent Install location page, specify the Agent installation path. The
default path is C:\Program Files\Netwrix\Activity Monitor\Agent. Click Next.
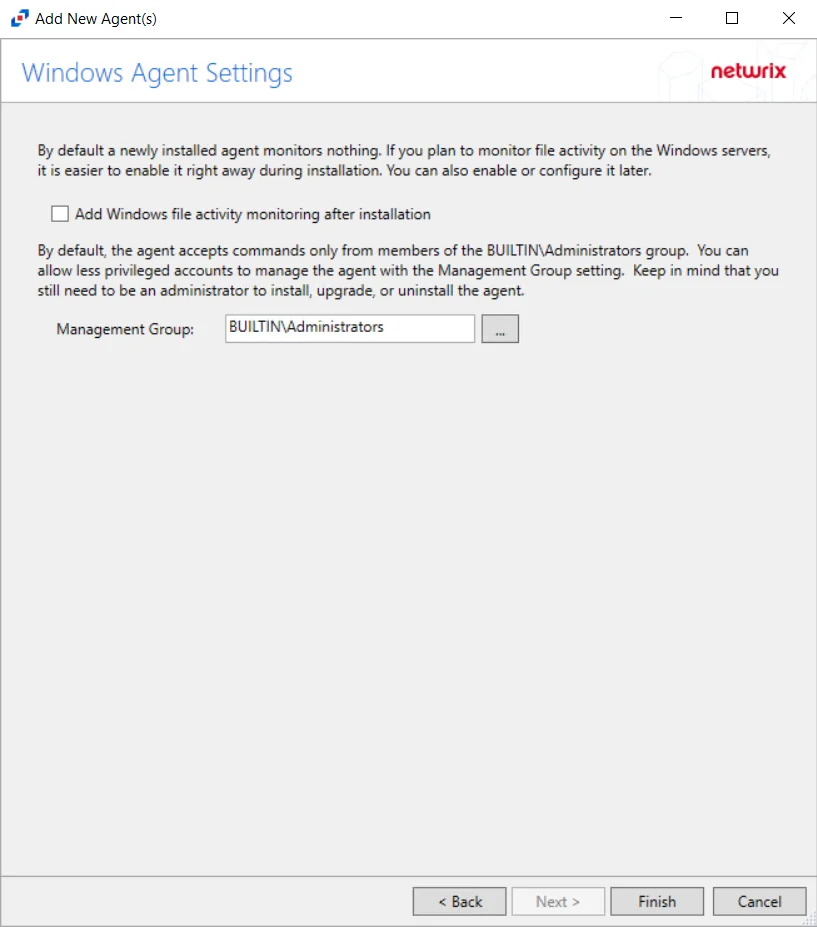
Step 7 – On the Windows Agent Settings window, configure the following options:
- Windows Activity Monitoring — Check the Add Windows file activity monitoring after installation checkbox to enable monitoring all file system activity on the targeted Windows server after installation. Alternatively, the Windows monitoring can be enabled later on the Monitored Hosts page.
- Management Group — By default, the agent only accepts commands from members from the BUILTIN\Administrators group. Less privileged accounts can be used to manage the agent with the Management group setting. Keep in mind that an administrator account must be used to install, upgrade or uninstall an agent. The value must be a domain or local security group entered in the DOMAIN\groupname format.
Step 8 – Click Finish. The Add New Agent(s) window closes, and the activity agent is deployed to and installed on the target host.
During the installation process of the agent, the status will display Installing. If there are any errors, the Activity Monitor stops the installation and lists the errors in the Agent messages box.
When the activity agent installation is complete, the status changes to Installed and the activity agent version populates. The next step is to add hosts to be monitored. See the Monitored Hosts Tab topic for additional information.
Multiple Activity Agents Deployment
Before deploying the activity agent, ensure all Prerequisites are met, including those for NAS devices when applicable. Follow the steps to deploy the activity agent to a multiple Windows servers. See the Activity Agent Server Requirements topic for additional information.
NOTE: These steps are specific to deploying activity agents for monitoring supported target environments.
Step 1 – On the Agents tab, click Add agent to open the Add New Agent(s) window.
Step 2 – On the Install new agent page, click the install agents on multiple hosts link to deploy activity agents to multiple hosts.
Step 3 – On the Specify Agent Port page, specify the port that should be used by the new agent. The default port is 4498. Click Next.
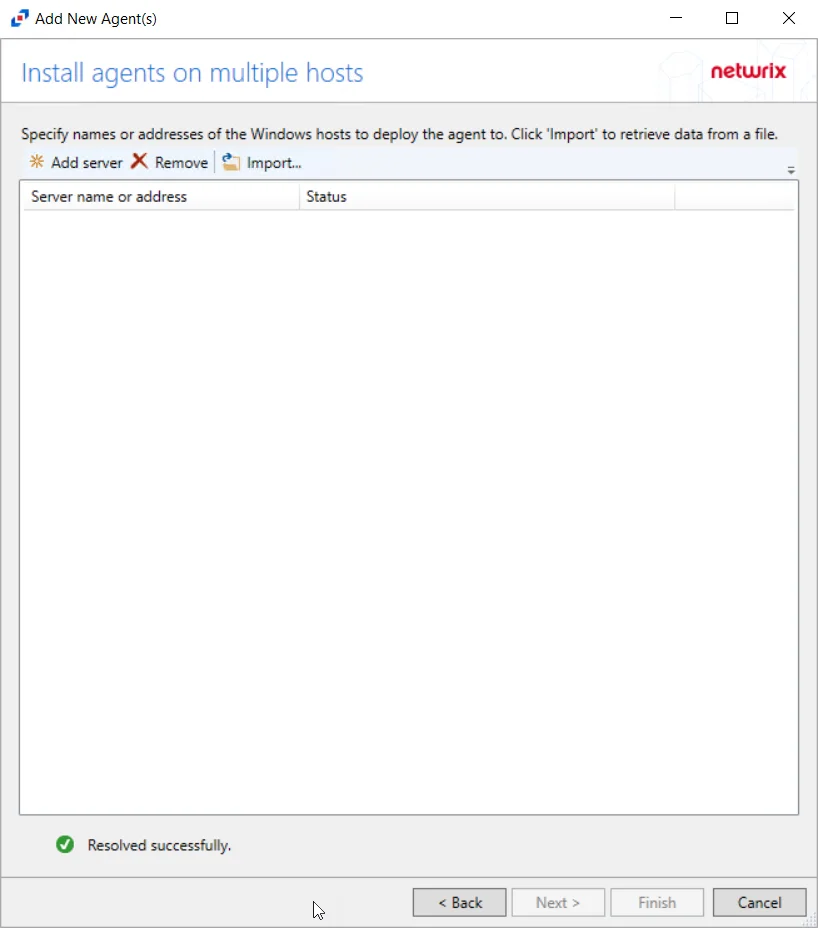
Step 4 – Windows or Linux hosts can be entered as either a name or an IP Address. The options are:
- Add server — Opens the Host name or IP address window. See the Manual Entry topic for additional information.
- Remove — Removes an entered host name or IP address from the table
- Import — Opens the Import from file window. See the Import a List topic for additional information.
There are two methods for adding multiple hosts are:
Manual Entry
Use Manual Entry to manually type the host names or IP addresses of the servers to be monitored.

For Manual Entry, the options are:
- Click Add server. The Host name or IP Address window opens.
- Enter the servers, separating the hosts with spaces, commas, or semicolons.
- (Optional) A multi-line list can be pasted into this textbox. When the servers have been entered, click OK. The Host name or IP address window closes and the identified servers are in the list.
Import a List
Use Import a List to import host names or IP addresses from an external source.
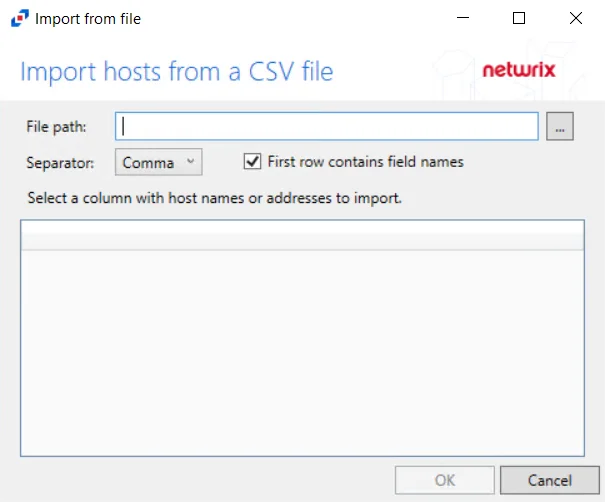
For Import a List:
- Click Import. The Import from file window opens.
- Enter the file path, or use the ellipsis (…) to navigate to the file.
- Identify the Separator used on the file (Comma, Semicolon, Tab, or Space). This is set to Comma for CSV format by default.
- If the first row of the file contains column headers, then check the First row contains field names box. If there are no column headers, uncheck this box.
- A preview of the selected file displays. Select the column with the host names.
- Click OK. The Import from file window closes and the identified servers are in the list.
The Activity Monitor will monitor the Host Names or IP Address added to the Install Agents on Multiple Hosts table. Click Next.
Step 5 – On the Credentials To Connect To The Server(s) page, connect to the server using either a User name and password, a Public Key, or a Client Certificate.
The options for connecting with a Password are:
- User name
- Password
The options for connecting with a Public Key are:
-
User name
-
Private Key
-
Use the Public Key option to install an agent using SSH
To connect with a Client Certificate, select the Client Certificate (for already installed agents) option. Copy the following command into a command prompt:
activity-monitor-agentd --create-client-certificate --client-name [NAME]
Using an existing Client Certificate installs a new agent without using SSH.
Step 6 – Click Connect to test the connection. If the connection is successful, click Next.
The credentials are tested against each server added on the Install Agent(s) on Multiple Hosts page. If the connection is unsuccessful, see the status message that appears for information on the failed connection. Activity agents are only successfully deployed for servers where the test status returns Ok. Failed deployments can be retried through the Connection tab of the agent’s Properties window. When one or more of the connections are successful, click Next.
Step 7 – On the Agent Install Location page, browse to theselect the agent installation path.
The default path is C:\Program Files\Netwrix\Activity Monitor\Agent. Click Next.
Step 8 – On the Windows Agent Settings window, configure the following options:
- Add Windows file activity monitoring after installation — Check the Add Windows file activity monitoring after installation checkbox to enable monitoring all file system activity on the targeted Windows server after installation.
- Management Group — By default, the agent only accepts commands from members from the BUILTIN\Administrators group. Less privileged accounts can be used to manage the agent with the Management group setting. Keep in mind that an administrator account must be used to install, upgrade, or uninstall an agent.
Step 9 – Click Finish. The Add New Agent(s) window closes, and the activity agent is deployed to and installed on the target host.
During the installation process, the status will be Installing. If there are any errors, the Activity Monitor stops the installation for that host and lists the errors in the Agent messages box.
When the activity agent installation completes, the status changes to Installed and the activity agent version populates. The next step is to add hosts to be monitored. See the Monitored Hosts Tab topic for additional information.
Active Directory Agent Deployment
Before deploying the Active Directory (AD) agent, ensure all AD Agent Server Requirements have been met. To effectively monitor Active Directory, it is necessary to deploy an AD agent to every domain controller, including the read only domain controllers. However, it is possible to deploy the agents in batches. Follow the steps to deploy the AD agents to the domain controllers in the target domain.
NOTE: These steps are specific to deploying AD agents for monitoring Active Directory.
Step 1 – On the Agents tab, click Add agent to open the Add New Agent(s) window.
Step 2 – Click on the Install agents on Active Directory domain controllers link to deploy activity agents to multiple domain controllers.
NOTE: The Activity Monitor will validate the entered Host Name or IP Address entered in the Server Name text box.
Step 3 – Specify the port that should be used by the new agent(s).
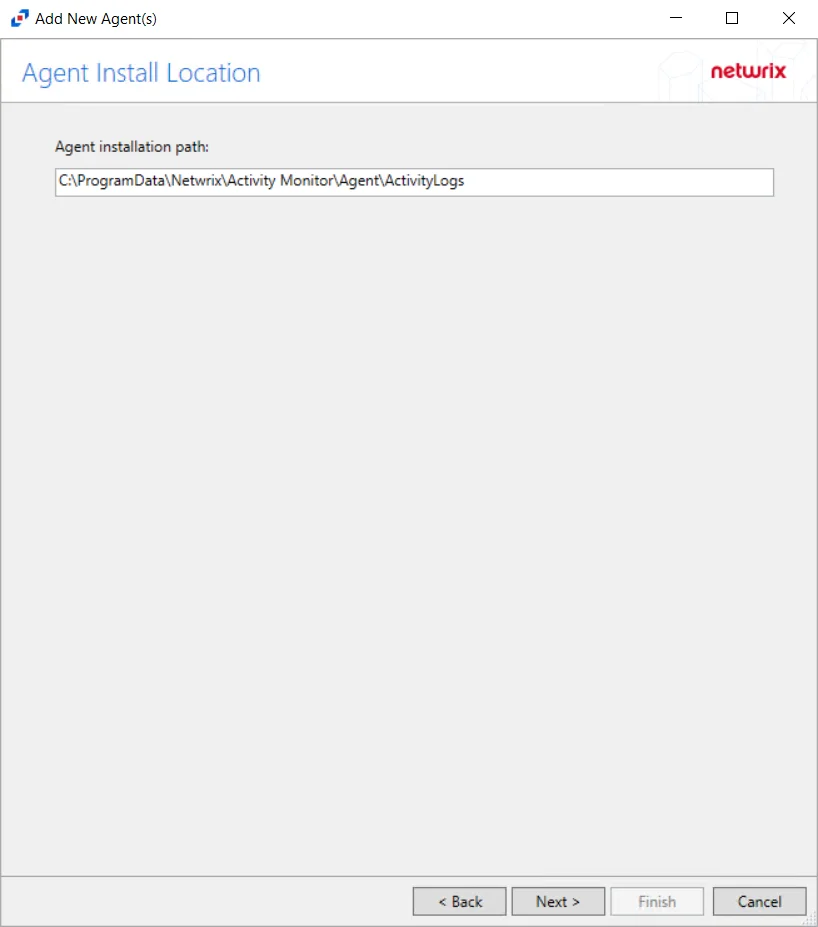
Step 4 – Select the agent installation path.
RECOMMENDED: Use the default installation path.
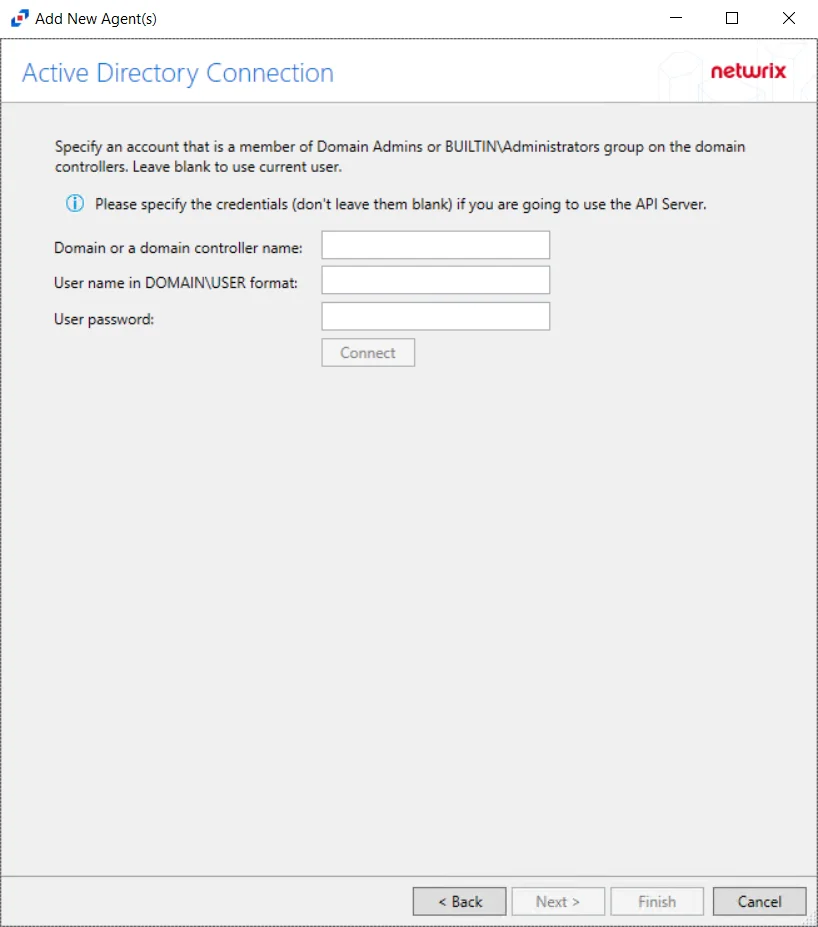
Step 5 – On the Active Directory Connection page, enter the domain, and specify an account that is a member of BUILTIN\Administrators group on the domain. Then, click Connect.
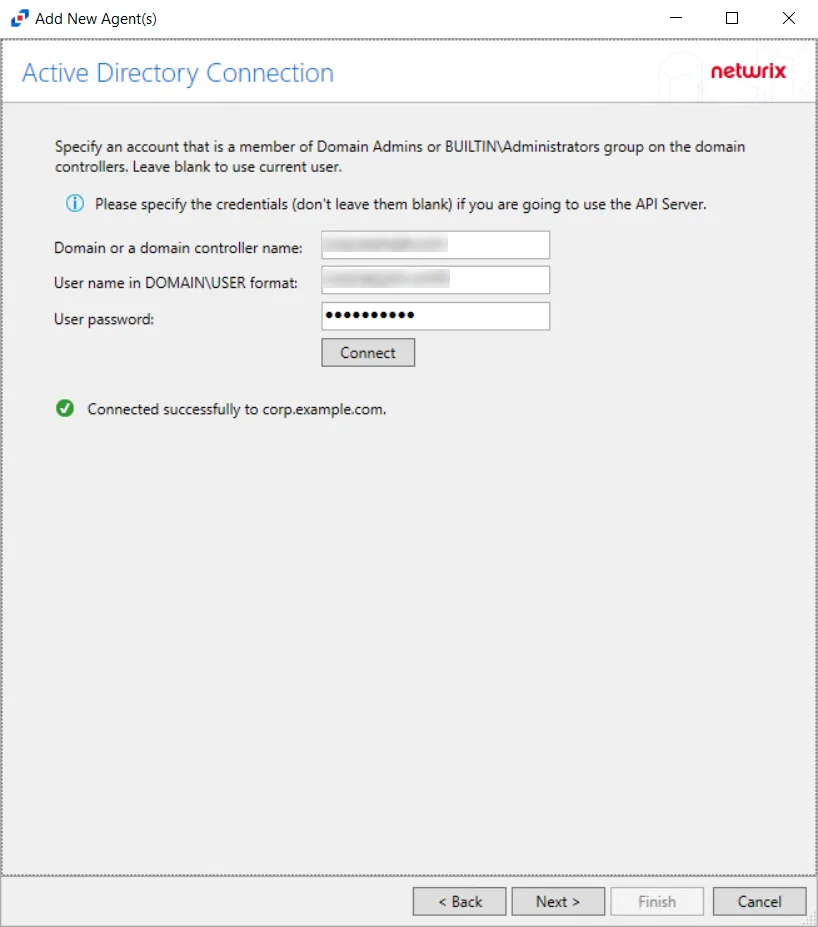
When the connection is successful, the Next button is enabled. Click Next to continue.
NOTE: An Administrator’s credentials are required to test the connection to the server. This is the only way to enable the Next button.
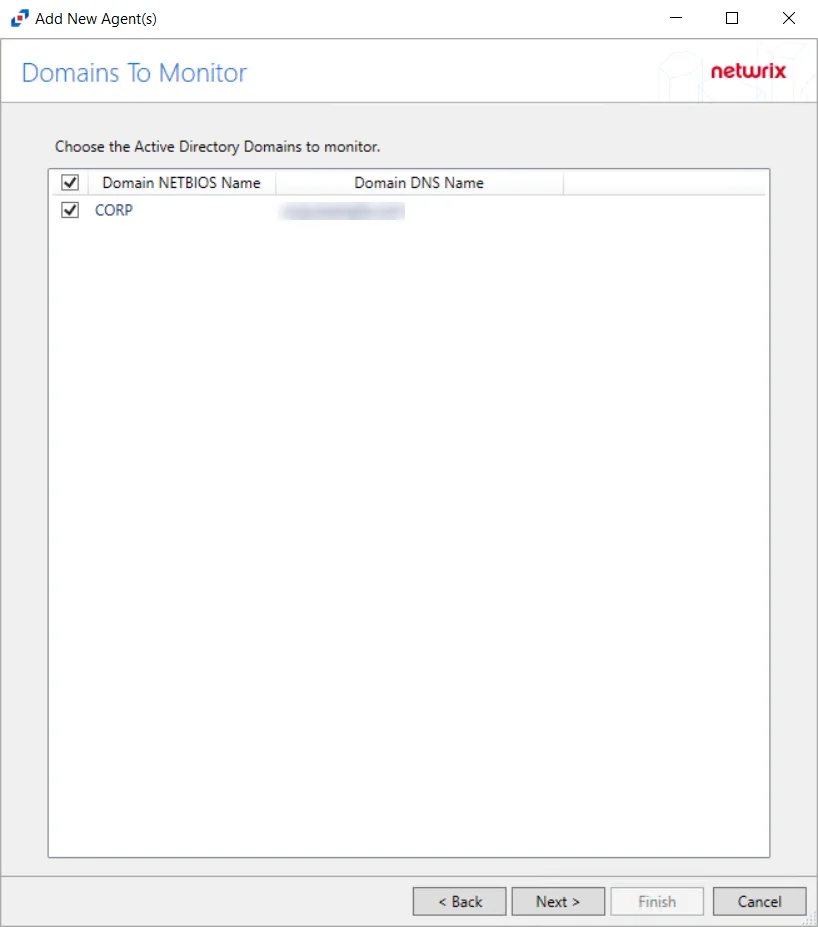
Step 6 – On the Domains To Monitor page, available domains display in a list, checked by default. Check/uncheck the boxes as desired to identify the domains to monitor, then click Next.
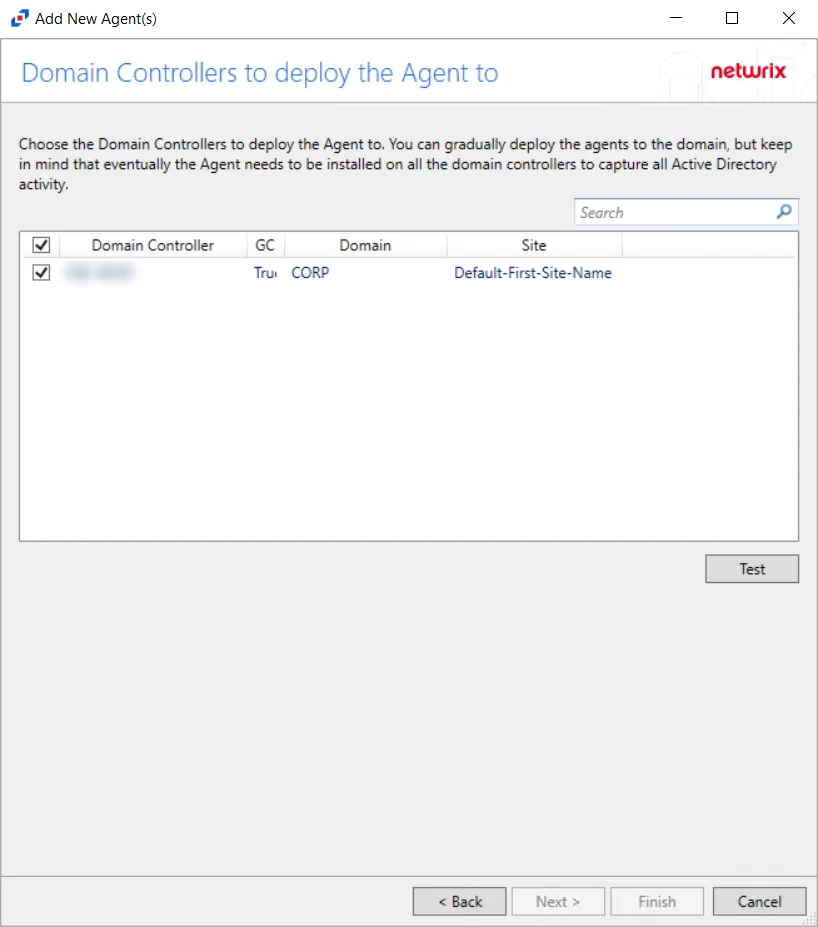
Step 7 – On the Domain Controllers to deploy the Agent to page, available domain controllers display in a list, checked by default. Check/uncheck the boxes as desired to identify the domain controllers where the AD agent is to be deployed.
NOTE: Agents can be gradually deployed, but the AD agent needs to be installed on all domain controllers to monitor all activity of the domain.
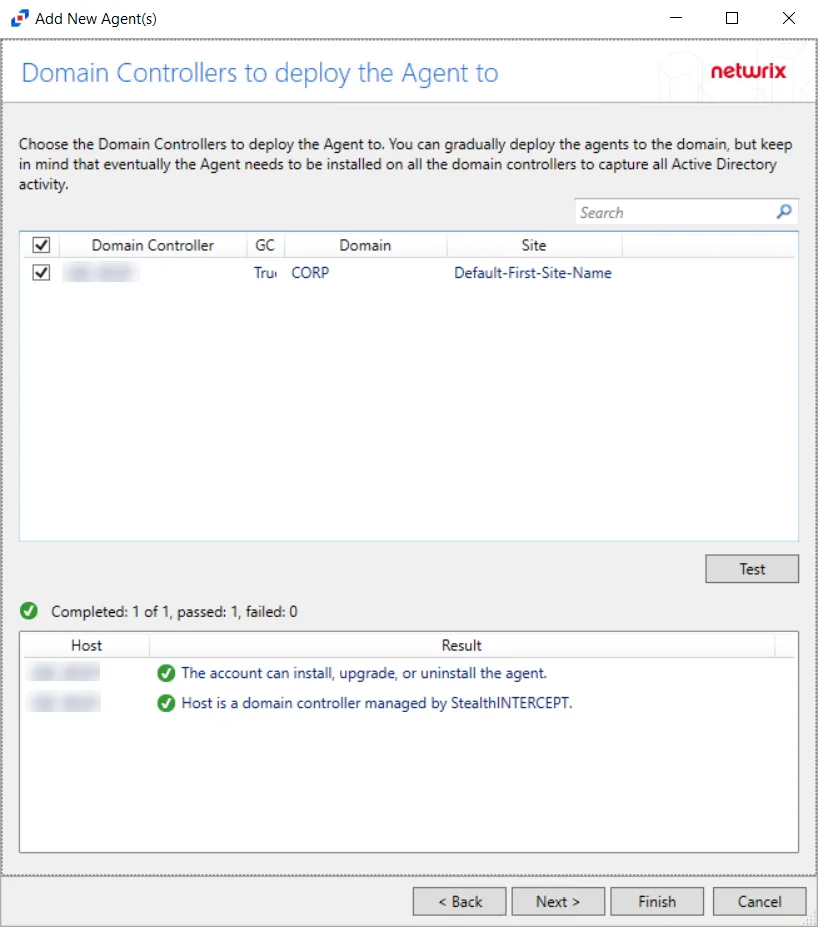
Step 8 – Click the Test button to verify the connection to the domains selected. Once the connection is verified, click Next to continue.
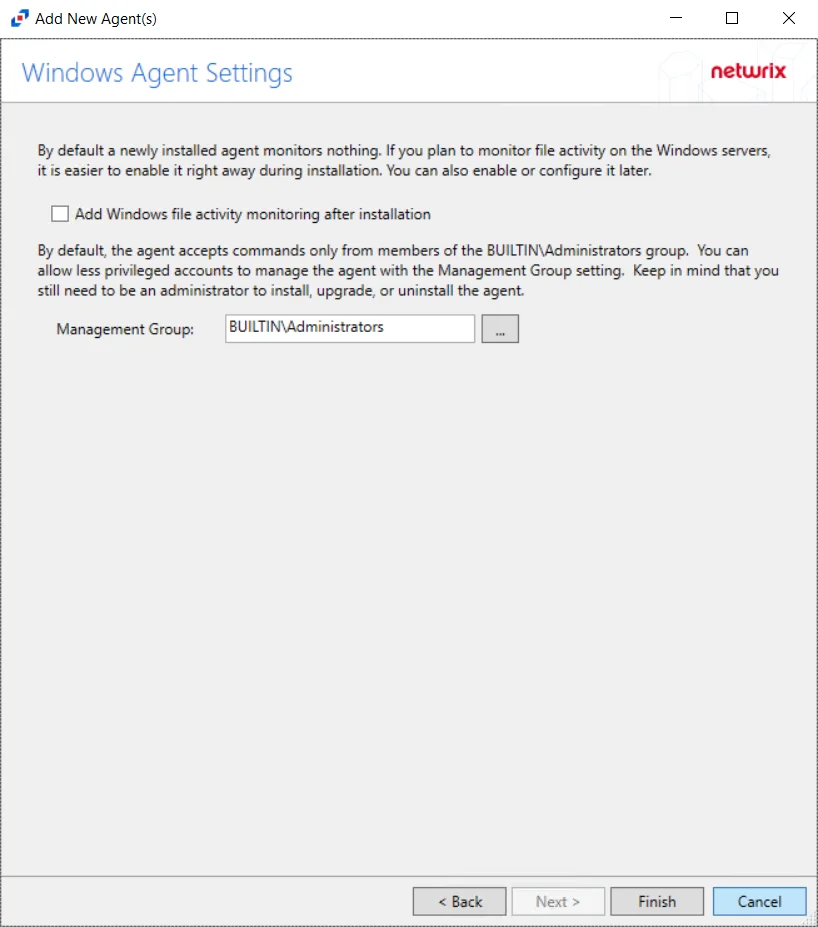
Step 9 – On the Windows Agent Settings page, there are two settings to configure.
- Add Windows file activity monitoring – Select the check box to add Windows file activity monitoring after installing the agent. By default a new agent install monitors nothing. If administrators want to monitor file activity on Windows servers, it is easier to enable it after installation of the agent. Windows file activity monitoring can be enabled and configured later in the console.
- Management Group – By default, the agent only accepts commands form members of the BUILTIN\Administrators group. Less privilege accounts can be configured to manage the agent with the Management Group setting. Keep in mind that only administrators can install, update and uninstall the agent.
Step 10 – Click Finish. The Add New Agent(s) window closes, and the activity agent is deployed to and installed on the target host.
During the installation process, the status will be Installing. If there are any errors, the Activity Monitor stops the installation and lists the errors in the Agent messages box.
When the AD agent installation is complete, the status changes to Installed and the agent version populates in the AD Module column. The next step is to configure the domains to be monitored. See the Monitored Domains Tab section for additional information.
Linux Agent Deployment
Understanding Linux File Activity Monitoring
The Activity Monitor can be configured to monitor the following:
- Ability to collect all or specific file activity for specific values or specific combinations of values
It also provides the ability to feed activity data to other Netwrix products:
- Netwrix Enterprise Auditor
- Netwrix Threat Manager
Prior to adding a Windows host to the Activity Monitor, the prerequisites for the target environment must be met. See the Linux Agent Server Requirements topic for additional information.
Deploy Linux Agent
Follow the steps to deploy the agent to the Linux host.
Step 1 – On the Agents tab, click Add agent to open the Add New Agent(s) window.
Step 2 – On the Install New Agent page, enter the server name for the Linux host. Click Next.
Step 3 – On the Agent Port page, specify the port to be used by the new agent. The default port is 4498. Click Next.
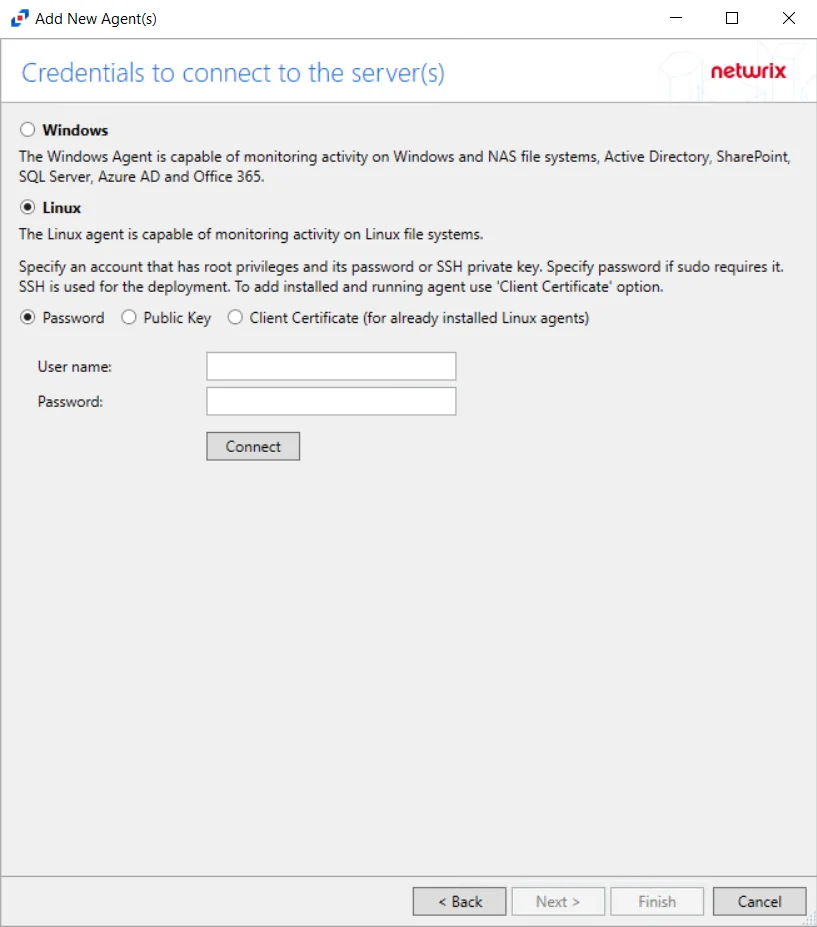
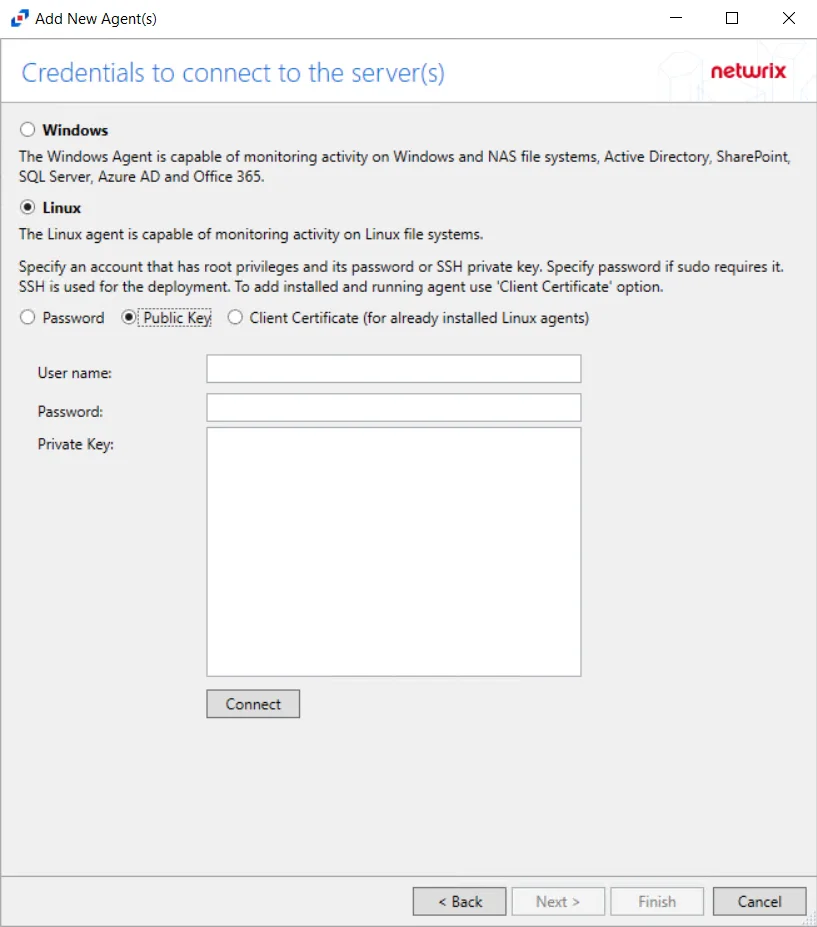
Step 4 – On the Credentials To Connect To The Server(s) page, connect to the Linux Server using either a User name and Password, or a Public Key.
The options for connecting with a Password are:
- User name
- Password
The options for connecting with a Public Key are:
- User name
- Private Key
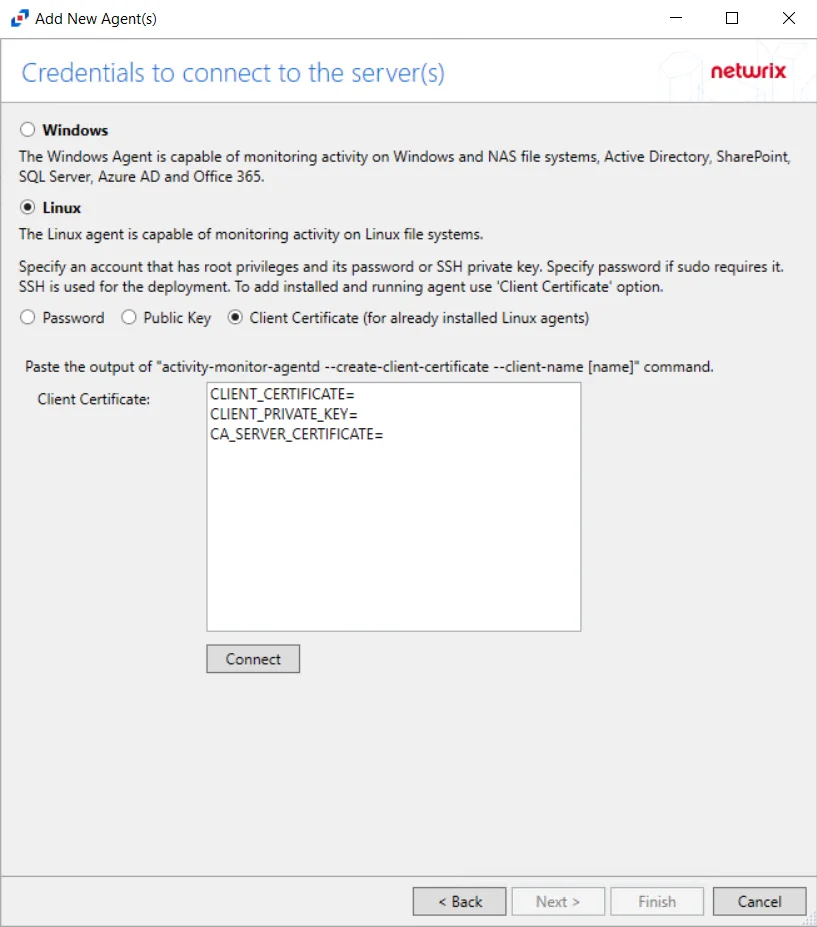
To connect with a Client Certificate, select the Client Certificate (for already installed agents) option. Run the following commands on the Linux machine:
cd /usr/bin/activity-monitor-agentd/
./activity-monitor-agentd create-client-certificate --name [name]
The Client Certificate option adds an already installed agent to the console without using SSH.
To connect with a public key, select the Public Key option. Copy the following command into a command prompt to generate ECDSA key for public key option:
ssh-keygen -m PEM -t ecdsa
Netwrix Activity Monitor requires to generate ECDSA Key with a blank passphrase
cat ~/.ssh/id_ecdsa.pub >> ~/.ssh/authorized_keys
NOTE: It is required to add public key to authorized keys for Activity Monitor. By default, a private key is generated at ~/.ssh/id_ecdsa location along with the public key (.pub file). A user can use a different file location. Copy the following command into a command prompt to generate a private key for Activity Monitorto use:
cat ~/.ssh/id_ecdsa
Step 5 – Click Connect to test the connection. If the connection is successful, click Next. If the connection is unsuccessful, see the status message that appears for information on the failed connection.
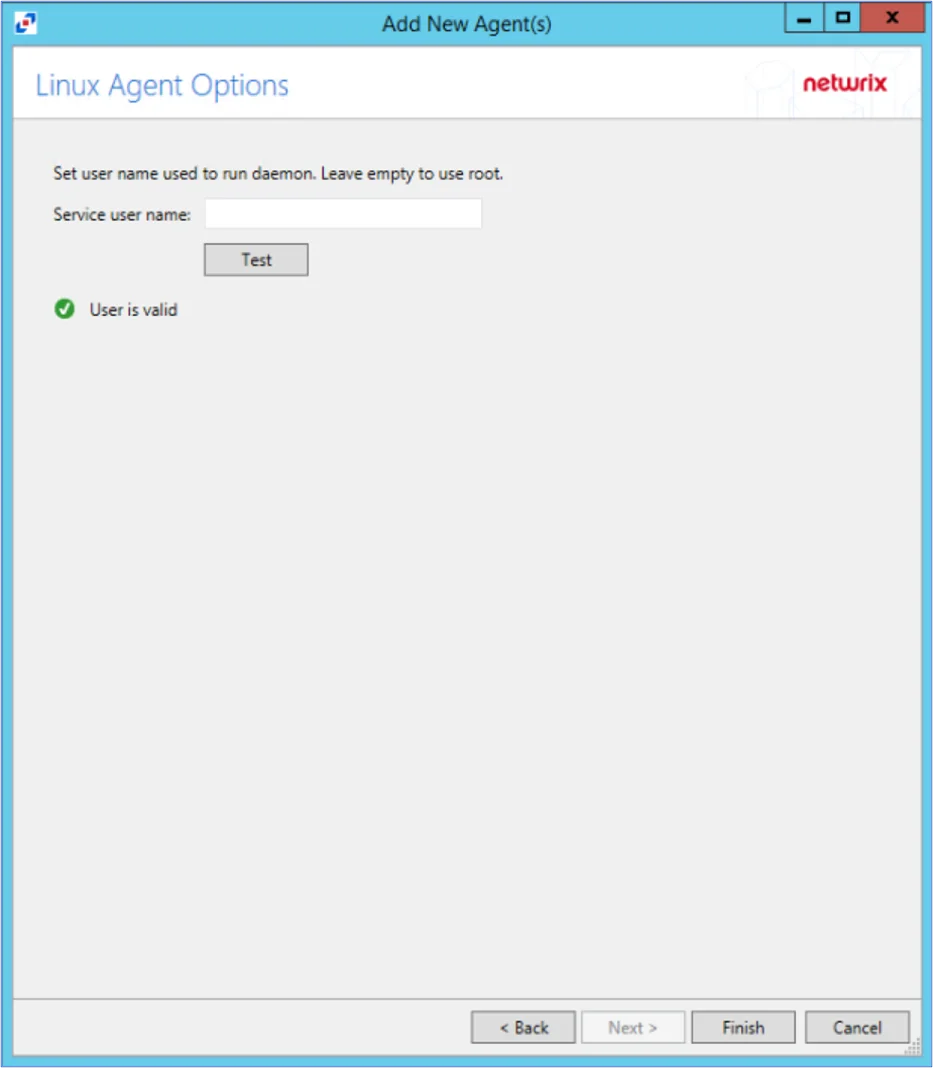
Step 6 – On the Linux Agent Options page, select which user name to use to run the daemon. To use root, leave the Service user name field blank. Click Test to test the connection.
Step 7 – Click Finish. The Add New Agent(s) window closes, and the activity agent is deployed to and installed on the target host.
During the installation process, the status will be Installing. If there are any errors, Activity Monitor stops the installation and lists the errors in the Agent messages box.

When the Linux agent installation is complete, the status changes to Installed. The Monitored Host is also configured, and the added Linux host is displayed in the monitored hosts table. See the Monitored Hosts Tab topic for additional information.
Once a host has been added for monitoring, configure the desired outputs. See the Output for Monitored Hosts topic for additional information.
Host Properties for Linux
Configuration settings can be edited through the tabs in the host’s Properties window. The configurable host properties are:
See the Host Properties Window topic for additional information.