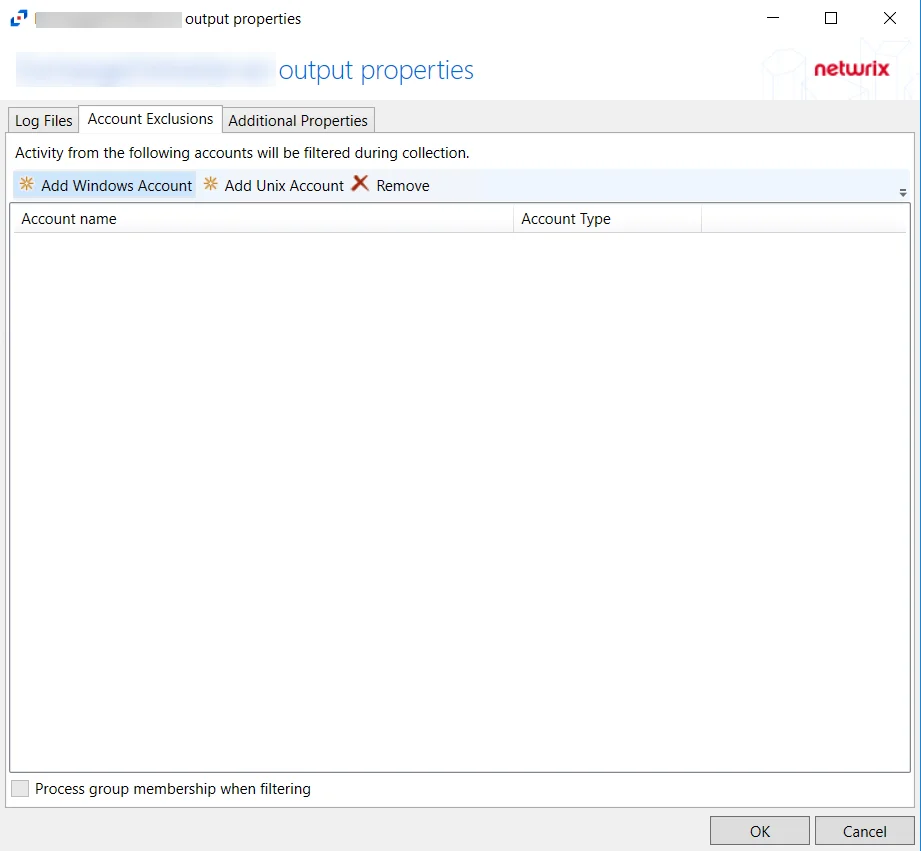
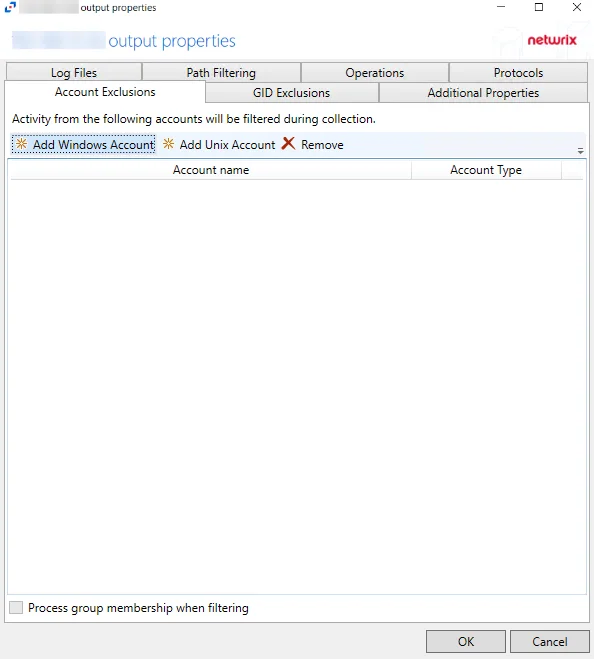
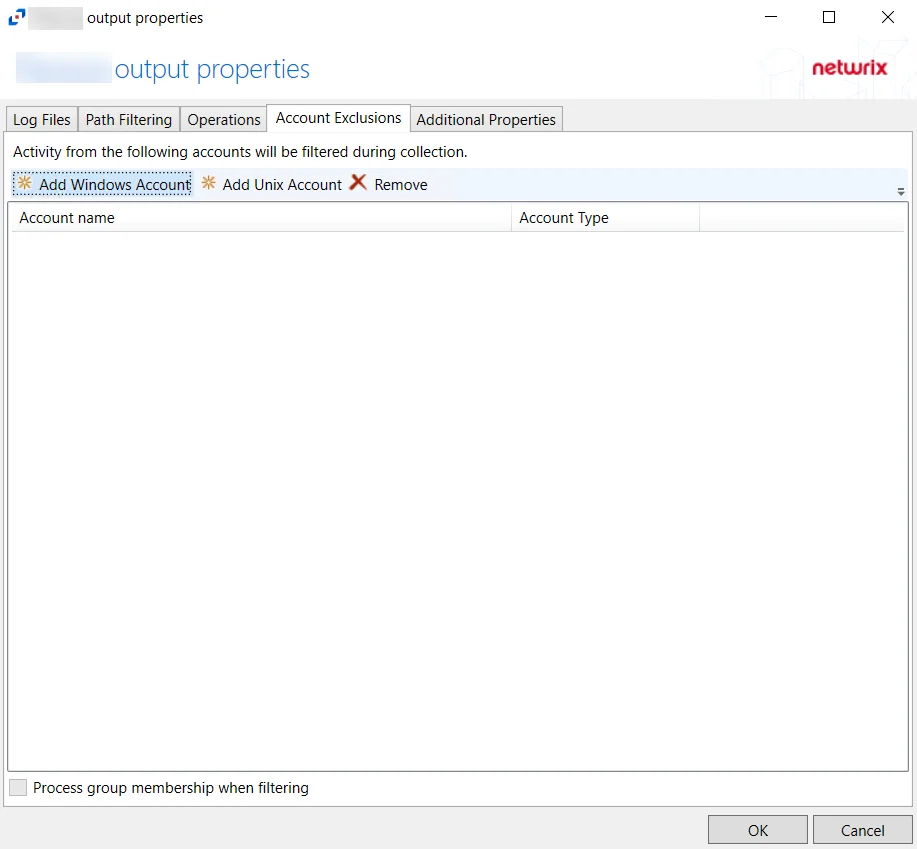
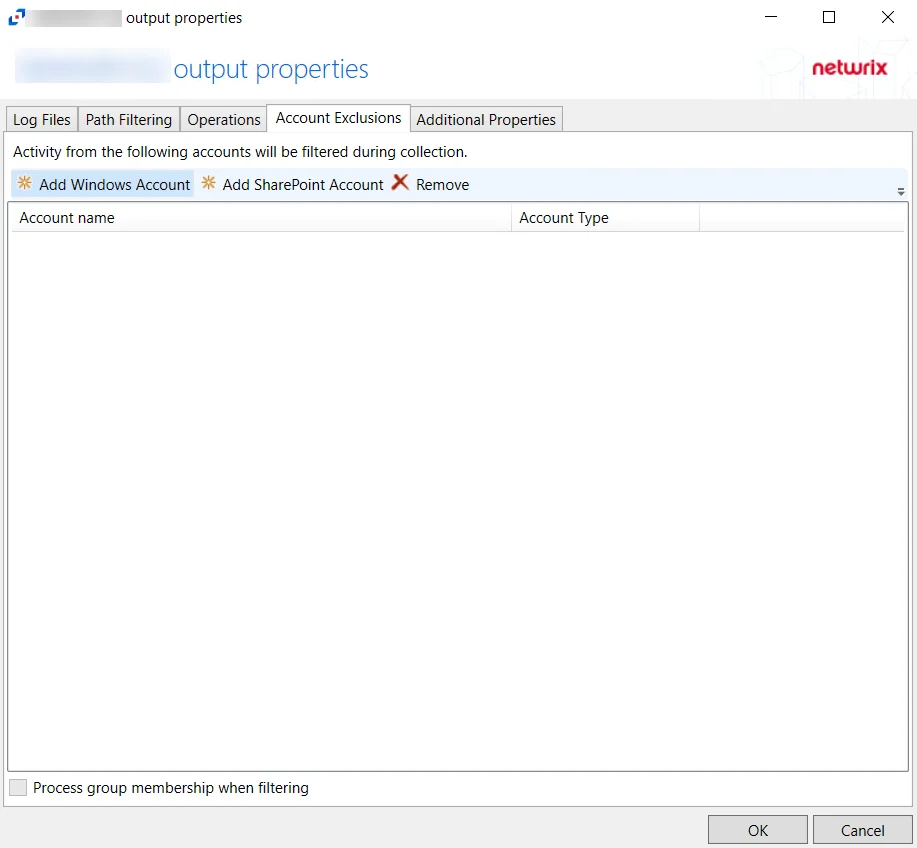
Account Exclusions Tab
The Account Exclusions tab on an output Properties window is where monitoring scope by account name can be modified. These settings are initially configured when the output is added.
Select an output from the Monitored Hosts tab and click Edit to open the output Properties window. The tab varies based on the type of host selected.
For Exchange Online Hosts
The tab contains the following settings:
-
Add Windows Account – Opens the Specify account or group window to add an account for exclusion. See the Specify Account or Group Window topic for additional information.
-
Add Unix Account – Opens the Specify Unix Account window to add an account for exclusion. See the Specify Unix Account Window topic for additional information.
-
Remove – Removes the selected account from exclusion. Confirmation is not requested.
CAUTION: If an account is removed by accident, use the Cancel button to discard the change.
-
Process group membership when filtering – Indicates if group memberships is processed when filtering accounts
The table lists accounts that are being excluded from monitoring, displaying columns for Account Name and Account Type. By default, no accounts are being excluded.
Click OK to commit the modifications. Click Cancel to discard the modifications. The output Properties window closes.
For Linux Hosts
The tab contains the following settings:
-
Add Windows Account – Opens the Specify account or group window to add an account for exclusion. See the Specify Account or Group Window topic for additional information.
-
Add Unix Account – Opens the Specify Unix Account window to add an account for exclusion. See the Specify Unix Account Window topic for additional information.
-
Remove – Removes the selected account from exclusion. Confirmation is not requested.
CAUTION: If an account is removed by accident, use the Cancel button to discard the change.
-
Process group membership when filtering – Indicates if group memberships is processed when filtering accounts
The table lists accounts that are being excluded from monitoring, displaying columns for Account Name and Account Type. By default, no accounts are being excluded.
Click OK to commit the modifications. Click Cancel to discard the modifications. The output Properties window closes.
For NAS Device Hosts
The tab contains the following settings:
-
Add Windows Account – Opens the Specify account or group window to add an account for exclusion. See the Specify Account or Group Window topic for additional information.
-
Add Unix Account – Opens the Specify Unix Account window to add an account for exclusion. See the Specify Unix Account Window topic for additional information.
-
Remove – Removes the selected account from exclusion. Confirmation is not requested.
CAUTION: If an account is removed by accident, use the Cancel button to discard the change.
-
Process group membership when filtering – Indicates if group memberships is processed when filtering accounts
The table lists accounts that are being excluded from monitoring, displaying columns for Account Name and Account Type. By default, no accounts are being excluded.
Click OK to commit the modifications. Click Cancel to discard the modifications. The output Properties window closes.
For SharePoint Hosts
The tab contains the following settings:
-
Add Windows Account – Opens the Specify account or group window to add an account for exclusion. See the Specify Account or Group Window topic for additional information.
-
Add SharePoint Account – Opens the Specify account window to add an account for exclusion. See the Specify Account Window topic for additional information.
-
Remove – Removes the selected account from exclusion. Confirmation is not requested.
CAUTION: If an account is removed by accident, use the Cancel button to discard the change.
-
Process group membership when filtering – Indicates if group memberships is processed when filtering accounts
The table lists accounts that are being excluded from monitoring, displaying columns for Account Name and Account Type. By default, no accounts are being excluded.
Click OK to commit the modifications. Click Cancel to discard the modifications. The output Properties window closes.
For SQL Server Hosts
The tab contains the following settings:
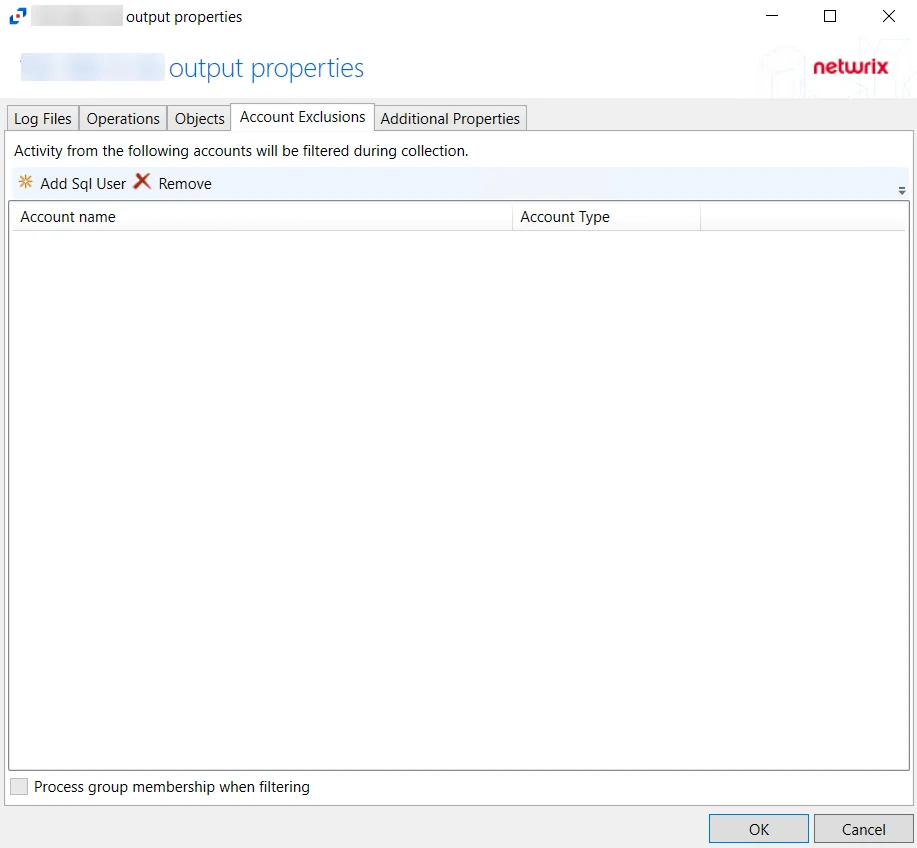
-
Add Sql User – Opens the Specify Sql User name window to add an account for exclusion. See the Specify Sql User Name Window topic for additional information.
-
Remove – Removes the selected account from exclusion. Confirmation is not requested.
CAUTION: If an account is removed by accident, use the Cancel button to discard the change.
-
Process group membership when filtering – Indicates if group memberships is processed when filtering accounts
The table lists accounts that are being excluded from monitoring, displaying columns for Account Name and Account Type. By default, no accounts are being excluded.
Click OK to commit the modifications. Click Cancel to discard the modifications. The output Properties window closes.
For Windows File Server Hosts
The tab contains the following settings:
-
Add Windows Account – Opens the Specify account or group window to add an account for exclusion. See the Specify Account or Group Window topic for additional information.
-
Remove – Removes the selected account from exclusion. Confirmation is not requested.
CAUTION: If an account is removed by accident, use the Cancel button to discard the change.
-
Process group membership when filtering – Indicates if group memberships is processed when filtering accounts
The table lists accounts that are being excluded from monitoring, displaying columns for Account Name and Account Type. By default, the Windows File Server monitoring is excluding the following accounts:
- NT Authority\IUSR
- NT Authority\SYSTEM
- NT Authority\LOCAL SERVICE
- NT Authority\NETWORK SERVICE
Click OK to commit the modifications. Click Cancel to discard the modifications. The output Properties window closes.
GID Exclusions Tab
The GID Exclusions tab on an output Properties window is where monitoring scope by group can be modified. These settings are initially configured when the output is added.
Select an output for a Linux host on the Monitored Hosts tab and click Edit to open the output Properties window.
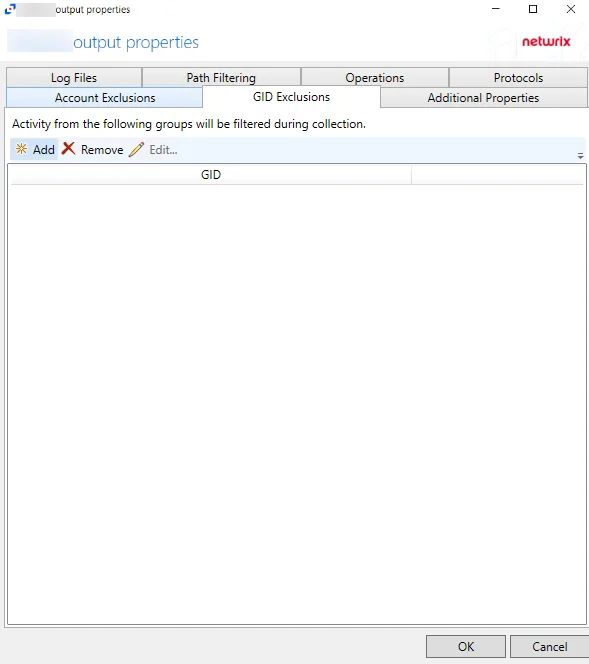
The tab contains the following settings:
-
Add – Opens the Add or Edit GID window to add a group for exclusion. See the Add or Edit GID Window topic for additional information.
-
Remove – Removes the selected group from exclusion. Confirmation is not requested.
CAUTION: If an account is removed by group, use the Cancel button to discard the change.
-
Edit – Opens the Add or Edit GID window to edit a selected group for exclusion. See the Add or Edit GID Window topic for additional information.
The table lists groups that are being excluded from monitoring, displayed in the GID column. By default, no groups are being excluded.
Click OK to commit the modifications. Click Cancel to discard the modifications. The output Properties window closes.
Path Filtering Tab
The Path Filtering tab on an output Properties window is where monitoring scope by file paths can be modified. Specified paths can be included in or excluded. These settings are initially configured when the output is added.
Select an output from the Monitored Hosts tab and click Edit to open the output Properties window. The tab varies based on the type of host selected.
For Linux Hosts
The tab contains the following settings and features:
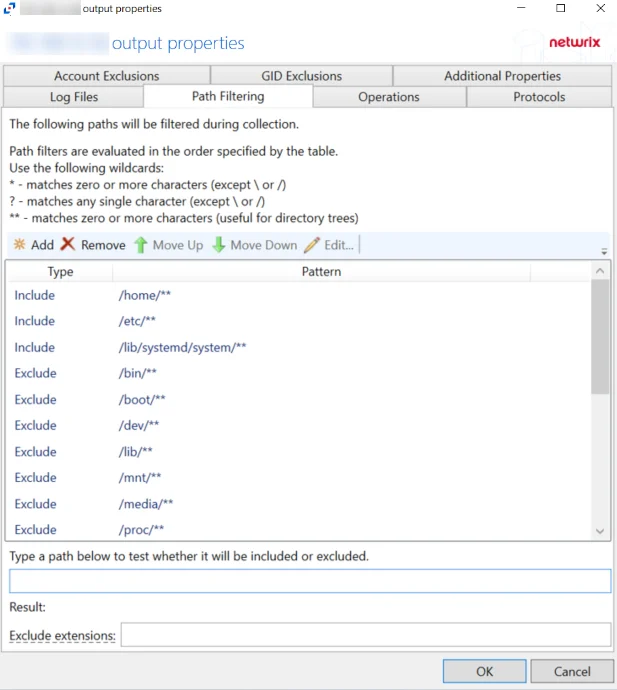
-
Add – Opens the Add or Edit Path window to add a new path to the list. See the Add or Edit Path Window topic for additional information.
-
Remove – Removes the selected path from the list. Confirmation is not requested.
CAUTION: If a path is removed by accident, use the Cancel button to discard the change.
-
Move Up / Move Down – Since path filters are evaluated in the order specified by the table, these buttons move the selected path up or down in the list
-
Edit – Opens the Add or Edit Path window to modify the selected path. See the Add or Edit Path Window topic for additional information.
-
Type a path below to test whether it will be included or excluded – Enter a path in the textbox to test whether it will be included/excluded based on the path filtering list
- Result – Under the text box, a description of whether the indicated path is included or excluded will appear, as well as a reason for why the indicated path is included or excluded. Additionally, the path in the list that is applied to the test will be highlight ed: green highlight for an included path and red highlight for an excluded path.
-
Exclude extensions – Displays a space separated list of file extensions that are excluded
-
Exclude streams – Displays a space separated list of streams that are excluded
The table lists paths that are being filtered, displaying columns for Type, indicating if it is being Included or Excluded, and Pattern. The order of the list determines what paths are included and what paths are excluded.
CAUTION: Exclude takes precedence over the Include. For example, if the C:\OpenShare is excluded, but the C:\OpenShare\Edward is included, the ‘OpenShare’ parent exclusion takes precedence, and the ‘Edward’ child folder will not be monitored.
NOTE: If ‘Include’ is not listed under the Filter Type column (or no Include filter paths are added), then all current and new discovered drives will be monitored.
Click OK to commit the modifications. Click Cancel to discard the modifications. The output Properties window closes.
For NAS Device Hosts
The tab contains the following settings and features:
-
Add – Opens the Add or Edit Path window to add a new path to the list. See the Add or Edit Path Window topic for additional information.
-
Remove – Removes the selected path from the list. Confirmation is not requested.
CAUTION: If a path is removed by accident, use the Cancel button to discard the change.
-
Move Up / Move Down – Since path filters are evaluated in the order specified by the table, these buttons move the selected path up or down in the list
-
Edit – Opens the Add or Edit Path window to modify the selected path. See the Add or Edit Path Window topic for additional information.
-
Type a path below to test whether it will be included or excluded – Enter a path in the textbox to test whether it will be included/excluded based on the path filtering list
- Result – Under the text box, a description of whether the indicated path is included or excluded will appear, as well as a reason for why the indicated path is included or excluded. Additionally, the path in the list that is applied to the test will be highlight ed: green highlight for an included path and red highlight for an excluded path.
-
Exclude extensions – Displays a space separated list of file extensions that are excluded
-
Exclude streams – Displays a space separated list of streams that are excluded
The table lists paths that are being filtered, displaying columns for Type, indicating if it is being Included or Excluded, and Pattern. The order of the list determines what paths are included and what paths are excluded.
CAUTION: Exclude takes precedence over the Include. For example, if the C:\OpenShare is excluded, but the C:\OpenShare\Edward is included, the ‘OpenShare’ parent exclusion takes precedence, and the ‘Edward’ child folder will not be monitored.
NOTE: If ‘Include’ is not listed under the Filter Type column (or no Include filter paths are added), then all current and new discovered drives will be monitored.
Click OK to commit the modifications. Click Cancel to discard the modifications. The output Properties window closes.
For SharePoint Hosts
For a SharePoint host, the Path Filtering tab is for including and excluding sites. The tab contains the following settings and features:
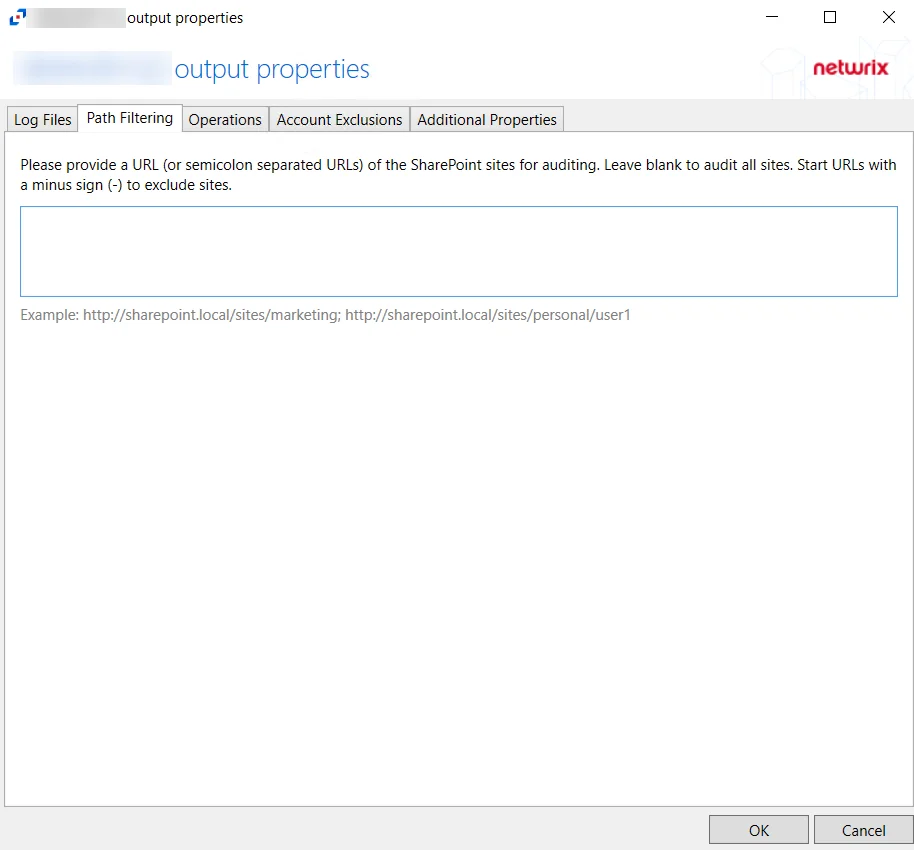
- To audit all sites, leave the textbox blank
- To include a specific site, enter the URL
- To exclude a specific site, enter the URL but add a minus sign (-) as a prefix to the URL, for example:
-http://sharepoint.local/sites/marketing
Use a semicolon (;) to separate multiple URLs.
For Windows File Server Hosts
The tab contains the following settings and features:
-
Add – Opens the Add or Edit Path window to add a new path to the list. See the Add or Edit Path Window topic for additional information.
-
Remove – Removes the selected path from the list. Confirmation is not requested.
CAUTION: If a path is removed by accident, use the Cancel button to discard the change.
-
Move Up / Move Down – Since path filters are evaluated in the order specified by the table, these buttons move the selected path up or down in the list
-
Edit – Opens the Add or Edit Path window to modify the selected path. See the Add or Edit Path Window topic for additional information.
-
Add all local drives – Retrieves and adds all local drives to the bottom of the list with a type of Include
-
Type a path below to test whether it will be included or excluded – Enter a path in the textbox to test whether it will be included/excluded based on the path filtering list
- Result – Under the text box, a description of whether the indicated path is included or excluded will appear, as well as a reason for why the indicated path is included or excluded. Additionally, the path in the list that is applied to the test will be highlight ed: green highlight for an included path and red highlight for an excluded path.
-
Exclude extensions – Displays a space separated list of file extensions that are excluded
-
Exclude streams – Displays a space separated list of streams that are excluded
The table lists paths that are being filtered, displaying columns for Type, indicating if it is being Included or Excluded, and Pattern. The order of the list determines what paths are included and what paths are excluded.
CAUTION: Exclude takes precedence over the Include. For example, if the C:\OpenShare is excluded, but the C:\OpenShare\Edward is included, the ‘OpenShare’ parent exclusion takes precedence, and the ‘Edward’ child folder will not be monitored.
NOTE: If ‘Include’ is not listed under the Filter Type column (or no Include filter paths are added), then all current and new discovered drives will be monitored.
Click OK to commit the modifications. Click Cancel to discard the modifications. The output Properties window closes.
Process Exclusions Tab
The Process Exclusions tab on an output Properties window is where monitoring scope by Windows processes can be modified. These settings are initially configured when the output is added.
NOTE: Netwrix product processes are excluded by default from activity monitoring.
Select an output for a Windows file server host on the Monitored Hosts tab and click Edit to open the output Properties window.
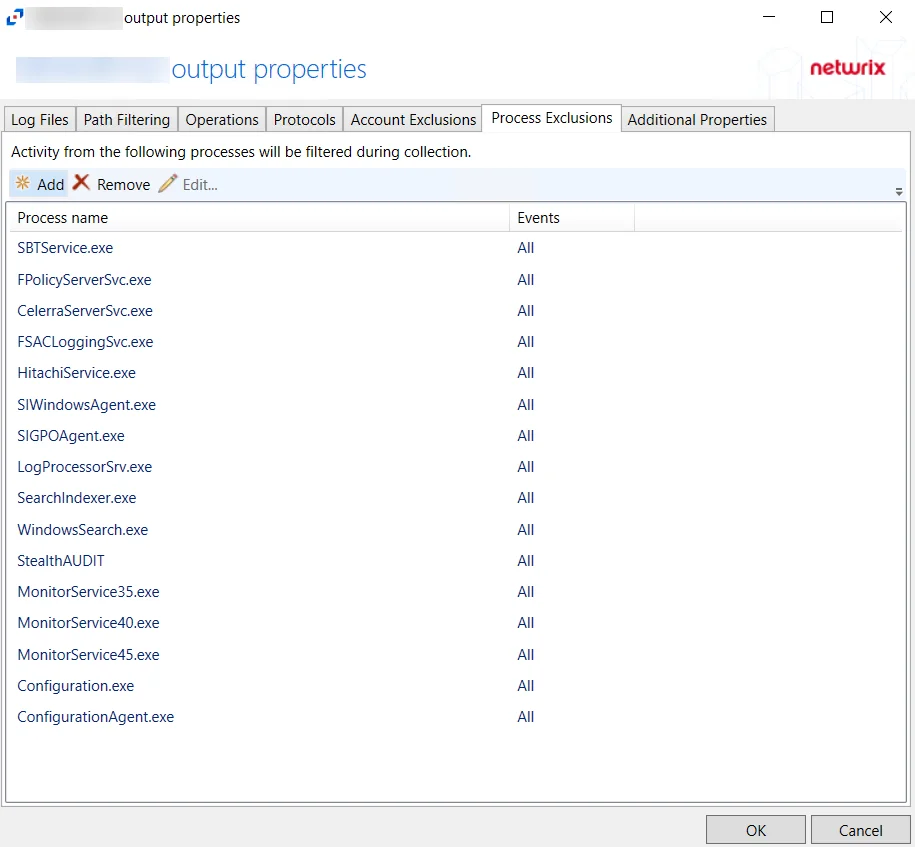
The tab contains the following settings and features:
-
Add – Opens the Add or Edit Process window to add a new process to the list. See the Add or Edit Process Window topic for additional information.
-
Remove – Removes the selected path from the list. Confirmation is not requested.
CAUTION: If a process is removed by accident, use the Cancel button to discard the change.
-
Edit – Opens the Add or Edit Process window to modify the selected process. See the Add or Edit Process Window topic for additional information.
The table lists process that will be excluded, displaying columns for Process Name and Events.
Click OK to commit the modifications. Click Cancel to discard the modifications. The output Properties window closes.
Suppress Windows Explorer Activity
Not all file operations are deliberate. Operating systems and third-party software have the capability to execute operations on files without explicit user action. While this functionality can improve user experience, it also presents a challenge to IT teams as it generates a record of actions that have not been explicitly triggered by users.
One of the most prominent examples is the Windows File Explorer - the standard application for file system browsing on the Windows family of operating systems. Over the years, File Explorer has had a number of improvements and new features. File Explorer displays various information about files to provide a better user experience. This allows users to view file content without having to open them.
File Explorer displays icons for certain file types like executable (.exe) files. Depending on the View mode, it can display thumbnails of various file formats and meta-data with things like author, number of pages, image dimensions, etc. Hovering a mouse cursor over a file also provides detailed information about a file in a tool tip. When working with sub-folders, File Explorer may display a thumbnail of the files contained within the sub-folder on top of the sub-folder icon. This additional functionality is executed automatically, mostly without the user's explicit action or intention.
As an example, a user may wish to open the MySampleReport.docx document located in the MyTestDepartment folder. The user opens the folder, locates the file and double-clicks to open it. From the user's perspective, only two actions were performed:
- Open MyTestMyDepartment folder.
- Open MySampleReport.docx.
However, File Explorer performs a number of additional operations on behalf of the user:
- It reads and displays icons for certain files types in MyTestMyDepartment folder.
- It reads the meta-data of the files or sub-folders under the mouse cursor while the user is locating the document.
- It reads the meta-data and preview if the user accidentally selects an incorrect file.
- It lists the content of all sub-folders and generates thumbnails to be displayed on top of the sub-folder icon.
- It may create or update Thumbs.db file - a cache of thumbnail images.
None of these additional file operations, which can be called Preview Reads, are explicitly initiated by the user. However, the audit log records all of them as originating from the user.
Preview Reads and similar unintentional automatic operations pose a significant challenge for IT teams and IT auditing software. At the file system level, preview reads are perceived as normal read operations, like file copying or opening a file in an application. There exists no distinguishing factor between explicit user activity and implicit actions by File Explorer. Whether it is a preview read, opening the file in Notepad, or copying the file, all these operations are perceived as the same Read operation at the file system level. Therefore, it is not possible to reliably filter unintentional activity without the risk of suppressing genuine user actions.
The Activity Monitor employs various techniques to minimize noise. These methods all rely on identifying patterns in the sequence of events. However, their effectiveness is severely limited, as research has shown that clear patterns of preview reads activity in File Explorer are lacking. For the Windows Server, the effectiveness is slightly higher since theActivity Monitor's file system driver can observe all the low-level details about operations.
The product provides the following filtering options to reduce File Explorer preview reads:
- Suppress reporting of File Explorer’s excessive directory traversal activity - This option aims to identify and suppress preview reads of sub-folders that occur immediately after the parent folder is opened.
- Suppress reporting of File Explorer’s excessive file read activity - This option attempts to identify and suppress preview reads of files that occur immediately after the parent folder is opened.
Both filtering options prioritize the accuracy of audit data over noise reduction. In other words, they will report a noise event rather than suppress a genuine user action.
Add or Edit GID Window
The Add or Edit GID window is opened from a field where a Linux group is needed.

Type the GID for the desired group in the textbox. Then click OK. The Add or Edit GID window closes, and the group is added to the field where the window was opened.
Add or Edit Path Window
The Add or Edit Path window is opened from the Path Filtering tab of a monitored host's output Properties window.

- Specify a path to filter during collection – Enter a file path in the textbox or use the ellipsis (…) to browse for a folder
- Filter Type – Indicates if the filter will be Included or Excluded
Then click OK. The Add or Edit Path window closes, and the path is added to the filtering list for the monitored host.
Special Consideration for NAS Device Hosts
For NAS devices, the activity agent can configured to add ‘C:\’ to the beginning of the path, which is a requirement for the output that is designated for StealthAUDIT.exe or being read by a Netwrix Threat Prevention agent. That configuration is on the Log Files Tab. If the option is enabled for this monitored device, start your paths with C:.
Wildcard
Wildcard filtering can be configured using the following wildcard characters:
| Wildcard | Definition |
|---|---|
| * | matches zero or more characters (except for "" or "/") |
| ? | matches any single character (except for "" or "/") |
| ** | matches zero or more characters (useful for directory trees) |
Add or Edit Process Window
The Add or Edit Process window is opened from the Process Exclusions tab of a monitored host's output Properties window.
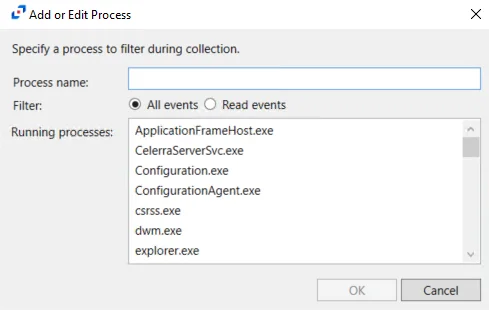
- Process name – Displays the name of the process to be excluded. You can enter a process name in the textbox or select a process from the Running processes list.
- Filter – Indicates if the filter will be for All events or only Read events
- Running Processes – Lists all processes currently running on the host
Then click OK. The Add or Edit Path window closes, and the path is added to the filtering list for the monitored host.
Specify Account Window
The Specify account window is opened from a field where a SharePoint account is needed.
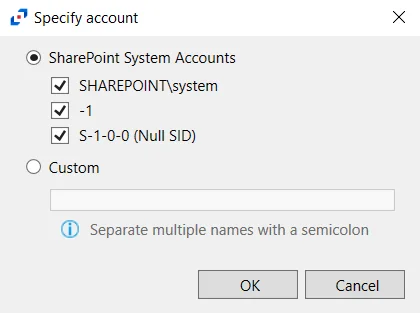
There are two options for specifying an account:
-
SharePoint System Accounts – Check the boxes for the desired system accounts: SHAREPOINT\system, -1, S-1-0-0 (Null SID)
-
Custom – Enter the account in the textbox. Multiple accounts can be added using a semicolon (;).
- For System Service Accounts – Enter the SID for system service accounts
- For Local User Accounts – Enter either the user name or SID for the local account
Click OK. The Specify account window closes, and the account is added to the field where the window was opened.
Specify Sql User Name Window
The Specify Sql User name window is opened from a field where a SQL Server account is needed.

Enter the SQL Server user name into the text box. Multiple user names can be added using a semicolon (;), a comma (,), or a space. Then click OK. The Specify Sql User name window closes, and the account is added to the field where the window was opened.
Specify Unix Account Window
The Specify Unix Account or group window is opened from a field where a Unix account is needed.

Type the UID for the desired account in the textbox. Multiple UIDs can be added using a semicolon (;), a comma (,), or a space. Then click OK. The Specify Unix Account window closes, and the account is added to the field where the window was opened.
Specify Account or Group Window
The Specify account or group window is opened from a field where a Windows account is needed.
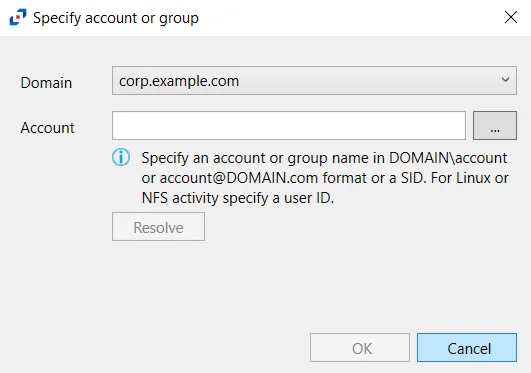
Follow the steps to use this window.
Step 1 – Select the Domain from the drop-down menu.
Step 2 – Enter the Account in the textbox.
- Accounts can be entered in NTAccount format, UPN format, or SID format.
- Use the ellipsis (…) button to open the Select Users, Computers, Service Accounts, or Groups window to browse for an account.
Step 3 – Then click Resolve. A message displays indicating whether or not the account could be resolved.
Step 4 – If successful, click OK.
The Specify account or group window closes, and the account is added to the field where the window was opened.