FPolicy Tab
Use the FPolicy tab to modify FPolicy settings for NetApp devices, privileged access, and enabling/connecting to cluster nodes.
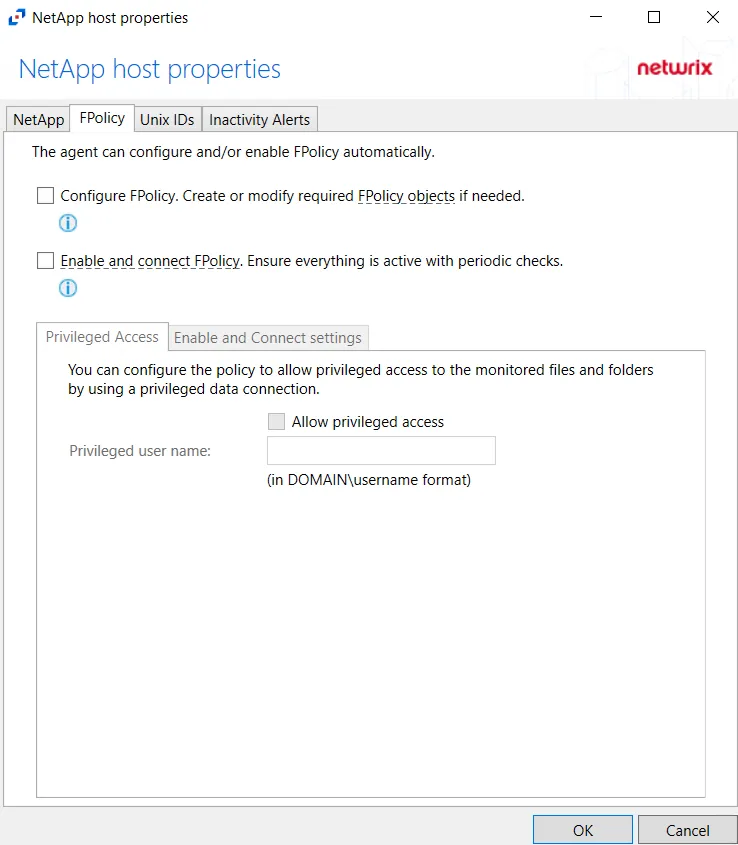
On the FPolicy tab, the agent can configure and/or enable FPolicy automatically. The recommended setting is dependent on the type of NetApp device being targeted. The permissions required for each option are listed. See the NetApp Data ONTAP 7-Mode Activity Auditing Configuration topic or the NetApp Data ONTAP Cluster-Mode Activity Auditing Configuration topic for additional information.
At the bottom are two additional tabs with setting options. On this tab, specify the protocols to monitor by selecting the radio buttons.
Privileged Access Tab
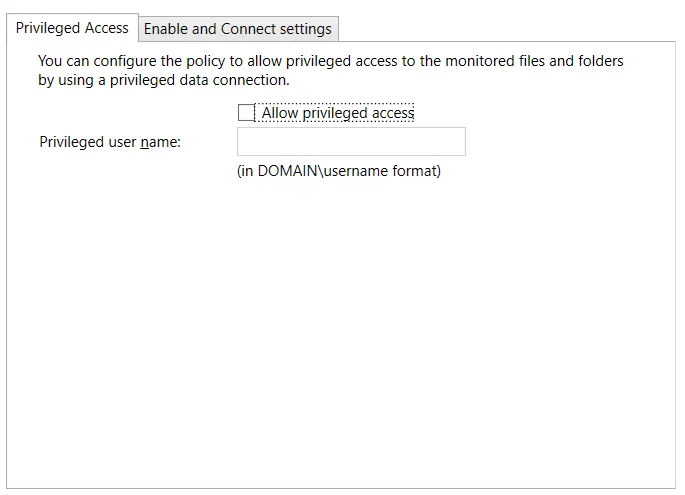
The Privileged Access tab becomes available when you select the Configure FPolicy checkbox at the top. You must configure the Privileged Access tab if you use automatic configuration of the FPolicy for NetApp Data ONTAP Cluster-Mode devices. See the Configure Privileged Access topic for additional information.
Enable and Connect settings Tab
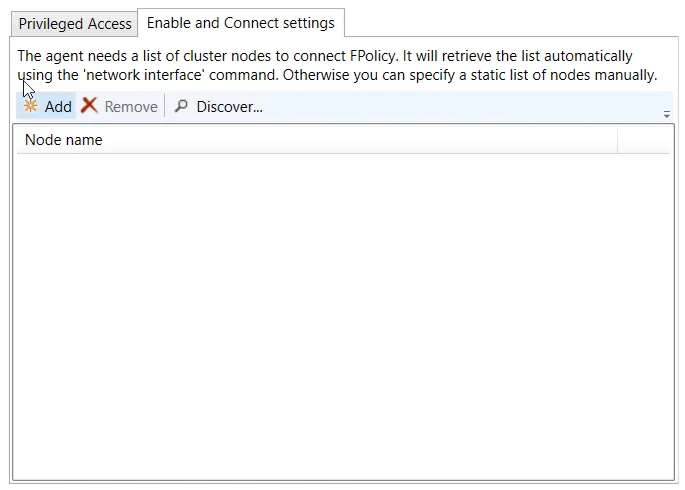
The Enable and Connect settings tab becomes available when you select the Enable and connect FPolicy checkbox.
You don't need to add nodes if the user has a role with Network Interface permissions.

Add a list of cluster nodes to connect to FPolicy by clicking Add, which opens the Add or Edit Cluster Node window. Enter at least one cluster node in the textbox. Separate multiple nodes with either commas (,), semicolons (;), or spaces. Click OK and the nodes is displayed in the Node name list.
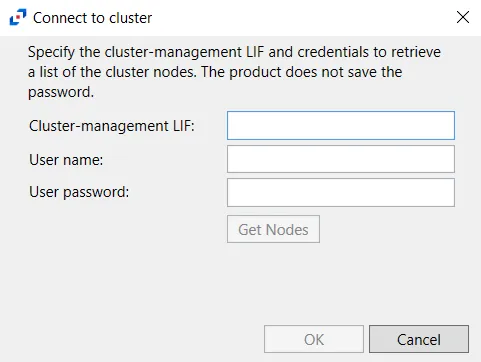
Click Discover to open the Connect to cluster window and retrieve nodes from the cluster.
Specify the Cluster-management LIF and enter user credentials to retrieve a list of the cluster nodes. This credential must have at least read-only rights to run the system node show command on the cluster. Click Get Nodes. If the connection fails, the message indicates the error. If the connection succeeds, the message indicates how many cluster nodes the system discovered. Click OK and all discovered nodes appear in the Node name list.
Use the Remove button to remove the selected node from the list.
Changing the FPolicy Heartbeat Interval
The activity agent periodically checks for and re-enables any StealthAUDIT filter policies that were disabled for any reason (for example, a network outage).
Step 1 – Using Regedt32 navigate to:
HKEY_LOCAL_MACHINE\SYSTEM\CurrentCotrolSet\Services\FPolicyServerSvc\Parameters
Step 2 – Right-click TimeInterval and select Modify.
Step 3 – Change “Base” to Decimal.
Step 4 – Set the “Value Data” to an integer value which represents how often, in minutes, the service should poll corresponding NetApp filers.
Step 5 – Restart both the Stealthbits NetApp File Activity Monitoring Service (FPolicyServerSvc) and the Stealthbits Logging Service for Network Appliances (FSACLogging) on the activity agent server.
The activity agent now checks for disabled filter policies according to the modified heartbeat interval.
Resources Required for NetApp Monitoring
Each individual NetApp filer being monitored impacts local system resources and requires disk space. These vary based on configuration settings chosen along with user activity. Average FPolicy and associated Logging service resource consumption may be around 2% CPU usage and 10 MB of RAM. Average disk space required per daily activity log file retained locally may be around 300 MB per filer.