Multiple Activity Agents Deployment
Before deploying the activity agent, ensure all Prerequisites are met, including those for NAS devices when applicable. Follow the steps to deploy the activity agent to a multiple Windows servers. See the Activity Agent Server Requirements topic for additional information.
NOTE: These steps are specific to deploying activity agents for monitoring supported target environments.
Step 1 – On the Agents tab, click Add agent to open the Add New Agent(s) window.
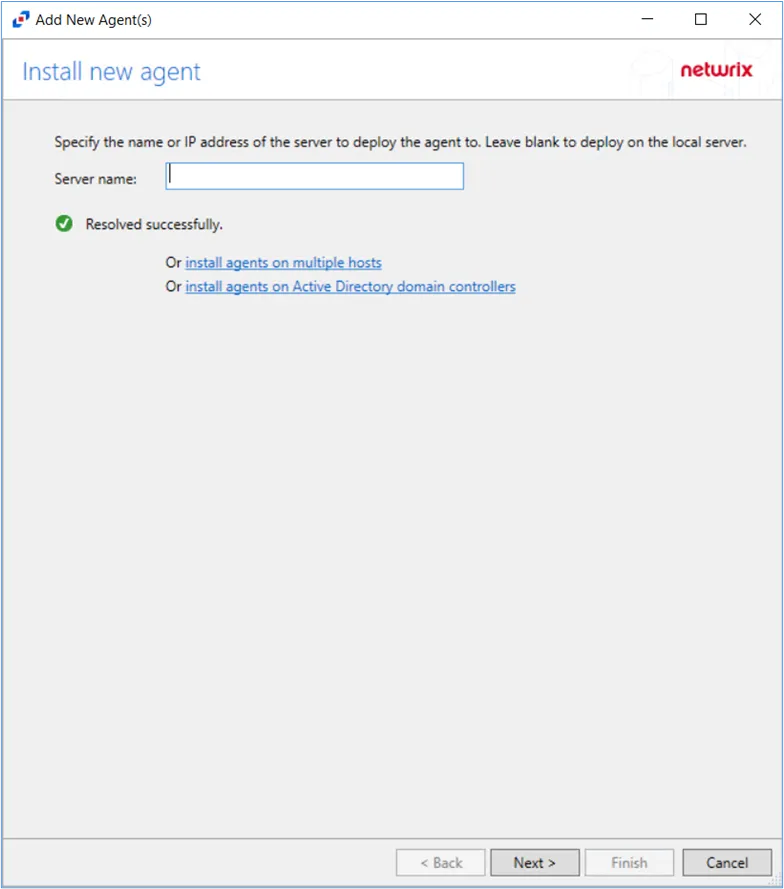
Step 2 – On the Install new agent page, click the install agents on multiple hosts link to deploy activity agents to multiple hosts.
Step 3 – On the Specify Agent Port page, specify the port that should be used by the new agent. The default port is 4498. Click Next.
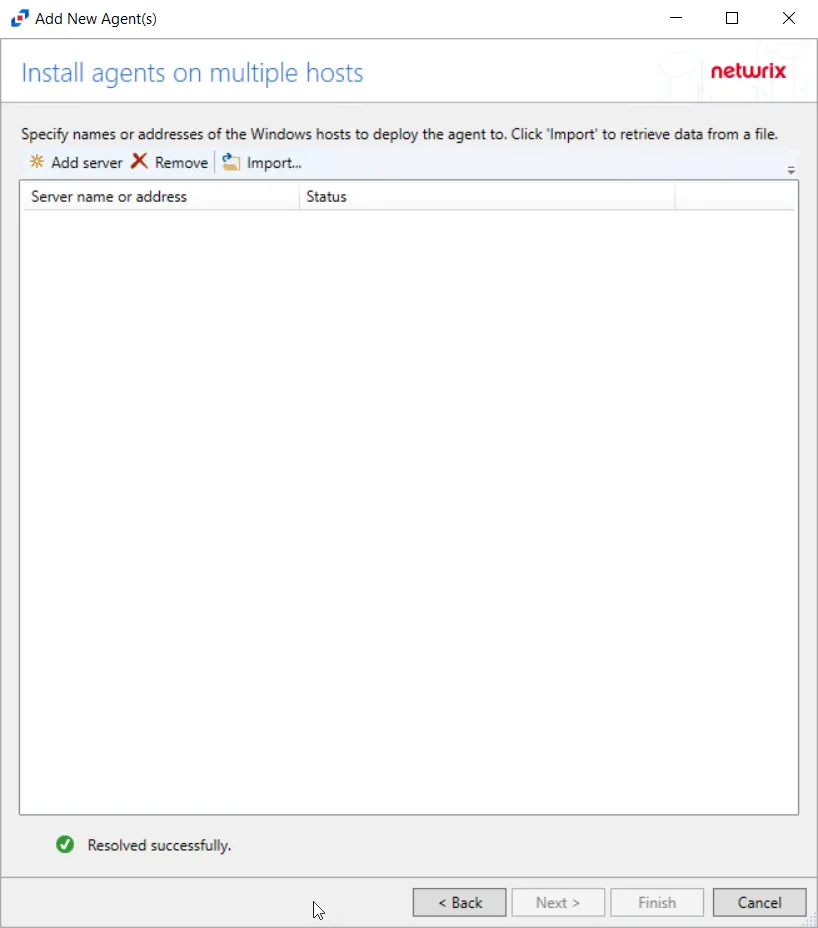
Step 4 – Windows or Linux hosts can be entered as either a name or an IP Address. The options are:
- Add server — Opens the Host name or IP address window. See the Manual Entry topic for additional information.
- Remove — Removes an entered host name or IP address from the table
- Import — Opens the Import from file window. See the Import a List topic for additional information.
There are two methods for adding multiple hosts are:
Manual Entry
Use Manual Entry to manually type the host names or IP addresses of the servers to be monitored.
For Manual Entry, the options are:
- Click Add server. The Host name or IP Address window opens.
- Enter the servers, separating the hosts with spaces, commas, or semicolons.
- (Optional) A multi-line list can be pasted into this textbox. When the servers have been entered, click OK. The Host name or IP address window closes and the identified servers are in the list.
Import a List
Use Import a List to import host names or IP addresses from an external source.
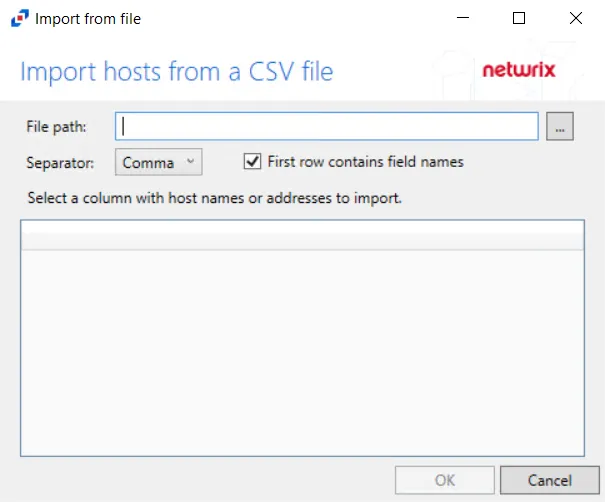
For Import a List:
- Click Import. The Import from file window opens.
- Enter the file path, or use the ellipsis (…) to navigate to the file.
- Identify the Separator used on the file (Comma, Semicolon, Tab, or Space). This is set to Comma for CSV format by default.
- If the first row of the file contains column headers, then check the First row contains field names box. If there are no column headers, uncheck this box.
- A preview of the selected file displays. Select the column with the host names.
- Click OK. The Import from file window closes and the identified servers are in the list.
The Activity Monitor will monitor the Host Names or IP Address added to the Install Agents on Multiple Hosts table. Click Next.
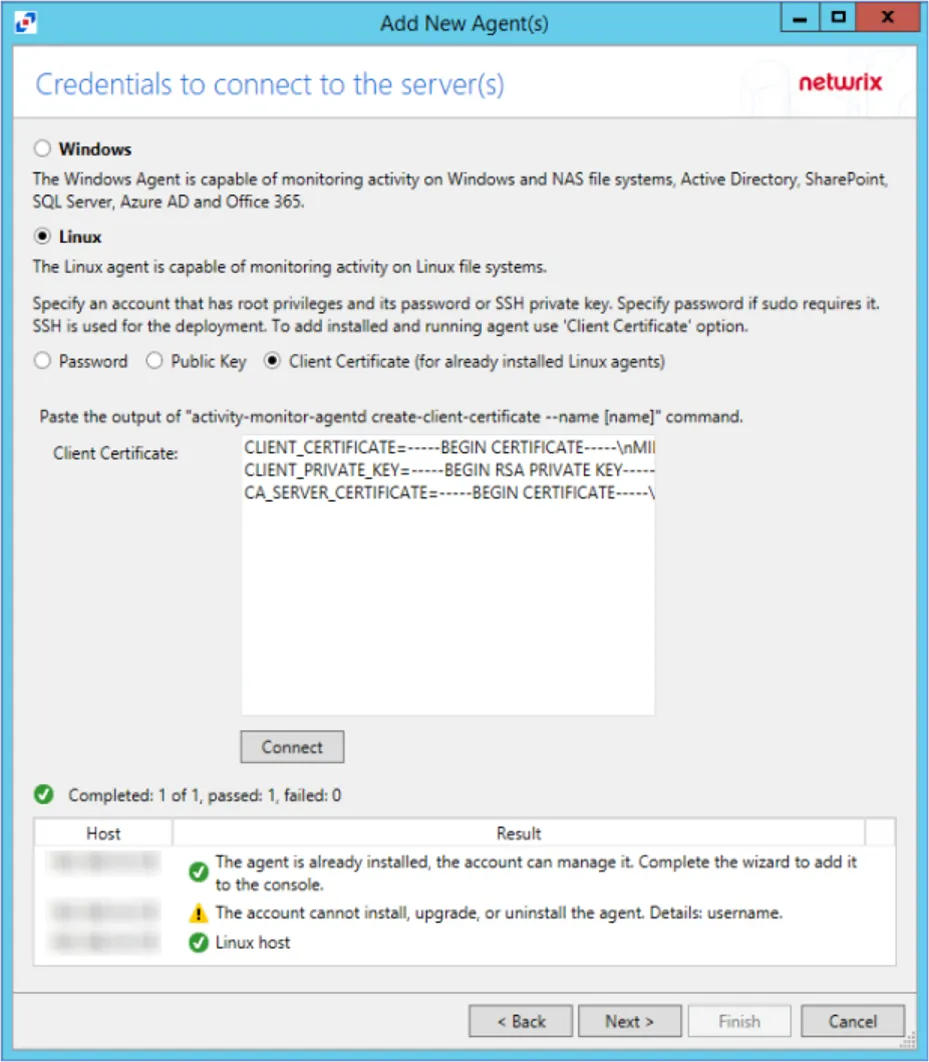
Step 5 – On the Credentials To Connect To The Server(s) page, connect to the server using either a User name and password, a Public Key, or a Client Certificate.
The options for connecting with a Password are:
- User name
- Password
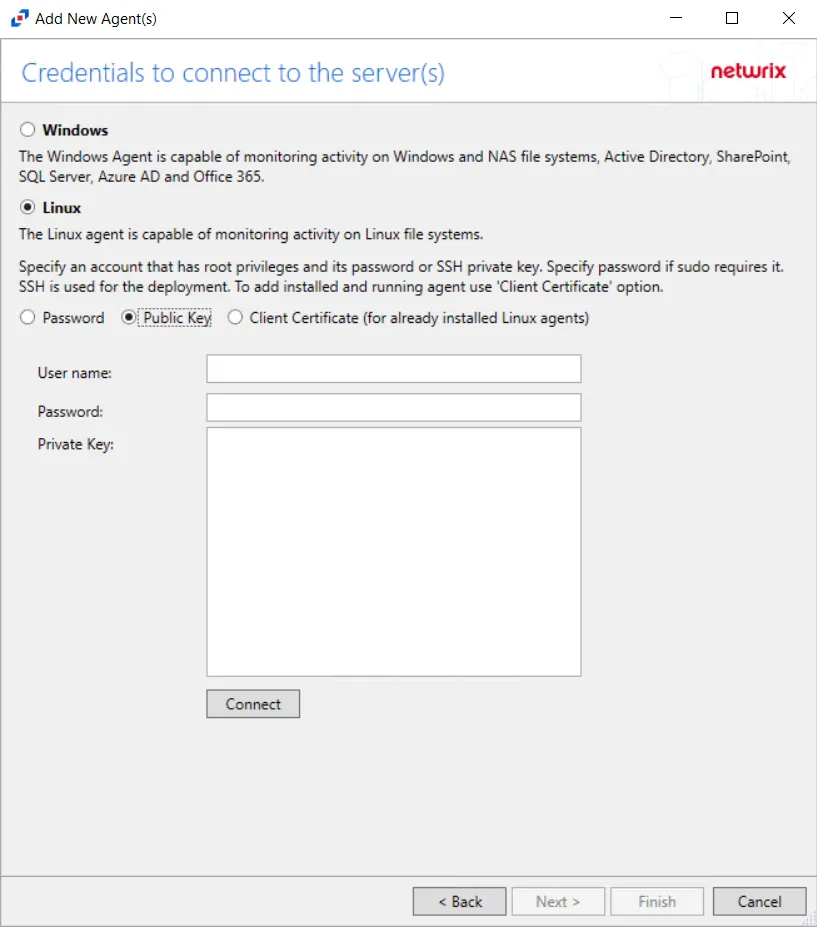
The options for connecting with a Public Key are:
-
User name
-
Private Key
-
Use the Public Key option to install an agent using SSH
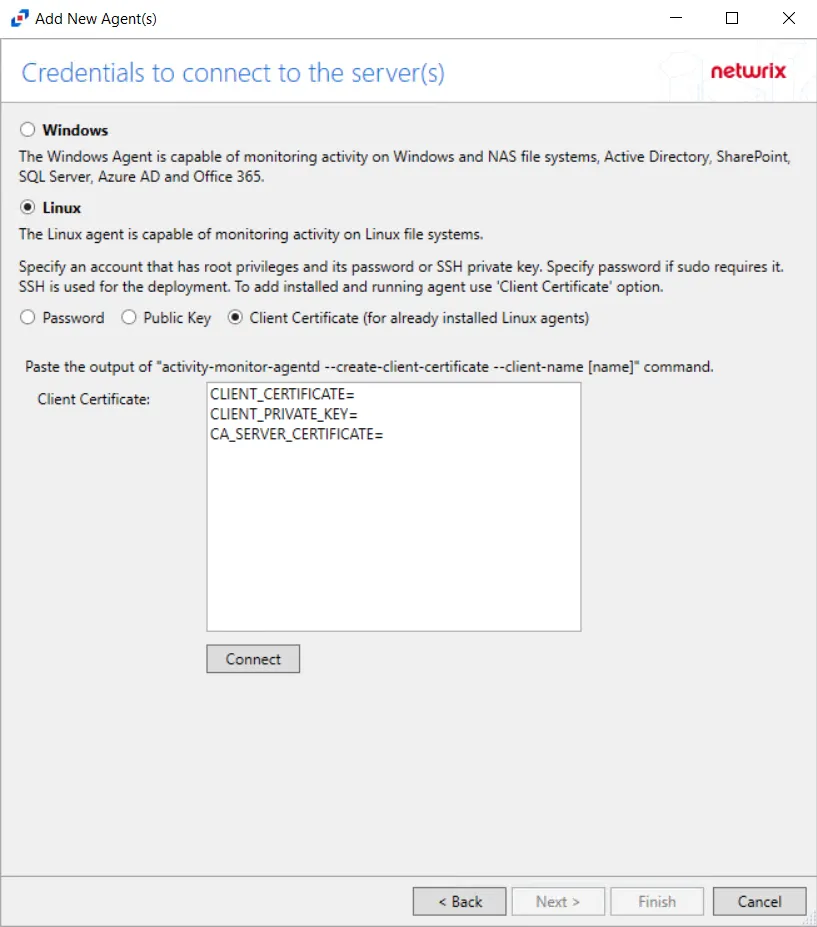
To connect with a Client Certificate, select the Client Certificate (for already installed agents) option. Copy the following command into a command prompt:
activity-monitor-agentd --create-client-certificate --client-name [NAME]
Using an existing Client Certificate installs a new agent without using SSH.
Step 6 – Click Connect to test the connection. If the connection is successful, click Next.
The credentials are tested against each server added on the Install Agent(s) on Multiple Hosts page. If the connection is unsuccessful, see the status message that appears for information on the failed connection. Activity agents are only successfully deployed for servers where the test status returns Ok. Failed deployments can be retried through the Connection tab of the agent’s Properties window. When one or more of the connections are successful, click Next.
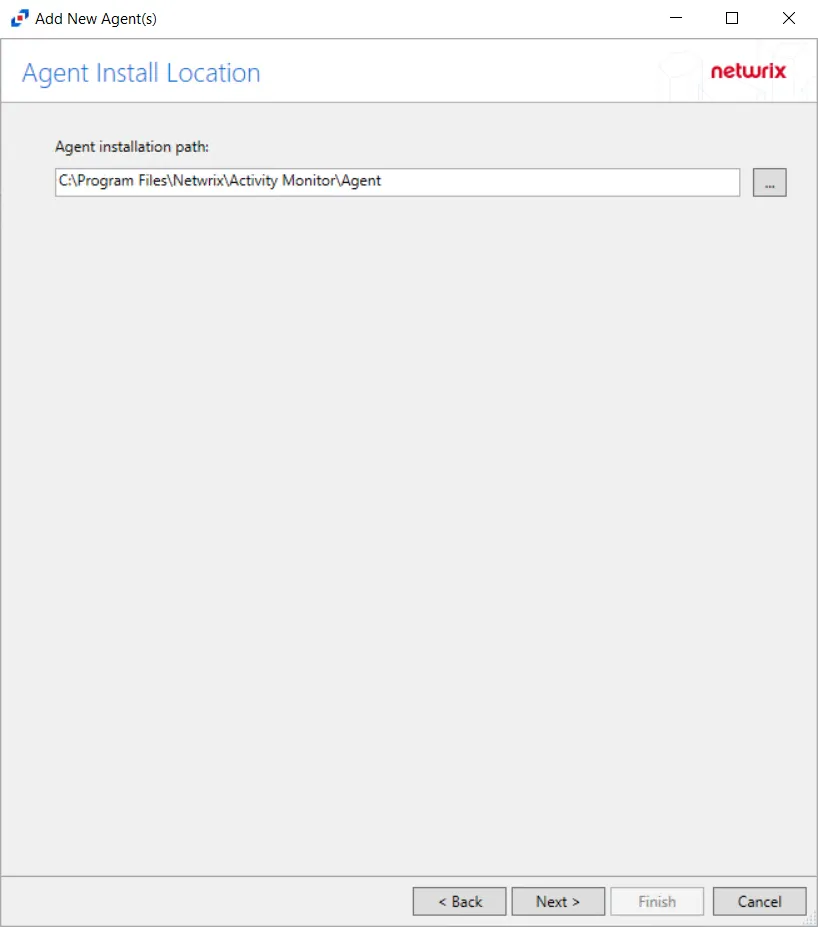
Step 7 – On the Agent Install Location page, browse to theselect the agent installation path.
The default path is C:\Program Files\Netwrix\Activity Monitor\Agent. Click Next.
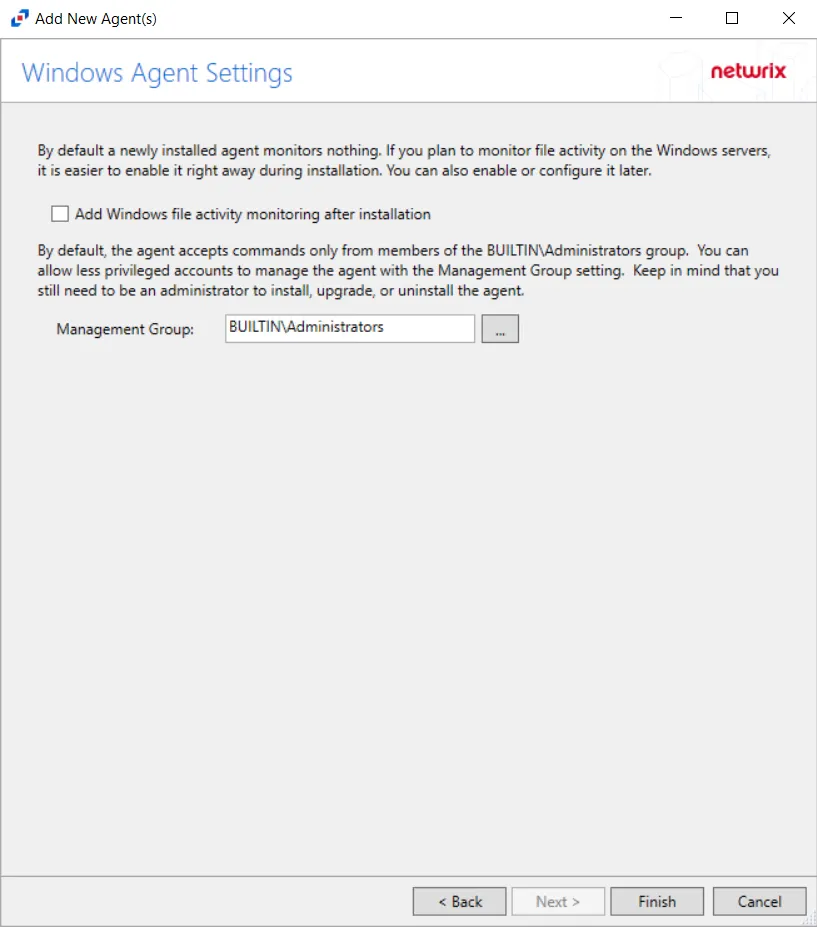
Step 8 – On the Windows Agent Settings window, configure the following options:
- Add Windows file activity monitoring after installation — Check the Add Windows file activity monitoring after installation checkbox to enable monitoring all file system activity on the targeted Windows server after installation.
- Management Group — By default, the agent only accepts commands from members from the BUILTIN\Administrators group. Less privileged accounts can be used to manage the agent with the Management group setting. Keep in mind that an administrator account must be used to install, upgrade, or uninstall an agent.
Step 9 – Click Finish. The Add New Agent(s) window closes, and the activity agent is deployed to and installed on the target host.
During the installation process, the status will be Installing. If there are any errors, the Activity Monitor stops the installation for that host and lists the errors in the Agent messages box.
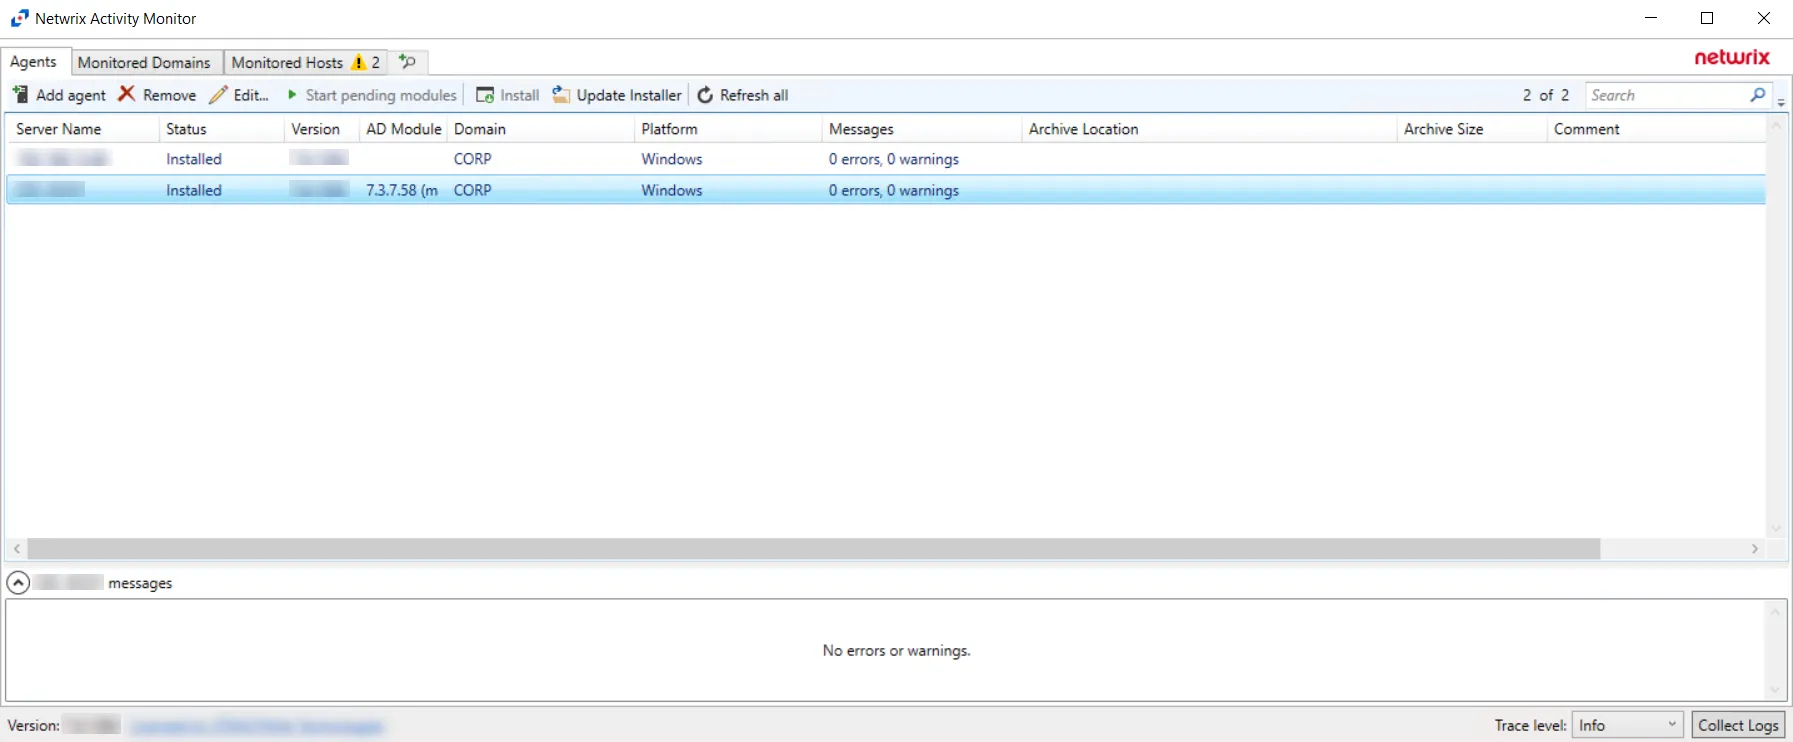
When the activity agent installation completes, the status changes to Installed and the activity agent version populates. The next step is to add hosts to be monitored. See the Monitored Hosts Tab topic for additional information.