Customization Examples
Here are several examples of why and how you might customize the Netwrix Auditor main page.
View Report and Add to Favorites
Follow the steps to view a report and add it to the list of Favorites.
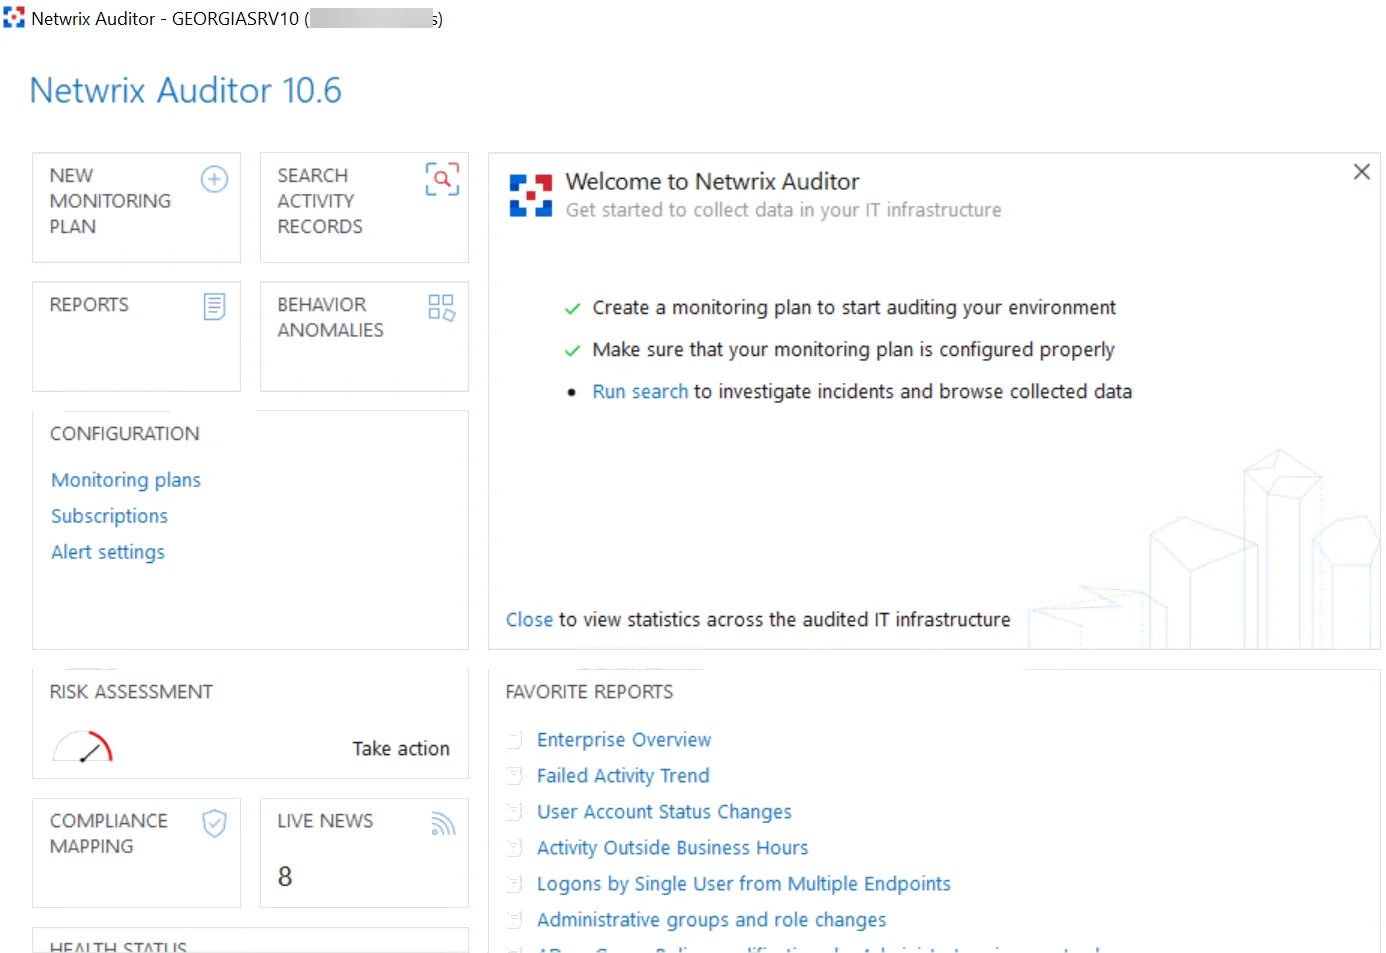
Step 1 – On the main Auditor page, click the Reports tile in the upper left corner.
Step 2 – Open a report you are interested in; for example, Account Permissions in Active Directory:
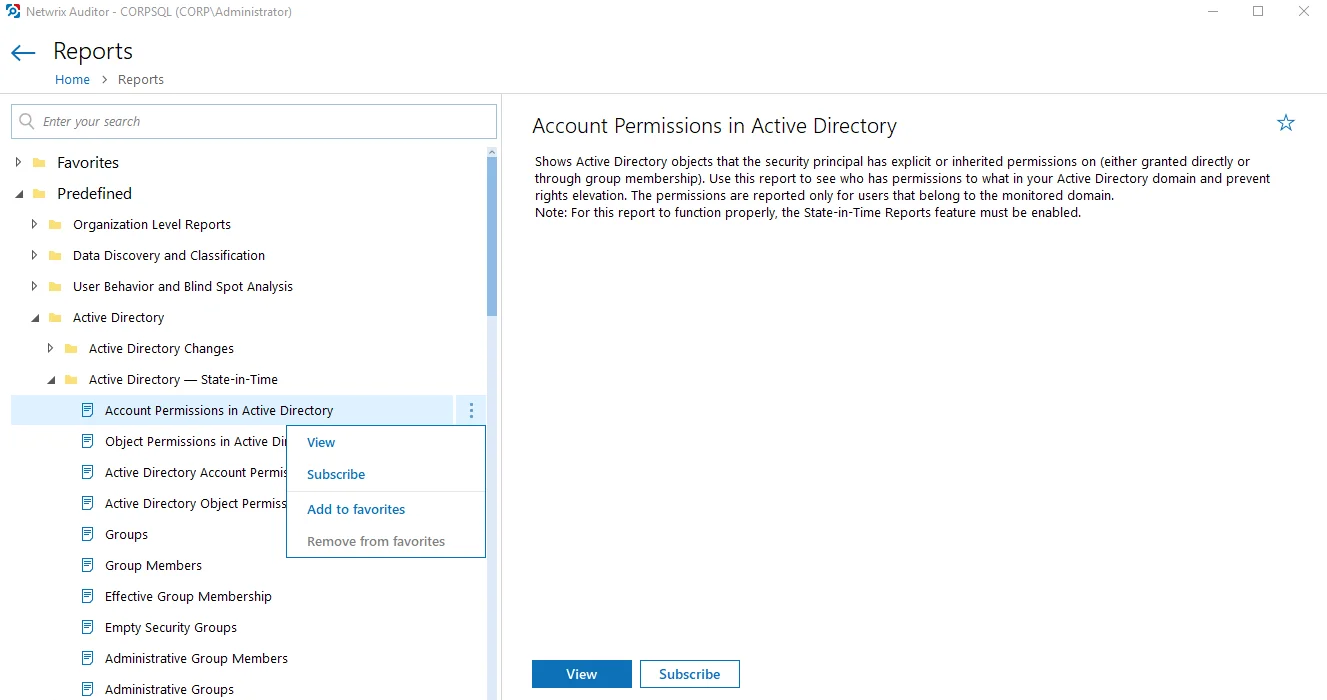
Step 3 – Click the report menu (three dots) to the right and select Add to favorites. (Alternatively, click the star icon in the upper right corner of the report description.)
The report is added to the Favorite reports section on the home page and you can run it instantly.
Run Search and Create Alert
Follow the steps to run search and create the alert based on the search filters.
Step 1 – On the main Auditor page, click the Search Activity Records tile.
Step 2 – Specify search filters to narrow your search results. See the Use Filters in Simple Mode topic for additional information.
Step 3 – Click Search.
Step 4 – Review your search results.
Step 5 – Navigate to Tools and click Create alert to get instant email or SMS notifications on suspicious activity that matches your current search criteria.
Step 6 – Specify a name for the new alert. See the Create Alertstopic for additional information.
Now, whenever there is activity that matches your search criteria, the appropriate people will receive a notification. You can also review the list of triggered alerts by clicking the Alerts tile on the home page, which opens the Alerts overview dashboard.
Review and Pin Risks
Follow the steps to review risks and pin important ones to the Home Screen.
Step 1 – On the main Auditor page, click the Risk Assessment tile.
Step 2 – Review the Risk Assessment Overview dashbord and select the risk you are interested in, such as "User Accounts with administrative permissions". See the IT Risk Assessment Overview topic for additional information.
Step 3 – To access this risk quickly, pin it to the home page, as follows:
-
On the main product page, click Customize.
-
Click Add tile.
-
Search the group of risks you want to pin to the home page (in this case, the "Permissions" risks group):

Step 4 – Click Add.
The selected risks group is added to the home screen.
What is Next?
Personalize the home page of the product depending on your business needs. Review the customization settings and collect only required tiles for quick access on the Auditor home page. See the Customize Home Screen topic for additional information.
Customizing Favorite Reports
The Favorite reports tile displays a shortened list of your favorite reports. To view, edit or update the full list, click View all.
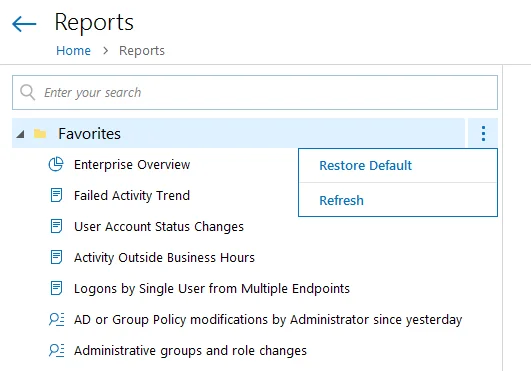
The Home > Reports page opens. This page includes several folders: Favorites, Predefined, Compliance and Custom. Favorite reports are located in the Favorites folder.

Follow the steps to add or remove a Favorite report
Step 1 – Locate the desired report in one of the other folders.
Step 2 – Click the name of the report to view its description.
Step 3 – To change whether the report is a favorite, click the star icon in the upper right-hand corner of the report description.
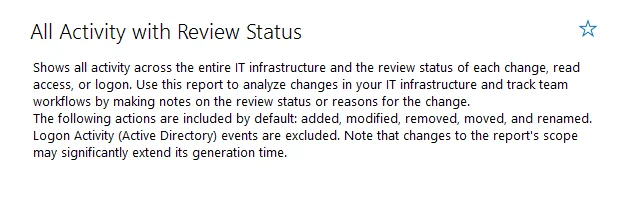
Report Summary with Star icon unchecked
Other Actions for Favorite Reports
The options on the Reports page for Favorite reports are show below:
 | 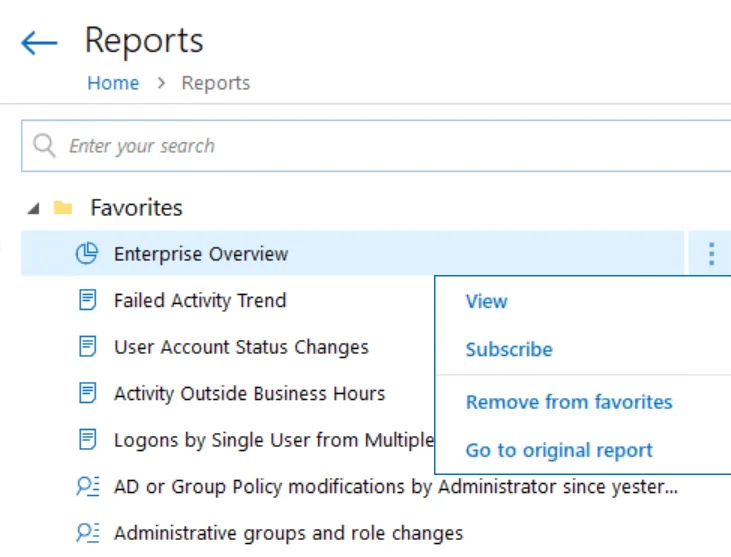 |
| Favorites Sub-Folder Options | Favorites > [Report] Options |
| Option Name | Description |
| --- | --- |
| Restore Default | Repopulates the Favorites sub-folder with all reports that have been marked Favorite. When using Role-Based Access in Netwrix Auditor, if several users mark the same report as Favorite, then that report will be removed from the Favorites list if a user removes the report from the Favorites list. Using the Restore Default option will re-add the report to the Favorites list for all users that have not removed the Favorite mark. |
| Refresh | Runs the reports in the Favorites folder to display the most recent information. |
| View | Opens the Preview Report page. There, you can modify report options (such as the timeframe) if desired, and then click View Report to see the resulting report. See the View Reports topic for additional information. |
| Subscribe | Opens the Add Subscription to Report page. See the Create Subscriptions topic for additional information. |
| Add to Favorites | This option is greyed out when viewing the Favorites list, since all the reports shown have already been added to Favorites. |
| Remove from Favorites | Removes a report from the Favorites list. This option provides the same function as removing a report as a favorite using the Star icon. |
| Go to Original | Expands the sub-folder in which the report is originally located. For example, clicking Go to Original for the Enterprise Overview report will expand the Predefined > Organization Level Reports sub-folder. |
Customize Home Screen
Starting with version 10, you can personalize theHome Screen of Netwrix Auditor to display the tiles that best meet your needs. Be sure to plan your screen space, considering which tiles you want to pin and their dimensions. You can modify the size of any tile; horizontal scrolling is also supported. Rest assured that your configurations and data will not be affected by any changes you make to the home screen.
Add a Tile to the Home Screen
Follow the steps to add tile on the Home Screen.
Step 1 – Click Customize in the upper right corner of the home screen.
Step 2 – Select Add tile.
Either search for the tile you want by name, or select it from the list of tiles. Note that tiles are grouped into menus; to view all tiles within a menu, check Show all menu tiles.
Step 3 – Click Add and the selected tile appears on the home screen.
Step 4 – Drag and drop it to the desired location.
Step 5 – Click Apply.
Remove a Tile from the Home Screen
Follow the steps to remove a tile from the Home Screen.
Step 1 – Click Customize in the upper right corner of the home screen.
Step 2 – Select the tile you want to remove.
Step 3 – Click close (x):

Step 4 – Click Apply.
Resize a Tile on the Home Screen
You can change the size of the tile to plan your screen placement and view detailed information on what you are interested in. There are several types of size: small, medium, wide, large, extra large, extra tall. However, not every tile supports all types of sizes. Tiles with graphic information have medium, large and extra large sizes. These sizes provide more screen space, resulting in a better visual representation of data. Additionally, tiles with less information have small and wide sizes. They are designed to open separate windows, providing easy access to features such as search, reports, and live news updates.
Follow the steps to resizea tile.
Step 1 – Click Customize in the upper right corner of the home screen.
Step 2 – Select the tile you want to resize.
Step 3 – Click the resize button:

Step 4 – Select the preferred size from the drop-down list.
Restore the Default View
Follow the steps to restore the default Home Screen view.
Step 1 – Click Customize in the upper right corner of the Home Screen.
Step 2 – Click Restore default.
Your configuration and data will be preserved during this operation.
Recommendations
This section covers the Recommendations interface that contains detailed guidance on the Auditor usage patterns. Once you installed the product, configured your IT infrastructure, and prepared Netwrix Service Accounts, you can start collecting data and review it with Netwrix Auditor. The recommendations are based on your current product configuration and help you to experience the Auditor capabilities in earnest.
Follow the steps to review the recommendations provided by Netwrix industry experts.
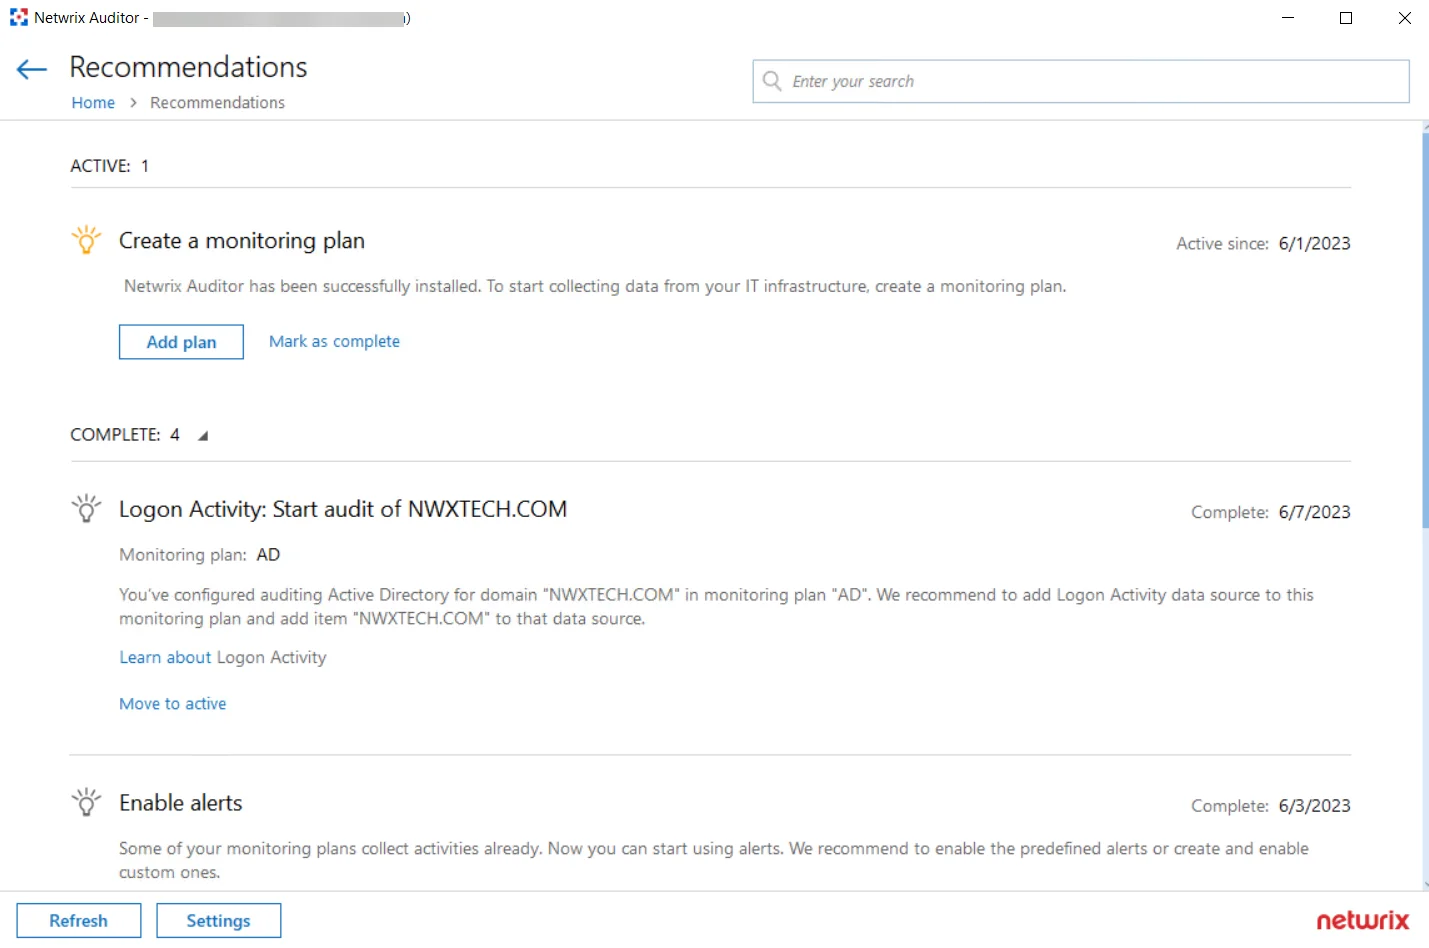
Step 1 – On the Auditor home page, click the Recommendations tile.
Step 2 – Review the recommendations applicable to your current Auditor configuration and take required steps.
Once the required steps are done, the recommendation goes to the 'Complete' list. You can move it back to the active state any time you want by clicking the Move to active link.
Available Recommendations
Review the list of the recommendations available in Auditor.
Create Your First Monitoring Plan
To start collecting data with Netwrix Auditor, you need to create a monitoring plan that defines data collection, notification, and storage settings and add a source-specific item. This recommendation will appear if you don’t have any monitoring plans configured. Clicking the Add plan button opens the New Monitoring Plan wizard. See the Create a New Plan topic for additional information about plans configuration. Once completed, you will be prompted to add an item to your plan, otherwise the configuration will be incomplete and the product will not be able to collect data. Auditor automatically suggests item types associated with your data source.
Start Abandoned Data Source Auditing
If you have a license for several applications, Netwrix suggests enabling each undeployed data source for each purchased application if they were never deployed before. Clicking the Add plan button opens the New Monitoring Plan wizard. Select the data source you want to monitor with Netwrix Auditor and see the Create a New Plan topic for additional information about further configuration.
Enable State-in-Time Data Collection
If you want to review the state of your system configuration at a specific moment in time, for example, account permissions or group membership, you need to enable the State-in-Time data collection for your data source. See the State–in–Time Reports topic for additional information about the available reports. Clicking the Go to data source button opens the settings page of the data source to which this recommendation applies to. See the Manage Data Sources topic for additional information.
NOTE: This recommendation will not be shown for to the File Servers data sources (Windows-based file shares, NetApp Filers, Dell Data Storage, etc.). Navigate to your file server data source and check the state-in-time data collection settings manually.
Subscribe to the Health Summary Email
The Health Summary email includes all statistics on the product operations and health for the last 24 hours; it also notifies you about license status. If you have configured monitoring plans with data sources and items, Netwrix recommends subscribing to Health Summary emails to be notified on the problems that need your attention. See the Health Summary Email topic for additional information.
Clicking the Go to Notifications button opens the Netwrix Auditor notifications settings page. See the Notifications topic for additional information.
Logon Activity: Start Auditing Item
If you have the monitoring plans with configured Active Directory data source and domain item, Netwrix recommends creating a new monitoring plan for the Logon Activity data source to review details around interactive and non-interactive logons, including failed logon attempts, and users logon and logoff activity on domain controllers in the audited domain. Clicking the Add plan button opens the New Monitoring Plan wizard with the Logon Activity as a selected data source. See the Create a New Plan topic for additional information about further configuration.
Enable Alerts
For the configured monitoring plans, Netwrix recommends enabling alerts to be immediately notified on the suspicious activity. You can enable predefined alerts or create your custom ones.
Clicking the Open settings button opens the All Alerts wizard. See the Manage Alerts topic for additional information.
Manage Recommendations
For active recommendations, you can follow the prompts or move them to the completed state by clicking the 'Mark as complete' link.
For completed recommendations, you can configure the retention period to keep them visible and select their categories for further displaying on the tile. If you want to proceed with a completed recommendation, click the 'Move to active' link below the recommendation.
Follow the steps to manage recommendations:
Step 1 – On the Auditor home page, click the Recommendations tile.
Step 2 – Click Settings at the bottom.
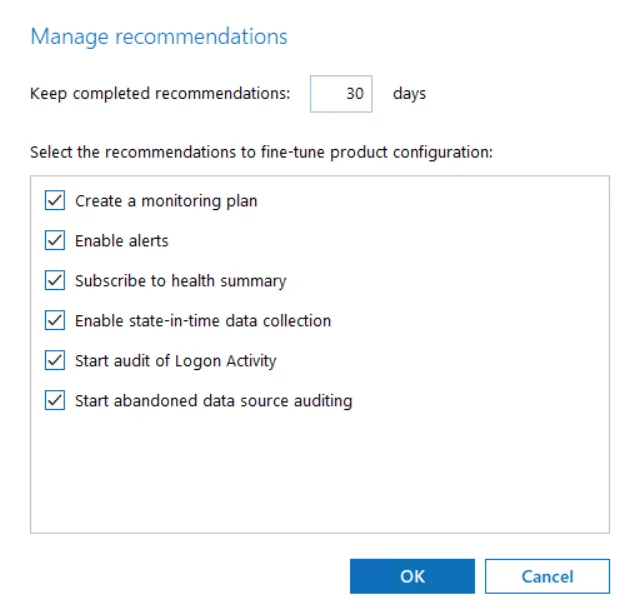
Step 3 – In the Manage recommendations dialog, do the following:
-
Keep completed recommendations: <30> days – Specify time period in days to keep the completed recommendations visible. The default period is set to 30 days.
-
Select the recommendations to fine-tune product configuration – Select recommendations types you want to be displayed. When checked, the recommendations of the selected type appear once your Auditor configuration meets the recommendation conditions.
For example, if you selected the 'Enable State-in-Time data collection', this recommendation appears for each new monitoring plan with disabled state-in-time option.
Step 4 – Click OK to save your edits.
To refresh the recommendations list, click the Refresh button in the left bottom corner.