IT Risk Assessment Overview
To help you identify configuration gaps in your environment and understand their impact on overall security, Netwrix Auditor offers a dashboard with a number of metrics and drill-down reports on IT risk assessment. They pinpoint the weak points in your IT infrastructure such as overly broad assignment of access rights, loose password policies, and stale accounts. This information will help you to take corrective measures in the required area, ensuring the IT risks stay in the safe zone.
Risk assessment dashboard can be accessed by clicking the Risk assessment tile in the main window of Netwrix Auditor. For details about using the dashboard, see IT Risk Assessment Dashboard.
For details about metrics calculation, see How Risk Levels Are Estimated .
Providing Data for Risk Assessment
To provide data for metrics and reports that belong to different categories, you will need to configure monitoring plans that will process related data sources. These monitoring plans should have at least one item added. See the following table for the certain reports:
| Category | Report name | Collect data from |
|---|---|---|
| Users and Computers | User accounts with "Password never expires" | AD domain |
| User accounts with "Password not required" | AD domain | |
| Disabled computer accounts | AD domain | |
| Inactive user accounts | AD domain | |
| Inactive computer accounts | AD domain | |
| Servers with Guest account enabled | Windows Server | |
| Servers that have local user accounts with "Password never expires" | Windows Server | |
| Permissions | User accounts with administrative permissions | AD domain |
| Administrative groups | AD domain | |
| Administrative group membership sprawl | Windows Server | |
| Empty security group | AD domain | |
| Site collections with the "Get a link" feature enabled | SharePoint farm | |
| Sites with the "Anonymous access" feature enabled | SharePoint farm | |
| Site collections with broken inheritance | SharePoint farm | |
| Sites with broken inheritance | SharePoint farm | |
| Data | Files and folders accessible by Everyone | Windows File Server |
| Sensitive data shared with Everyone * | Windows File Server | |
| File and folder names containing sensitive data | Windows File Server | |
| Potentially harmful files on file shares | Windows File Server | |
| Direct permissions on files and folders | Windows File Server | |
| Direct permissions to sensitive files * | Windows File Server | |
| Documents and list items accessible by Everyone and Authenticated Users | SharePoint farm | |
| Files shared with external users | Windows File Server | |
| Files shared with anonymous users | Windows File Server | |
| Documents and list items accessible by Everyone | Windows File Server | |
| Files that can be modified by external users or anonymous users | Windows File Server | |
| Infrastructure | Servers with inappropriate operating systems | Windows Server |
| Servers with under-governed Windows Update configurations | Windows Server | |
| Servers with unauthorized antivirus software | Windows Server |
NOTE: Risks marked with (*) require both pre-configured NDC SQL database connection and NDC API connection. To check configuration status, go to Settings > Sensitive Data Discovery. See Sensitive Data Discovery for more information.
NOTE: Right after setting up the integration the drill down reports might be empty, while the risk indicator is already completed. Please wait until Auditor gets all the information from Netwrix Data Classification it needs.
Required Monitoring Plan Settings
To provide data needed for risk assessment, the related monitoring plan must be set up to store data to the audit database.
Also, consider that all risk metrics and related reports require state-in-time data to be collected. You can select the relevant option when creating a new monitoring plan, as described in the Create a New Monitoring Plan section. For the exising plan, refer to the procedure below.
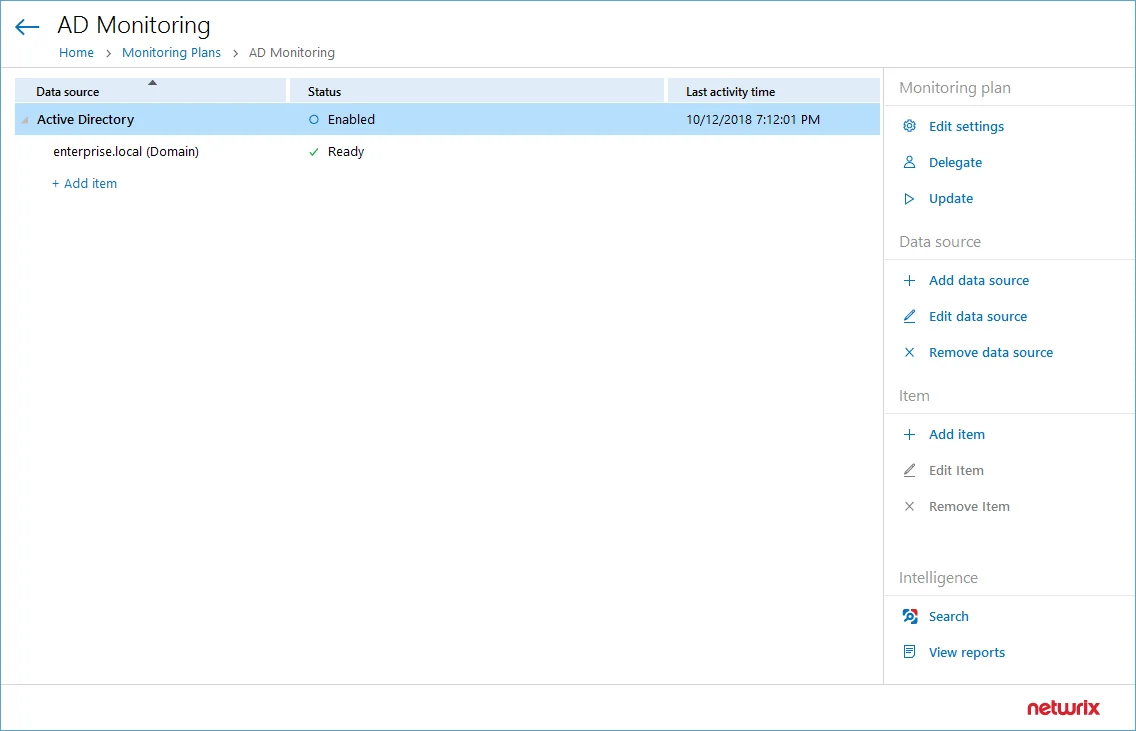
To verify the necessary settings of the existing plan
- Select the monitoring plan you need and click the Edit button.
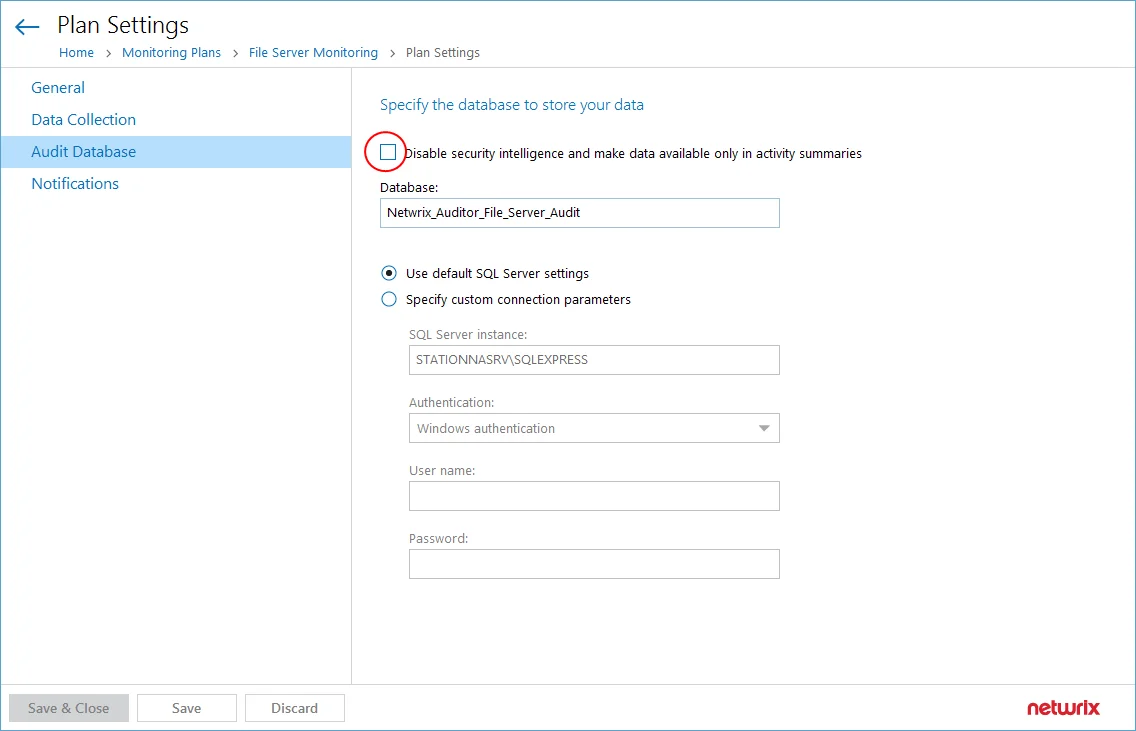
- In the right pane of the dialog displayed, select Edit settings from the Monitoring plan section.
- Go to the Audit Database section and make sure that Disable security intelligence ... checkbox is
cleared. This will instruct Netwrix Auditor to store data to both Long-Term Archive and audit
database:
- Save the settings and return to the window with the monitoring plan details. Make sure you have at least one monitored item in the plan. If necessary, add an item.
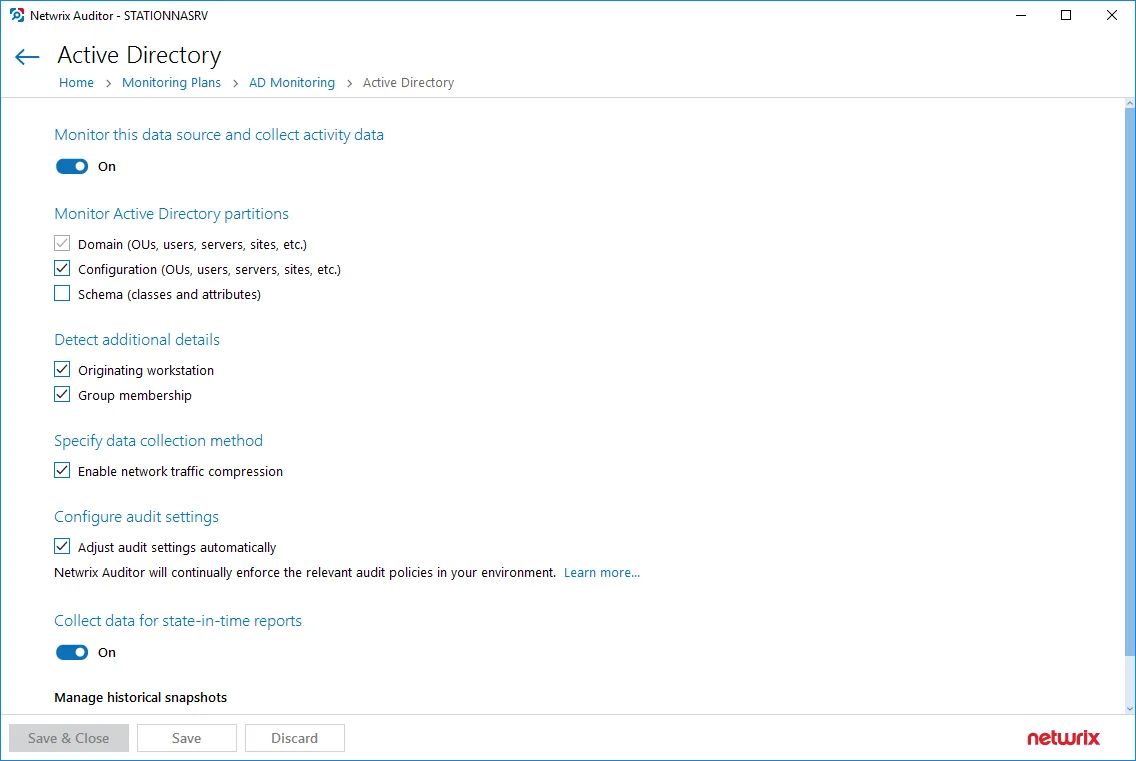
- Select the data source you need (for example, Active Directory) and click Edit data source from
the Data source section on the right.
- Make sure that:
- Monitor this data source and collect activity data is switched ON.
- Collect data for state-in-time reports is switched ON.
- Save the settings and close the dialog.