Work with Collected Data
To leverage data collected with the add-on, you can do the following in Auditor:
- Search for required data. For that, start Auditor client and navigate to Search. After specifying the criteria you need, click Search. You will get a list of activity records with detailed information on who did what in the reported time period.
You might want to apply a filter to narrow down your search results to the NetwrixAPI data source only.
- You can also click Tools in the upper-right corner and select the command you need. For
example:
- If you want to periodically receive the report on the results of search with the specified criteria, click Subscribe. Then specify how you want the report to be delivered – as an email or as a file stored to the file share.
- To create an alert on the specific occurrences, click Create alert.
- To export filtered data to PDF or CSV, click Export data.
- You can also configure and receive alerts on the events you are interested in.
See the following topics for additional information:
Deployment Procedure
Follow the steps to install Azure Files add-on.
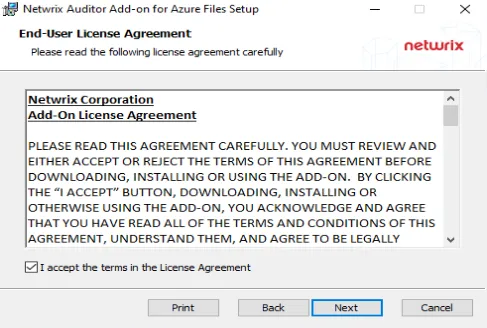
Step 1 – Accept EULA.
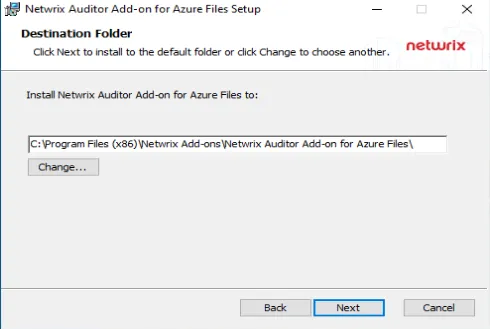
Step 2 – Select the installation folder and click Next.
Step 3 – Click Install. The wizard will start and ask the additional parameters.
Configure Azure Files for Monitoring
Follow the steps to configure Azure files for monitoring.
Step 1 – Make sure you have a storage account to store logs. To reduce the volume of the stored logs and the corresponding cost, it is recommended to create a rule in Life Cycle Management for this storage. Netwrix Auditor doesn't need historic logs, after the add-on has written them into the database. Refer to the corresponding Microsoft article for additional information.
Step 2 – Enable audit in the Azure Files settings. Go to the Diagnostic settings, and make sure that the following options are selected:
- "Audit" under the Logs
- "Archive to a storage account" under the Destination details
- Correct Storage account in the drop-down menu
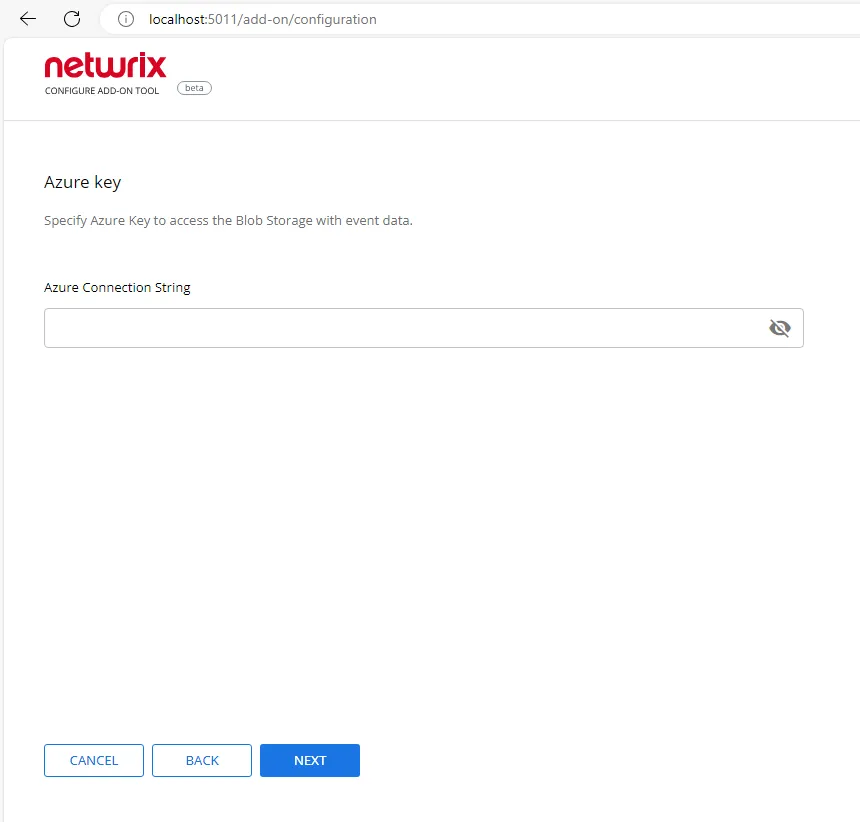
Step 3 – Go to the storage account that has been created before and copy Connection String. This parameter will be used in the add-on configuration.
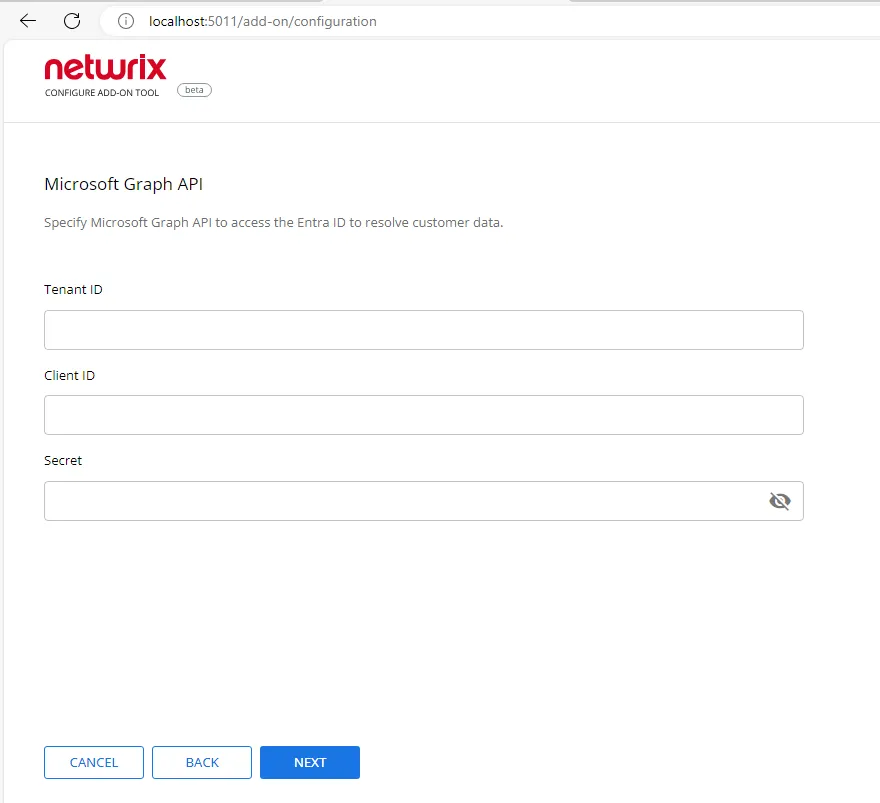
Step 4 – If Microsoft Entra Kerberos or Active Directory Domain Services is used as an Identity source, Graph API will be used to resolve the user names. It is necessary to register an Azure App and grant it the following permissions:
- Type - Application
- Microsoft.Graph - User.Read.All
After that, save the Tenant ID, Application ID, and secret.
Configure the add-on
Follow the steps to configure the add-on.
Step 1 – After the installation, the add-on configuration wizard will start. If it didn't start automatically - open it from the installation folder.
Step 2 – Select Proceed.
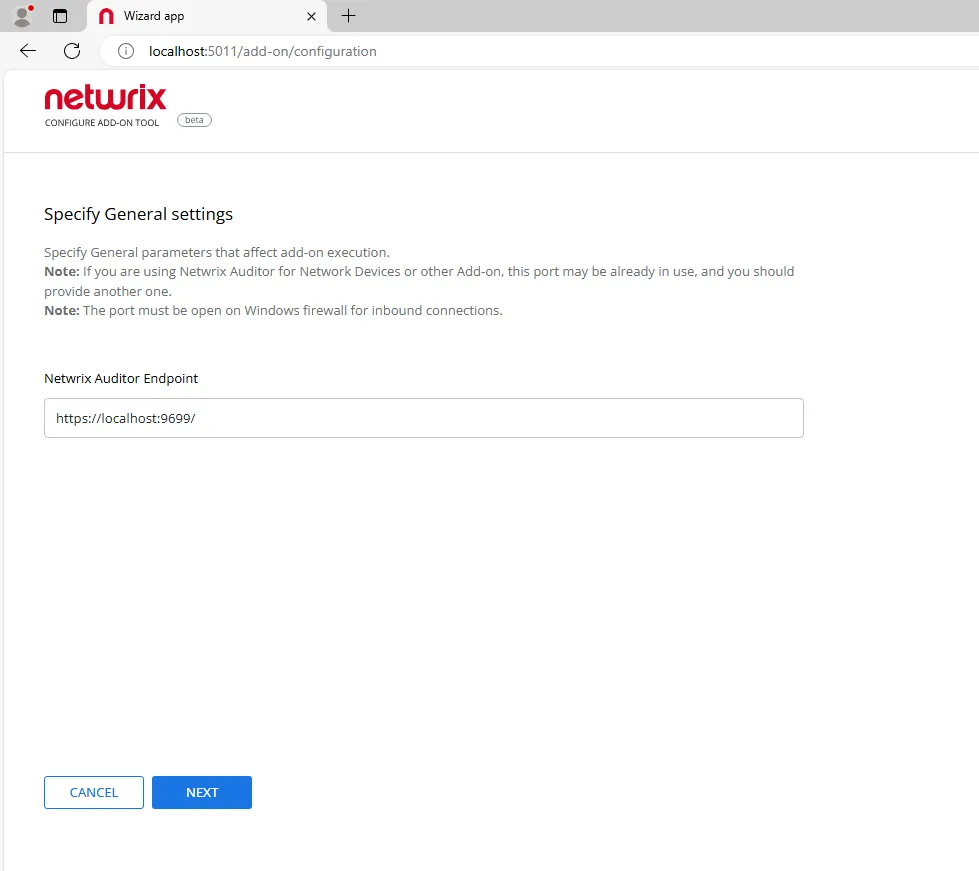
Step 3 – Provide Auditor Server IP address and port number followed by endpoint for posting Activity Records. See the API Endpoints topic for more information.
This assumes that the add-on runs on the computer hosting Auditor Server and uses default port 9699.
If you want to run the add-on on another machine, you need to provide a name of the computer where Auditor Server resides (e.g., 172.28.6.15, EnterpriseNAServer, WKS.enterprise.local). To specify a non-default port, provide a server name followed by the port number (e.g., WKS.ent erprise.local:9999).
CAUTION: Do not modify the endpoint part (/netwrix/api).
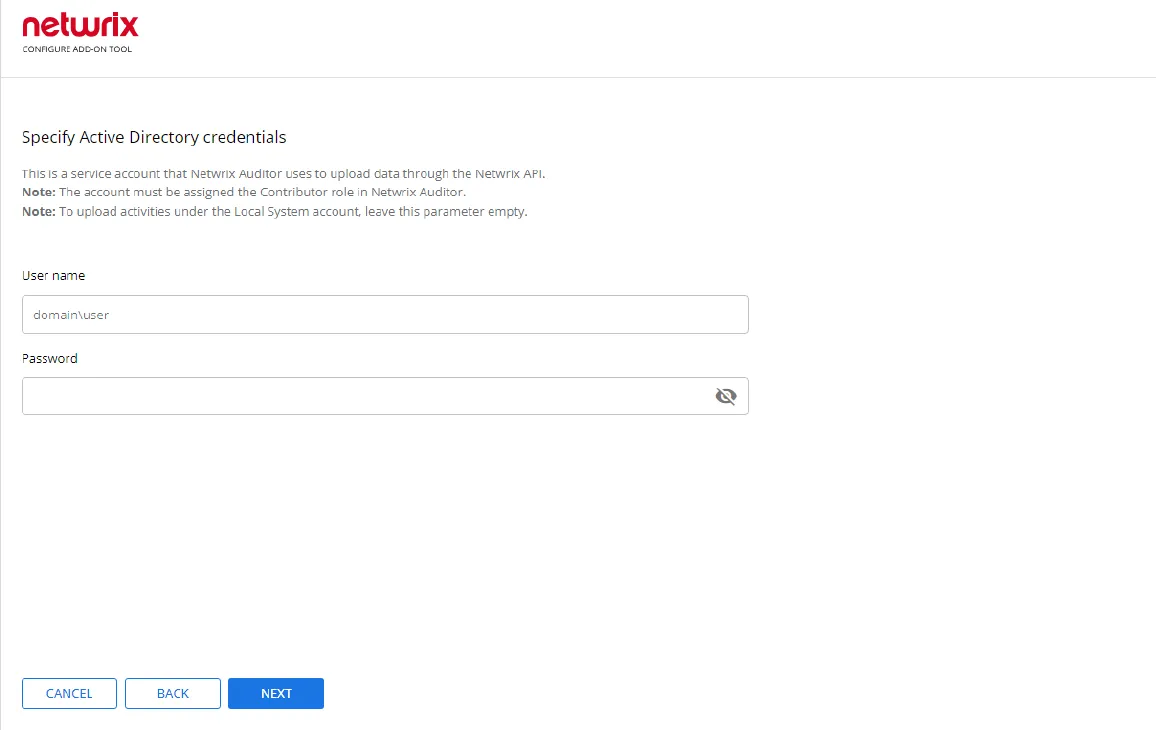
Step 4 – Specify Active Directory credentials:
- Username – Provide the name of the account under which the service runs. Unless specified, the service runs under the account currently logged on.
- Password – Provide the password for the selected account.
Step 5 – Paste Azure Connection String in the corresponded field and click Next.
Step 6 – Enter Tenant ID, App ID and App Secret of the Azure App you registered for the add-on. Click Next.
Step 7 – Click Run and close the window. The service should start the data collection now.
Azure Files
Azure Files is a Microsoft service that offers file shares in the cloud that are accessible via the industry standard Server Message Block (SMB) protocol, Network File System (NFS) protocol, and Azure Files REST API. Azure file shares can be mounted concurrently by cloud or on-premises deployments. SMB Azure file shares are accessible from Windows, Linux, and macOS clients. To learn more about Azure Files, refer to the corresponding Microsoft article.
The Netwrix Auditor Add-On for Azure Files works in collaboration with Netwrix Auditor, supplying data about SMB changes on your Azure Files shares, such as document reads, modifications and deletions.
To get the add-on up and running, please read the following topics:
Prerequisites
Before running the add-on, ensure that all the necessary components and policies are configured as follows:
- The Audit Database settings are configured in Auditor Server. See the Prerequisites and Audit Database topics for additional information.
- The TCP 9699 port (default Integration API port) is open for inbound connections.
- The user writing data to the Audit Database is granted the Contributor role in Auditor. See the Role-Based Access and Delegation topic for additional information.
- Alternatively, you can grant the Global administrator role or add the user to the Netwrix Auditor Administrators group. In this case, this user will have the most extended permissions in the product.
- Azure Files environment is configured for auditing. The connection of Azure file share to Windows should be configured with authentication through Active Directory or Entra ID (as opposed to the account key). See the Deployment Proceduretopic for more information.
- Active Directory Domain Services or Microsoft Entra Kerberos is used as an Identity source. See the Deployment Procedure topic for additional information.
How It Works
On a high level, the add-on works as follows:
- The add-on collects logs from the specified Azure storage account. The add-on supports activity auditing of shares with identity-based access via saved logs collected from storage account and using Graph API for SIDs resolving.
- The add-on processes these events into Netwrix Auditor compatible format (Activity Records). Each Activity Record contains the user account, action, time, and other details.
- Using the Integration API, the add-on sends the activity records to the Netwrix Auditor Server, which writes them to the Long-Term Archive and the Audit Database.