SharePoint Online
NOTE: Read and complete the instructions in the following topics before configuring your monitoring plan:
-
Protocols and Ports Required – To ensure successful data collection and activity monitoring configure necessary protocols and ports for inbound and outbound connections
-
Data Collecting Account – Configure data collecting accounts as required to audit your IT systems
-
SharePoint Online – Configure data source as required to be monitored
To configure SharePoint Online data source settings, complete the following fields:
| Option | Description |
|---|---|
| Monitor this data source and collect activity data | Enable monitoring of the selected data source and configure Auditor to collect and store audit data. |
| Audit SharePoint Online configuration and content changes | Auditor always audits configuration and content changes. |
| Audit SharePoint Online read access | Configure Auditor to monitor SharePoint Online read access. |
| Collect data for state-in-time reports | Configure Netwrix Auditor to store daily snapshots of your SharePoint Online configuration required for further state-in-time reports generation. See the State–In–Time Reports topic for additional information. The product updates the latest snapshot on the regular basis to keep users up-to-date on actual system state. Only the latest snapshot is available for reporting in Netwrix Auditor. If you want to generate reports based on different snapshots, you must import snapshots to the Audit Database. For that, in the Manage historical snapshots section, click Manage and select the snapshots that you want to import. To import snapshots, you must be assigned the Global administrator or the Global reviewer role . Move the selected snapshots to the Snapshots available for reporting list using the arrow button. When finished, click OK. |
| Skip inaccessible SharePoint Online sites | When enabled, Netwrix Auditor skips SharePoint Online sites that are inaccessible to the data collecting account and continues data collection for the remaining sites. |
Review your data source settings and click Add to go back to your plan. The newly created data source will appear in the Data source list. As a next step, click Add item to specify an object for monitoring. See the Add Items for Monitoring topic for additional information.
How to Add Office365 Item
This instruction shows how to collect audit data from the Microsoft 365 tenant.
If you plan to use modern authentication, see the Configuring Microsoft Entra ID App for Auditing Microsoft Entra ID topic for additional information on how to prepare Microsoft Entra ID app with required permissions. Ensure you have the following available:
- Tenant name
- For modern authentication: Application (client) ID
- Application secret
- For basic authentication: User name and password
The types of data Netwrix Auditor can collect from the Microsoft 365 tenant depend on the authentication option you choose.
To configure Office 365 tenant as a monitored item, complete the following steps.
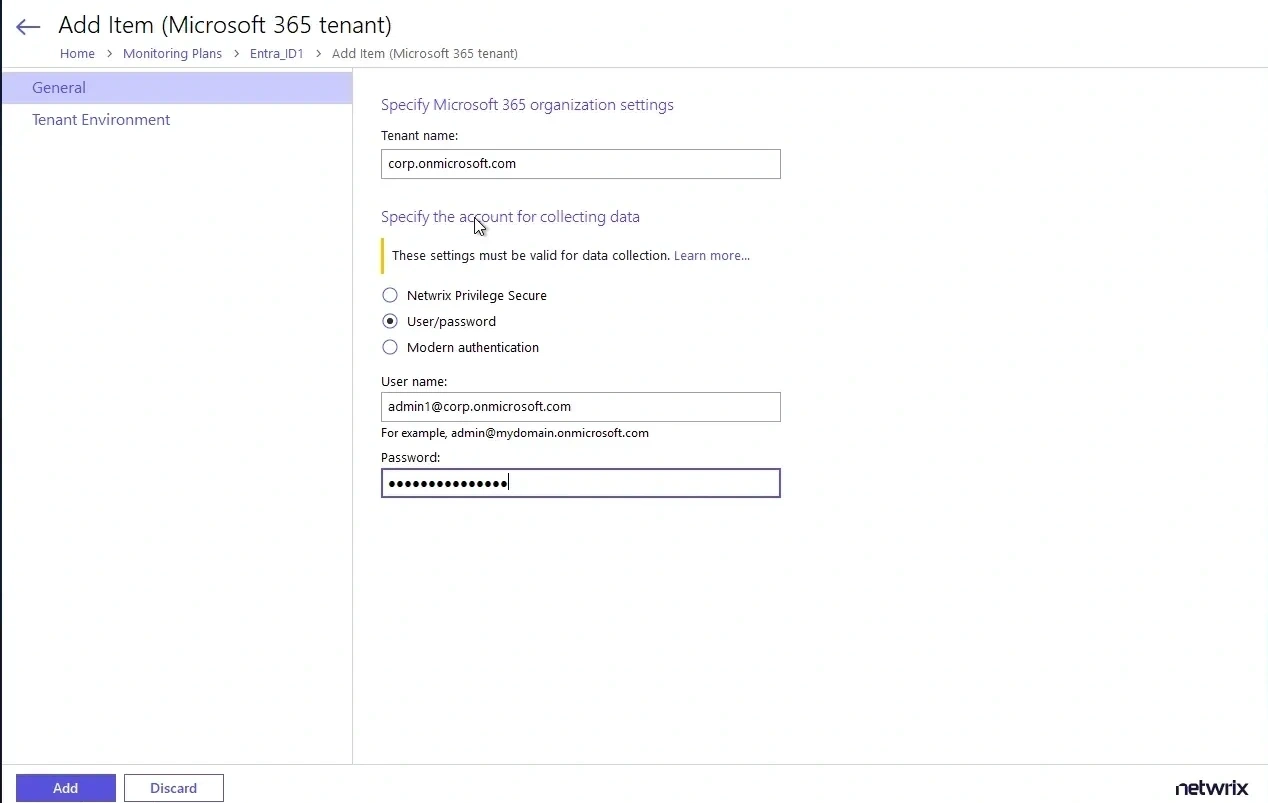
Step 1 – On the General page of the item properties, specify Tenant name:
- If you are going to use Basic authentication, you can proceed to the next step – Tenant name will be filled in automatically after it.
- If you are going to use Modern authentication, paste the obtained name. See the Using Modern Authentication with Microsoft Entra ID topic for additional information.
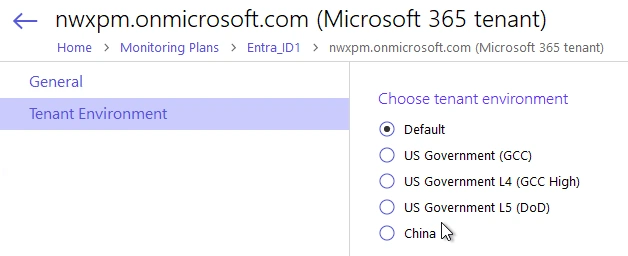
- If you are using a government tenant, click the Tenant Environment tab and select the desired tenant environment.
Basic authentication is no longer possible for Exchange Online. For the already existing tenants, it is still possible to use basic authentication for SharePoint Online and Microsoft Entra ID monitoring.
Step 2 – Select the authentication method to use when accessing Office 365 services:
-
Basic authentication:
- Selected, Office 365 organization will be accessed on behalf of the user you specify.
- Enter User name and password; use any of the following formats: user@domain.com or user@domain.onmicrosoft.com.
- The Tenant name field then will be filled in automatically.
- ensure this user account has sufficient access rights. See Using Basic Authentication with Microsoft Entra ID topic for additional information.
-
Modern authentication:
-
Selected, Office 365 organization will be accessed using the Microsoft Entra ID (formerly Azure AD) app you prepared. Enter:
- Application ID
- Application secret
-
See the Using Modern Authentication with Microsoft Entra ID for additional information.
-
Step 3 – Click the Add button.
You can use a single account to collect audit data for different Office 365 services (Microsoft Entra ID, Exchange Online, SharePoint Online); however, Netwrix recommends that you specify individual credentials for each of them.
See the Permissions for SharePoint Online Auditing topic for additional information.