Event Log Manager
Netwrix Auditor Event Log Manager standalone tool consolidates and archives event log data, and lets you set up alerts on critical events, including unauthorized access to mailboxes in your Exchange organization and events generated by Auditor.
Netwrix Auditor relies on native logs for collecting audit data. Therefore, successful change and access auditing requires a certain configuration of native audit settings in the audited environment and on the Auditor console computer. Configuring your IT infrastructure may also include enabling certain built-in Windows services, etc. Configure auditing properly to ensure audit data integrity; otherwise, your change reports may contain warnings, errors, or incomplete audit data.
CAUTION: Folder associated with Netwrix Auditor must be excluded from antivirus scanning. See the Antivirus Exclusions for Netwrix Auditor knowledge base article for additional information.
You can configure your IT Infrastructure for monitoring in one of the following ways:
-
Automatically through a monitoring plan – This is the recommended method. If you select to configure audit automatically in the target environment, Auditor checks your current audit settings on each data collection and adjusts them if necessary.
-
Manually – Adjust native audit settings manually to collect comprehensive, reliable audit data. You can enable Auditor to continually enforce the relevant audit policies, or configure them manually:
- For Windows-based platforms: the Remote Registry service must be running and its Startup Type must be set to "Automatic".
- For Syslog-based platforms: the Syslog daemon must be configured to redirect events.
Review the following for additional information:
- Create Monitoring Plans for Event Logs
- Configure Audit Archiving Filters for Event Log
- Create Monitoring Plan for System Health Log
- Review Past Event Log Entries
- Import Audit Data with the Database Importer
- Create Alerts for Event Log
- Create Alerts for Non-Owner Mailbox Access Events
Create Monitoring Plans for Event Logs
Step 1 – Navigate to Start > Netwrix Auditor > Netwrix AuditorEvent Log Manager__.__
Step 2 – On the main page, select a monitoring plan. Click Add to add a new plan.
Step 3 – Configure basic parameters as follows:
-
Enable event log collection — Select the checkbox to start monitoring event logs.
-
Monitoring plan — Enter a name for a new list of monitored computers.
-
Notification recipients — Specify one or several email addresses for users to receive daily Event Log collection status notifications. Use semicolon to separate several addresses.
-
Monitored computers — Select items that you want to audit. You can add several items to your monitoring plan. Click Add and complete the following:
Option Description Computer name Lets you specify a single computer by entering its FQDN, NETBIOS, or IP address. You can click Browse to select a computer from the list of computers in your network. Active Directory container Lets you specify a whole AD container. Click Browse to select from the list of containers in your network. You can also: - Select a particular computer type to be monitored within the chosen AD container: Domain controllers, Servers (excluding domain controllers), or Workstations. - Click Exclude to specify domains, OUs, and containers you don't want to audit. The list of containers doesn't include child domains of trusted domains. Use other options (Computer name, IP address range, or Import computer names from a file) to specify the target computers. IP address range / Computers within an IP range Lets you specify an IP range for the audited computers. To exclude computers from within the specified range, click Exclude. Enter the IP range you want to exclude, and click Add.
Step 4 – You can specify multiple computer names by importing a list from a .txt file (Auditor accepts one computer name or IP address per line). Click Import and select a .txt file. You can choose whether to import the list once, or to update it on every data collection.
Step 5 – Navigate to the General tab and configure the following:
| Option | Description |
|---|---|
| User name Password | Enter the account that Netwrix Auditor Event Log Manager uses for data collection. For a full list of the rights and permissions required for the account, and instructions on how to configure them, refer to the Permissions for Event Log Auditing section. |
| Audit archiving filters | Define which events Auditor saves to the Long-Term Archive or the Audit Database. See Configure Audit Archiving Filters for Event Log for detailed instructions on how to configure audit archiving filters. |
| Alerts | Configure alerts that specific events trigger. Refer to Create Alerts for Event Log for detailed instructions on how to configure Netwrix Auditor Event Log Manager alerts. |
Step 6 – Navigate to the Notifications tab and complete the following fields:
| Option | Description |
|---|---|
| SMTP server | Enter your SMTP server address. It can be your company's Exchange server or any public mail server (e.g., Gmail, Yahoo). |
| Port number | Specify your SMTP server port number. |
| Sender address | Enter the address that appears in the From field. RECOMMENDED: click Send Test Email. The system sends a test message to the specified email address and notifies you of any problems. |
| SMTP authentication | Select this checkbox if your mail server requires the SMTP authentication. |
| User name | Enter a user name for the SMTP authentication. |
| Password | Enter a password for SMTP authentication. |
| Use Secure Sockets Layer encrypted connection (SSL) | Select this checkbox if your SMTP server requires SSL to be enabled. |
| Use implicit SSL | Select this checkbox if the implicit SSL mode is used, which means that an SSL connection is established before any meaningful data is sent. |
| Enforce certificate validation to ensure security | Select this checkbox if you want to verify security certificate on every email transmission. The option isn't available for auditing User Activity or other Netwrix Auditor tools. |
Step 7 – Navigate to the Audit Database tab to configure Audit Database and review SQL Server settings. Netwrix Auditor Event Log Manager synchronizes Audit Database and reports settings with the default Audit Database configuration from Netwrix Auditor Server. If this option is disabled, contact your Netwrix Auditor Global administrator and ensure that these settings are properly configured in Netwrix Auditor Server. Refer to Audit Database for detailed instructions on how to configure the Audit Database settings.
Step 8 – Complete the following fields:
| Option | Description |
|---|---|
| Write data to Audit Database and enable reports | Select if you want to generate reports. Even if you don't select this checkbox now, you can still configure these settings later, but Auditor won't import already collected audit data into the Audit Database. |
| Write event descriptions to Audit Database | Select if you want to see the exact error or warning text. |
| Store events for... days | Specify the Audit Database retention period. This setting affects all monitoring plans. Auditor applies the minimum value specified across the plans. Auditor also automatically deletes your data when its retention period ends. |
NOTE: You can't edit SQL Server settings for Netwrix Auditor Event Log Manager.
Step 9 – Navigate to the Advanced tab and configure the following:
| Option | Description |
|---|---|
| Enable network traffic compression | If enabled, Auditor automatically launches a Compression Service on the audited computer to collect and prefilter data. This significantly improves data transfer and minimizes the impact on the target computer's performance. |
| Specify notification delivery time | Modify the Event Log collection status email delivery schedule. |
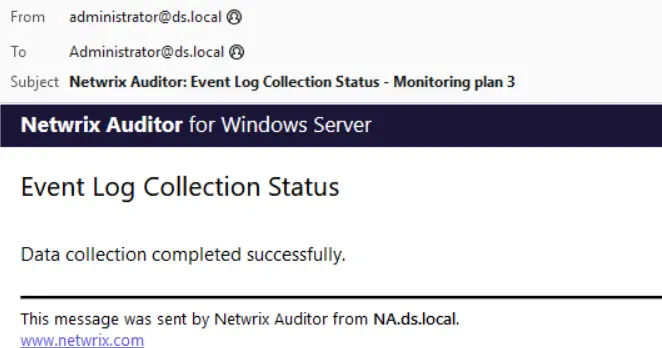
The Event Log Collection Status email shows whether data collection for your monitoring plan completed successfully or with warnings and errors.
Configure Audit Archiving Filters for Event Log
Audit archiving filters define which events Auditor saves to the Long-Term Archive or the Audit Database, and provide more granular reporting. For example, if you are going to audit Internet Information Services (IIS) or track health status of the product, enable the Internet Information Services Events or Netwrix Auditor System Health filter respectively. You can also skip certain events with exclusive filters (e.g., computer logons). You can enable, disable, or modify existing filters, and create new filters. To do it, click Configure next to Audit archiving filters.
The product lets you create inclusive and exclusive audit archiving filters.
Configure audit archiving filters
Step 1 – To create or modify an audit archiving filter, see Create Monitoring Plans for Event Logs.
Step 2 – To collect events required to generate a specific report, you must select a filter whose name coincides with this report’s name. Click Enable and select Filters for Reports. Auditor automatically selects all filters required to store events for all available reports.
Create or edit an audit archiving filter
Step 1 – On the Audit archiving filters page, click Add or select a filter and click Edit.
Step 2 – Complete the fields. Review the following for additional information:
| Option | Description |
|---|---|
| The Event tab | |
| Name | Specify the filter name. |
| Description | Enter the description for this filter (optional). |
| Event Log | Select an event log from the dropdown list. Auditor alerts you on events from this event log. You can also input a different event log. To find a log’s name, navigate to Start > Windows Administrative Tools→ Event Viewer → Applications and Services Logs → Microsoft → Windows, expand the required <Log_Name> node, right-click the file under it, and select Properties. Find the event log’s name in the Full Name field. Netwrix Auditor Event Log Manager doesn't collect the Analytic and Debug logs, so you can't configure alerts for these logs. You can use a wildcard (*). For inclusive filters, Auditor saves all Windows logs except the ones already mentioned. For exclusive filters, Auditor excludes all Windows log events. |
| Write to/Don't write to | Select the location to write or not write events to, depending on the filter type (inclusive or exclusive). Netwrix recommends writing events both to the Long-Term Archive and to the Audit Database, because if your database is corrupted, you can import the necessary data from the Long-Term Archive using the DB Importer tool. See Import Audit Data with the Database Importer for more information. |
| The Event Fields tab | |
| Event ID | Enter the identifier of a specific event that you want to save. You can add several IDs separated by comma. |
| Event Level | Select the event types that you want to save. If you clear the Event Level checkbox, Auditor saves all event types. If you want to select the inclusive Success Audit/Failure Audit filters, on these platforms these events belong to the “Information” level, so Auditor won't collect them if you select the Information checkbox in the Exclusive Filters. |
| Computer | Specify a computer, as it appears in the Computer field in the event properties. Auditor saves only events from this computer. If you want to specify several computers, you can define a case-sensitive mask for this parameter. The following is an example of a mask: - * - any machine - computer – a machine named ‘computer’ - *computer* - machines with names like ‘xXxcomputerxXx’ or ‘newcomputer’ - computer? – machines with names like ‘computer1’ or ‘computerV’ - co?puter - machines with names like ‘computer’ or ‘coXputer’ - ????? – any machine with a 5-character name - ???* - any machine with a 3-character name or longer |
| User | Enter a user’s name. Auditor saves only events created by this user. If you need to specify several users, you can define a mask for this parameter the same way as described earlier. |
| Source | Specify this parameter if you want to save events from a specific source. Input the event source as it appears in the Source field in the event properties. If you need to specify several sources, you can define a mask for this parameter the same way as described earlier. |
| Category | Specify this parameter if you want to save a specific events category. |
| The Insertion Strings tab | |
| Consider the following event Insertion Strings | Specify this parameter if you want to store events containing a specific string in the EventData. You can use a wildcard (*). Click Add and specify Insertion String. |
Create Monitoring Plan for System Health Log
If you want to generate reports on health state and have Auditor alert you on important Netwrix Auditor health events, you need to create a dedicated monitoring plan for this log with the Netwrix Auditor Event Log Manager standalone tool.
You can also review and filter Netwrix Auditor health events right in the product. See Netwrix Auditor Health Log for additional information
Step 1 – Start Netwrix Auditor Event Log Manager and create the new monitoring plan.
Step 2 – ensure that the Enable event log collection checkbox is selected. Specify the name for the new monitoring plan, for example, "_Netwrix Auditor _Health Status".
Step 3 – Navigate to the Monitored computers list and add a server where the Netwrix Auditor Server resides.
Step 4 – Navigate to the Audit Database tab and select Write event descriptions to Audit Database if you want to see the exact error or warning text. Ensure that Audit Database settings are configured properly, follow the Audit Database
Step 5 – Click Configure next to Audit archiving filters and select the Netwrix Auditor System Health Log filter in the Inclusive Filters list.
This procedure describes the basic steps for creating the monitoring plan that collects data on Netwrix Auditor health status events.
Review Past Event Log Entries
Netwrix Auditor Event Log Manager collects event log entries and stores them to the Audit Archive.
Step 1 – On the main Netwrix Auditor Event Log Manager page, click View next to View collected events.
Step 2 – In the Netwrix Auditor Event Viewer window, complete the following to narrow results:
| Option | Description |
|---|---|
| Monitoring plan | Select the monitoring plan that audits desired event log entries. |
| Computer | If you have several items in the monitoring plan, adjust a computer. |
| Event log | Select event log that contains desired entries. |
| From... To... | Specify the time range for which you want to retrieve past audit data. |
Import Audit Data with the Database Importer
Step 1 – On the main Netwrix Auditor Event Log Manager page, click Import Data.
Step 2 – Select a monitoring plan and the time range for which you want to import data.
Step 3 – Click Import.
Permissions for Event Log Auditing
Before you start creating a monitoring plan to audit the event logs of your servers (including IIS), plan for the account you'll use for data collection. This account must meet the following requirements. You provide this account in the monitoring plan wizard.
On the target server:
The account must be a member of the local Administrators group.