Access SharePoint Online using modern authentication
This option is recommended for organizations that use modern authentication as the identity management approach, having multi-factor authentication (MFA) enabled for their user accounts. In this scenario, Netwrix Data Classification will access the cloud-based infrastructure via Microsoft Graph and other modern APIs, being authenticated through a pre-configured Microsoft Entra ID application with appropriate access permissions.
So, if you plan to implement such scenario, you should register a Microsoft Entra ID app manually and provide its settings to Netwrix Data Classification when configuring a monitored item.
Step 1: Prepare an Application Certificate
Prepare application certificate as follows:
- Create (or load) an IIS certificate on NDC Server (recommended).
NOTE: This certificate should be installed for the local machine so that it can be accessed by Netwrix Data Classification and other services.
- Export the certificate (.CER file):
- Open Certificate Manager.
- Go to search and type in Certificate.
- Choose Manage Computer Certificates.
- Right-click on the certificate you created.
- Select All Tasks, Export.
- On the displayed message, click __Do not export private key__.
- Set file type to DER-encoded binary x.509 (CER).
- Chose location to save the certificate and name it as leave.cer. You can later upload it to the Microsoft Entra ID admin center.
Step 2: Create and Register a New App in Microsoft Entra ID
Follow the steps to register a new Microsoft Entra ID application.
-
Sign into the Microsoft 365 Admin Center (with your Global Administrator, Application Administrator or Cloud Application Administrator account).
-
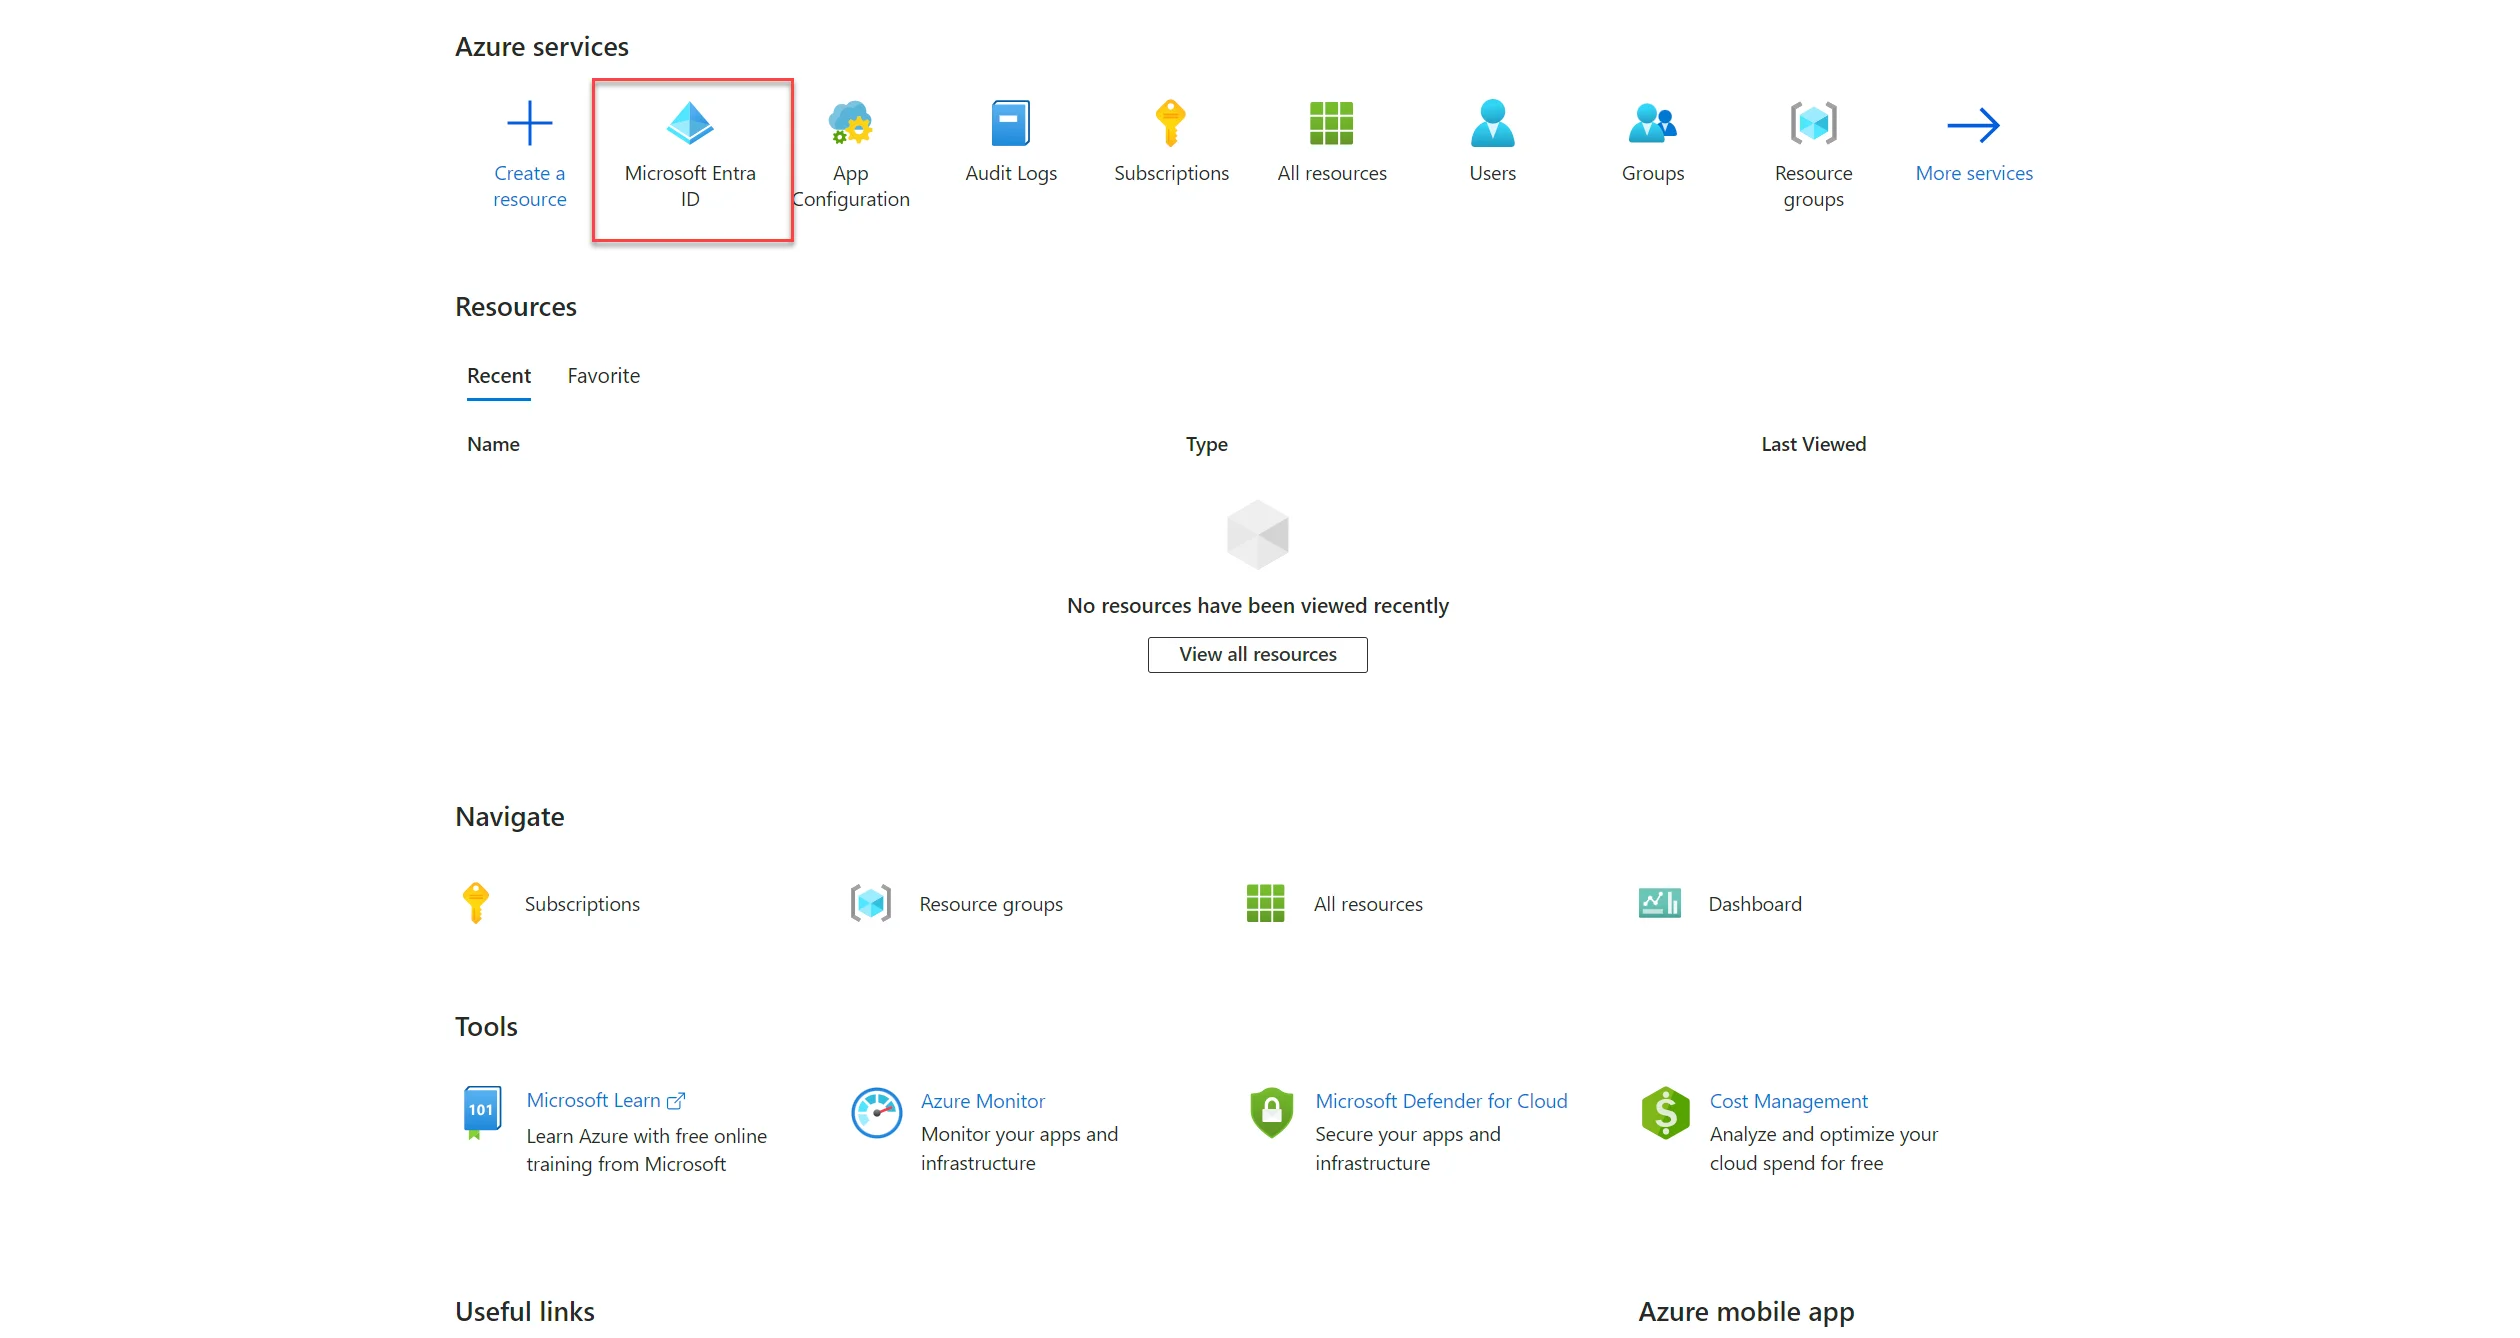
Search for and select Microsoft Entra ID.

-
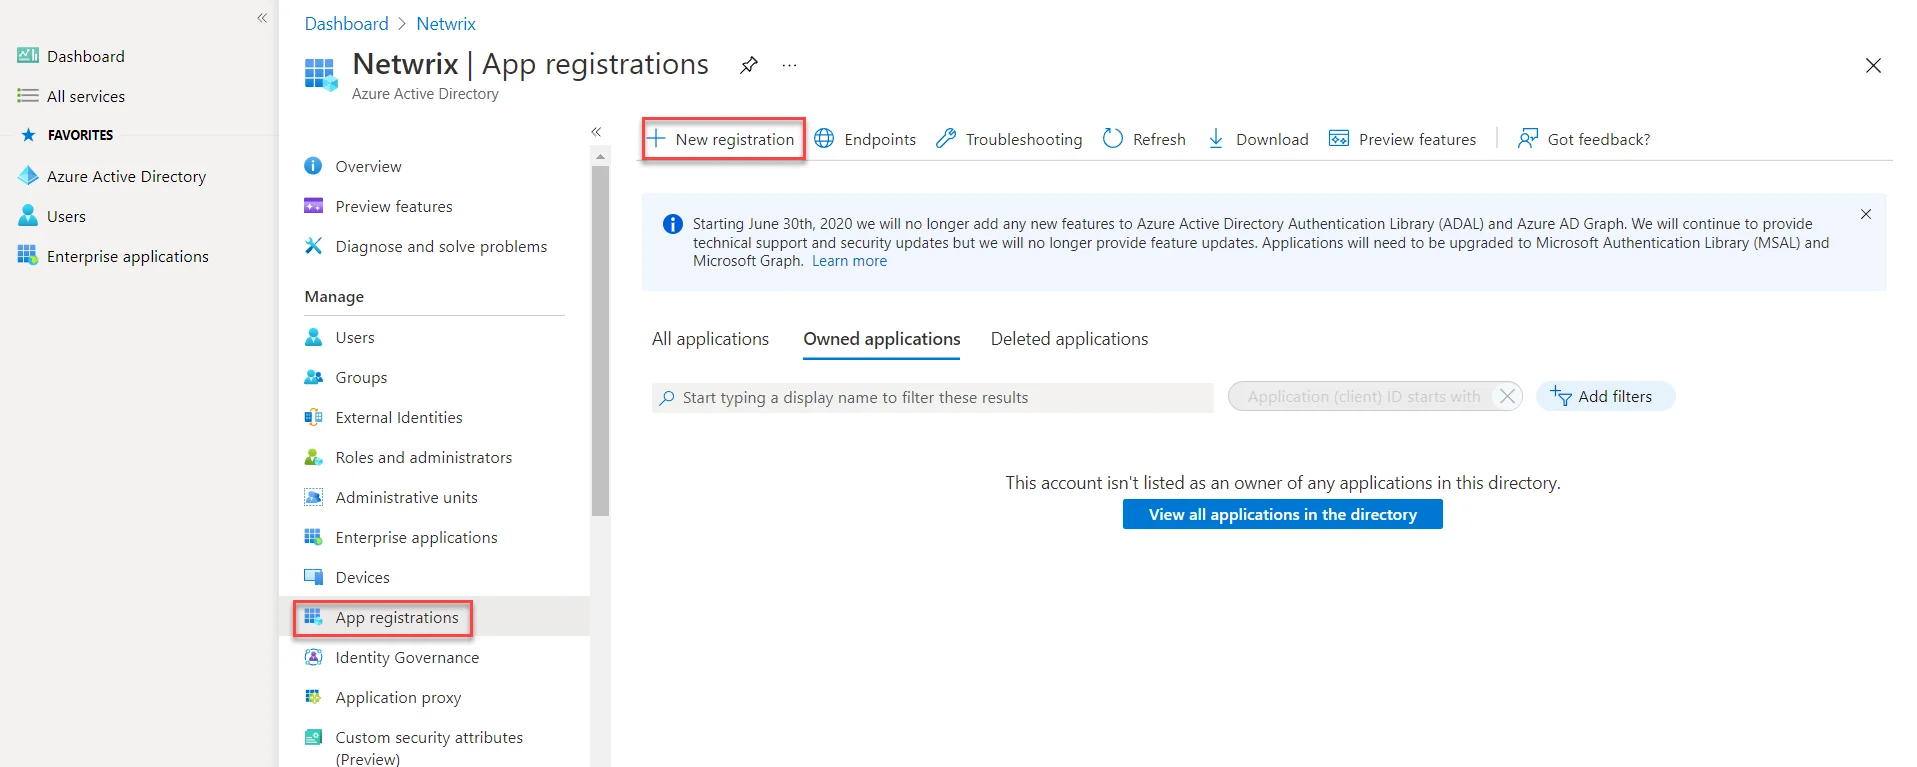
Under the Microsoft Entra ID select the App registrations section.
-
Select New registration:

-
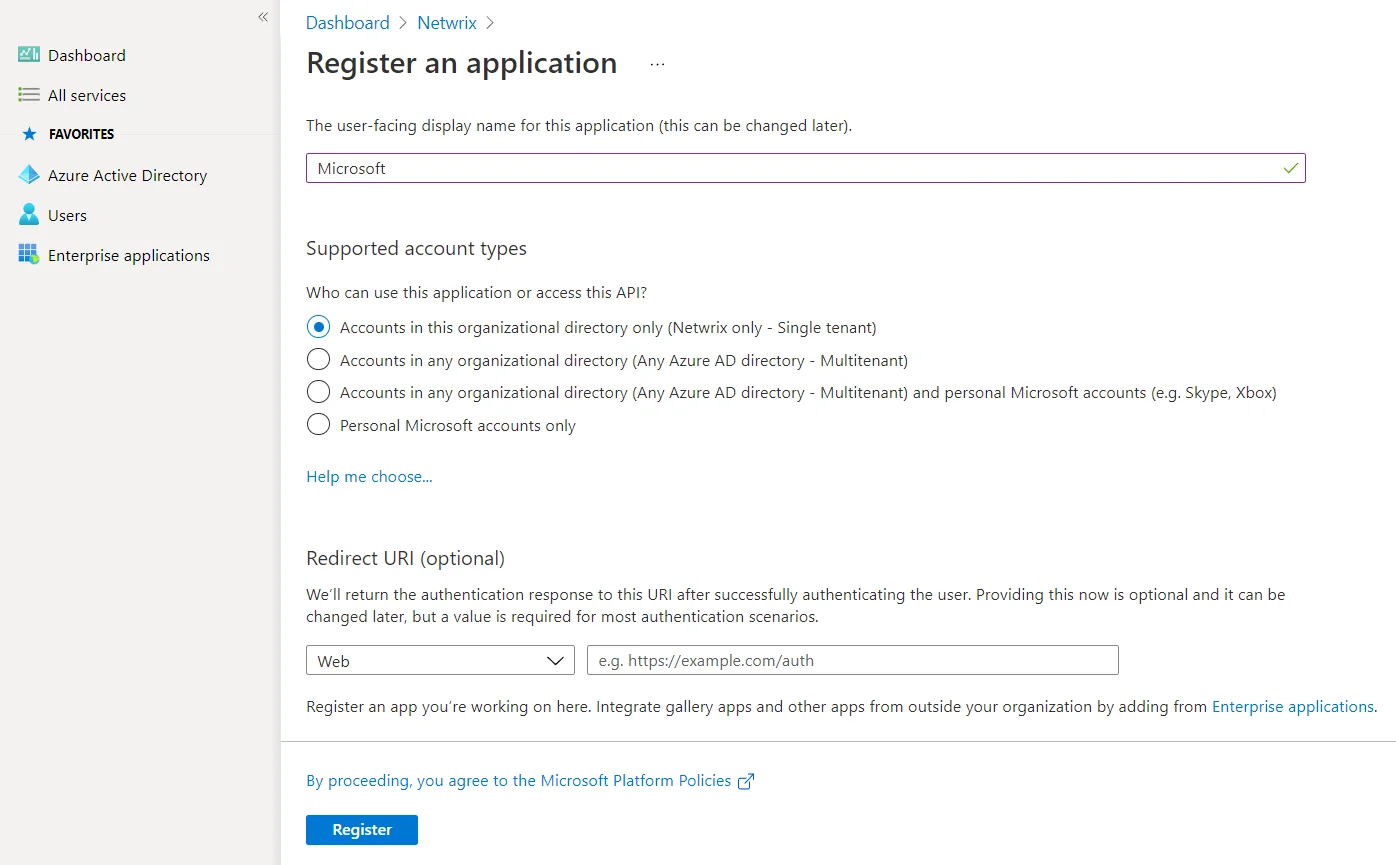
In the Name field, enter the application name.
-
In the Supported account types, select who can use this application – use the Accounts in this organizational directory only option.
-
Click the Register button.
NOTE: Application redirect URl is optional, you can leave it blank on this step.

-
Copy your application ID from the Overview section it to a safe location.
Step 3: Grant Required Permissions
Next, you need to grant your new application the required API permissions.
Microsoft Entra ID applications can be assigned Delegated or Application permissions:
- Delegated permissions require a signed-in user present who consents to the permissions every time an API call is sent.
- Application permissions are consented by an administrator once granted.
For the newly created app, you should use Application permissions.
NOTE: By default, a new application is granted one delegated permission for Microsoft Graph API – User.Read. It is not required and can be removed.
Do the following:
When found, click on the entry and proceed with adding the necessary permissions. The steps from here on remain the same, so in most cases you would need the Application permissions entry, and the relevant set of permissions therein.
-
Select the relevant entries and then click Add permissions.
-
On the Request API permissions> Microsoft APIs pane, scroll down and select SharePoint.
-
Select Application Permissions.
-
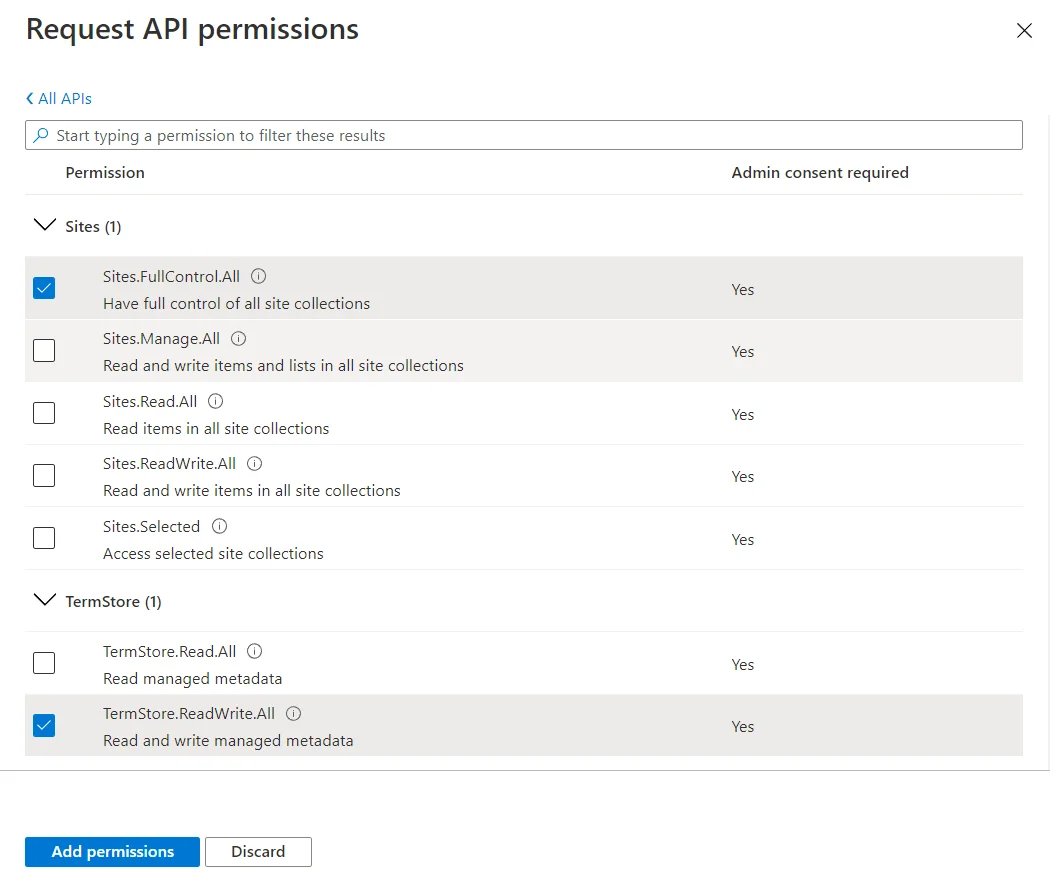
Apply the following permissions:
-
Graph – Application permissions (With admin consent granted)
- Sites.FullControl.All (Crawling)
-
SharePoint – Application permissions (With admin consent granted)
- Sites.FullControl.All (Crawling)
- TermStore.ReadWrite.All (Term Set access)

NOTE: For taxonomy manager to full operate you must also make the user “app@sharepoint” a taxonomy admin (or group admin).
You need to add app@sharepoint identity as a Term Store Administrator, by going to the term store on the website https://xxxx-admin.sharepoint.com/_layouts/15/termstoremanager.aspx (where "xxxx" is your tenant).
-
-
Click __Add permissions__.
Step 4: Configure Certificates & Secrets
Having configured the app, you can upload its application certificate.
- In the app settings, click Certificates & secrets and select Upload certificate.
- Upload the .CER file you prepared at Step 1: Prepare an Application Certificate.
- Copy the certificate thumbprint to a safe location.
Step 5: Obtain Tenant ID
- Open the Microsoft Entra Admin Center.
- Select the Microsoft Entra ID > Overview section for the required SharePoint Online organization.
- Locate the Tenant ID and copy it to a safe location.
Configure the Product to Crawl an Entire SharePoint Online Tenancy
Typically SharePoint environments are crawled on a per site collection basis. Sometimes however there is a need to crawl an entire SharePoint Online tenancy. The following guide details the step-by-step instructions in order to configure a whole tenancy for collection.
-
Add SharePoint Online source as described in the SharePoint Online section.
NOTE: If this option is not available within the source type selection then it would suggest that the source type is not currently licensed, please contact support for more details.
-
The Source is configured to the tenancy level, therefore we recommend specifying the URL as the root site collection URL. This is however not a requirement if you do not have a root site collection.
-
Specify an account with tenancy administration rights. Accounts can be specified in either the default AD format DOMAIN\USERNAME, or in the format of the user's email address USERNAME@DOMAIN.
-
The Match Rules are an important configuration option, defining which site collections will be crawled. Here are some example match rules that may be required:
.*\/Personal\/.*—Identifying "/personal/" within the URL (as per the below example) - this would be the correct configuration to crawl end-user's OneDrive site collections (OneDrive for Business).*— Identifies any site collections, ensuring that all collections will be crawled
-
Define the required Classification Template, as well as the Detection Period which defines how often we will detect new site collections
-
Select Save.