Available Actions
This section lists workflow actions available for the certain content source types.
| Content source type | Available actions |
|---|---|
| Exchange | Email Alert Migrate Document Apply Additional Classification Advanced Actions for Exchange*: delete email, move email |
| File System | Email Alert Migrate Document Apply Additional Classification Advanced Actions for File System*: update permissions, add/remove MIP label |
| Google Drive | Email Alert Migrate Document Apply Additional Classification |
| SharePoint | Email Alert Migrate Document Apply Additional Classification Advanced Actions for SharePoint*: send classification value, filtered targeted meta update, write/remove O365 label, copy/move document |
| SQL and other databases | Email Alert Migrate Document Apply Additional Classification |
* — these actions can be only configured using the Advanced UI dialog window.
Workflow Actions
Actions are automated operation to be performed with the documents when rule conditions are triggered. There are two types of workflow actions:
-
Generic actions available for any type of document. These are:
- Email Alert
- Migration
- Apply Additional Classification
-
Source-specific actions
Workflow actions are executed at the final stage of the document processing.
Available Actions by Source
This table lists workflow actions available for the certain content source types.
| Content source type | Available actions |
|---|---|
| Exchange | Email Alert Migrate Document Apply Additional Classification Advanced Actions for Exchange*: delete email, move email |
| File System | Email Alert Migrate Document Apply Additional Classification Advanced Actions for File System*: update permissions, add/remove MIP label |
| Google Drive | Email Alert Migrate Document Apply Additional Classification |
| SharePoint | Email Alert Migrate Document Apply Additional Classification Advanced Actions for SharePoint*: send classification value, filtered targeted meta update, write/remove O365 label, copy/move document |
| SQL and other databases | Email Alert Migrate Document Apply Additional Classification |
* — these actions can be only configured using the Advanced UI dialog window.
Update Permissions
This action updates the file system permissions for the classified document. You can use this approach to automatically restrict access to sensitive documents or provide access permissions, based upon the document's classifications.
Specify the following:
| Option | Description |
|---|---|
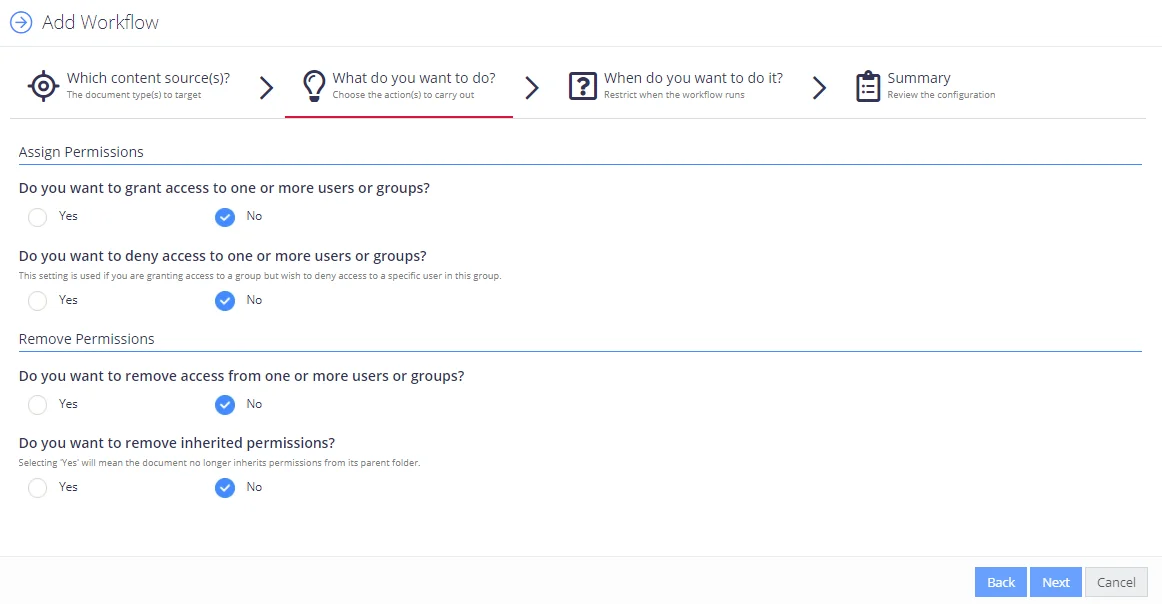
| Assign Permissions | |
| Do you want to grant access to one or more users or groups? | Select Yes if you want the access rights to be granted automatically to the classified document upon workflow completion. (missing or bad snippet) |
| Which permissions should be given to these users? | Select permission level you want to be granted automatically to the classified document upon workflow completion. Available options: - Read and Execute (default setting) - Read, Execute, and Modify - Full Control |
| Do you want to deny access to one or more users or groups? | Select Yes if you want to deny access to the classified document to a specific user in this group. (missing or bad snippet) |
| Remove Permissions | |
| Do you want to remove access from one or more users or groups? | Select Yes if you want to restrict access to the classified document: remove all explicit permissions, or remove access from specific users/groups. Then select the necessary option under Do you want to remove all explicit permissions, or remove specific users/group? NOTE: Only applies to explicit permissions, not inherited permissions. - All Users—Select to remove all explicit permissions for all users. - Specific Users—Select to remove all explicit permissions for specific users. Then under Which users or groups should no longer have access? enter the user or group account in the textbox. Use the domain\name format, e.g. CORP\Administrator. To add multiple accounts, click + on the right. |
| Do you want to remove inherited permissions? | Select Yes to remove permissions inherited by the classified document from its parent folder. |
When finished, click Next to proceed with the wizard.
To configure advanced actions or modify action settings, select the workflow and use the Advanced UI window. See Advanced Actions for SharePoint.
Apply Additional Classification
You can instruct the program to apply one or more additional classifications to the processed document. This workflow action is called Manual Classification and can be configured via the Advanced UI window.
Alternatively, you can configure a workflow action that permanently removes all existing classifications on a document and disables future auto-classification for it.
To apply additional classification:
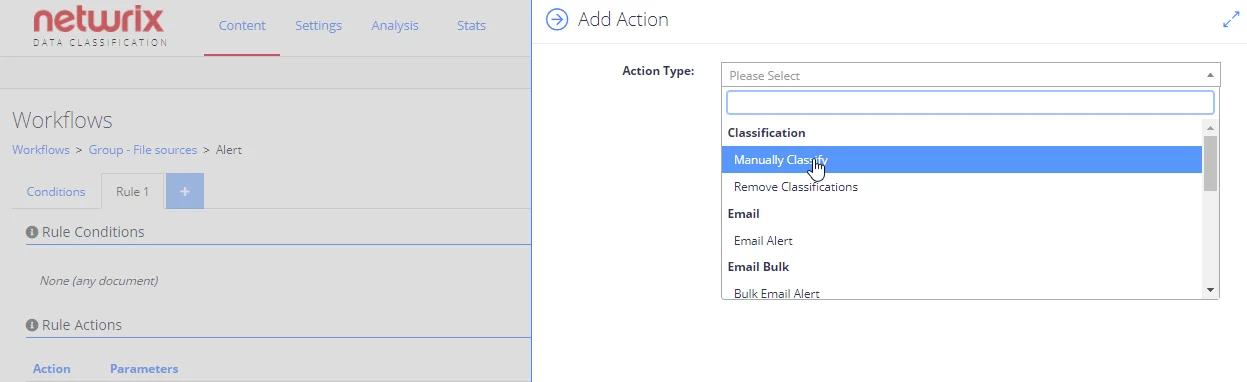
In the Add Action dialog, from the Action Type list select Manually Classify under Classification, then configure the necessary terms as described below.
NOTE: The terms you select must belong to a single taxonomy / termset.
To remove all classifications:
In the Add Action dialog, from the Action Type list select Remove Classifications under Classification.
-
In the Select Term field, click the tag icon.
-
In the Details dialog, specify filter settings to use when filtering out the documents:
- Taxonomy - select what classification taxonomy from the existing ones should be used.
- All Terms - select this option if you want to filter by all terms in the taxonomy. If this option is cleared, then after selecting the necessary taxonomy, you will be presented the list of its terms. Select the one you plan to use for filtering.
NOTE: Multiple selection is not supported: to configure several filter values, you should repeat this procedure for each filter value you need.
- Include Children - select this option if needed.
-
Finally, click OK to save the settings and close the dialog.
NOTE: The additional classification will not trigger other workflows or affect the source item.
Advanced Actions for Content Server
In addition to the Email Alert ,Migrate Document and additional classification actions, for the documents stored on your Content Server you can instruct the program to update the document property field (metadata) with the values you specify.
For that, configure Update Field as the automated action, using the Advanced UI window :
- In administrative web console, navigate to Workflows and select the workflow you want to configure action for.
- Click the workflow, then click Add next to Rule Actions.
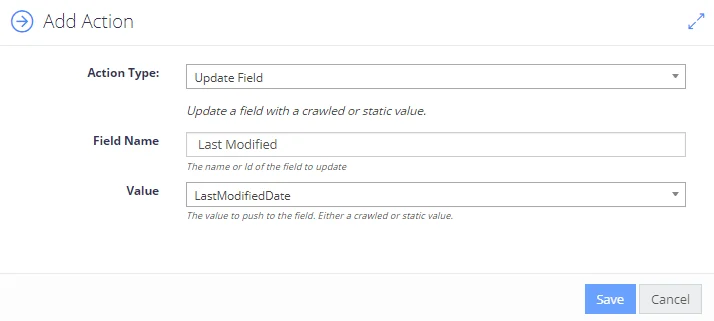
- In the Add Action dialog, from the Action Type list select Update Field in the Content Server.
Then specify the following action parameters
| Action parameter | Description | Comments |
|---|---|---|
| Field Name | Provide the internal name or ID of the document property field (metadata) that should be updated. | This can be, for example, DocType, URL, Last modified date, etc. |
| Value | Select where the new field value should be obtained from. | You can use static or crawled value, similarly to SharePoint (as described in the Update Field section). |
Advanced Actions for File System
In addition to the Email Alert ,Migrate Document and additional classification, the following actions are available for the File system content source type:
- Update Permissions — this action updates the file system permissions for the classified document. See Update Permissions for details.
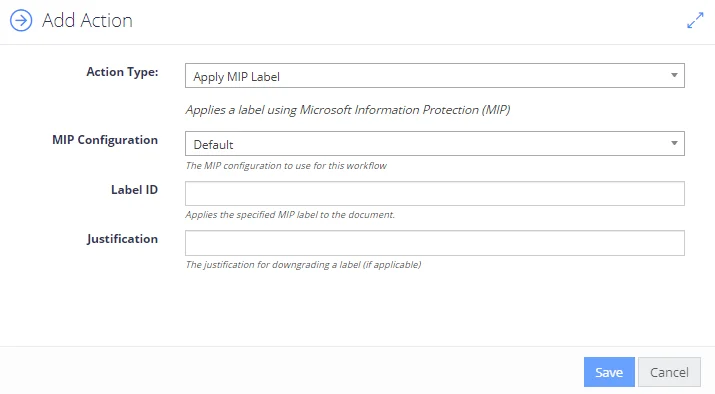
- Apply MIP Label, Remove MIP Label — these actions, respectively, apply and remove sensitivity label to/from a document stored on a file system, using Microsoft Information Protection (MIP). This helps to automate protection policies application. See Modify MIP Label for details.
To configure actions for file systems using the Advanced interface:
- In administrative web console, navigate to Workflows and select the workflow you need.
- Click the workflow, then click Add next to Rule Actions.
- In the Add Action dialog, select the action you need from the File System section in the Action Type list.