Managing Workflows
Authorized users can create, modify or delete automated workflows that apply to the certain content. For that, in the administrative web console select Content from the top menu and go to the Workflows tab.
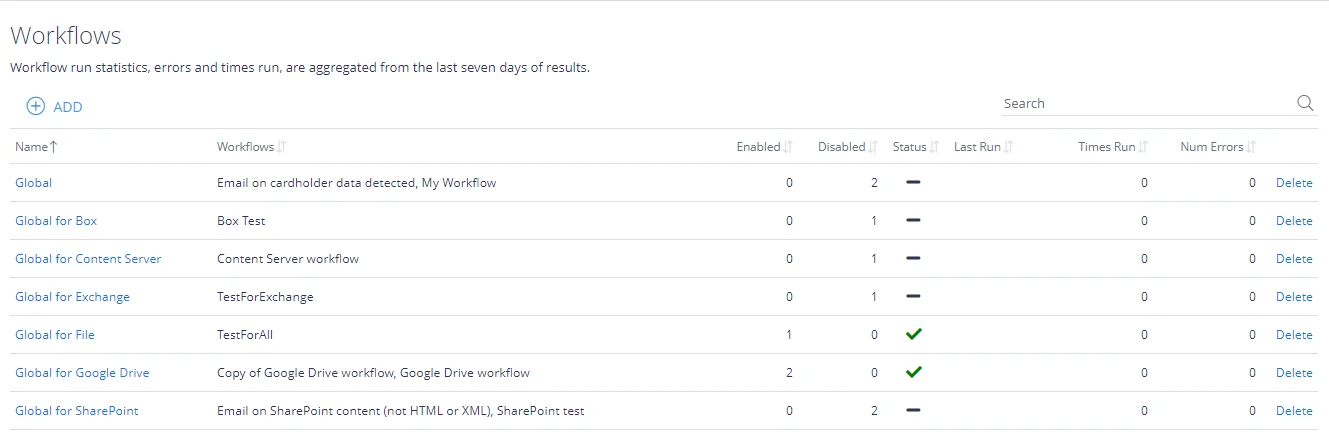
NOTE: To manage the automated workflows, users require sufficient access rights that are assigned based on either their Windows identity or using non-Windows based access controls. See "Users" for details on rights and permissions.
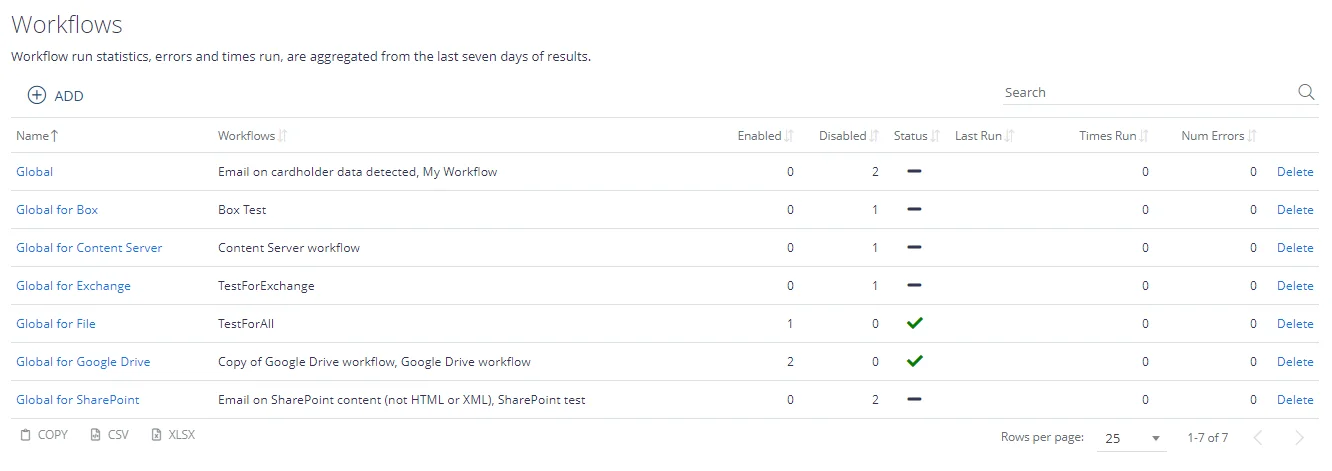
- Click Copy if you want to copy the list content to the clipboard.
- You can also export the list to CSV or XLSX file.
- By default, the number of list items displayed (Page Size) is set to 10. Modify this setting as necessary.
- To delete all workflows from a certain scope, select the corresponding list item and click Delete.
Creating a Workflow
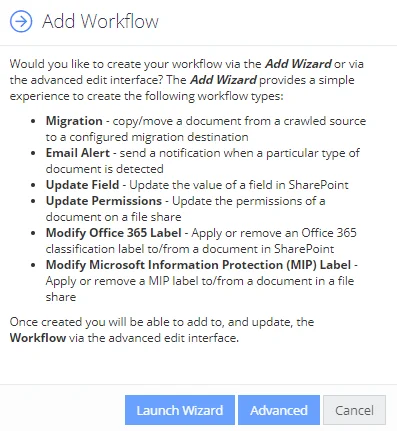
To create an automated workflow for certain type of documents, you can use the Add Workflow wizard or Advanced dialogs.
See next:
- Create a Workflow using Add Workflow Wizard
- Configuring a Workflow Using Advanced Dialog
Modifying or Deleting a Workflow
To modify a workflow, follow the steps described in the Edit Workflow settings section.
To delete a workflow, follow the steps described in the Delete Workflowsection.
Cloning, Enabling or Renaming a Workflow
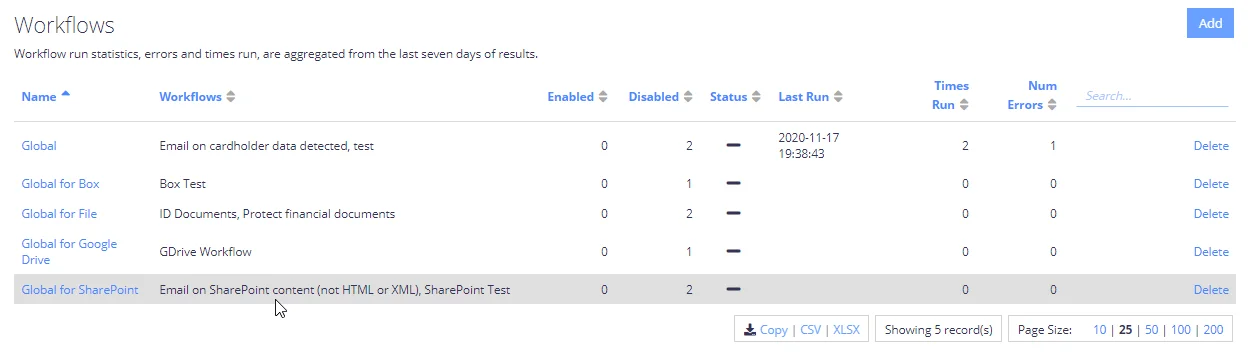
- Click the link in the Name column for the required workflow ( e.g. Global for Google Drive in the figure below):
- This will open the list of workflows for selected scope. You can sort the list by Details (workflow action) or by Active (workflow state) field.
- Select one or several workflows you need.
- To Disable or Enable the workflow, use the corresponding button above or link on the right. Workflow state (Active field) will change accordingly.
- If you want to create a copy of selected workflow, with all associated actions and conditions, click Clone, then enter the scope (group) and name for the new workflow.
NOTE: Workflows within a generic group (scope) are cloned within the same group, source-specific workflows can be copied within any groups of the same type. The clone workflow will be disabled by default.
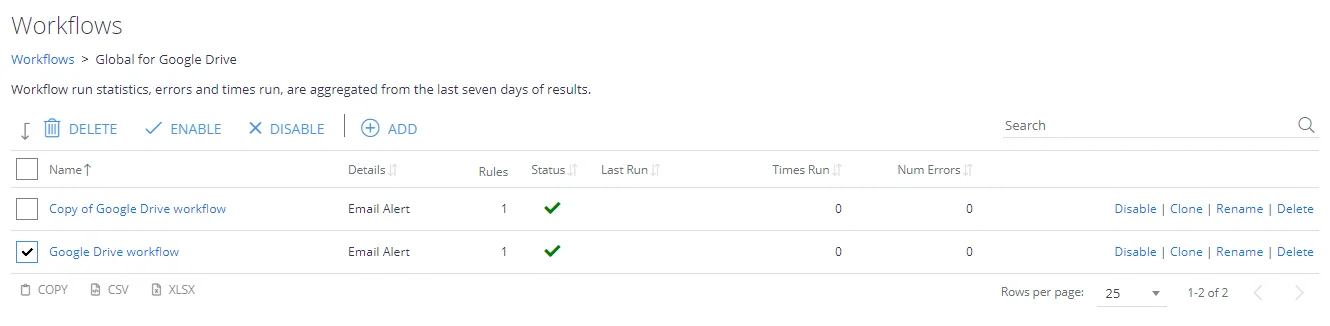
To provide another name to a workflow, select it from the list and click Rename.
NOTE: Workflow names must be unique within the group (scope).
Step 1. Select Content Type
At the first step of the wizard, select the type of content your workflow will process, and specify which content sources of that type should be included in processing.
- From the drop-down list, select what type of documents you want this workflow to target:
- To apply the workflow to all types of content, selecting All types.
- Otherwise, select what type of content you want to be included in the workflow:
- Exchange
- File
- Google Drive
- SQL
- Then specify which source of content you want to process. You can select All sources, or select the one you need.
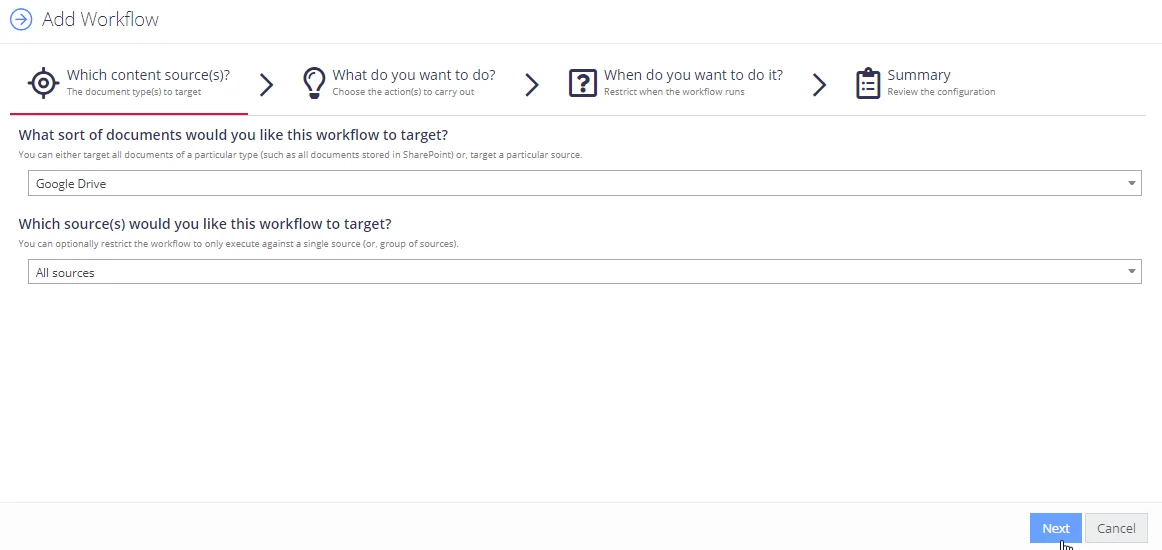
Click Next to proceed.
See also: Content Sources.
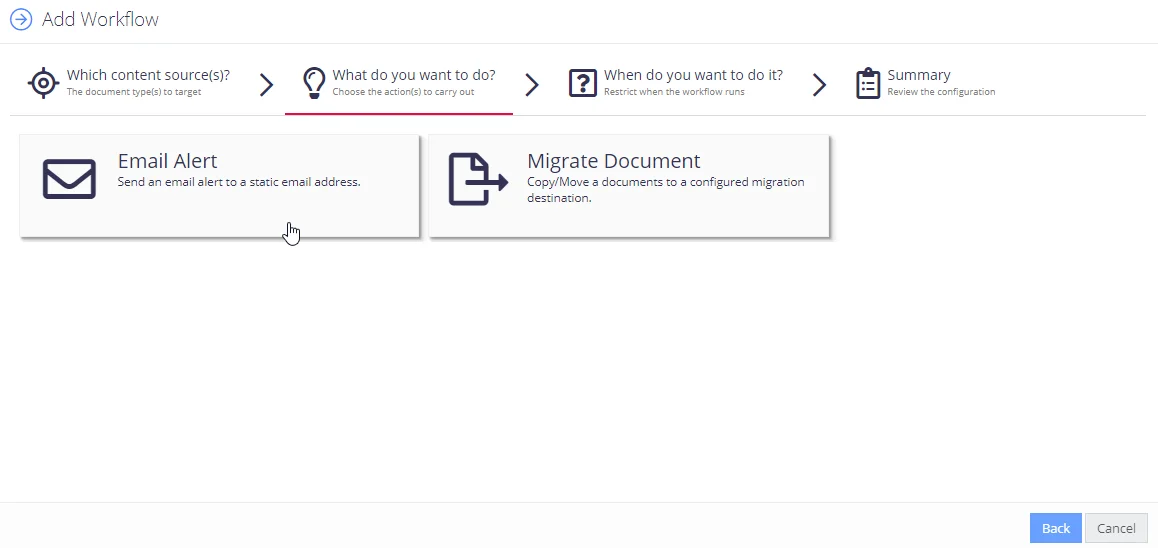
Step 2. Select Action
After you select the required type of content source, you will be offered the number of automated actions available for such content, for example, send an alert by email or update document metadata, etc.
Click the action you need and configure the necessary settings. For details, see Available Actions.
When finished, proceed to the next step.
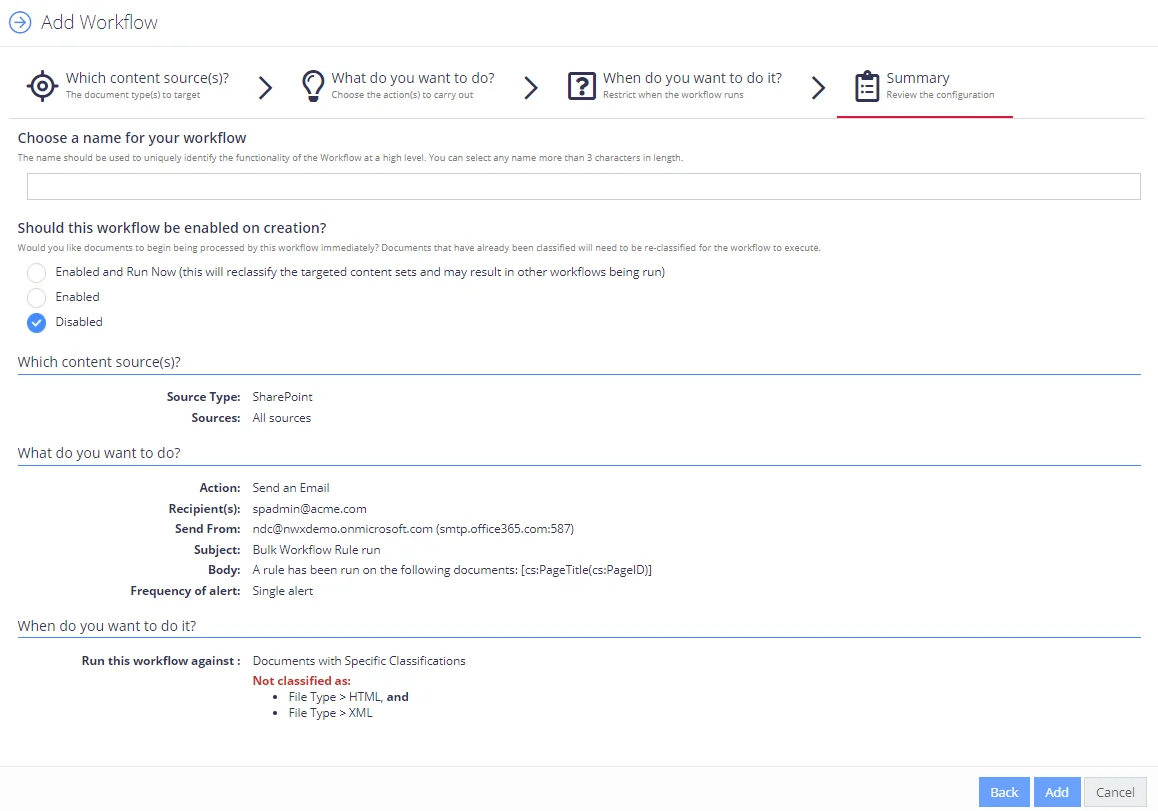
Step 4. Enter Name and Review Settings
At this step, you need to provide workflow name, review its settings, and disable or enable the workflow (to start immediate processing). Do the following:
-
Enter workflow name. It should contain at least 3 characters.
-
Review the workflow settings you have configured at the previous steps.
-
If you want the documents to be processed immediately after you finish the wizard, select Enabled option. Otherwise, you can select Disabled and change this settings later on using the UI.
NOTE: Documents that have already been classified will be re-classified before applying this automated workflow.
-
When finished, click Add to close the wizard. Your new workflow will be added to the list on the Workflows tab:
-
Navigate to Content → Sources and select Re-classify for the selected sources in the workflow.
Create a Workflow using Add Workflow Wizard
To create an automated workflow for certain type of documents, you can use the Add Workflow wizard or Advanced dialogs.
To launch the Add Workflow wizard:
- In the administrative web console, select Workflows from the top menu.
- Click the Workflows tab.
- Click the Add button in the upper right corner.
- In the dialog displayed, click the Launch Wizard button.
See next:
- Step 1. Select Content Type
- Step 2. Select Action
- Step 3. Specify Conditions for Processing
- Step 4. Enter Name and Review Settings
NOTE: Once created you will be able to modify the workflow using the Advanced dialog.
Alternatively, take steps 1-3 from the procedure above, then in the Add Workflow dialog click Advanced. See Configuring Workflows Using Advanced Dialog