Create a Taxonomy
SQL taxonomies reside within the administrative web console database. They are fully functional except for writing metadata back to SharePoint.
To create an SQL taxonomy
- Navigate to the Global Settings tab.
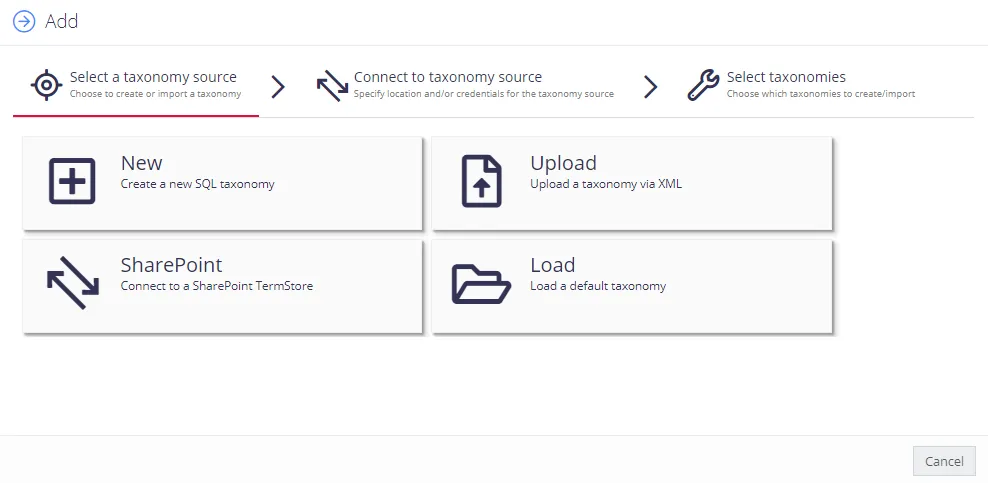
- Click the Add button, select the New tile.
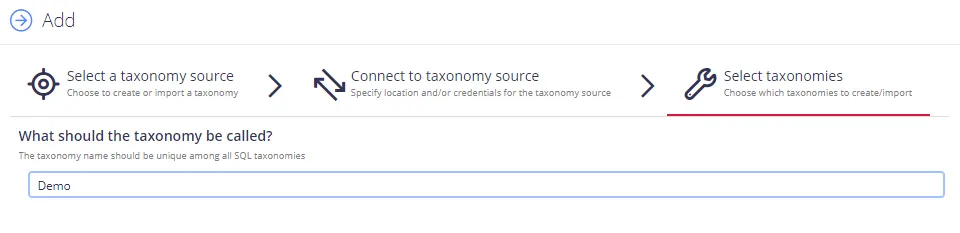
- Enter the taxonomy name and click Add.
Taxonomy name should be unique among all SQL taxonomies.
To import an existing taxonomy go to the Global Settings tab, select Add and then choose one of the import options:
- SharePoint—Set the URL to any site collection within the farm or tenancy, such as: https://netwrix.sharepoint.com. The supplied credentials must have access to both the site collection specified, as well as the termstore (preferably as a term store administrator).
- Upload—Imports an XML file directly into the SQL database; the background services import large taxonomies.
- Load—The product provides certain taxonomies by default; you can use these fully as part of the product or as a reference for regular expression and metadata clues.
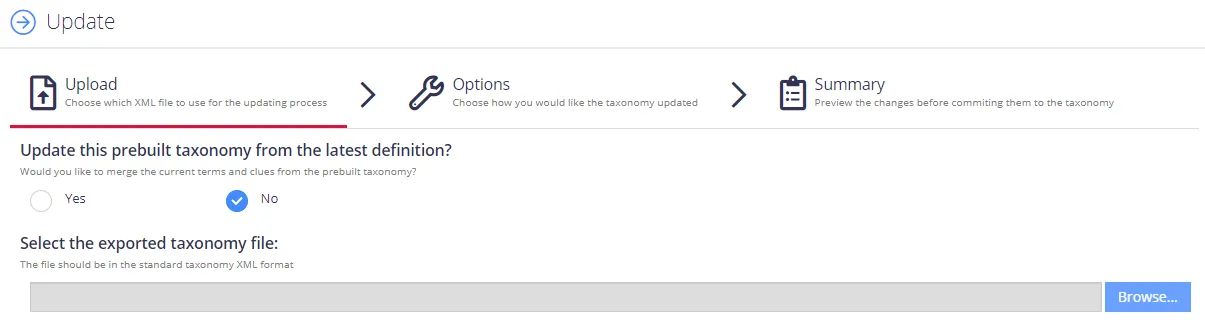
You can also merge / update SQL taxonomies from the Global Settings page. Select the Update link for the taxonomy that you want to update to load the taxonomy merge wizard:

You can update predefined taxonomies from the latest built-in definition or from an XML file in the standard taxonomy format:
The merge operation automatically adds any new terms, updates the clues of existing terms, and when enabled deletes terms that no longer exist in the new taxonomy definition.
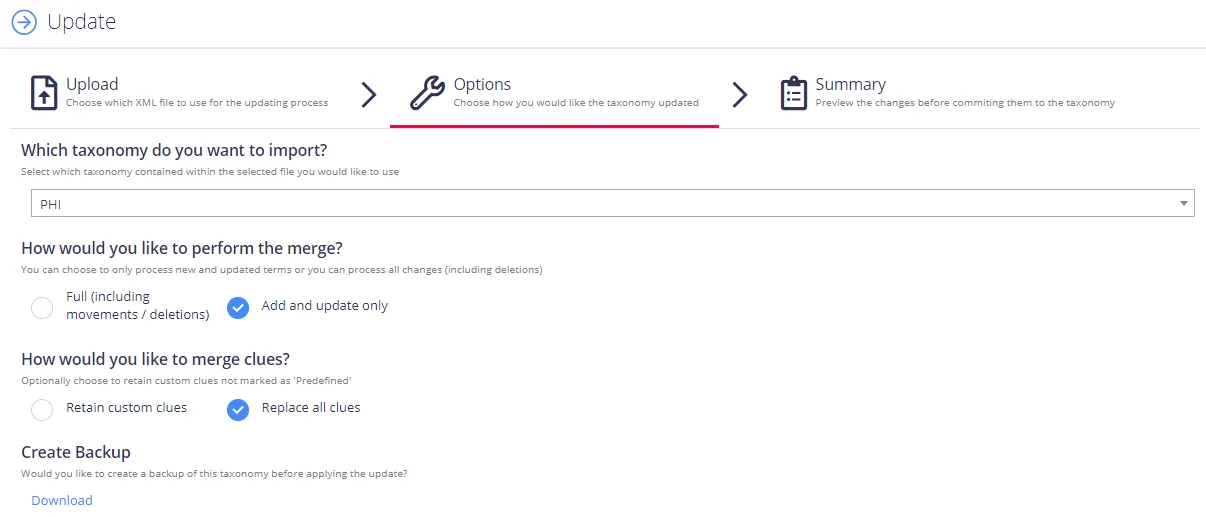
To retain custom clues, select the option Retain custom clues. When enabled, the product retains any clues not defined as Predefined. To view the Predefined flag, select the "i" icon for a clue to display the following dialog:

Any predefined taxonomies you previously loaded show an asterisk indicator when an update is available (post upgrade):

The merge operation relies on matching the source definition to the destination definition - using the Term Id (GUID). If there are no matching ids, the merge operation stops automatically. In this case, delete the taxonomy and re-import it.
You can merge SharePoint taxonomies with the TermStoreManager tool (see the associated user guide available via documentation downloads).
You can manage existing taxonomies via the Global Settings tab:
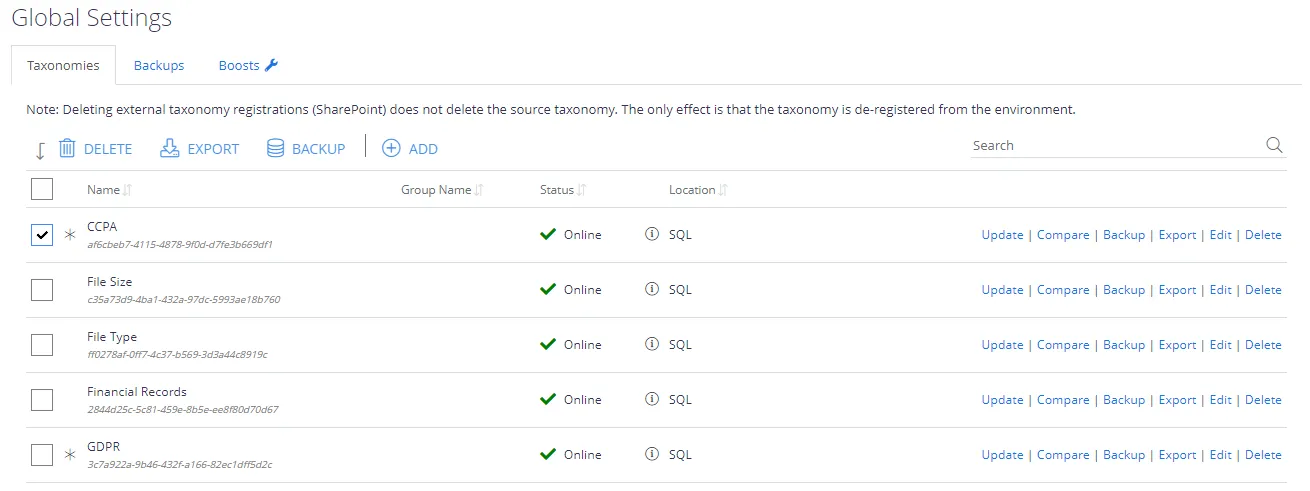
You can export taxonomies as XML regardless of the taxonomy type, or remove them. When removing SharePoint Term Set registrations the source Term Set remains intact - the system removes only a link to the Term Store.
User can compare current XML taxonomy definition (terms, clues, etc) to an updated/older definition. Comparison matches on the GUID of each term in the source/destination and ignores term movements. The comparison detects the following types of changes: term additions, term deletions, clue additions, clue deletions, and clue updates.
Do the following:
- On the Global Settings tab, go to Taxonomies, select the one you need and click Compare.
- In the Compare dialog, select what taxonomy definition to compare to:
- To compare with the latest predefined definition, click Yes.
- Otherwise, click No and browse to the required comparison file, i.e. the one that you want to compare the current taxonomy definition to.
- Click Compare and wait for the process to complete. Examine the results.
The taxonomy update wizard lets you make large repetitive changes to taxonomies in bulk. Use the wizard to:
- Add Clues—Create a default standard clue, a default metadata clue, or define the clue template to use.
- Update Clues—Update or replace text within the clue text and reference, adjust the score (statically or by percentage), set the local/predefined flags for each clue.
- Delete Clues—Remove specific/matching clues.
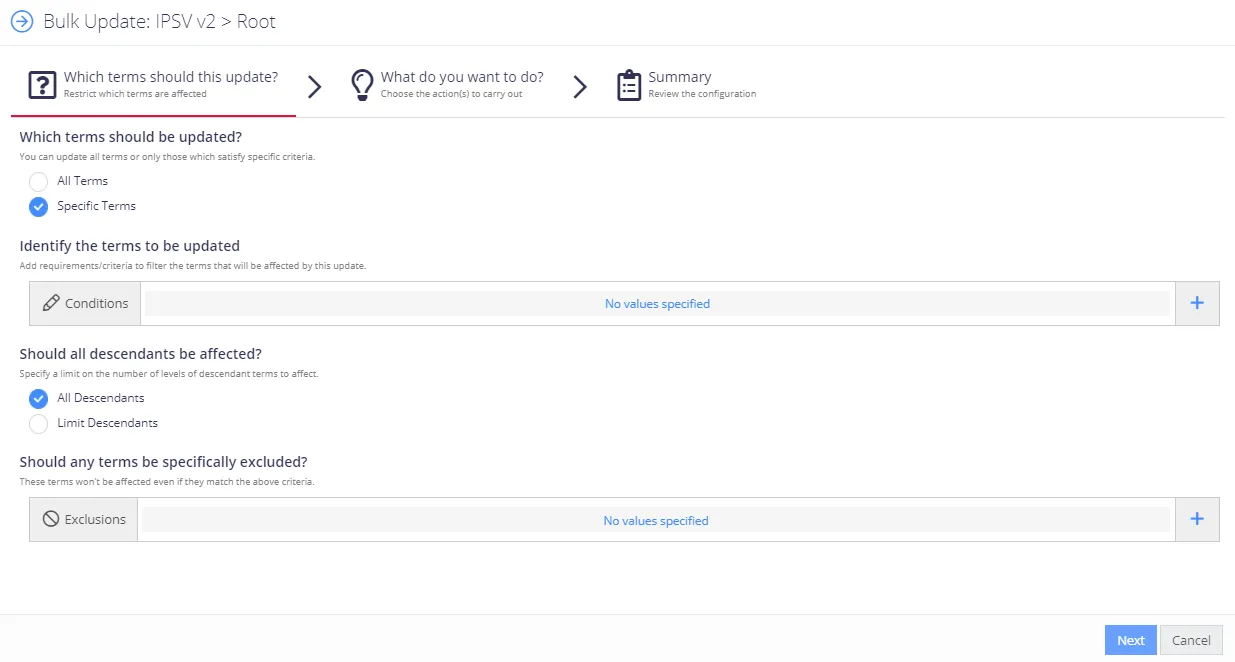
To start the wizard, right-click a node within the treeview and select "Perform Bulk Update". You can perform updates across the whole taxonomy by right-clicking the root node, or scope them to a particular branch by right-clicking the top node of the intended branch:

The wizard then walks you through performing the update. Each update lets you restrict the scope of your change by specifying:
- Filters—filters for which terms/clues you want to update (based on score, clue text, etc).
- Descendants Limit—specify how many levels down the update should process within the tree.
- Exclusions—specific terms to exclude from the update.
You can perform the update either immediately or in "report-only" mode. In report-only mode, the wizard shows the scope of changes to the end-user—the end-user can then choose to commit the update, which performs the changes (or leave the update if the scope was incorrect).
The "Bulk Updates" tab lists all updates, report-only or otherwise. The system queues and processes updates in the background and exposes the results through this interface.
Managing Term Sets
To manage the term set, select the taxonomy you need, then in the taxonomy tree browse to the required term set and click the Term Management tab on the right.
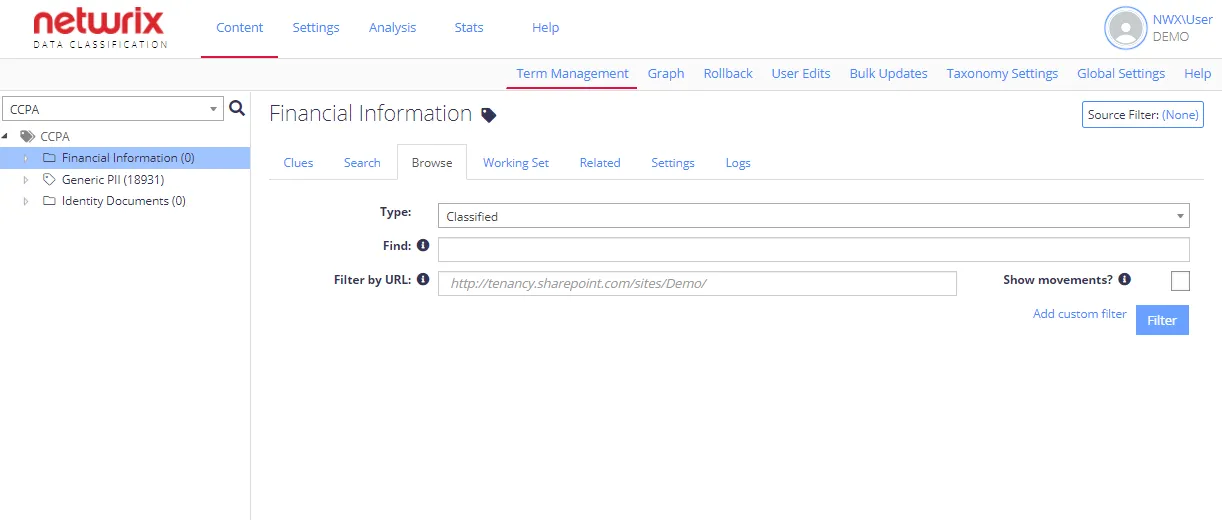
Then you can work with the tabs you need, including Search, Browse, and Working Set tabs.
Review the following for additional information: