Configure a Workflow using Advanced dialog
This section contains information on how to add or edit workflows using the Advanced dialog window.
To configure a workflow:
-
On the Workflow tab, click Add and in the dialog displayed click Advanced.
-
Specify Name for the workflow.
-
From the Type dropdown list, select the type of content your workflow applies to.
-
Click Add.

-
Configure document processing rules. For each rule, set up rule conditions and rule actions. Also, specify how the workflow processes rules.
- Specifying Rule Conditions
- Specifying Rule Actions
- Other Rule Settings
To apply pre-conditions (the workflow uses them before rule processing starts), see Specifying Workflow Conditions
-
Navigate to Content → Sources and select Re-classify for the selected sources in the workflow.
Specifying Rule Conditions
- In the corresponding section on the Rule tab, click Edit on the right. The Edit Rule Conditions dialog opens.
- From the Mode list, select how the product applies the conditions.

The following options are available:
-
Any Document — with this option selected, the workflow applies to all documents in the specified content source
-
Any Classified Document — with this option selected, the workflow applies to the documents in the specified source if any classification tagged them
-
Specific Classification — with this option selected, you need to specify whether to apply the workflow to the classified or non-classified documents
- To process only documents classified by specific classification, select Classified (this acts as an including filter)
- To process only non-classified documents, select Not Classified.
If you selected any of the Specific Classification variants, then specify taxonomy terms to filter the documents for your workflow.
To configure terms
-
In the Select Term field, click the tag icon.
-
In the Details dialog, specify filter settings to use when filtering the documents:
- Taxonomy - select which classification taxonomy to use.
- All Terms - select this option if you want to filter by all terms in the taxonomy. If you don't select this option, the system displays the list of terms after you select the taxonomy. Select the one you plan to use for filtering.
noteThe product doesn't support multiple selection: to configure several filter values, repeat this procedure for each filter value you need.
- Include Children - select this option if needed.
-
Click OK to save the settings and close the dialog.
-
Specify what logic to use when applying the filtering terms:
- To apply AND logic (i.e. the document must match all filters), select Require all conditions be met.
- Otherwise, the product uses OR logic (i.e. the document must meet any of the filtering conditions).
- Verify the filtering term appears in the Edit Rule Conditions window in blue. Click Save.
The configured rule condition appears in the Rule Conditions section on the Rule tab.
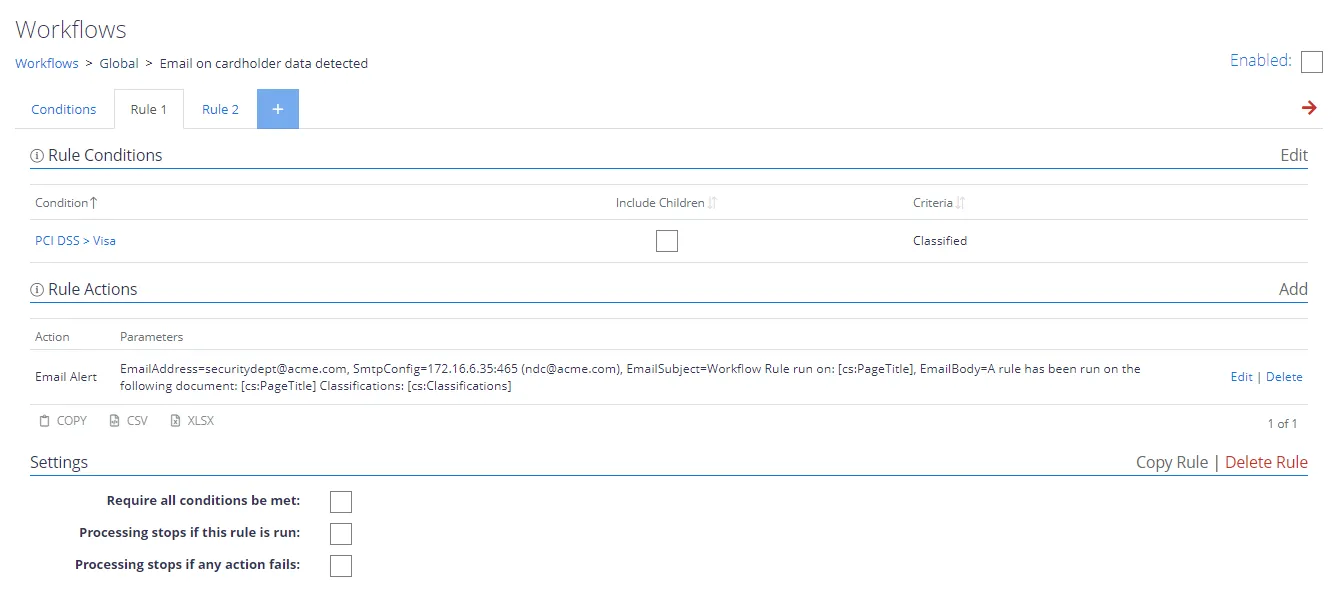
Example
If you want to apply the rule to all documents classified as Visa cardholder data using PCI DSS taxonomy, configure the rule condition as follows:
- From the Mode list select Specific Conditions.
- Select Classified option.
- In the Select Term, click the tag icon.
- In the Details window, from the Taxonomy list select PCI DSS.
- In the tags hierarchy, select Visa and click OK.

Ensure the filtering term appears in the Edit Rule Conditions window in blue. Click Save.
The configured rule condition appears in the Rule Condtions section on the Rule tab.
Specifying Rule Actions
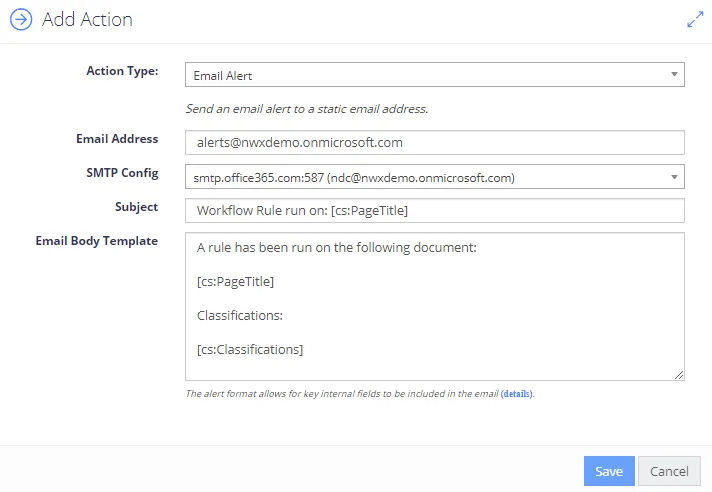
- In the corresponding section on the Rule tab, click Add on the right. The Add Action dialog opens.
- From the Action Type list, select the action to apply to documents that match the rule conditions. For details, see Workflow Actions.
- Click Save.
Other Rule Settings
On the Rule tab, you can also manage the rule, as follows:
- Add another rule by clicking the '+' sign.
- Enable or disable the rule by selecting or clearing the Enabled checkbox in the top right corner.
- Specify how rule application affects workflow processing. Possible options are:
- Processing stops if this rule is run
- Processing stops if any action fails
- Edit rule conditions.
- Copy or delete the current rule.
- Copy rule configuration as text, CSV, or XLSX file.
- Add, Edit or Delete rule actions.
If you configure multiple rule actions, the system processes them in the order listed. Use the red down arrow or green up arrow to change the processing sequence:

Specifying Workflow Conditions
You can narrow the initial workflow scope. For that, specify the conditions that document should match to be processed by the workflow.
- Go to the Conditions tab. By default, the Workflow Conditions list is empty, so the current workflow considers any document; the rule applies actual filtering conditions (rule conditions).

- Click Edit to open the Edit Workflow Conditions dialog.
- Select the option you need from the Mode list. The next steps resemble those in Specifying Rule Conditions