Configuring an NDC Server Cluster and Load Balancing with DQS Mode
The Distributed Query Server (DQS) mode lets you balance the processing load of data collection, indexing, and classification over multiple NDC Servers with a single shared database. Netwrix strongly recommends this approach if you need to process large data volumes, for example:
- File Servers — Use DQS mode when processing over 16M objects. A cluster of 4 servers supports up to 64M objects.
- SharePoint — Use DQS mode when processing over 8M objects. A cluster of 4 servers supports up to 32M objects.
To use Distributed Query Server mode, arrange your NDC Servers in a 'cluster' for load distribution. Each clustered NDC Server stores its own set of .CSE index files, thus distributing the NDC Index over the clustered servers. To assemble and combine data required for the search results, each NDC Server automatically communicates with the other clustered servers.
All NDC Servers in the cluster share a single NDC SQL database.
The Query Server application implements this functionality.
Configuring DQS Mode
You configure DQS mode in the administrative web console and, from version 5.7.10 onwards, the installer.
You can't undo DQS configuration after you apply it to your NDC deployment. Netwrix strongly recommends taking a full backup of your environment before enabling DQS. Also, read the DQS documentation sections thoroughly before you start.
Ensure all servers you plan to add to the DQS cluster have a network connection and are visible to each other across the network. Adjust your firewall settings if necessary.
Only users with the Superuser role can configure DQS mode.
Enabling DQS Mode (5.7.9 and earlier versions)
-
Install and configure the first Netwrix Data Classification Server as described in the Install Netwrix Data Classification section.
-
Open the administrative web console.
-
Navigate to Settings → Config → Utilities → DQS.
-
Select Enable DQS.
-
On the DQS tab, click Add to open the DQS addition menu, and input the details for the first secondary NDC server.
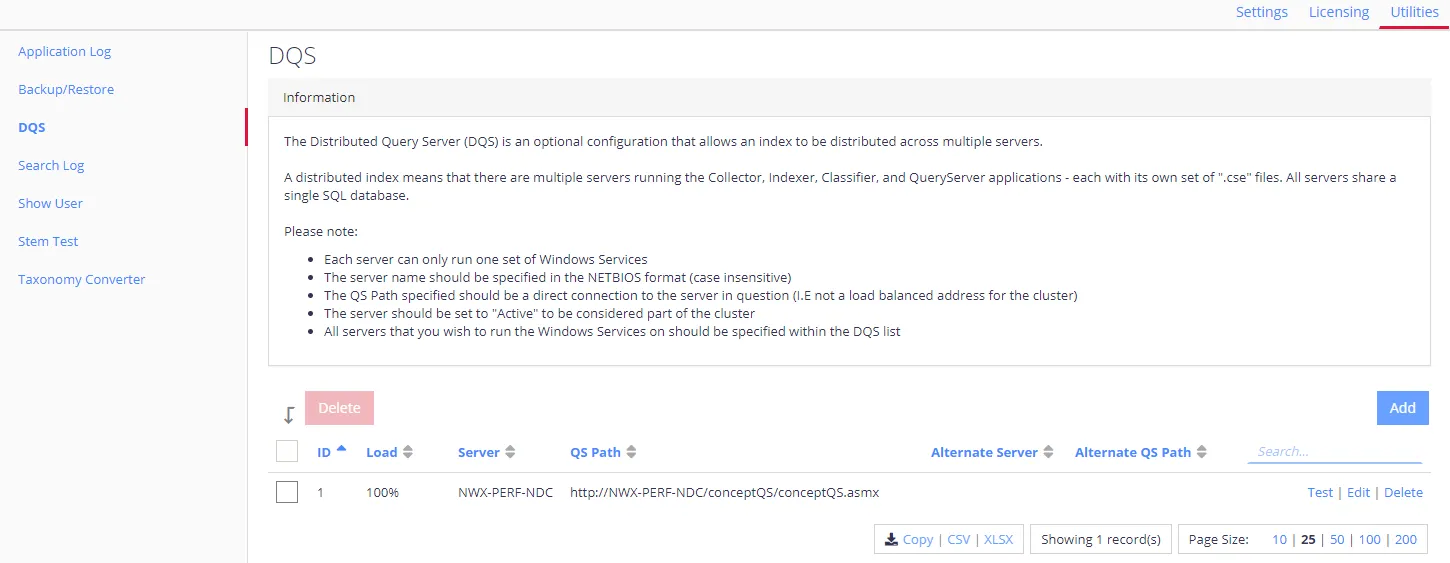
Complete the following fields:
Setting Value Server The NDC Server name or IP address (name format is case-insensitive). QS Path The path to the NDC QS process on the server you're adding. The system fills this in automatically when you enter the server name; leave the default value. Alternate Server Optional, Netwrix recommends using default values. Alternate QS Path Optional, Netwrix recommends using default values. -
Click Save to close the dialog. Repeat steps 5 and 6 for each server you intend to add.
-
Prepare to install the other Netwrix Data Classification Server instances on their dedicated servers. Each NDC server requires a dedicated machine to make best use of resources. Ensure they meet the Hardware Requirements and general Software Requirements
-
On each server, follow the installation steps as described in the Install Netwrix Data Classification section up to the SQL Database configuration step.
-
On the SQL Database step, provide connection details for the SQL Server or PostgreSQL instance that hosts the NDC SQL database you configured for the first NDC Server. A popup informs you that an NDC schema already exists in the database. Ignore this and continue.
-
Complete the installation.
-
Repeat steps 7 - 10 for each NDC Server you want to add.
Enabling DQS Mode (5.7.10 and later versions)
-
Install and configure the first Netwrix Data Classification Server as described in the Install Netwrix Data Classification section.
-
Open the administrative web console.
-
Navigate to Settings → Config → Utilities → DQS.
-
Select Enable DQS.
-
Prepare to install other Netwrix Data Classification Server instances. Ensure each NDC server meets the Hardware Requirements and general Software Requirements
-
On each server, follow the installation steps as described in the Install Netwrix Data Classification section up to the SQL Database configuration step.
-
On the SQL Database step, provide the details of the SQL Server or PostgreSQL instance that hosts the NDC SQL database you configured for the first NDC Server.
-
When you click Next, a message box appears stating that the installer detected an NDC configuration and will add the new install to the existing DQS environment. Click OK.
noteWhen you upgrade an existing NDC instance, the installer attempts to resynchronize the DQS instances in the background and, if successful, skips the DQS Synchronization step. You can then skip ahead in these instructions to step 13.
The DQS Synchronization step displays for an upgrade only if this process fails. The remaining steps resynchronize the NDC instance with the primary NDC server.
-
The Primary NDC Server URL field automatically contains the server URL of the primary NDC server (i.e. the first row in the DQS table). If it isn't present or is incorrect, enter the address from the QS Path column of the corresponding row of the DQS table. Then click Connect to connect the installer to that server.
-
After the installer successfully connects to the primary NDC server, it generates an authentication code and displays it in the Authentication Code field. Click Sync to open the NDC DQS settings page in a web browser.
-
On the web page, click Register/Resync. This opens the authentication code entry tab - the authentication code the installer generated appears in the input field. Click Submit to submit the authentication code.
If the authentication code isn't autofilled, click the Authentication Code field in the installer to copy the value to your clipboard, then paste it in the Authentication Code field in the NDC UI.
- The Register/Resync tab now displays an 8-digit verification code. Copy this, paste it into the Verification Code field in the installer, then click Join. The NDC installer then performs the resynchronisation.
- Complete the installation.
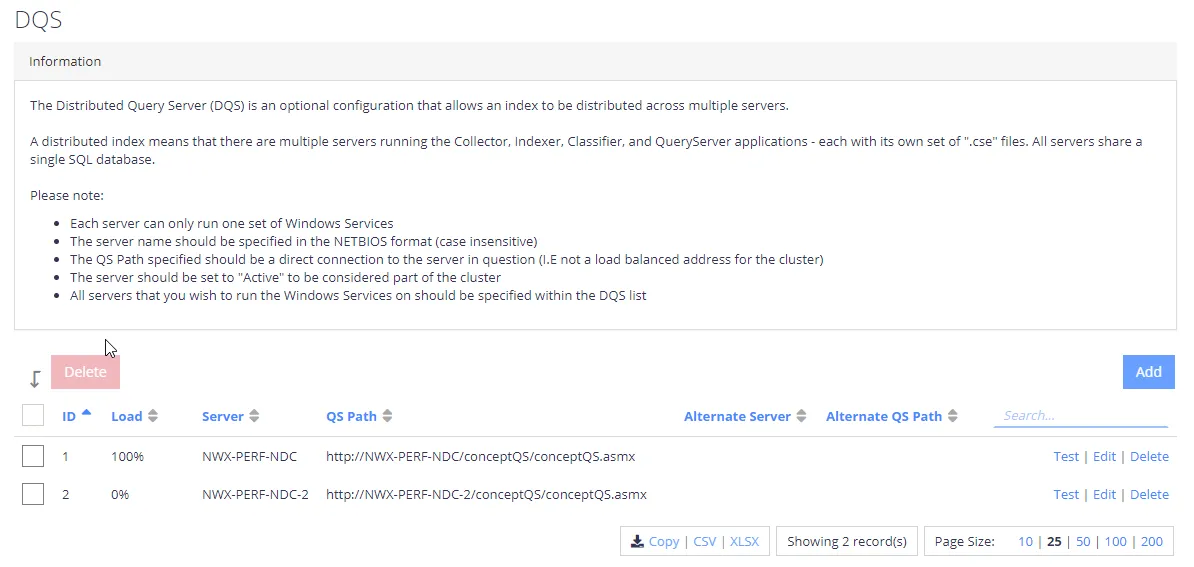
- Repeat steps 6 - 13 for each additional NDC Server you want to add, then review the list of servers to confirm all new servers appear.
If you configured DQS mode for an existing NDC deployment, the product prompts you to re-collect data from the data sources to re-distribute the content index across all NDC Servers in the cluster. The system recollects all data sources, which may take a significant amount of time.
To force re-distribution, use the Re-Collect command, which becomes available after you click the Run Cleaner button on the Settings > Core > Collector tab.
To review system health and check your configuration, use the product dashboards. See Operations and Health Dashboards for details on monitoring system status.