Create Entra ID app for Modern Authentication
To connect to an Exchange Online organization that uses Modern authentication, you need to create an Azure AD application, as described in this section.
Step 1: Prepare application certificate
Prepare application certificate as follows:
- Create (or load) an IIS certificate on NDC Server (recommended).
Install this certificate for the local machine so that Netwrix Data Classification and other services can access it.
-
Export the certificate (.CER file):
- Open the certificate in IIS management console.
- Go to the Details tab.
- Select Copy to File.
noteDon't export private key.
- Set file type to DER-encoded CER.
Step 2: Create and Register a new app in Azure AD
To register a new Azure AD application, do the following:
- Sign into the Microsoft 365 Admin Center (with your Global Administrator, Application Administrator or Cloud Application Administrator account) and go to the Azure Active Directory admin center.
- Search for and select the Azure Active Directory admin center.
- Under the Azure Directory select the App registrations section.
- Select New registration:
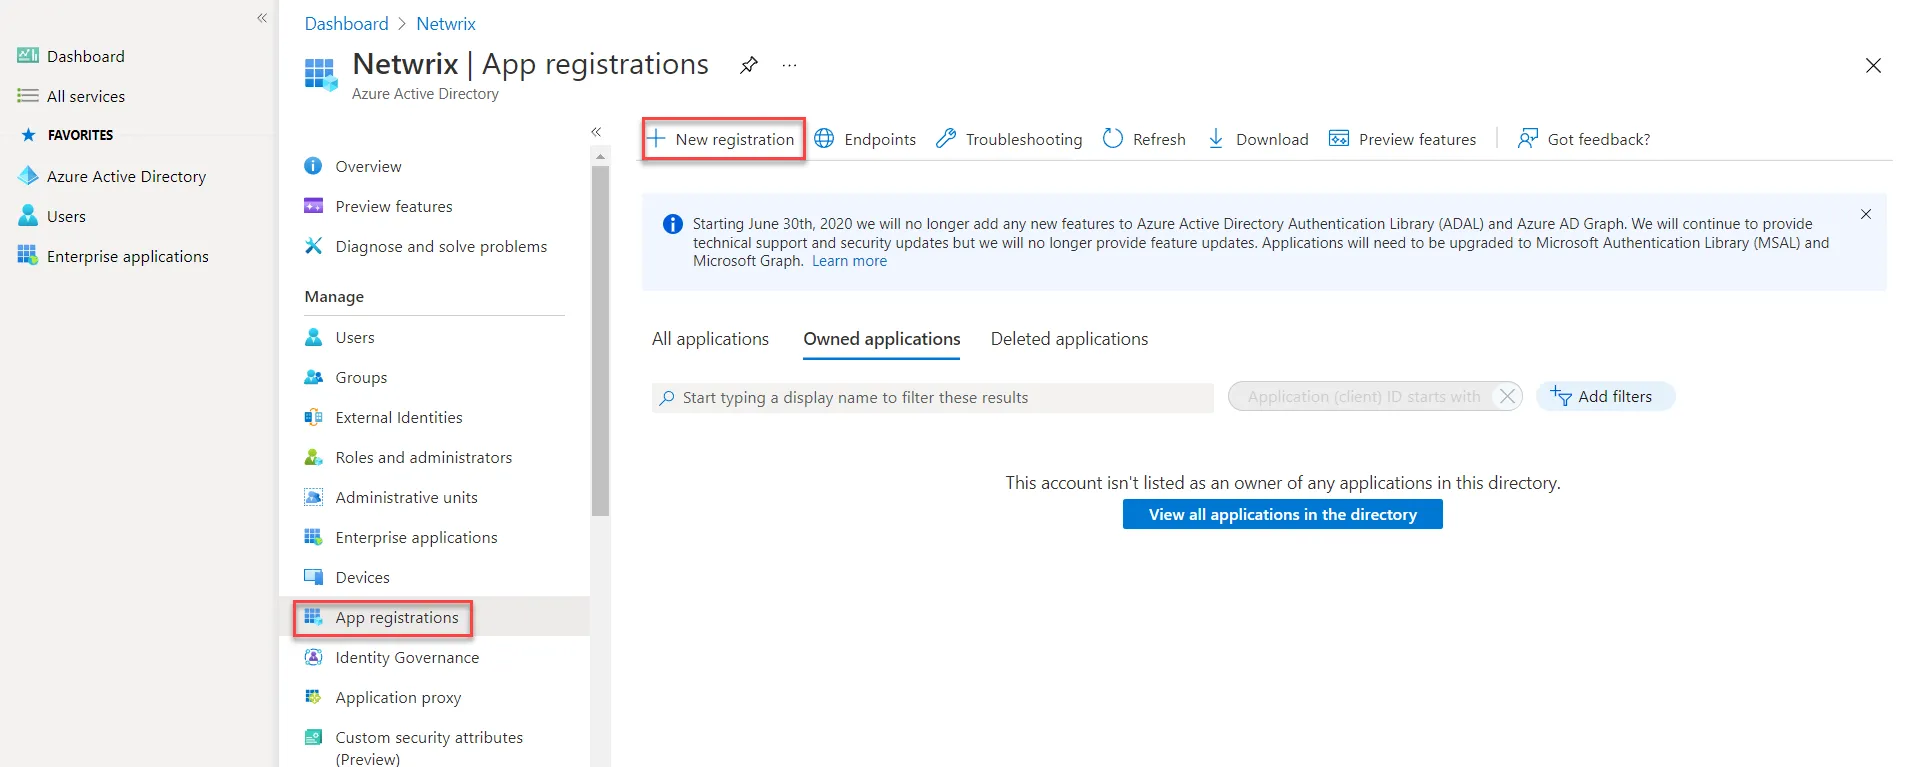
- In the Name field, enter the application name.
- In the Supported account types select who can use this application – use the Accounts in this organizational directory only option.
- Click the Register button.
Application redirect URl is optional, you can leave it blank on this step.
- . Copy your application ID from the Overview section to a safe location.
Step 3: Grant Required Permissions
Next, you need to grant your new application the required API permissions.
You can assign Azure AD applications either Delegated or Application permissions:
- Delegated permissions require a signed-in user present who consents to the permissions every time the app sends an API call.
- Application permissions require one-time consent from an administrator.
For the newly created app, use Application permissions.
By default, a new application has one delegated permission for Microsoft Graph API – User.Read. It isn't required, and you can remove it.
Do the following:
- At the top of the Request API permissions pane, click the APIs your organization uses tab and search for Office 365 Exchange Online.
- Go to APIs your organization uses and search for "office" in the search bar.
- Select Office 365 Exchange Online.
- Click the Office 365 Exchange Online entry in the list of apps found.
- Proceed with adding the permissions for this app: select Application permissions and then select full_access_as_app.
- Click Add a permission.
Finally, you need to grant admin consent to the tenant (that is, for the Exchange organization whose audit data the newly registered app collects).
Do the following:
- Go to the new app settings > API permissions and click Grant admin consent for
<tenant name>. - When prompted to confirm granting, click Yes.
Step 4: Configure Certificates & secrets
Having configured the app, you can upload its application certificate.
- In the app settings, click Certificates & secrets and select Upload certificate.
- Upload the .CER file you prepared at Step 1: Prepare application certificate.
- Copy the certificate thumbprint to a safe location.
Step 5: Obtain Tenant ID
- Open Azure Active Directory admin center.
- Select Azure Active Directory > Overview section for the required Exchange Online organization.
- Locate the Tenant ID and copy it to a safe location.