User Management
Configure user authentication mechanisms, manage user permissions, and manage existing users.
Authentication Mechanisms
On first install, the QS defaults to Windows authentication. To set up the QS to use an ADFS server, follow the "Installation and Configuration" guide using the section "ADFS". To use forms based authentication, disable all other authentication methods in IIS other than: Anonymous and Forms:
To use authentication forms:
Step 1 – Check that the “authentication mode” setting in conceptQS/web.config file is set as follows:
(This is the default setting.)
Step 2 – Check that the Authentication settings are correct in IIS for Windows Authentication:
The NDC web application must have these authentication methods enabled:
- Anonymous Authentication
- Windows Authentication
Disable all other authentication methods.
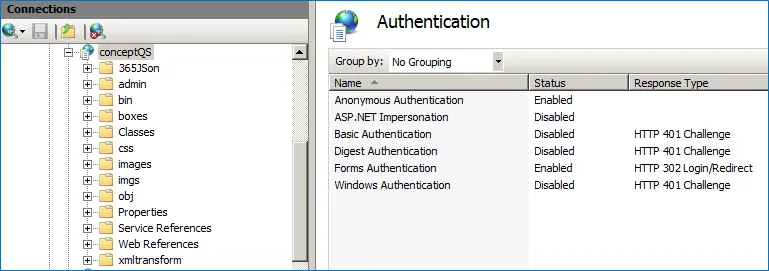
Step 3 – If you want to allow anonymous access to NDC, edit the conceptQS web.config file and delete (or comment out) three lines:
*
If these lines are present, users must log in using their Windows credentials.
Configure Microsoft Entra ID Authentication
To configure Microsoft Entra ID you need to create a client application and add two new appSettings
to the "<appsettings>" section of the web.config file in the QS directory:
<add key="ida:AzureClientId" value="NewAzureADClientID (GUID)" /><add key="ida:AzureAuthority" value="AzureADAuthorityValue such as: https://login.windows.net/mytenant.onmicrosoft.com" />
The Netwrix Data Classification REST APIs also support Bearer-based authentication. To enable this mode, add one further appSetting entry into the web.config file:
<add key="ida:AzureTenant" value="Tenant Name such as: netwrix.com" />
In the QS, settings are split between Basic and Advanced. To always see Advanced options:
- Select your username from the footer of the application
- Click User Preferences
- Tick Always Show Advanced Settings
- Click Save
See the following Knowledge Base article to learn how to set up single sign-on for Netwrix Data Classification via Microsoft Entra ID authentication: How to Set Up SSO via Microsoft Entra ID Authentication.
Add or Remove Users
You can add and remove users via the Users screen at any time.
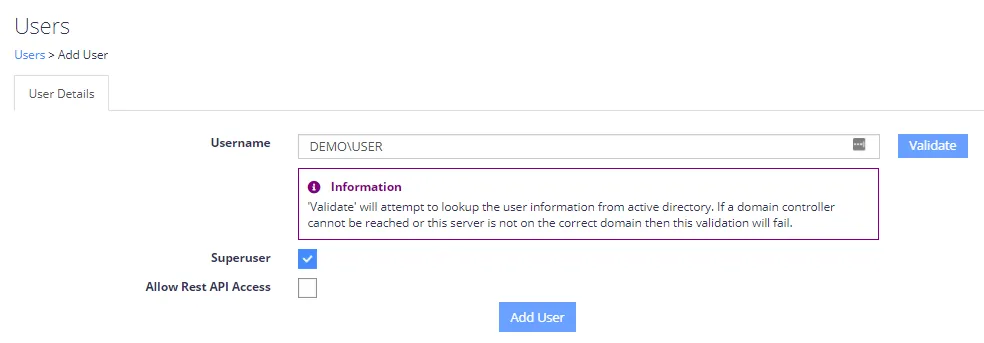
You can validate additional Windows users using Integrated Windows Authentication. You can only add additional non-Windows users if the Non-Windows Authentication mode is enabled.
If you delete the only Super User, the system removes all security and reverts the QS administrative functions to unrestricted access.
User accounts with REST API access are still restricted by their specific permissions. A Super User with REST API access can run any API method. The same rules that govern the UI restrict any normal user. You can find further API samples and documentation at: /NDC/_api
Permission Management
To allocate granular permissions to a user (non-Super Users), click Edit on their row in the Users table. The permissions for each section of the administrative web interface appear as tabs. Each tab contains a top-level checkbox of the form "Access [Area Name]” (e.g. Access Sources) which defines whether a user has access to each of the top level administrative areas.
When you enable an area, you can typically enable more granular permissions, such as:
- Within the Taxonomies area, you can also assign permissions at a specific Term Set or Term branch level. To view a full user permission summary (for all Term/Set level permissions), select the View Taxonomy Permissions button.
- Within the Sources area, you can restrict a user’s access to specific source groups, as shown in the following image.
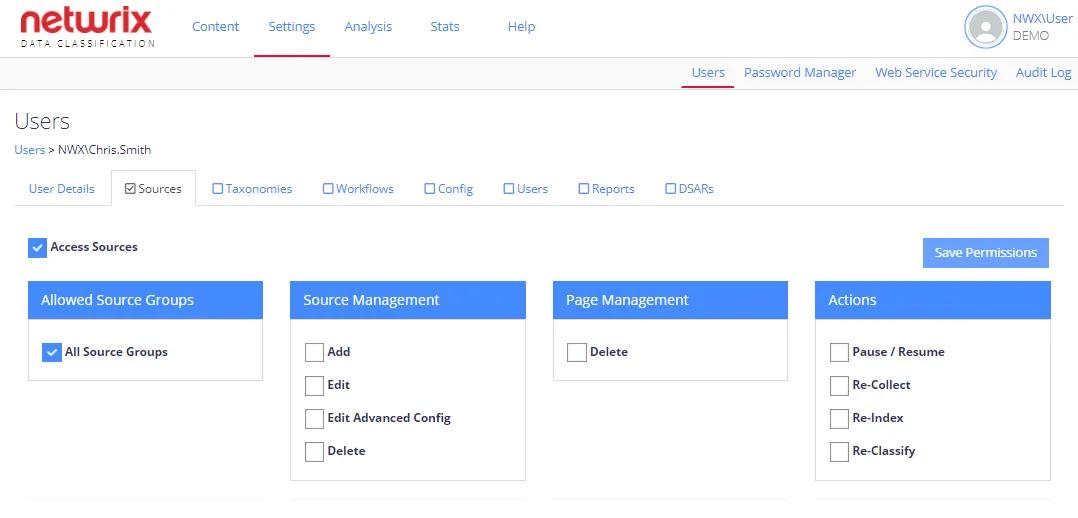
Permissions Summary
The Permissions window lets you set permissions for the selected user.

You can restrict permissions for a user to the following areas:
- Sources. See Content Sources for additional information.
- Taxonomies. See Taxonomies for additional information.
- Workflows. See Understanding Workflows for additional information.
- Configuration options. See Configuration Options for additional information.
- Users. See Users and Security Settings for additional information.
- Reports. See Reporting Capabilities for additional information.
- DSARs. See Data Subject Access Requests for additional information.
Super Users
Super Users have access to all Query Server administrative functions.
You must specifically configure access rights for non-Super Users; the product disables all rights by default. See User Management section for details about configuring the access rights for non-Super Users.
Regardless of the authentication mode you select, usage of the QS administrative functions remains unrestricted until you add at least one user. The first user must be a Super User. If you use Windows or ADFS Authentication, the first user defaults to the logged-in user, although you can change this if required.
If you enable Non-Windows Authentication, you must enter additional information to define the non-Windows user.