Upgrade to GroupID 11
The topic guides you to upgrade to GroupID 11 from GroupID 9 and 10.
Follow the steps to upgrade.
-
To launch the Upgrade wizard, click Next on the GroupID Successfully Configured page of the Configuration Tool.
OR
Click the Windows Start menu > Imanami > GroupID Upgrade Tool 11.0.
-
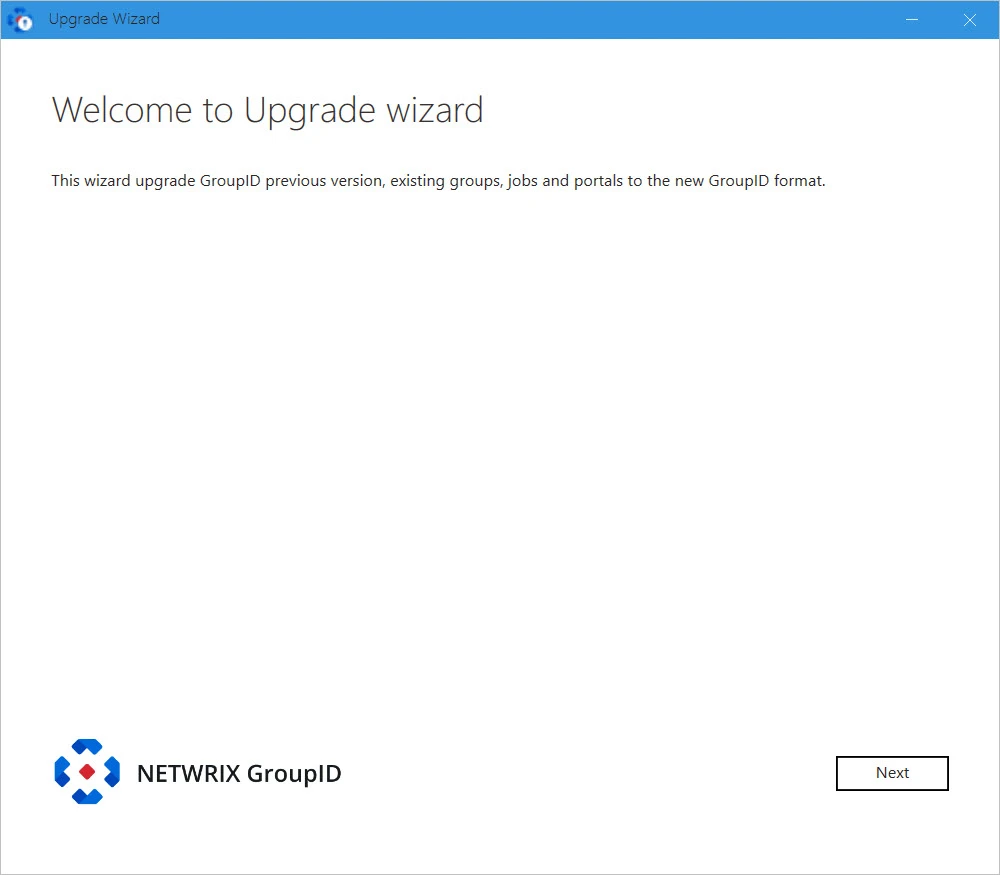
Read the welcome message and click Next.
-
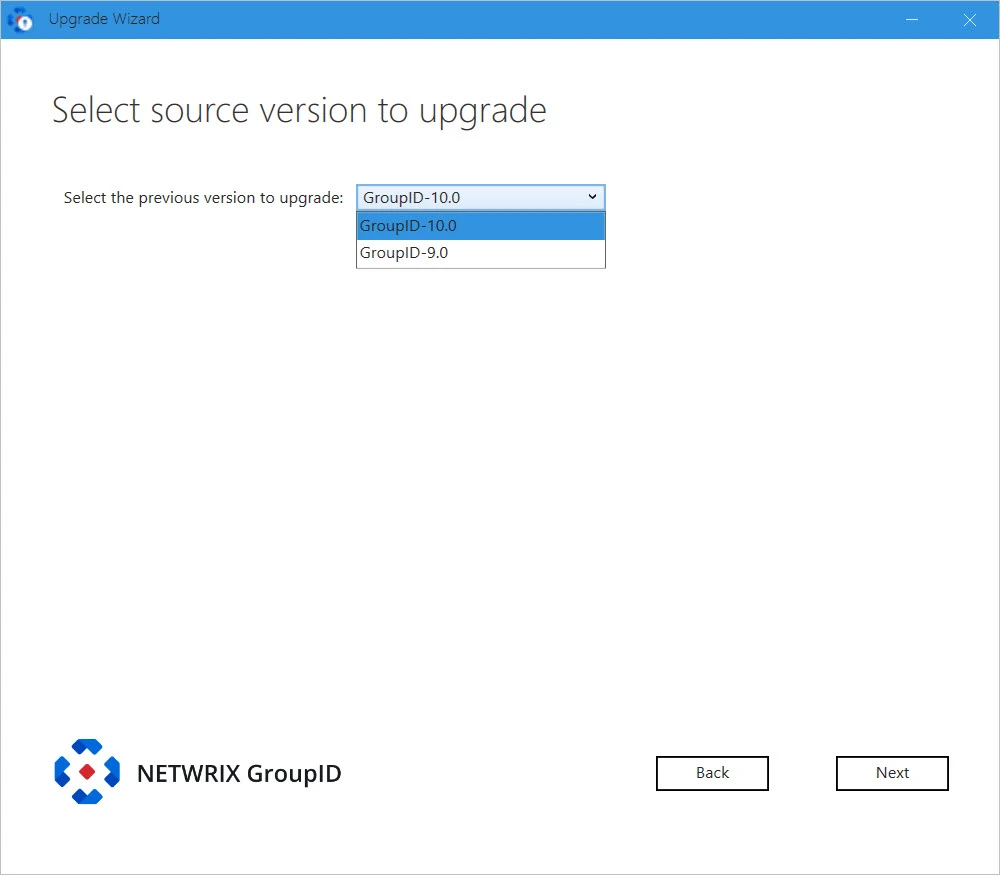
From the Select the previous version to upgrade list, select the GroupID version to upgrade from.
NOTE: The following steps discuss the upgrade process with GroupID 10 as the source version. The process may vary for different source versions.
-
Click Next.
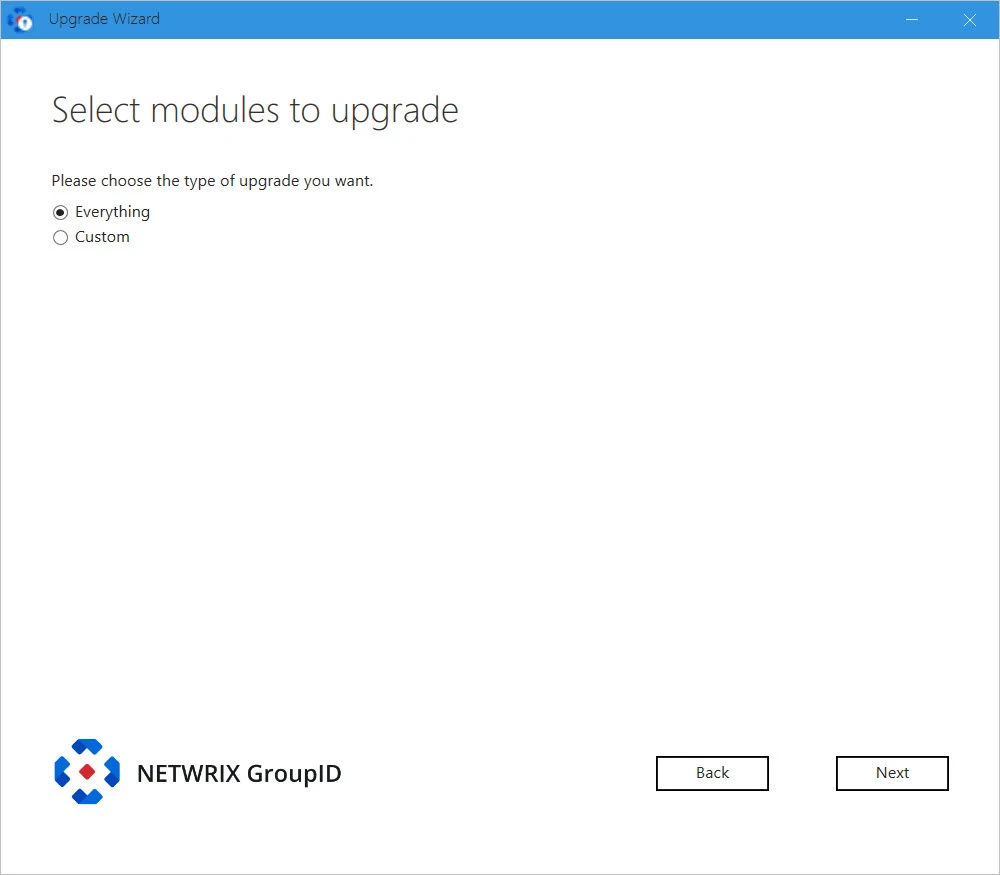
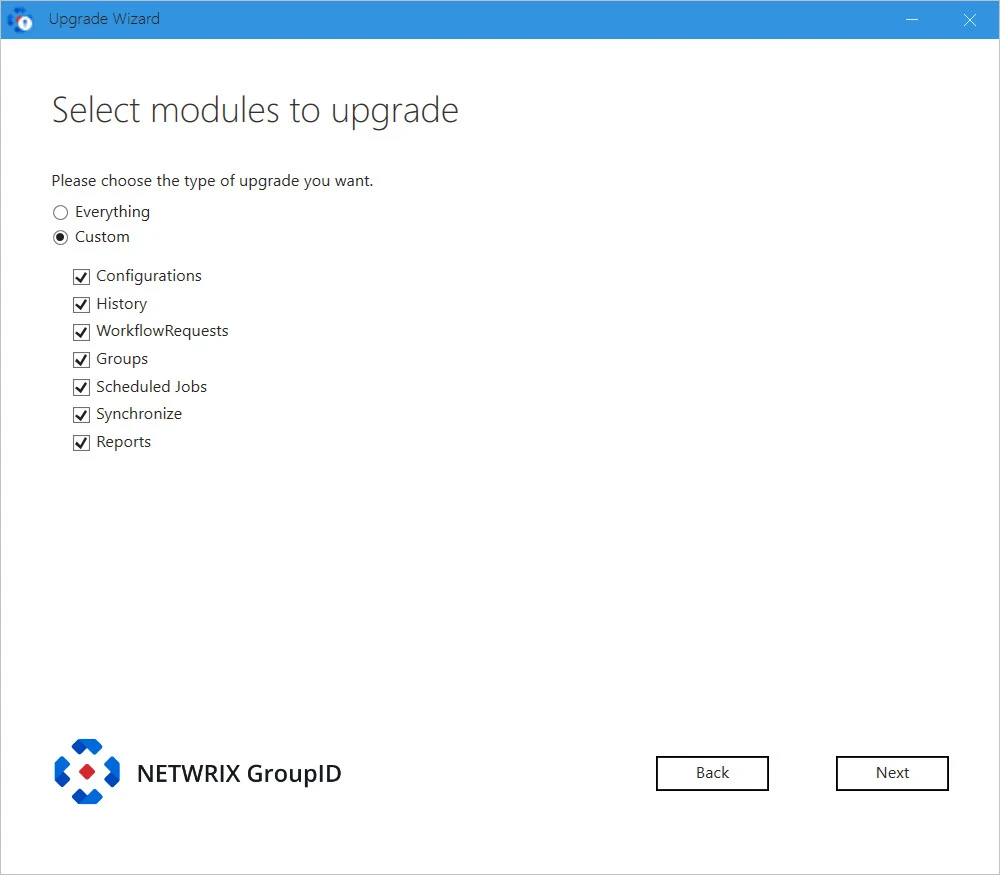
On the Select Modules to upgrade page, select the type of GroupID data for upgrade. You can choose to upgrade all or selective data of the previous version. Options are:
-
Everything – upgrades all data, which covers all options discussed under Custom.
-
Custom – choose what data you want to upgrade. On selecting it, the following options are listed, from where you can choose the data to upgrade.
-
-
Click Next.
-
If you have an Microsoft Entra ID based identity store in GroupID 10, the following page appears.
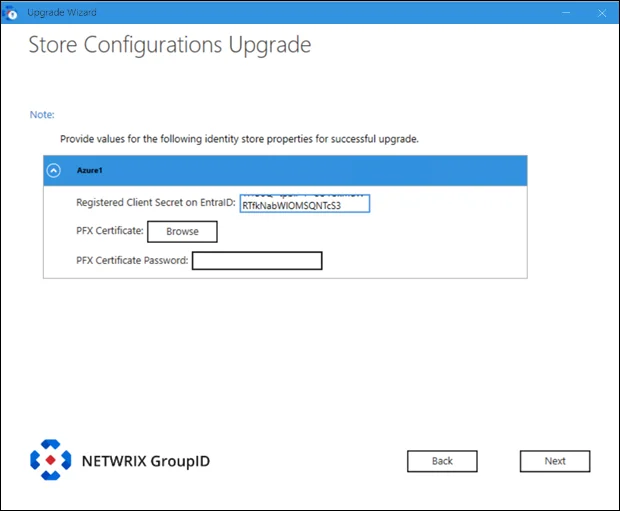
Provide the following information:
- Registered Client Secret on EntraID: provide the client secret value generated against the certificate uploaded to Microsoft Entra Admin Center while registering the GroupID application.
- PFX Certificate: Click Browse to navigate to the folder where the certificate is saved. This certificate must be the same uploaded for the registered GroupID app in Microsoft Entra ID.
- PFX Certificate Password: Provide password of the PFX certificate.
-
Click Next.
-
If in the GroupID source version, Office 365 messaging provider is configured in a Microsoft Entra ID based identity store or in an AD identity store, the Upgrade wizard displays the following page.
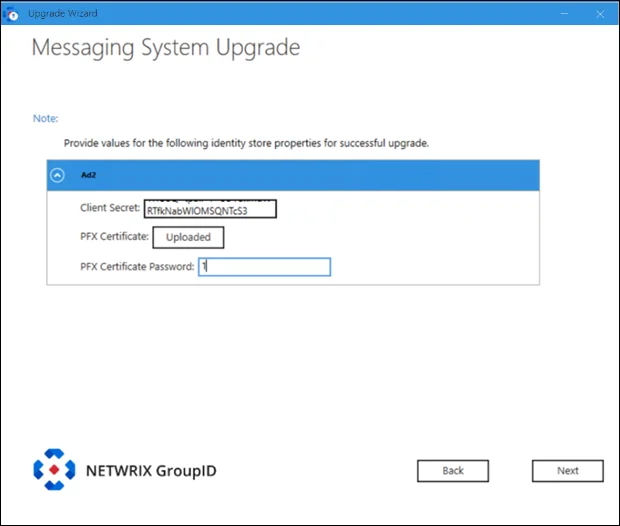
Provide the following information:
- Client Secret: provide the client secret value generated against the certificate uploaded to Microsoft Entra Admin Center while registering the GroupID application.
- PFX Certificate: Click Browse to navigate to the folder where the certificate is saved. This certificate must be the same uploaded for the registered GroupID app in Microsoft Entra ID.
- PFX Certificate Password: Provide password of the PFX certificate.
-
If any Synchronize jobs exist in GroupID 10 or the version you are upgrading from, then the wizard checks the destination domain set for them. Let's assume you have 5 jobs that connect to different child domains in a forest with different service accounts and different messaging providers.
-
If an identity store already exists in GroupID 10 for the destination domains that the jobs connect to, then jobs are moved to the respective identity stores in GroupID 11.
-
When there is no identity store in GroupID 10 for the destination domain that the jobs connect to, the Upgrade wizard reads the FQDN of the destination domains used in the jobs and tries to create a forest structure. On identifying one, it proceeds to create an identity store for the forest, requiring you to provide a service account. (The user name and password fields will be auto populated but you can change them.) All jobs with destination provider for that forest domain or any of its child domains will be moved to the new identity store.
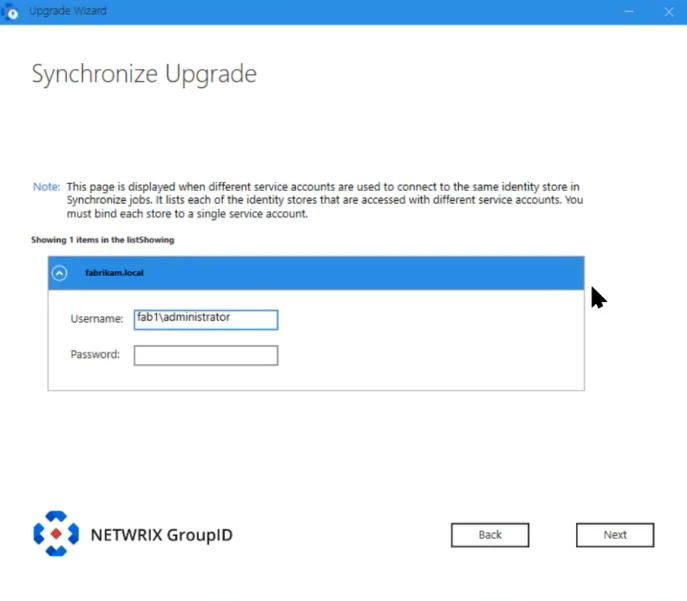
NOTE: The service account you provide here should have at least read permission in the entire forest, so that all objects from the forest can be replicated to Elasticsearch.
The wizard does not create a separate identity store for each child domain in the same forest. In case it cannot determine a forest structure, it creates separate identity stores for each domain.
-
-
For Synchronize jobs that use Office 365 as messaging provider in GroupID 10, the wizard would require you to provide the PFX certificate. All Synchronize jobs that use Office 365 as messaging provider will be listed on the wizard page. Expand each job and provide the PFX certificate along with its password.

Provide the following information:
- Certificate: Click Browse to navigate to the folder where the certificate is saved. This certificate must be the same uploaded for the registered GroupID app in Microsoft Entra ID.
- Password: Provide password of the PFX certificate.
- Client Secret: provide the client secret value generated against the certificate uploaded to Microsoft Entra Admin Center while registering the GroupID application.
-
Click Next.
-
In GroupID 10 and earlier versions, reports were generated for the domain that the GroupID server was joined to. During upgrade, the wizard checks if an identity store for that domain exists or not.
- If an identity store for that domain exists or if it being created for a Synchronize job in this upgrade process, GroupID will bind the reports to it.
- If an identity store for that domain does not exist, then you have to create an identity store
for it. It must essentially be an Active Directory identity store. The wizard will bind the
reports generated in GroupID 10 to the identity store, so you will be able to view them in
GroupID 11.
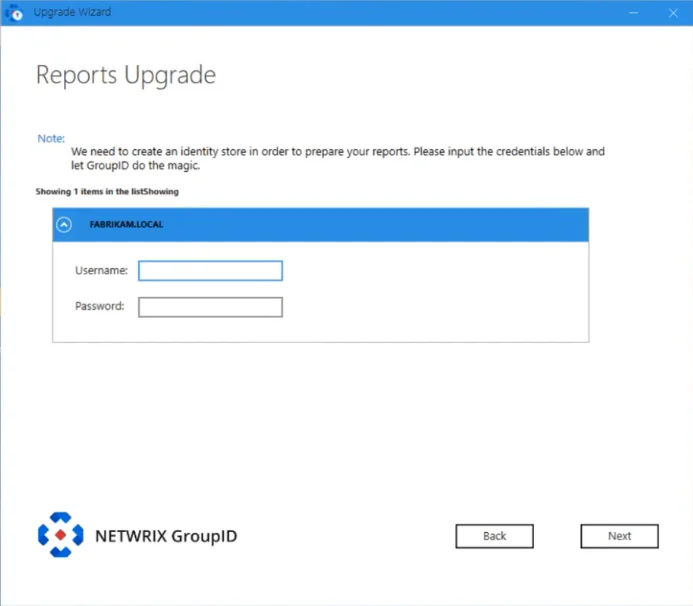
NOTE: If no report has been generated in GroupID 10, the page related to reports upgrade will not be displayed.
-
During upgrade, Synchronize schedules are also moved to identity stores. The Upgrade wizard will check the jobs added to a schedule. If the destination in a job is a directory provider, it will automatically move the schedule to the respective identity store.
Remember, during upgrade, identity stores are created for destination directory providers of Synchronize jobs (i.e., for providers that do not have an identity store in the source version).
Consider the following:
-
If a schedule has Synchronize jobs where one job uses an Active Directory domain (DomainA) as destination and another job uses a file-based provider as destination, then the schedule will auto move to the identity store created for DomainA.
-
For schedules with Synchronize jobs that use file-based providers as destination, the Upgrade wizard will display the following page that will list all such schedules. Select an identity store for each schedule, so that the schedule moves to that identity store.
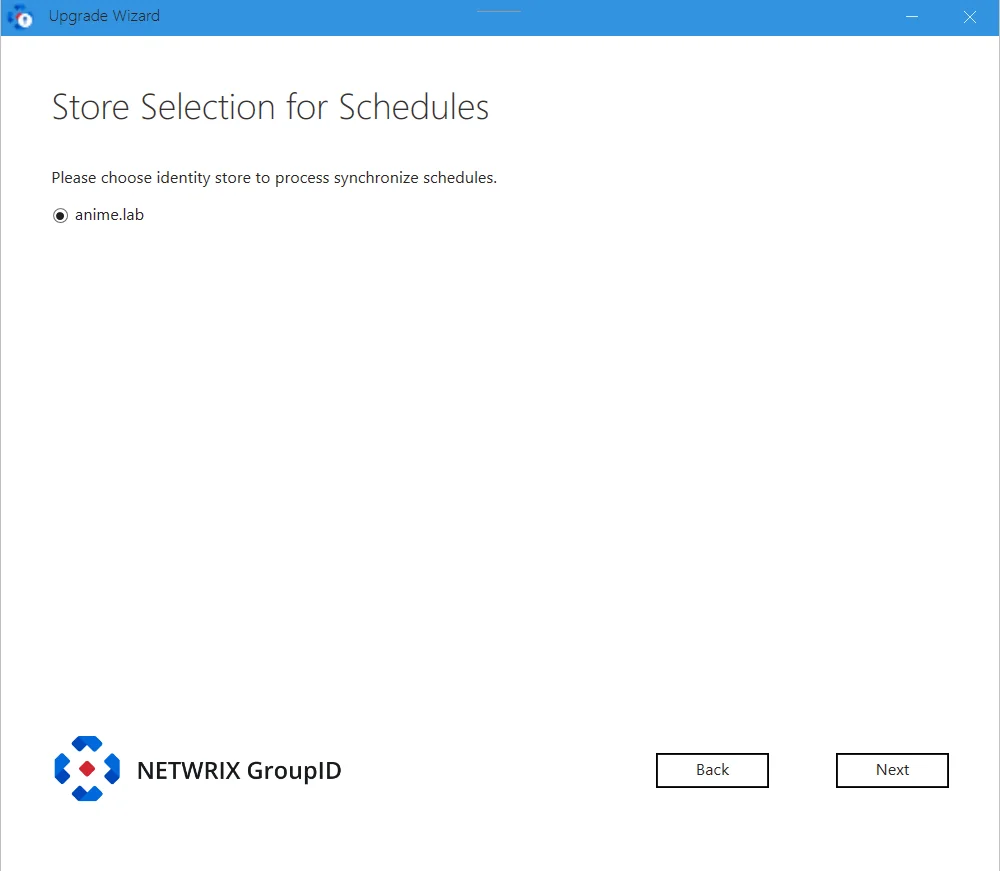
-
The rules stated above also apply to schedules with job collections added to them.
-
-
Click Next.
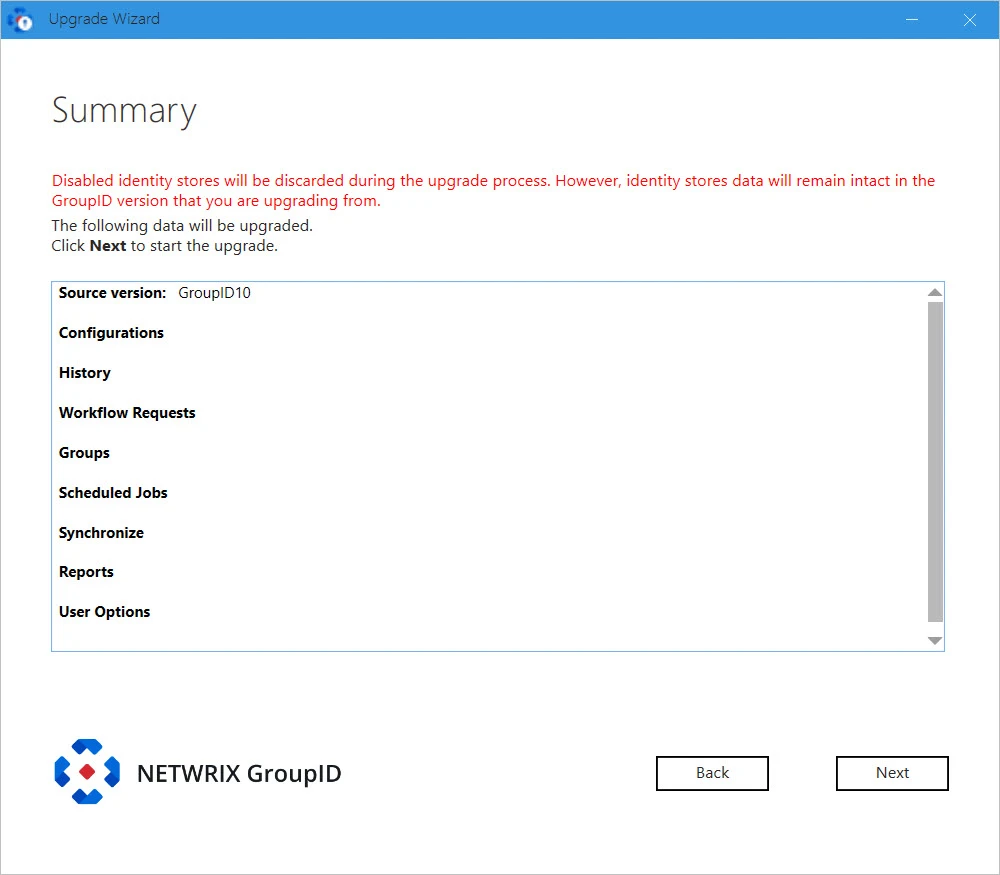
This page displays a complete summary of the data to be copied/upgraded for your selected options. These options were selected on the Select modules to upgrade page..
NOTE: If there are any disabled identity store(s) in the source GroupID version, GroupID will not upgrade those identity store(s). However, data of those identity store(s) will remain intact in the source GroupID version.
-
Review the summary and click Next.
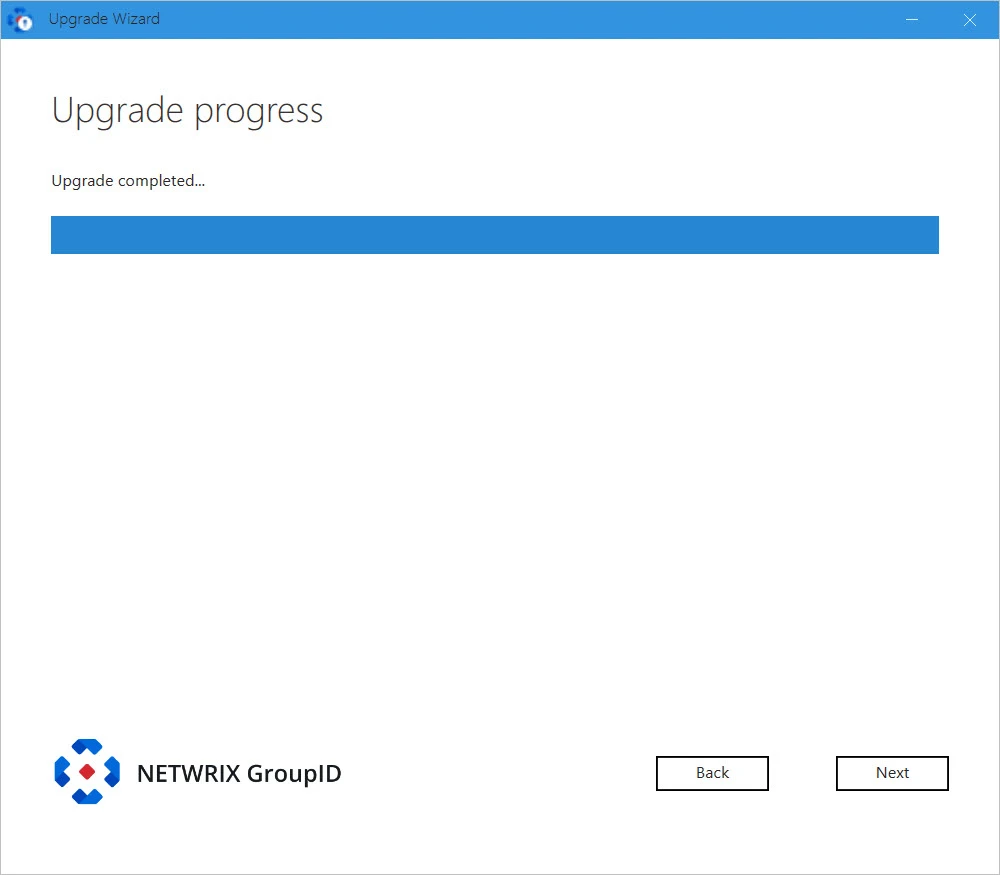
GroupID is upgraded while the Upgrade Process displays the upgrade progress. On successful upgrade, the Upgradce Completed message above the progress bar is displayed.
-
Click Next.
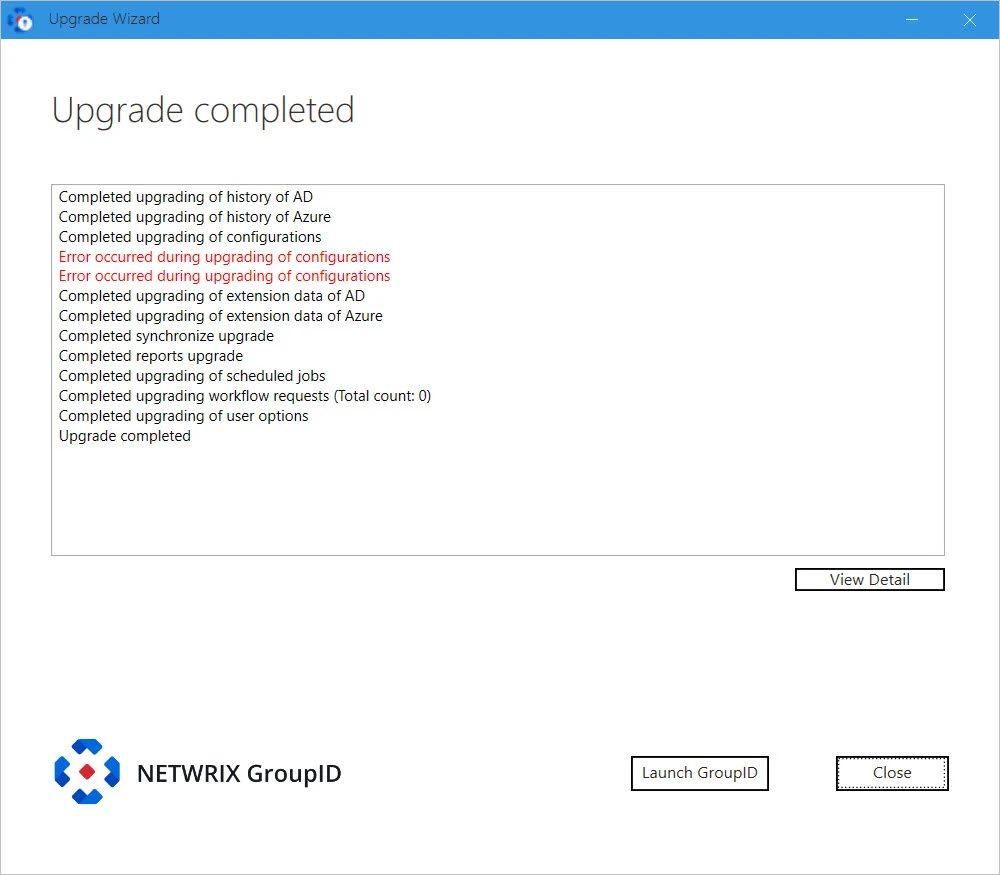
The Upgrade Completed page displays the status of features selected for upgrade.
-
You can click:
- View Details: to view log file generated during the Upgrade process.
- Launch GroupID: to start using GroupID 11.
- Close: to close the Upgrade wizard.
See Also