Installation
The Directory Manager installer auto detects the prerequisite software and Windows features that Directory Manager requires, and installs them without any manual intervention. This has practically simplified Directory Manager installation, reduced workloads, and diminished installation time.
Furthermore, Directory Manager configuration and upgrade has been seamlessly integrated into the installation experience.
Back Up and Restore GroupID Data
This topic provides instructions for backing up and restoring the data from previous versions of GroupID when upgrading to Directory Manager 11.1.
- Database on SQL Server
- Elasticsearch Data
- GroupID Self-Service Portals
- GroupID Password Center Portals
- Synchronize Jobs
- Reports
Database on SQL Server
Take a backup of the GroupID database that you will use to upgrade to Directory Manager 11.0.
Follow Microsoft standards to back up this SQL Server database.
Whenever this database is restored, any changes you made using Directory Manager 11.1 would be lost.
Elasticsearch Data
Before you upgrade from GroupID 10 to Directory Manager 11.1, take a backup of the Elasticsearch data folder. The default folder location is:
C:/ProgramData/Imanami/GroupID 10.0/Replication/data/
ldifde -f c:\groupinfobeforedirectorymanager.ldf -r "(&(objectClass=group)(objectCategory=group)(|(extensionData=*)(extensionAttribute15=*)(extensionAttribute14=*)(extensionAttribute13=*)(extensionAttribute12=*)" -p Subtree -l extensionData,extensionAttribute15,extensionAttribute14,extensionAttribute13,extensionAttribute12
GroupID Self-Service Portals
Back Up
Follow these steps to back up the Self-Service portals created using GroupID 9.0, and 10.0.
Step 1 – Go to the Inetpub folder of the product for which you want to take a backup.
- GroupID 9 — X:\Program Files\Imanami\GroupID 9.0\SelfService\Inetpub
- GroupID 10 — X:\Program Files\Imanami\GroupID 10.0\SelfService\Inetpub
Step 2 – Copy the folders for each virtual server or portal.
Step 3 – Create a new folder (ideally on a different drive) and paste the copied data into that folder.
Restore
Follow these steps to restore GroupID Self-Service portals.
Step 1 – Copy the folders containing the portals from the backup folder you created in the previous steps.
Step 2 – Go to the Inetpub folder of the product’s installation directory:
- GroupID 9 —
X:\Program Files\Imanami\GroupID 9.0\SelfService\Inetpub - GroupID 10 —
X:\Program Files\Imanami\GroupID 10.0\SelfService\Inetpub
Step 3 – Paste the copied data in the location, replacing any existing files.
GroupID Password Center Portals
Back Up
Follow these steps to back up Password Center User and Helpdesk portals created using GroupID 9.0 and 10.0.
Step 1 – Go to the PasswordCenter folder of the product’s installation directory:
- GroupID 9 —
X:\Program Files\Imanami\GroupID 9.0\PasswordCenter\Inetpub
(for Password Center User portals) - GroupID 9 —
X:\Program Files\Imanami\GroupID 9.0\PasswordCenter\Helpdesk\Inetpub
(for Password Center Helpdesk portals) - GroupID 10 —
X:\Program Files\Imanami\GroupID 10.0\PasswordCenter\Inetpub
(for Password Center User portals) - GroupID 10 —
X:\Program Files\Imanami\GroupID 10.0\PasswordCenter\Helpdesk\Inetpub
(for Password Center Helpdesk portals)
Step 2 – Copy the folders of each portal.
Step 3 – Create a new folder (on a different drive) and paste the copied data into that folder.
Restore
Follow these steps to restore Password Center portals to Directory Manager.
Step 1 – Copy the folders containing the Password Center portals from the backup folder you created in the previous steps.
Step 2 – Go to the PasswordCenter folder of the product’s installation directory:
- GroupID 9 —
X:\Program Files\Imanami\GroupID 9.0\PasswordCenter\Inetpub
(for Password Center User portals) - GroupID 9 —
X:\Program Files\Imanami\GroupID 9.0\PasswordCenter\Helpdesk\Inetpub
(for Password Center Helpdesk portals) - GroupID 10 —
X:\Program Files\Imanami\GroupID 10.0\PasswordCenter\Inetpub
(for Password Center User portals) - GroupID 10 —
X:\Program Files\Imanami\GroupID 10.0\PasswordCenter\Helpdesk\Inetpub
(for Password Center Helpdesk portals)
Step 3 – Paste the copied data into the location, replacing any existing files.
Synchronize Jobs
Back Up
Follow these steps to create a backup of jobs created with GroupID 9.0 and 10.0 Synchronize.
Step 1 – On the Windows Run dialog box, type one of the following paths and run the command:
- GroupID 9 —
%ALLUSERSPROFILE%\Imanami\GroupID 9.0\Synchronize - GroupID 10 —
%ALLUSERSPROFILE%\Imanami\GroupID 10.0\Synchronize
Step 2 – Copy the Jobs folder.
Step 3 – Create a new folder (ideally on a different drive) and paste the Jobs folder into it.
NOTE: If some scheduled tasks are defined for Synchronize jobs, you do not need to create their backup. On restoring, the scheduled tasks remain functional for Synchronize jobs.
Restore
Follow these steps to restore jobs from Directory Manager 9.0 and 9.0.
Step 1 – Copy the Jobs folder from the backup folder you created in the preceding steps.
Step 2 – On the Windows Run dialog box, type one of the following paths and run the command:
- GroupID 9 —
%ALLUSERSPROFILE%\Imanami\GroupID 9.0\Synchronize - GroupID 10 —
%ALLUSERSPROFILE%\Imanami\GroupID 10.0\Synchronize
Step 3 – Paste the Jobs folder into the location, replacing any existing files.
Reports
Back Up
Follow these steps to create a backup of Directory Manager 9.0 and 10.0 Reports:
Step 1 – Browse to the location where the reports generated by these products are saved. The default locations are:
- GroupID 9 —
X:\ProgramData\Imanami\GroupID 9.0\Reports - GroupID 10 —
X:\ProgramData\Imanami\GroupID 10.0\Reports
Step 2 – Copy all data at the location.
Step 3 – Create a new folder (ideally on a different drive) and paste the copied data into that folder.
NOTE: Note: You do not need to create a backup of scheduled tasks that include report criteria. On restoring, the scheduled tasks remain functional for these reports.
Restore
Follow these steps to restore Directory Manager 9.0 and 10.0 Reports:
Step 1 – Copy the data from the backup folder you created in the previous steps.
Step 2 – On the Windows Run dialog box, type the path of the location where the reports are saved and run the command:
- GroupID 9 —
X:\ProgramData\Imanami\GroupID 9.0\Reports - GroupID 10 —
X:\ProgramData\Imanami\GroupID 10.0\Reports
Step 3 – Paste the copied data in the location, replacing any existing file.
Configuration Tool
You can configure Directory Managerimmediately after installing it.
Step 1 – Run the Configuration Tool in one of the following ways:
- To configure Directory Managerright after installation, click Next on the Run Configuration Tool page. See the Installation Tool topic.
- When Directory Manager is installed, the Configuration Tool is also installed as a separate program on the machine. Launch the Directory Manager Configuration Tool from the Windows Start screen.
In either case, the tool opens to the Introduction page.
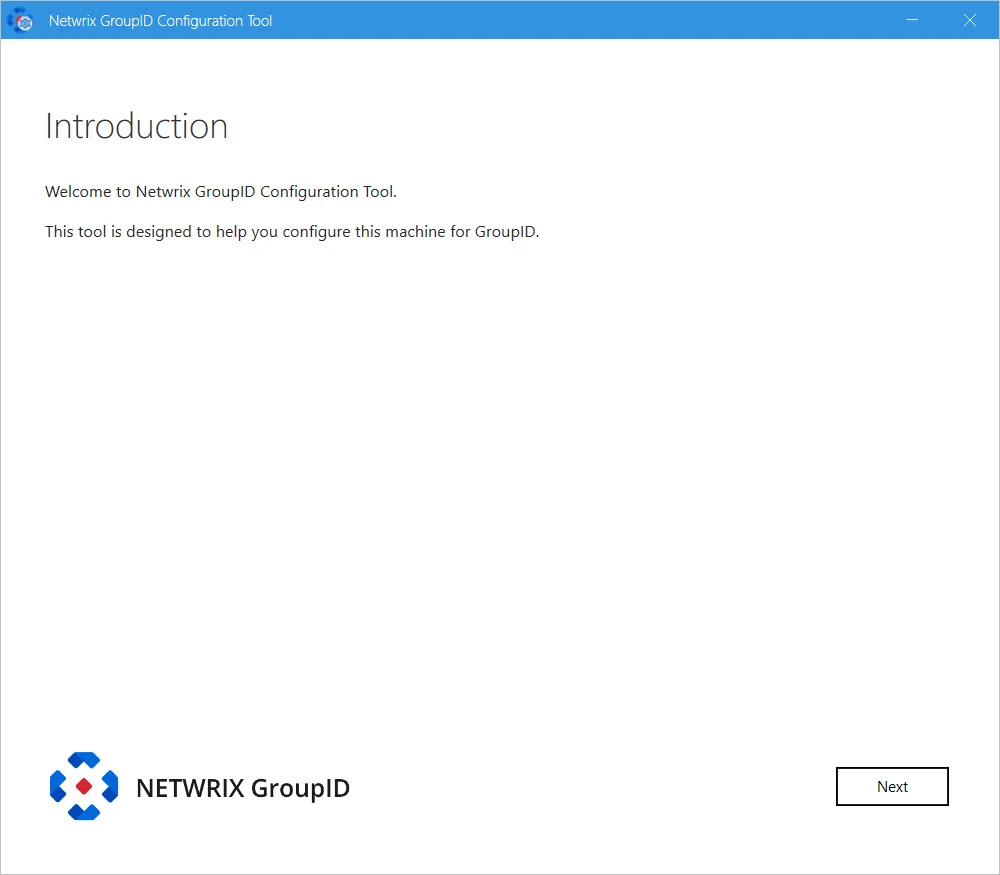
Step 2 – Read the welcome message and click Next.
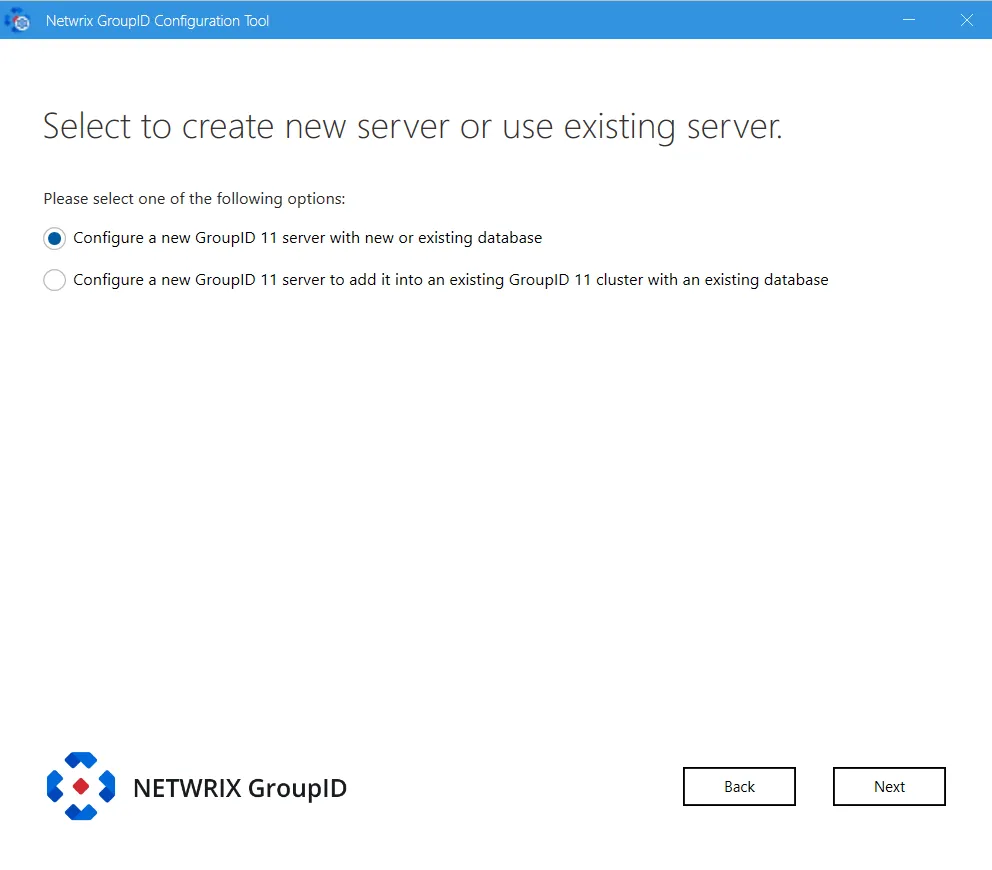
Step 3 – To configure a Directory Manager server or a Directory Manager client, select the relevant option.
-
Configure a new GroupID server with new or existing database – configures the Directory Manager server and the Directory Manager Data Service on the machine where Directory Manager is being installed.
It also configures the Directory Manager Elasticsearch Service as a master node for the Elasticsearch service cluster to support load balancing. See the Configure a New Directory Manager Server with a New or an Existing Database topic for additional information.
-
Configure a new GroupID 11 server to add it into an existing GroupID 11 cluster with an existing database – configures a Directory Manager server that has its own Data Service. This data service gets the configurations (paraphrase and database settings) of the Data Service deployed for another Directory Manager server in your environment.
This option also configures the Directory Manager Elasticsearch Service as a slave node to the master node for the Elasticsearch Service cluster configured on the Directory Manager server. See the Configure a new Directory Manager server to add it to an existing Directory Manager 11 cluster with an existing database topic for additional information.
Configure a new Directory Manager server to add it to an existing Directory Manager 11 cluster with an existing database
While installing Directory Manager, you can choose to create a Directory Managerserver with load balancing support, where load will be balanced in real time with multiple Data Services, portals and Elasticsearch instances.
This option also configures the Directory Manager Elasticsearch Service as a slave node to the master node for the Elasticsearch Service cluster configured on the Directory Manager server.
To configure a Directory Manager server with existing database:
Step 1 – On the Select to create new server or use existing server page of the Configuration Tool, select Configure a New Directory Manager Server with a New or an Existing Database option. See Step 3 on the Configuration Tool topic.
Step 2 – Click Next.
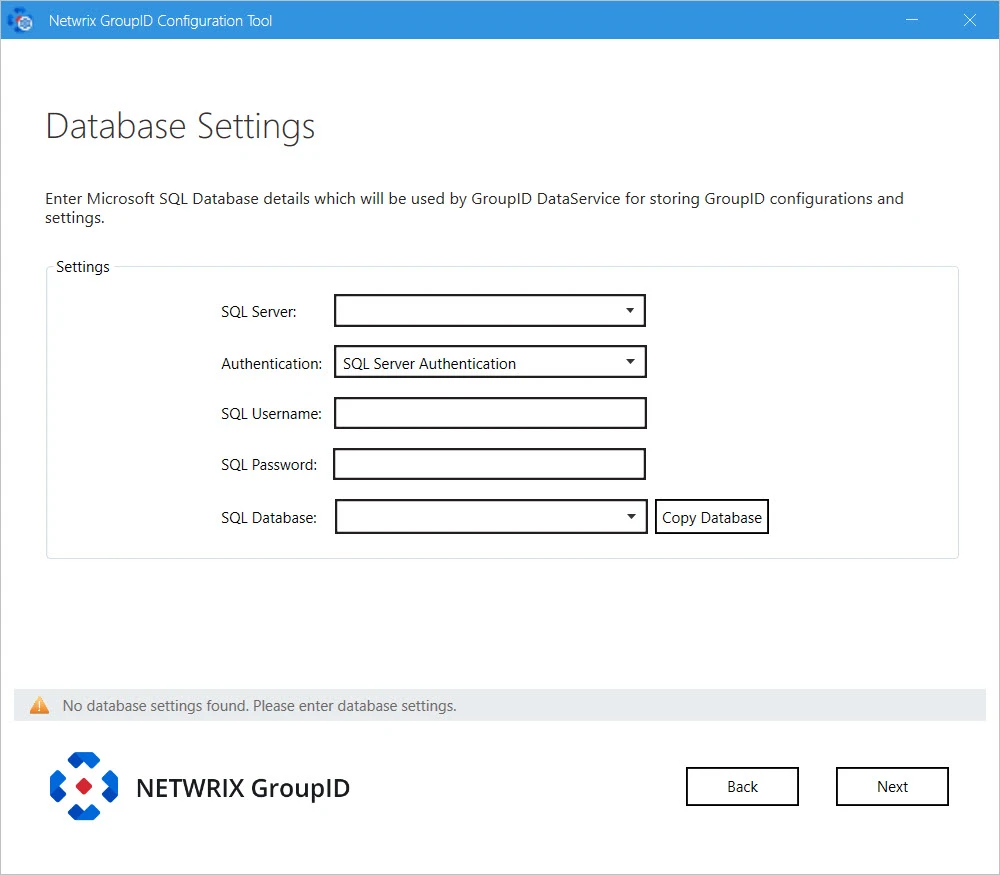
Step 3 – In the SQL Server list, select the SQL Server to use with this new Directory Manager Server. The SQL Server must be the same used with the master node of Directory Manager.
If the required server does not appear in the list, make sure that the SQL Server Browser service is running on the SQL Server machine and then click the Refresh button.
Step 4 – In the Authentication list, select an authentication mode to be used when connecting to the SQL Server database. Modes are:
- SQL Server Authentication - To set SQL Server to work with Directory Manager using an SQL Server account. See the Authentication Modes topic for additional information.
- Windows Authentication - To set SQL Server to work with Directory Manager using a Windows user account. See the Authentication Modes topic for additional details.
Step 5 – Depending on the authentication mode selected, do the following:
- For SQL Server Authentication: enter the user name and password of the selected SQL Server in the SQL Username and SQL Password boxes.
- For Windows Authentication: User name and password fields will be disabled with Windows Authentication. The logged-in user credentials will be populated here.
Step 6 – In the SQL Database box, specify name of the SQL database being used by the master Directory Manager node. This new Directory Manager instance will use the same database.
NOTE: While configuring a new Directory Manager machine with an existing database option, the Copy Database button has no relevance here.
Step 7 – Click Next.
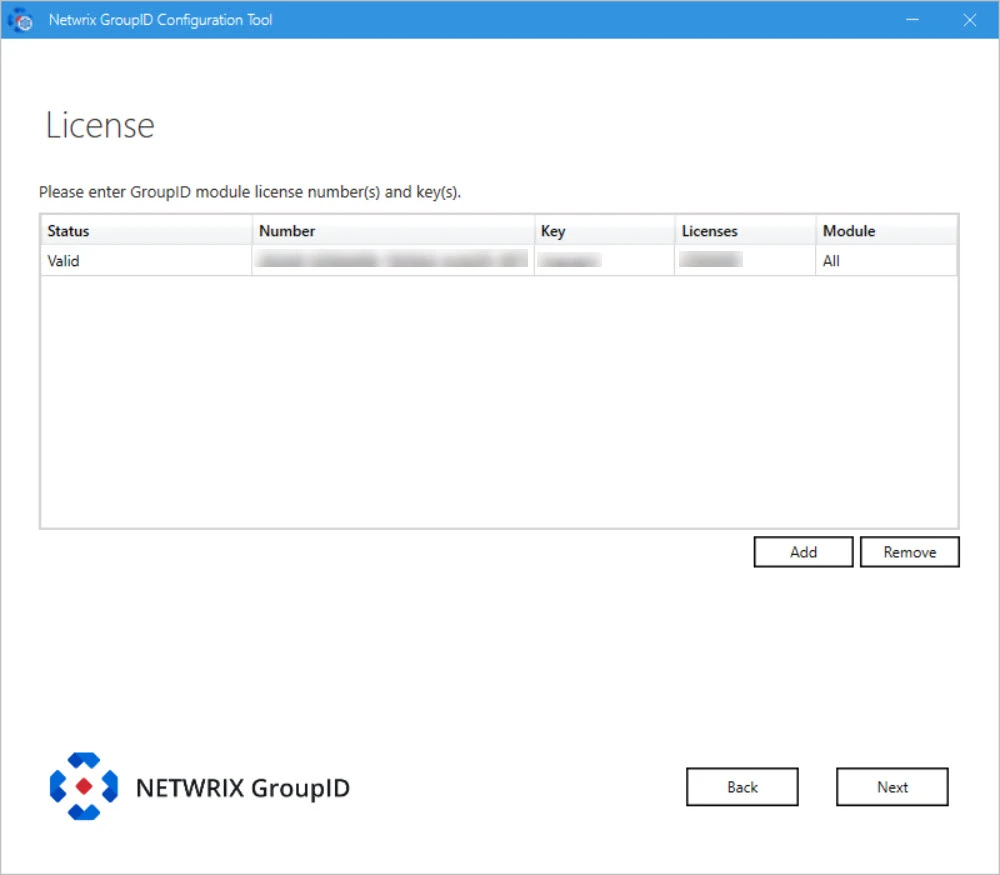
Step 8 – On the License page, license information of Directory Manager installed on the master node is displayed. A valid license and key enable the Next button. If the Next button remains disabled, check your entries for errors.
Step 9 – Click Next.
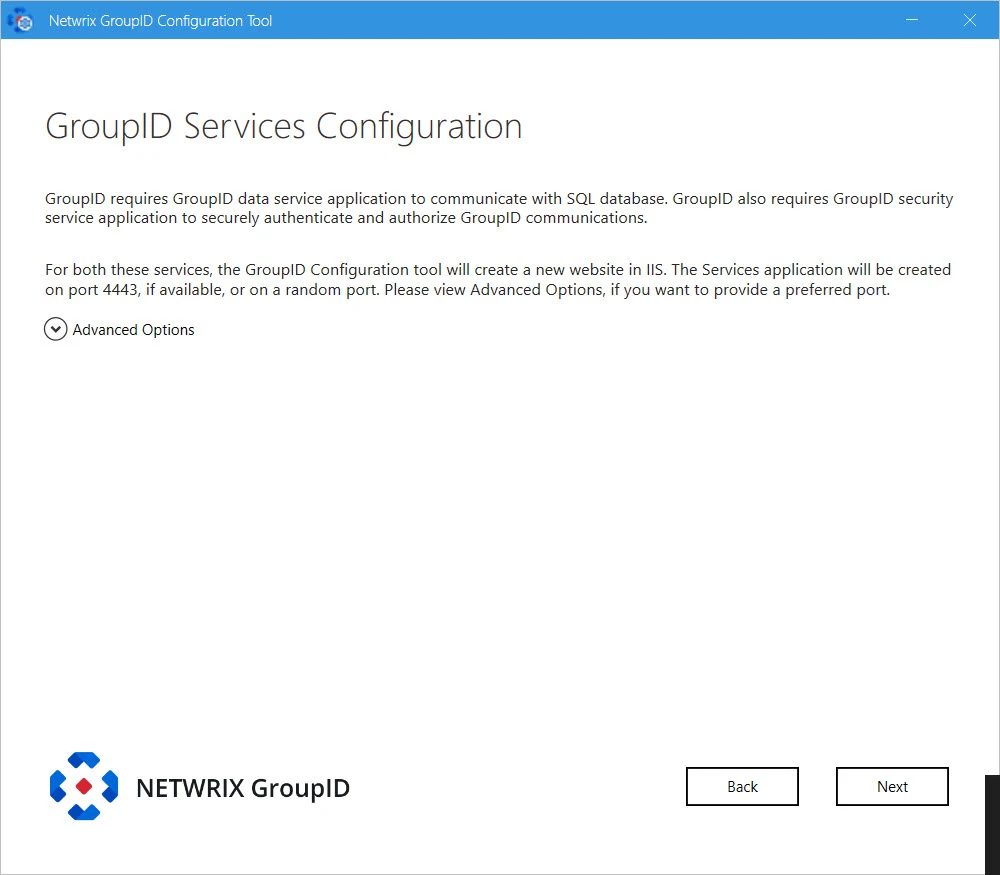
Step 10 – Directory Manager requires two services:
-
Directory Manager Data Service: This is a web-based service that Directory Manager uses to communicate with Microsoft SQL Server for storing and fetching data in the database.
-
Directory Manager Security Service: This is also a web-based service that Directory Manager uses to:
- Authenticate and authorize users on different Directory Manager functionalities in accordance with their roles.
- Encrypt and decrypt data that Directory Manager Data Service stores and fetches from the SQL database.
To deploy these services, the Configuration Tool creates and configures a new website in IIS with the name GroupIDSite11. By default, it binds this site to any of the available ports. However, if you have a different preference, you can change the port.
Click Advanced Options and enter the port in the Port Number box.
-
Replication service: This service replicates object attributes from the provider (such as Active Directory) to Elasticsearch.
-
Admin Center: Admin Center is a web-based application that can be accessed over the Internet and Intranet.
NOTE: This Directory Manager instance will use Email and Scheduler services of the selected cluster.
Step 11 – Click Next.
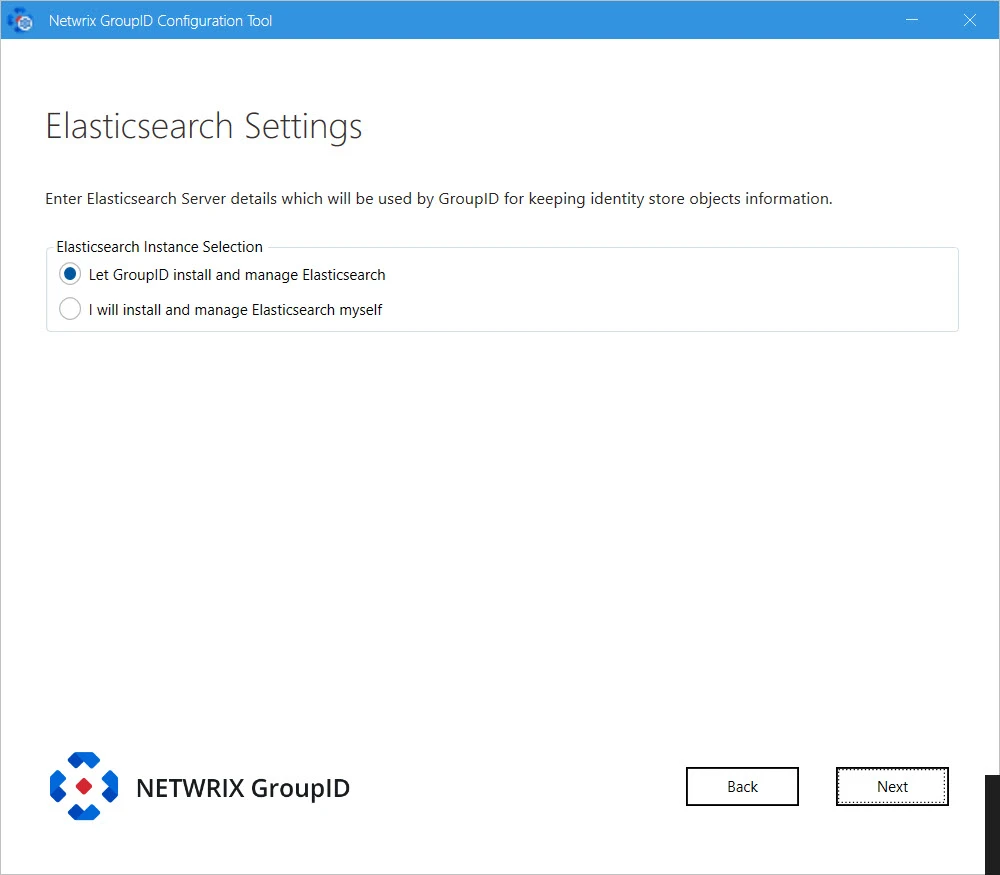
Step 12 – Directory Manager provides the following two options for Elasticsearch configuration. Select the relevant option:
-
Let Directory Managerinstall and manage Elasticsearch: If you select this option, Directory Manager Configuration Tool will install Elasticsearch. It presents you default configuration of Elasticsearch cluster it will create:
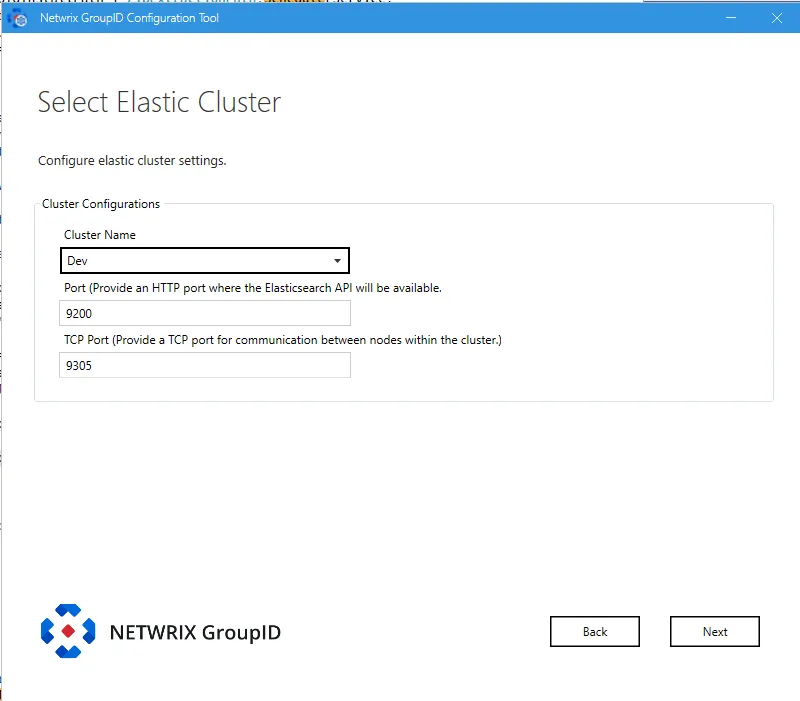
-
Cluster Name: lists all the clusters defined so far. Select one to create an Elasticsearch node within the selected cluster.
-
Port: the default port for Elasticsearch API communication. Modify the port number if the mentioned default port is not available.
-
TCP Port: the default port for communication between nodes within the cluster. Modify the port number if the mentioned default port is not available.
NOTE: Make sure that the specified ports are available and unblocked.
I will install and manage Elasticsearch myself: If you select this option, the following page is displayed:
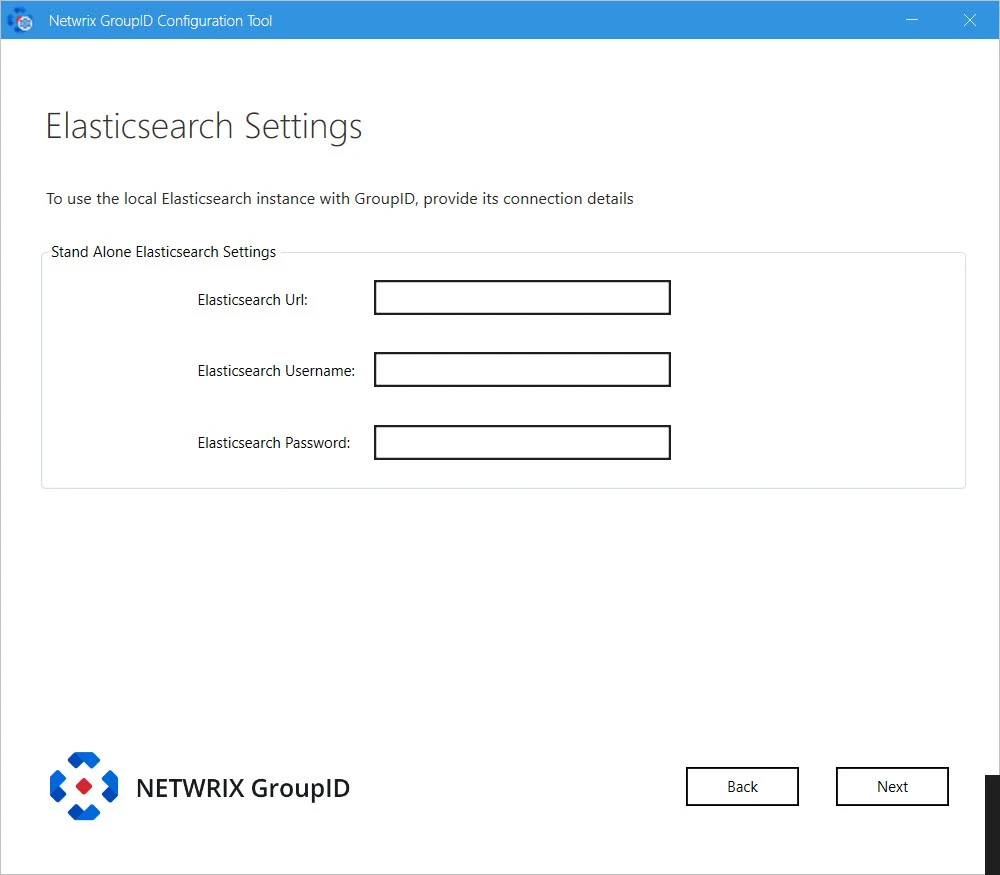
Provide configurations of Elasticsearch you want to use with Directory Manager:
- Elasticsearch URL: URL for accessing the Elasticsearch.
- Elasticsearch Username: service account for Elasticsearch.
- Elasticsearch Password: password of the Elasticsearch service account.
-
Step 13 – Click Next.
NOTE: If you configure a Group Managed Service Account (gMSA) as an App Pool service account then the Directory ManagerConfiguration tool will add this account in the local administrators and IIS_IUSRS groups.
NOTE: If you configure a normal user account as an App Pool service account and an AD identity store is created with a gMSA service account, then the App Pool service account must have the PrincipalsAllowedToRetrieveManagedPassword property. The App Pool service account also must be a member of Backup Operators and IIS_IUSRS groups.
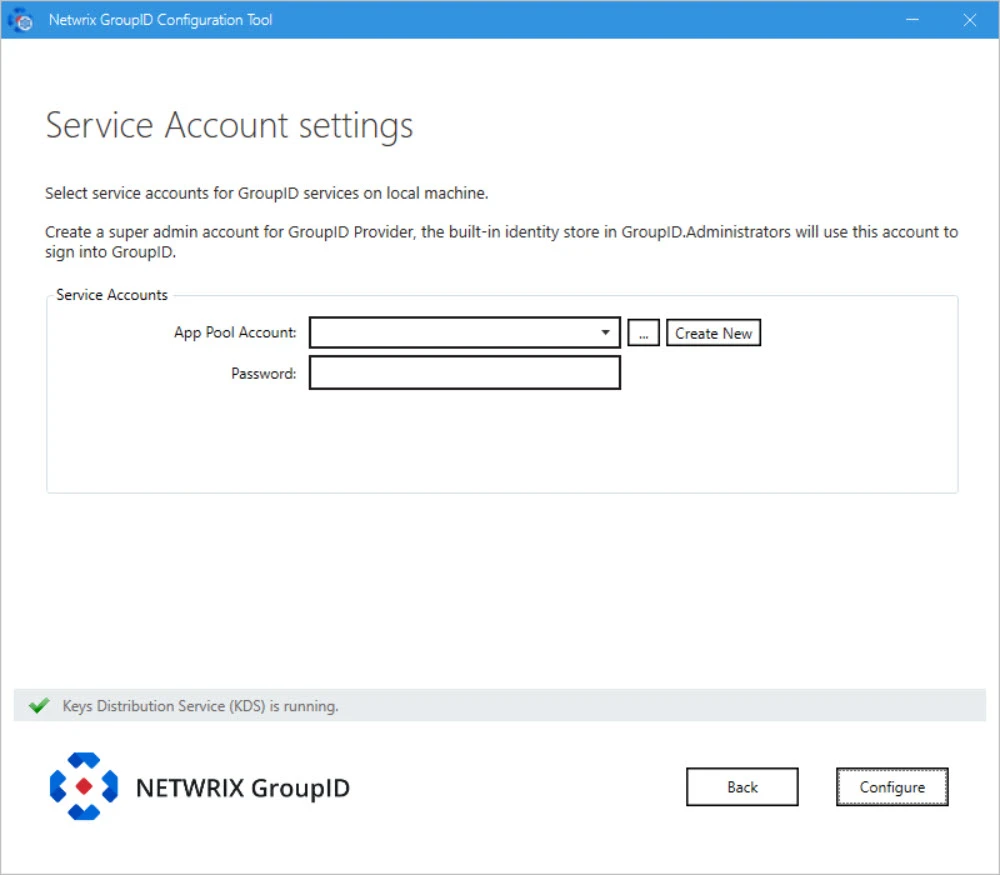
Step 14 – On the Service Account Settings page, specify the service account to use for the Directory Manager app pool in IIS and Windows services.
-
Use a domain account or a Group Managed Service Account (gMSA).
-
The account must be a member of the Administrators group or both the Backup Operators and IIS_IUSRS groups.
-
The account you specify will be used to manage the Directory Manager app pool in IIS. Directory Manager Data Service, Security Service, and the portals run under the app pool.
-
By default, a local account, GroupIDSSuser, is set for the Directory Manager app pool, but you cannot proceed unless you change it to a domain account or gMSA.
-
You can specify a local account (with local administrator rights) in app pool for a machine that is not joined to any domain (this applies to an Microsoft Entra ID identity store only).
NOTE: For Directory Manager App Pool, a domain account can be used for a machine joined to a domain.
NOTE: Before you use a Group Managed Service Account, make sure that:
- Key Distribution Service (KDS) is enabled on the Directory Manager machine.
- Microsoft AD module for PowerShell is installed on the machine.
Step 15 – You can specify a service accounts for the app pool in any of the following ways:
-
Use an existing account: Click Browse.
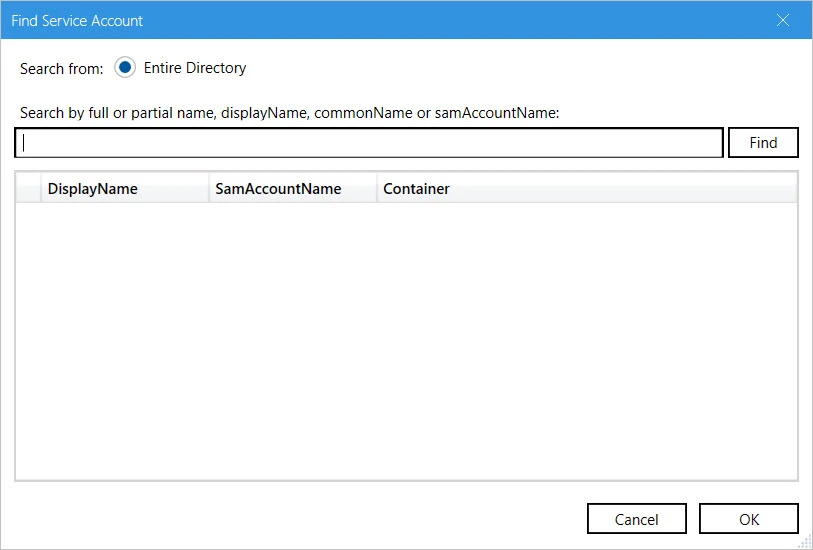
On the Find Service Account dialog box, search and select the required account and click OK.
-
Create a new service account: Click the Create New button on the Service Account Setting page.
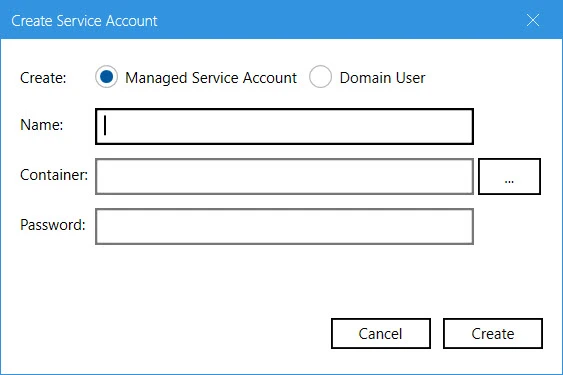
On the Create Service Account dialog box, select the kind of account you want to create. Enter a name, container and password for the account. Click Create.
NOTE: The logged-in user must have appropriate rights to create a new account.
NOTE: If Key Distribution Service (KDS) is not configured in the environment, a warning will be displayed that you cannot use a Group Managed Service Account.
Step 16 – Provide password for the App Pool service account (except for a Group Managed Service Account) in the Password box.
Step 17 – Click Configure.
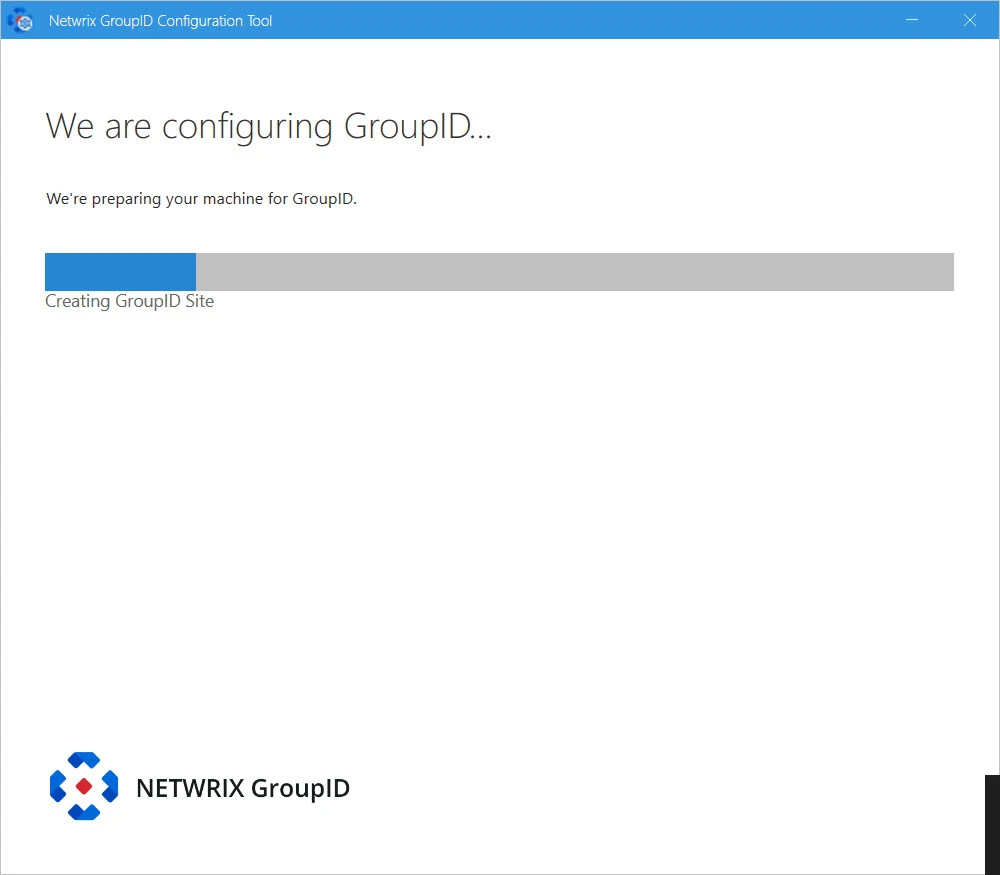
Step 18 – The next page displays the progress while a Directory Manager server is configured on the machine. While configuring the machine, the Configuration Tool checks the application’s signing key status and update it according to your Directory Manager environment. See the Update Signing Key topic for information how Configuration Tool will update Directory Manager's Signing Key.
Step 19 – This completes the configuration of Directory Manager as a slave node on your machine.
Click Launch GroupID to start using Directory Manager. The Sign In pa ge opens:

To login in to Directory Manager Admin Center for the first time, provide Directory Manager Administrator user name and password.
or
click Next to launch the Upgrade wizard for upgrading Directory Manager.
Configure a New Directory Manager Server with a New or an Existing Database
This option configures the Directory Managerserver and the Directory Manager Data Service on the machine where Directory Manageris being installed. It also configures the Directory Manager Elasticsearch Service as a master node for the Elasticsearch service cluster to support load balancing.
To configure Directory Manager server on the machine where the Configuration Tool is being run:
Step 1 – Select the Configure a new GroupID server with new or existing database option on the Select to create new server or use existing server page of the Configuration Tool and select Next.
Step 2 – In the SQL Server list, select the SQL Server to use with Directory Manager. If the required server does not appear in the list, make sure that the SQL Server Browser service is running on the SQL Server machine and then click the Refresh button.
Step 3 – In the Authentication list, select an authentication mode to be used when connecting to the SQL Server database. Modes are:
- SQL Server Authentication - To set SQL Server to work with Directory Managerusing an SQL Server account. See SQL Authentication in Authentication Modes topic.
- Windows Authentication - To set SQL Server to work with Directory Managerusing a Windows user account. See Windows Authentication in in Authentication Modes topic.
Step 4 – Depending on the authentication mode selected, do the following:
- For SQL Server Authentication: enter the user name and password of the selected SQL Server in the SQL Username and SQL Password boxes.
- For Windows Authentication: provide the credentials of a domain account or a Windows local account that Directory Managerwill use to connect with SQL Server. On clicking OK, the system authenticates with that account on SQL Server via Windows authentication.
Step 5 – In the SQL Database box, either specify name of a new SQL database to use for Directory Manager or continue using your existing database.
Step 6 – Click Next.
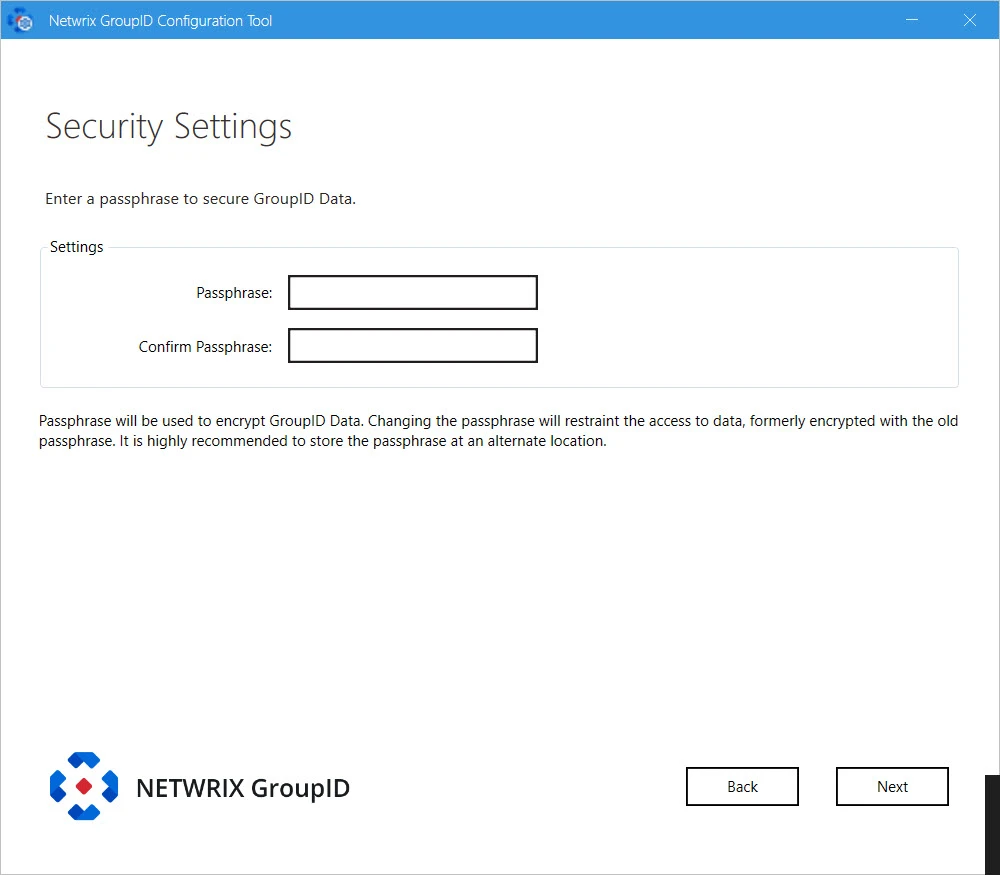
Step 7 – On the Security Settings page, enter an encryption key in the Passphrase and Confirm Passphrase boxes to secure Directory Manager data.
Directory Manager Data Service uses this key to encrypt and decrypt the data that it stores in, and retrieves from, the SQL Server database.
- The passphrase must have at least eight characters.
- Be sure to save this passphrase with you. Providing an incorrect passphrase at any later point will result in the loss of Directory Managerdata.
Step 8 – Click Next.
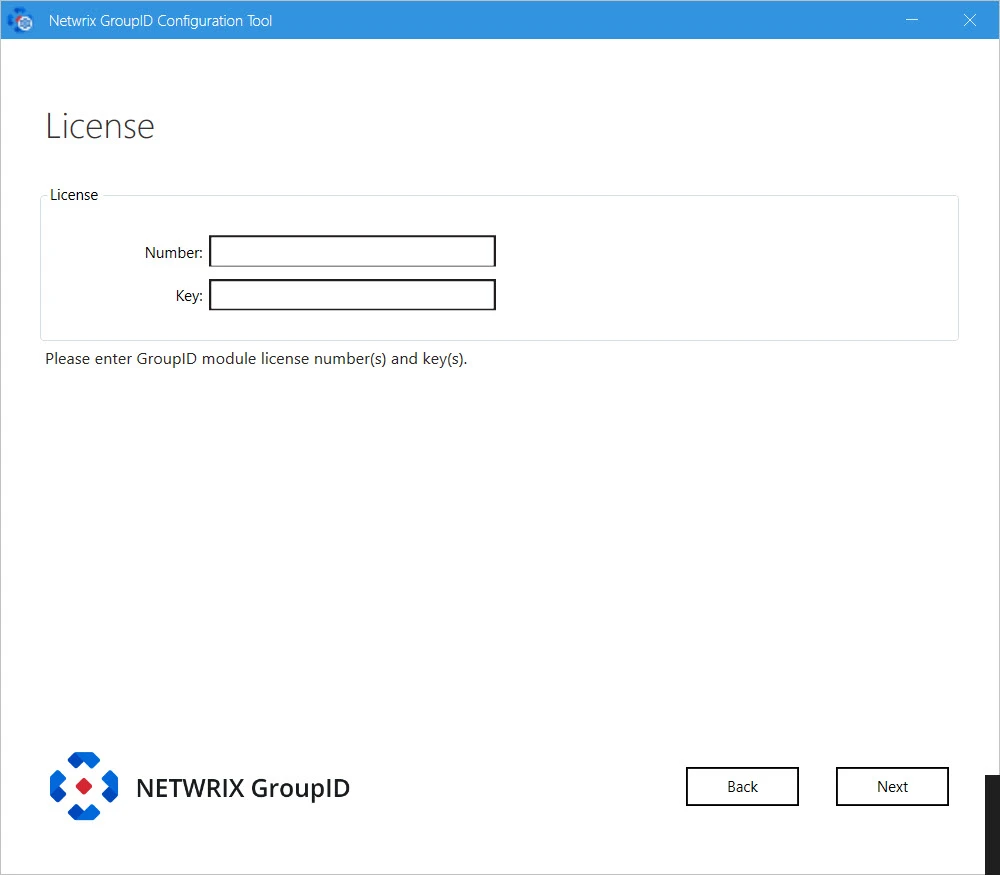
Step 9 – On the License page, enter a valid license number and key in the respective boxes. A valid license and key enable the Next button. If the Next button remains disabled, check your entries for errors.
Step 10 – Click Next.
Step 11 – Directory Manager provides the following two options for Elasticsearch configuration. Select the relevant option:
-
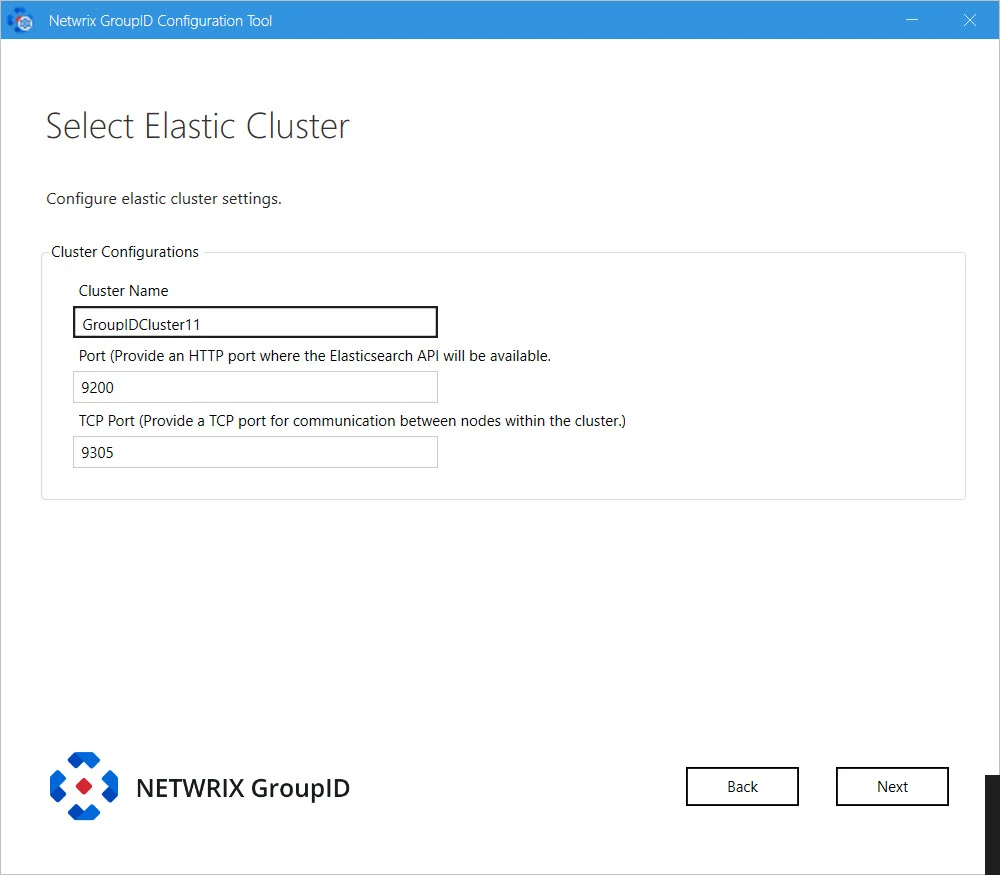
Let GroupID install and manage Elasticsearch: If you select this option, Directory Manager Configuration Tool will install Elasticsearch. It presents you default configuration of Elasticsearch cluster it will create:
-
Cluster Name: for Elasticsearch node(s) within the cluster. You can modify the name.
-
Port: the default port for Elasticsearch API communication. Modify the port number if the mentioned default port is not available.
-
TCP Port: the default port for communication between nodes within the cluster. Modify the port number if the mentioned default port is not available.
NOTE: Make sure that the specified ports are available and unblocked.
I will install and manage Elasticsearch myself: If you select this option, the following page is displayed:
Provide configurations of Elasticsearch you want to use with Directory Manager:
- Elasticsearch URL: URL for accessing the Elasticsearch.
- Elasticsearch Username: service account for Elasticsearch.
- Elasticsearch Password: password of the Elasticsearch service account.
Step 12 – Click Next.
Step 13 – At this point, Directory Manager configures the following:
-
Directory Manager Data Service: This is a web-based service that Directory Manager uses to communicate with Microsoft SQL Server for storing and fetching data in the database.
-
Directory Manager Security Service: This is also a web-based service that Directory Manager uses to:
- Authenticate and authorize users on different Directory Manager functionalities in accordance with their roles.
- Encrypt and decrypt data that Directory Manager Data Service stores and fetches from the SQL database.
To deploy these services, the Configuration Tool creates and configures a new website in IIS with the name GroupIDSite11. By default, it binds this site to any of the available ports. However, if you have a different preference, you can change the port.
Click Advanced Options and enter the port in the Port Number box.
-
Replication service: This service replicates object attributes from the provider (such as Active Directory) to Elasticsearch.
-
Admin Center: Admin Center is a web-based application that can be accessed over the Internet and Intranet.
-
Email service: It maintains a queue of all notification requests generated by identity stores, and sends them one by one. This service is deployed for each cluster.
-
Scheduler service: This service initiates schedule runs for scheduled jobs defined in Directory Manager. Directory Manager configures this service for each cluster.
Step 14 – Click Next.
NOTE: If you configure a Group Managed Service Account (gMSA) as an App Pool service account then the Directory Manager Configuration tool will add this account in the local administrators and IIS_IUSRS groups.
NOTE: If you configure a normal user account as an App Pool service account and an AD identity store is created with a gMSA service account, then the App Pool service account must have the PrincipalsAllowedToRetrieveManagedPassword property. The App Pool service account also must be a member of Backup Operators and IIS_IUSRS groups.
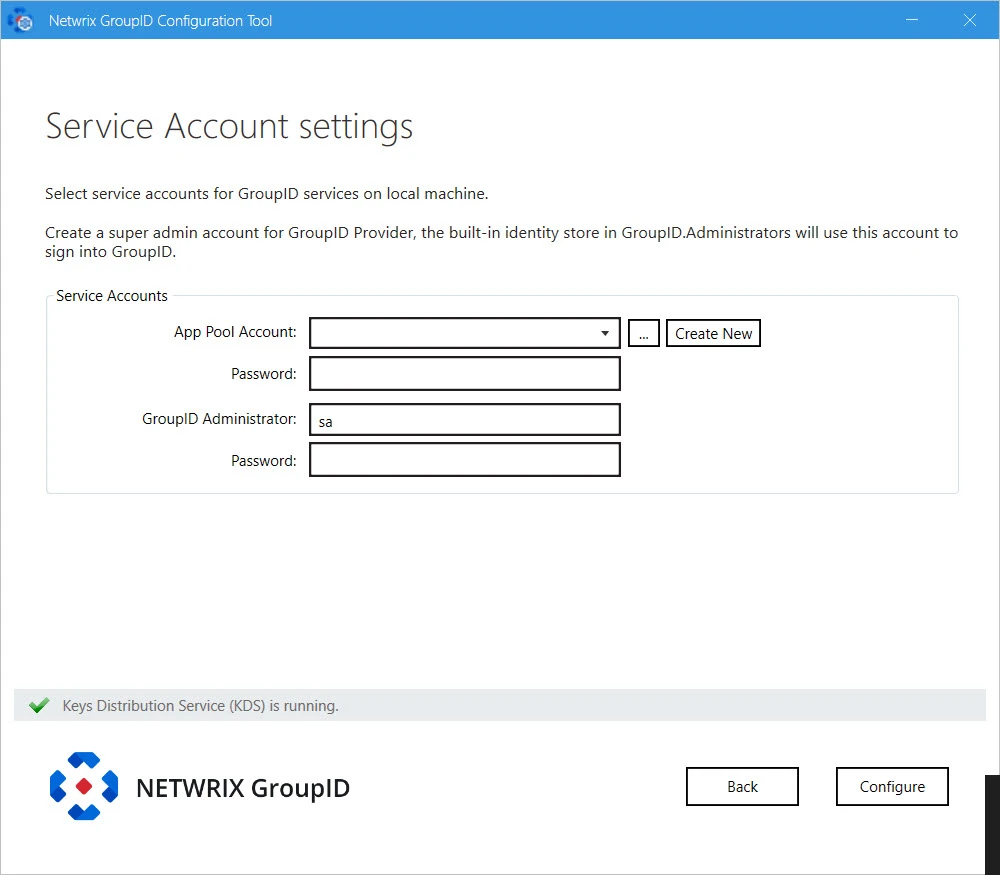
Step 15 – Directory Manager enables you to specify the service accounts to use for the Directory Manager App Pool and a default Administrative account for Directory Manager Admin Center.
Service Service Account Description Directory Manager App Pool Use a domain account or a Group Managed Service Account (gMSA). The account must be a member of the Administrators group or both the Backup Operators and IIS_IUSRS groups. The account you specify will be used to manage the Directory Manager app pool in IIS. Directory Manager Data Service, Security Service, and the portals run under the app pool. By default, a local account, GroupIDSSuser, is set for the Directory Manager app pool, but you cannot proceed unless you change it to a domain account or gMSA. You can specify a local account (with local administrator rights) in app pool for a machine that is not joined to any domain (this applies to an Microsoft Entra ID identity store only). Directory Manager Administrator Use this account as default Administrative account for first time login to Directory Manager Admin Center. This account is not associated with any identity store, but one that is specific to Directory Manager. This account works as an Admin of all Admin accounts of defined identity stores in Admin Center. NOTE: For Directory Manager App Pool, a domain account can be used for a machine joined to a domain.
NOTE: Before you use a Group Managed Service Account, make sure that:
- Key Distribution Service (KDS) is enabled on the Directory Manager machine.
- Microsoft AD module for PowerShell is installed on the machine.
Step 16 – You can specify a service accounts for the app pool in any of the following ways:
-
Use an existing account: Click Browse.
On the Find Service Account dialog box, search and select the required account and click OK.
-
Create a new service account: Click the Create New button on the Service Account Setting page.
On the Create Service Account dialog box, select the kind of account you want to create. Enter a name, container and password for the account. Click Create.
NOTE: The logged-in user must have appropriate rights to create a new account.
NOTE: If Key Distribution Service (KDS) is not configured in the environment, a warning will be displayed that you cannot use a Group Managed Service Account.
Step 17 – Provide password for the App Pool service account (except for a Group Managed Service Account) in the Password box.
Step 18 – Provide password for the Directory Manager Administrator account in the Password box.
Step 19 – Click Configure.
We are configuring Directory Manager page displays the progress while a Directory Manager server is configured on the machine.
While configuring the machine, the Configuration Tool checks the application’s signing key status and update it according to your Directory Manager environment. See the Update Signing Key topic for information how Configuration Tool will update Directory Manager's Signing Key.
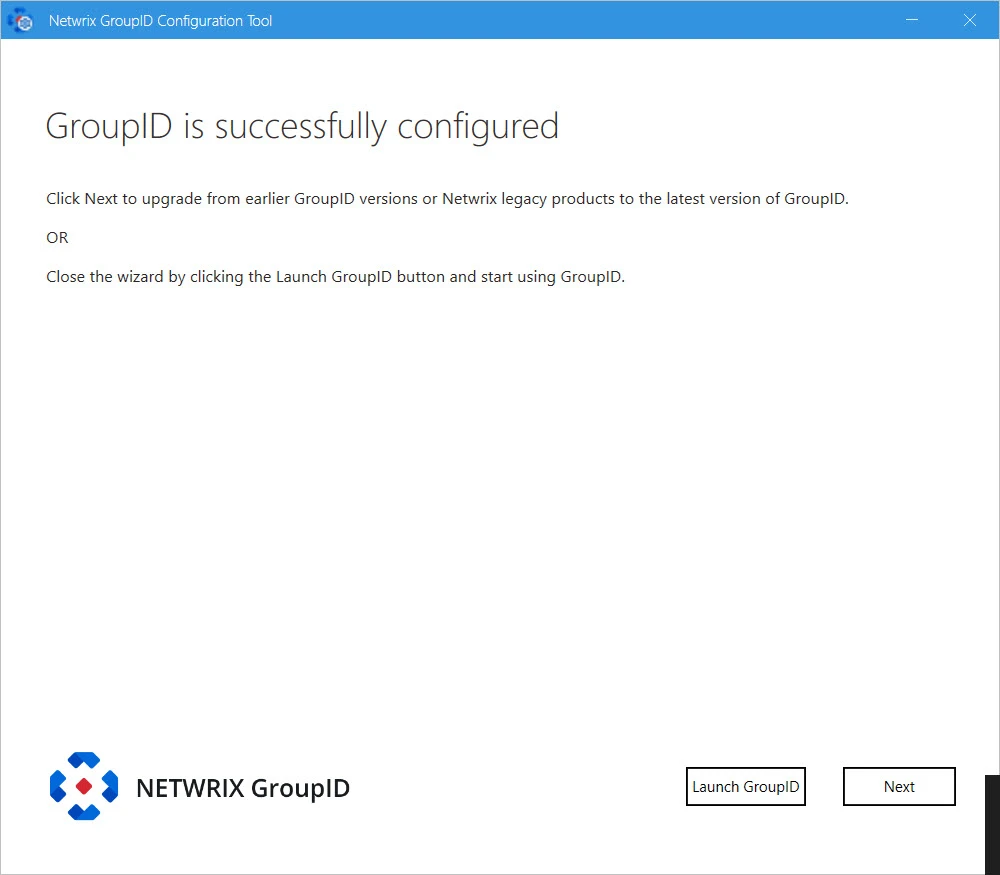
On successful configuration, the Directory Manager is successfully configured page is displayed and Directory Manager is configured on your machine.
Step 20 – Click Launch GroupID on the Directory Manager is successfully configured page to start using Directory Manager. The Sign In page opens:
To login in to Directory Manager Admin Center for the first time, provide Directory Manager Administrator user name and password.
or
click Next to launch the Upgrade wizard for upgrading Directory Manager.
Configuration
Use the Configuration Tool to configure a new Directory Manager server. The tool configures:
- A valid license for Directory Manager
- Scheduling, Email and Replication services
- Elasticsearch settings
- An encryption key to encrypt Directory Manager data
- An SQL Server and database
- Service account for Directory Manager App Pool
- Admin Center
- A default account for Admin Center
Update Signing Key
While configuring the Directory Manager machine, the Configuration Tool checks the application’s signing key status. The following scenarios are possible for the application’s Signing Key:
- Single Directory Manager instance
- Multi Directory Manager instances with a single cluster
- Multi Directory Manager instances with multiple clusters
Single Directory Manager instance
If you are running the Configuration Tool on a machine that had a prior Directory Manager version and the Signing Key utility is not applied on that Directory Manager on that machine. The Configuration Tool will change the Signing Key and displays a disclaimer message on the Directory Manager is successfully configured page as follows:

Remember, after the Signing Key update, your existing schedules will not work as their authentication mechanism will no longer be considered valid. Therefore, the authentication mechanism must be updated for schedules using one of the following way:
- Signing Key Utility – See the Signing Key utility guide for information on how to download the utility and update the schedules.
- Admin Center – See the Schedules topic and go to the respective schedule page to update its Authentication information.
Multi Directory Manager instances with a single cluster
In the multi Directory Manager instances environment with a single cluster ( i.e. with a master node and a slave node) and the instances had a prior Directory Manager version and without the Signing Key utility applied to them, follow the steps to change the Signing Key on all the instances.
Step 1 – Run the Configuration Tool on the master node of the cluster. It will change the Signing Key on the master node and display a disclaimer message on the Directory Manager is successfully configured page as shown in the Single Directory Manager instance section.
Step 2 – Export the Signing Key so that the slave node also has the same Signing Key as of the master node. See the Export a Signing Key section of the Signing Key Utility topic for information on how to export the Signing Key.
Step 3 – On the slave node copy the exported Signing Key file into a folder.
Step 4 – Run the Configuration Tool on the slave node until you reach the Import Signing Key page of the wizard:
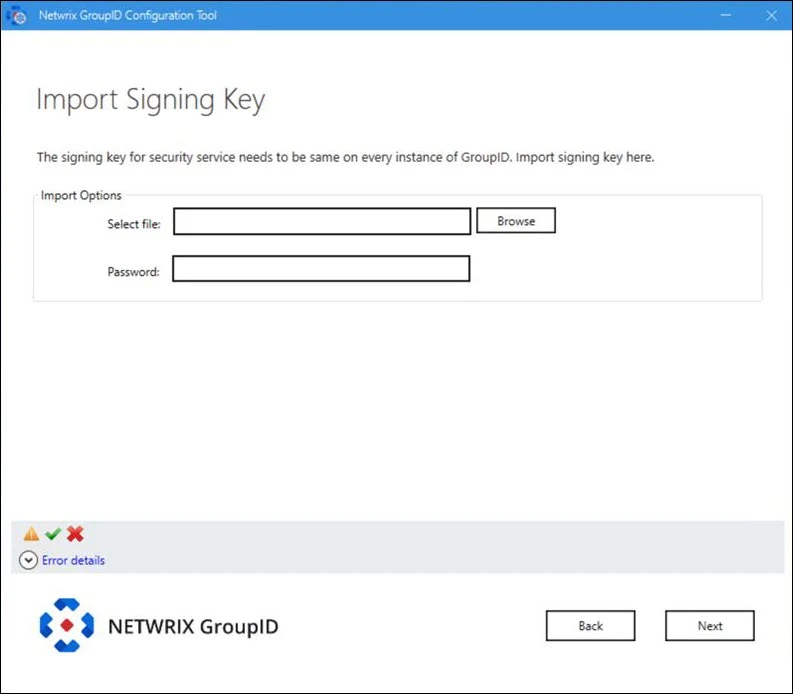
- Click Browse next to the Select file box to browse to the folder where you have copied the Signing Key file.
- Provide the password of the Signing Key file in the Password box.
- Click Next.
Step 5 – The Configuration Tool displays the Directory Manager is successfully configured page without the disclaimer.
Remember, after the Signing Key update, your existing schedules will not work as their authentication mechanism will no longer be considered valid. Therefore, the authentication mechanism must be updated for schedules using one of the following way:
- Signing Key Utility – See the Signing Key utility guide for information on how to download the utility and update the schedules.
- Admin Center – See the Schedules topic and go to the respective schedule page to update its Authentication information.
Multi Directory Manager instances with multiple clusters
Let’s say you have a multi Directory Manager instances environment with multiple clusters (i.e. a master node in each cluster and a slave node in each cluster), for example:
-
Cluster A (instance 1: a master node and instance 2: a slave node)
-
Cluster B (instance 3 : a master node and instance 4 : a slave node)
Follow the steps to change the Signing Key on all four Directory Manager instances.
Step 1 – Run the Configuration Tool on the master node of Cluster A (i.e. instance 1). It will change the Signing Key on the master node and display a disclaimer message on the Directory Manager is successfully configured page as shown in the Single Directory Manager instance section.
Step 2 – Export the Signing Key so that the slave nodes of both the clusters also have the same Signing Key as of the master node of cluster A. See the Export a Signing Key section of the Signing Key Utility topic for information on how to export the Signing Key file.
Step 3 – On the slave nodes of Cluster A and Cluster B (i.e. instances 2 and 4) copy the exported Signing Key file into a folder.
Step 4 – Run the Configuration Tool on instance 2 and 4 until you reach the Import Signing Key page of the wizard.
- Click Browse next to the Select file box to browse to the folder where you have copied the Signing Key file.
- Provide the password of the Signing Key file in the Password box.
- Click Next.
Step 5 – The Configuration Tool displays the Directory Manageris successfully configured page without the disclaimer.
Step 6 – Run the Configuration Tool on the master node of cluster B (i.e. instance 3). The Configuration Tool displays the Directory Manager is successfully configured page with the disclaimer as shown in the Single Directory Manager instance section.
Step 7 – On the master node of Cluster B (i.e. instance 3), run the Signing Key Utility and import the copied Signing Key file using the commandlet given in the Import a Signing Key section of the Signing Key Utility topic for information on how to import the Signing Key.
Remember, after the Signing Key update, your existing schedules will not work as their authentication mechanism will no longer be considered valid. Therefore, the authentication mechanism must be updated for schedules using one of the following way:
- Signing Key Utility – See the Signing Key utility guide for information on how to download the utility and update the schedules.
- Admin Center – See the Schedules topic and go to the respective schedule page to update its Authentication information.
All Directory Manager instances now have the same Signing Key.
Installation Tool
Installing Directory Manager is a simple process; it asks you to agree to the license agreement then installs Directory Manager to the default location:
C:\Program Files\Imanami\GroupID 11.0\
To install Directory Manager:
Step 1 – Run _directorymanagerInstallTool.exe_ from the Directory Manager<_version #_> folder in the
Directory ManagerInstallation package. It launches the Installation Tool.
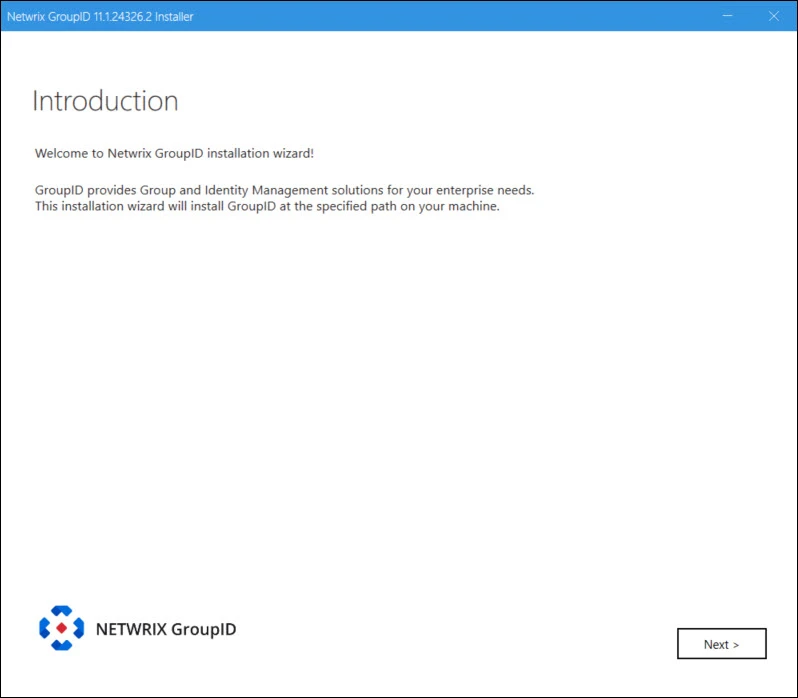
Step 2 – Read the welcome message and click Next.
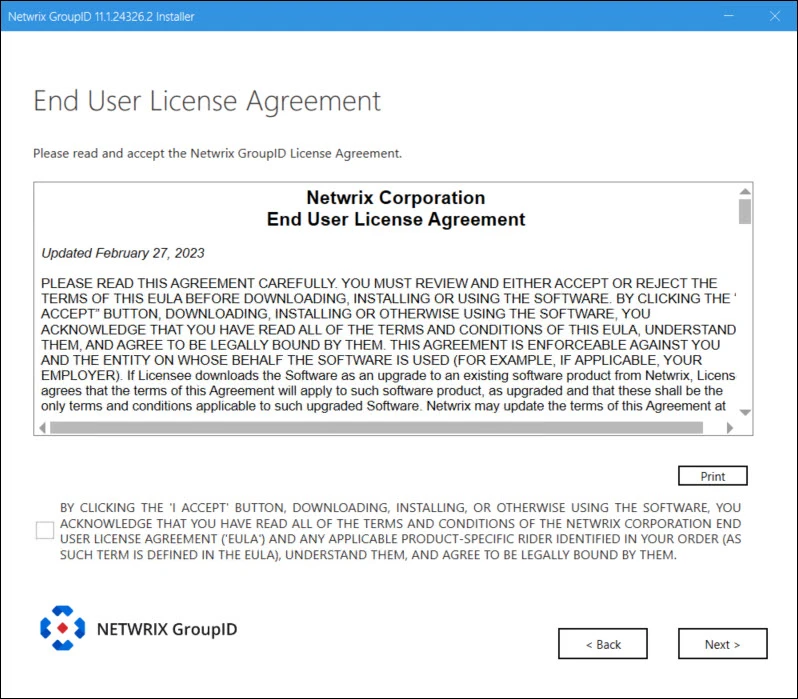
Step 3 – On the End User License Agreement page, review and accept the licensing agreement and click Next.

Step 4 – In the Installation Folder box, specify the location where you want to install Directory Manageror accept the one suggested by the Installer. Click Install.

Step 5 – The progress bar shows the installation progress while all files are copied and Directory Manageris installed. On successful installation, the Run Configuration Tool page is displayed.
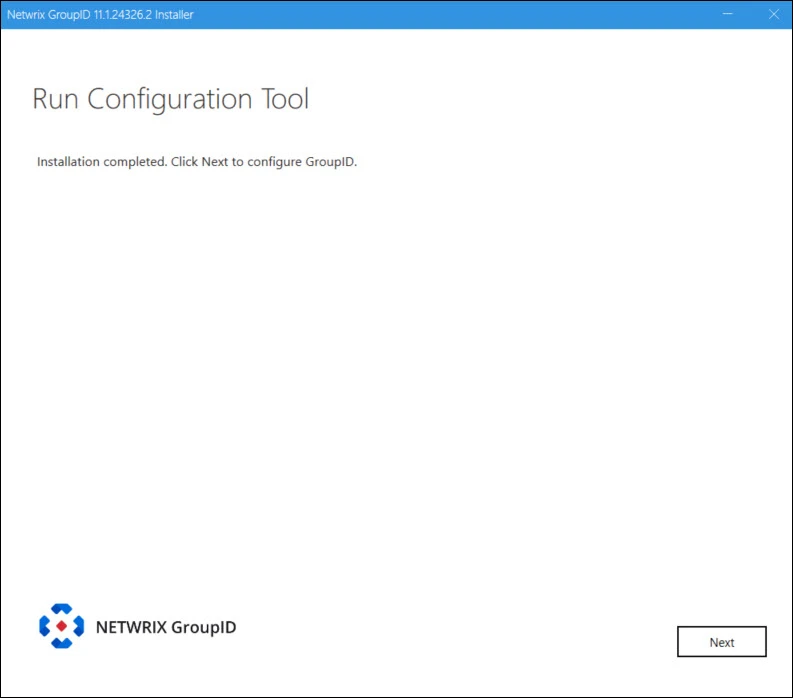
Step 6 – Click Next to proceed with configuring Directory Manager.
or
Click Close on the title bar to close the Directory ManagerInstaller and configure Directory Managerlater.
See the Configuration Tool topic for additional information on configuring Directory Manager.
Installer
To install Directory Manager, you have to run the following tools in the given order:
-
Preparation Tool - Detects and instals the prerequisite software and Windows features that Directory Manager requires.
-
Installation Tool - Installs Directory Manager.
-
Configuration Tool - Configures Directory Manager services, database, and other components.
Installation Package
The Directory Manager installation package consists of:
- Directory Manager 11 Prerequisites Tool (file folder)
- Directory Manager
<_version #_>(file folder)
Who can install
Before installing Directory Manager, make sure that the logged-in user is a member of the local Administrators group on that machine.
NOTE: (1) There should be a dedicated server for Directory Manager.
(2) Do not install Directory Manager on the domain controller.
(3) Do not install Directory Manager and Microsoft Exchange Server on the same machine.
Installation Cases
Choose one of the four installation cases for Directory Manager 11:
-
Case # 1: Directory ManagerID 11 to co-exist with Directory Manager 10 on the same machine
-
Case # 2: Directory Manager 11 to co-exist with Directory Manager 10.0 / 9.0 in the same environment
-
Case # 3: In-place installation of Directory Manager 11 on the same machine
-
Case # 4: In-place installation of Directory Manager 11 in the environment
The Directory Manager 11 installation and configuration process is the same for all four cases. You must create a copy of the database being used with the previous Directory Manager version and bind the copy with Directory Manager 11.
Next, run the Upgrade wizard to make the copied database compatible with Directory Manager 11. Once upgraded, the database schema changes, making it incompatible with the previous Directory Manager version.
NOTE: When Directory Manager 11 co-exists with a previous Directory Manager version (case # 1 and 2), the two must have separate databases. Data is not replicated between these databases.
NOTE: This section does not apply to a fresh Directory Manager installation.
Preparation Tool
The preparation tool installs all prerequisites software on a machine to prepare it for Directory Manager.
What do you want to do?
- Run the Preparation Tool first time on a fresh machine
- Run the Preparation Tool on a Directory Manager server
Run the Preparation Tool first time on a fresh machine
To run the Directory Manager preparation tool:
Step 1 – Open Directory Manager 11.1 Prerequisites Tool folder from the Directory Manager Installation package.
Step 2 – Run directorymanagerPrereqTool.exe file. It launches the Preparation Tool.
Step 3 – Read the welcome message and click Next.
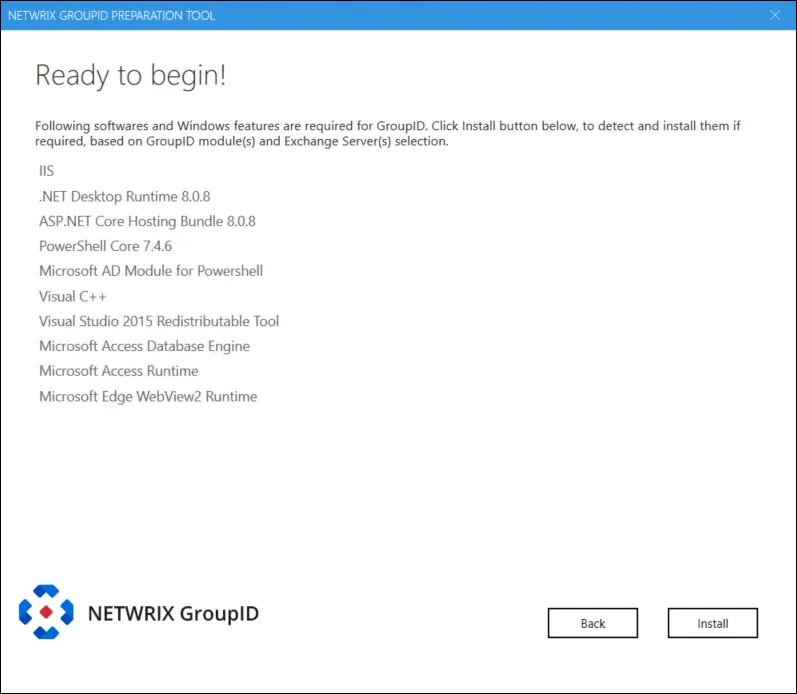
Step 4 – The Ready to begin page lists the required software and Windows features that the Preparation Tool has identified for Directory Manager. Click Install to begin.

Step 5 – On the We are preparing this machine for Directory Manager... page the progress bar shows the installation progress while prerequisites are installed.
The You are ready to install GroupID! page displays the status of each prerequisite software and Windows feature as Passed or Failed.
Expand the node for a perquisite to view its details.
-
A Passed prerequisite has one of these statuses:
- was already installed (no action taken)
- Configured Successfully
-
For a Failed prerequisite, read the given message and take appropriate action. That done, click Retry to verify whether the prerequisite has been installed.
Step 6 – After viewing the information, click Close.
If you are installing the prerequisites for the first time, a message to restart the machine is displayed. Click OK to restart.
Run the Preparation Tool on a Directory Manager server
If you have an earlier version of Directory Manager 11.0 installed on a machine, then before running the preparation tool make sure no other version of the following prerequisite than the mentioned below is installed, otherwise uninstall them manually:
-
Microsoft .NET Desktop Runtime 8.0.8
-
Microsoft ASP.NET Core Hosting Bundle 8.0.8
-
Microsoft Access Database Engine 2016
-
Microsoft Access Database Engine version later to 2016
-
PowerShell 7.4.6
-
Exchange Online Management versions from 3.2.0 to 3.4.0
If a higher version is installed, uninstall that using the following cmdlet:
uninstal-Module-Name exchangeonlinemanagement -force -
Microsoft Edge Webview2 Rnntime
NOTE: If you need to re-run the preparation tool, uninstall this component first.
After uninstalling the prerequisites, follow the steps given in the Run the Preparation Tool first time on a fresh machine section above.
What does the Preparation Tool Install
When the Preparation Tool runs, it installs the following software and Windows features:
| Software | Comments |
|---|---|
| Required by all Directory Manager modules | |
| Microsoft Internet Information Services (IIS) with the following role services: - Common HTTP Features - Default Document - Static Content - WebDAV Publishing - Performance - Static Content Compression - Security - Request Filtering - Windows Authentication - Application Development - NET Extensibility - ASP.NET - ISAPI Extensions - ISAPI Filters - Management Tools - IIS Management Console - IIS 6 Management Compatibility (with sub options IIS 6 Metabase Compatibility & IIS 6 Management Console) | |
| Windows server features: - Windows Process Activation Service - Process Model - Configuration APIs | |
| Microsoft .NET Desktop Runtime 8.0.8 Click here to download. Microsoft ASP.NET Core Hosting Bundle 8.0.8 Click here to download. | Directory Manager runs on Microsoft .NET 6. The .NET Core Hosting bundle is an installer for the .NET Core Runtime and the ASP.NET Core Module. The bundle allows ASP.NET Core apps to run with IIS. Directory Manager Installer, Configuration Tool and Upgarde Wizard need this specific version of .Net Framework. |
| PowerShell Core 7.4.6 | |
| Microsoft AD module for PowerShell | |
| Visual C++ | |
| Visual Studio 2015 Redistributable Tool | |
| Microsoft Edge WebView2 Runtime | |
| Microsoft Distributed Transaction Coordinator | The Microsoft Distributed Transaction Coordinator service (MSDTC) is installed during the installation of the Windows OS. Errors that occur during installation may stop the component from working properly. Any errors that occur during an upgrade process may also stop the component from working properly More information: Microsoft Distributed Transaction Coordinator Service Installation and Setup |
| Elasticsearch 8.0.0 | If 95% of space is consumed on C drive, Elasticsearch will stop responding intermittently and will require a restart after more than 95% space is available. When Elasticsearch is locked, any object created or modified in Directory Manager will be committed in the provider but not in the Elasticsearch repository. While configuring an Elasticsearch cluster on all Directory Manager Instances, make sure that port TCP IP 9305 or a custom port (configured in the yml file for the Elasticsearch cluster) is unblocked and remains the same on each Directory Manager instance that is part of the master-slave cluster. If you do not want to use this version of Elasticsearch, select the I will install and manage Elasicsearch myself option on the Elasticsearch Settings page of the Configuration Tool. |
| Exchange Online Management Module | Required for Microsoft Entra ID |
| WinRM IIS Extension | For Directory Manager to make a connection to Exchange, configure WinRM in one of the following ways. - Option 1: intra-Domain Both Directory Manager and the destination Exchange host must be in the same domain. Both systems must have WinRM configured (use the PowerShell command winrm /quickconfig for this). The default value for the necessary listener(s) is * and that is all that is necessary to make a remote connection when the “–authentication” parameter is not specified. - Option 2: Inter-Domain Both systems must have WinRM configured (use the PowerShell command winrm /quickconfig for this). Design the hosts to trust each other by configuring “Trusted Hosts” either by GPO or locally. - By GPO — Computer > Windows > Admin Templates > Windows Components > Windows Remote Management > WinRM Client > Trusted Hosts - Use this PowerShell command to configure locally: Set-Item wsman:\localhost\Client\TrustedHosts –Value servername.domain.com |
| Required by Synchronize | |
| Microsoft Access Database Engine 2016 Click here to download. | Required if Microsoft Office Access 2016 or Microsoft Office Excel 2016 is used in a Synchronize job, either as a source or a destination. Install manually since the Preparation tool will not detect and install it automatically. |
| Microsoft Access Runtime 2016 Click here to download. | Required if Microsoft Office Access 2016 is used in a Synchronize job, either as a source or a destination. Install manually since the Preparation tool will not detect and install it automatically. |
Security Utility
The NDM11-ADV-2025-014 utility is used to:
- Restrict the IP addresses that can access Directory Manager services.
- Generate and encrypt the password for the GroupID user account, which is a hard-coded account hidden from end-users. This account is used to authenticate from Security Service for the Replication service, Email service, and Scheduler service.
Downloads
- Click here to download NDM11-ADV-2025-014-Utility.
- Click here to download GroupIDPasswordTransferUtility.
Restrict IP Addresses
The NDM11-ADV-2025-014 utility adds an IIS IP security rule to prevent remote access to internal Directory Manager services. To achieve this, the utility:
-
Defines 127.0.0.1,::1, and the host's primary public address as an IIS IP security rule.
-
Detects whether the primary public address is obtained from DHCP and alerts that dynamically assigned addresses may present operational challenges. A DHCP Reservation or statically configured IP should be used for the Directory Manager server.
-
Allows you to add additional addresses to support remote Directory Manager servers.
-
The following services/virtual directories have the IP rule applied:
- GroupIDDataService
- GroupIDEmailService
- GroupIDReplicationService
- GroupIDSchedulerService
Follow the steps to limit access to the Directory Manager services to specific IP addresses.
Step 1 – On the Directory Manager server, run the “NDM11-ADV-2025-014-Utility.exe” utility from the command line as an administrator. This will present the following options:
- AddIpSecurity — Enables the IIS IP Security feature on the Directory Manager server
- GenerateSecurePassword — Generates a secure password for the GroupID user account
- --help — Displays details about a specific command
- version — Displays the NDM11-ADV-2025-014-Utility version
Step 2 – Run the NDM11-ADV-2025-014-Utility.exe AddIpSecurity cmdlet. This will enable the IIS IP
Security feature in Directory Manager and ask if there is any machine other than the local one that
accesses GroupIDDataService. If yes, provide the IP of that machine. Press Enter.
In case of multiple machines, use a comma to separate the IP addresses with no space after the comma.

RECOMMENDED: Use a static IP address for the Directory Manager server and the additional IP addresses you specify here to include in the IP security rules.
Step 3 – After successful configuration, the following message is displayed.
In the event of a Directory Manager multi-instance deployment, execute the above steps on each Directory Manager server in your environment.
NOTE: In case you deploy a new Directory Manager server/instance, add the IP address of the new server to the primary server's IP security rule allowed list. Run the NDM11-ADV-2025-014 utility on the primary server to add the additional IP. This should be done before the new server connects to the Data service on the primary server (this connection is required while configuring the new server). Once the new server is configured, you can remove the IP from the allowed list of the primary server.
Generate a Secure Password
Follow the steps to generate and encrypt the password for the GroupID user account.
Step 1 – On the Directory Manager server, run the “NDM11-ADV-2025-014-Utility.exe” utility from the command line as an administrator.
Step 2 – Next, run the NDM11-ADV-2025-014-Utility.exe GenerateSecurePassword cmdlet.
Step 3 – After that, provide the database configurations in the following cmdlet according to your environment:
NDM11-ADV-2025-014-Utility.exe GenerateSecurePassword -s "SQLSERVER" -i -u "sa" -d "NetwrixGroupIDDatabase"
Step 4 – You will be asked to provide the database connection password. On doing so, the password for the GroupID user account will be updated with the generated password.

Export/Import the New Password
If you have multiple Directory Manager servers or distributed portals, you must also run the GroupIDPasswordTransfer utility to securely transport the password to distributed Directory Manager systems. When done, you must restart IIS on those systems.
Follow the steps to export the generated password from the primary Directory Manager server to a secondary server/instance.
Step 1 – On the Directory Manager server, run the “directorymanagerPasswordTransferUtility.exe” utility from the command line as an administrator.
Step 2 – Next, run the directorymanagerPasswordTransferUtility.exe export -o "directory\filename" cmdlet to
export the encrypted password from the primary server.
Step 3 – Copy the encrypted password displayed on cmd in response to this command.
Step 4 – Then copy the file created at the directory path provided in the cmdlet and place it on another instance of Directory Manager.
Step 5 – Run the following cmdlet on the instance where you placed the file to import the encrypted password.
directorymanagerPasswordTransferUtility.exe import -i "path to the file" -p "password copied from above"
Step 6 – Restart IIS on this server.
Repeat Steps 3-6 on all Directory Manager servers to eliminate the hard-coded password for the GroupID user account on all servers.
Delete the GroupIDSSUser Account
You must delete the GroupIDSSUser account from each Directory Manager server. Go to the Computer Management console to delete the account.

Uninstall
Before you uninstall Directory Manager , make sure that the logged-in user is a member of the local Administrators group on that machine.
To uninstall the current Directory Manager version to upgrade to a newer version, follow these steps:
- Click Start.
- Type Control Panel and select it.
- Select Uninstall a program.
- From the Name column, right-click **Imanami GroupID
version**and select Uninstall. - On the User Account Control window, click Yes.
This will uninstall Directory Manager from your machine.
Complete Uninstall
To uninstall Directory Manager completely, remove the Directory Manager folders and registry keys from your machine. This done, you do not have the option to upgrade to a newer version of Directory Manager.
First, uninstall Directory Manager using the steps described above.
Next, to completely uninstall Directory Manager from your machine, remove:
- The Directory Manager installation directory
- Other relevant directories
- Registry keys
- Directory Manager Site
- Directory Manager application pools
- Directory Manager certificates
Remove the Directory Manager installation directory
- Go to the location:
X:\Program Files\Imanami
(X represents the Directory Manager installation drive). - Delete the directory named GroupID 11.0.
Remove other relevant directories
-
On the Windows Run dialog box, type the command:
%ALLUSERSPROFILE%\Imanami -
From the location referenced by the given command, delete the folder: GroupID 11.0.
Remove registry keys
-
Open the Registry Editor by typing regedit in the Windows Run dialog box.
-
Delete the following registry keys:
HKEY_LOCAL_MACHINE\SOFTWARE\Imanami\GroupID\Version 11.0
Remove the Directory Manager Site
Follow these steps to remove the Directory Manager site from IIS:
- Open the Internet Information Service console by typing inetmgr in the Windows Run dialog box.
- Expand the
<machine name>node in the console tree and click Sites. - On the Sites page, delete GroupIDSite11.
Remove the Directory Manager applications and services pools
Follow these steps to remove the Directory Manager Admin Center, app pool, services and portal from IIS:
- Open the Internet Information Service console by typing inetmgr in the Windows Run dialog box.
- Expand the
<machine name>node in the console tree and click Application Pools. - On the Application Pools page, delete all app pools for Directory Manager Admin Center, applications, portals and services.
Remove Directory Manager Certificates
Follow these steps to remove Directory Manager certificates from IIS:
-
Open the Internet Information Service console by typing inetmgr in the Windows Run dialog box.
-
Click the
<machine name>node in the console tree. On the Features View tab, select Server Certificates in the IIS section. -
Delete these certificates bound to GroupIDSite11 (the site deploying Data Service):
- GroupIDSecurityService
- Imanami GroupID Certificate
NOTE: Do not remove these certificates if another Directory Manager version is installed on the machine.