Using the Grays Wizard
Many applications have configuration options, which will gray out or reveal items depending on whether the checkboxes are checked or unchecked. For instance, in this application, when the checkbox "Use fixed resolution for snapshots" is checked, the spinbox "Resolution:" is available for editing, as shown in Figure 185.
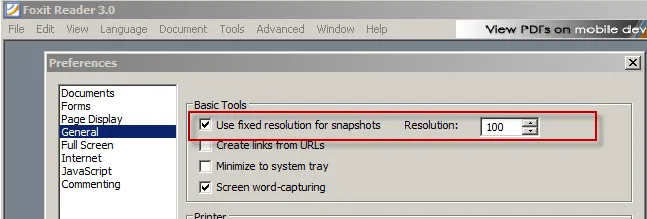
Figure 185. When the checkbox "Use fixed resolution for snapshots" is checked, the spinbox "Resolution:" is available for editing.
In Figure 186, when the checkbox is unchecked, the "Resolution:" element is uneditable.
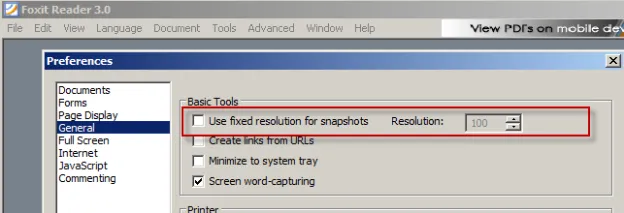
Figure 186. When the checkbox is unchecked, the "Resolution:" element is uneditable.
You are able to perform the same function within your AppSet. To do this, right-click over the checkbox and select "Grays Wizard," as shown in Figure 187.
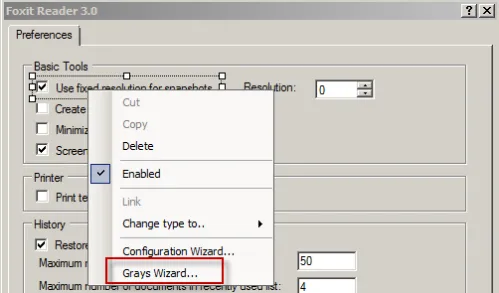
Figure 187. Opening the Grays Wizard.
NOTE: The Grays Wizard is only available for checkboxes and radio buttons. Additionally, the checkbox or radio button group needs to be configured with the Configuration Wizard before the Grays Wizard is run.
When you run the Grays Wizard, you do not need to use the "OK" or "Apply" buttons in your application. You are only learning what happens inside your application when you click a checkbox or radio button and what is grayed out when those items are selected. In Figure 188, we can see that when the checkbox is checked, the "Resolution:" spinbox can be edited. Therefore, on the first screen of the Grays Wizard, you would do nothing because when the checkmark is checked, "Resolution:" is editable.
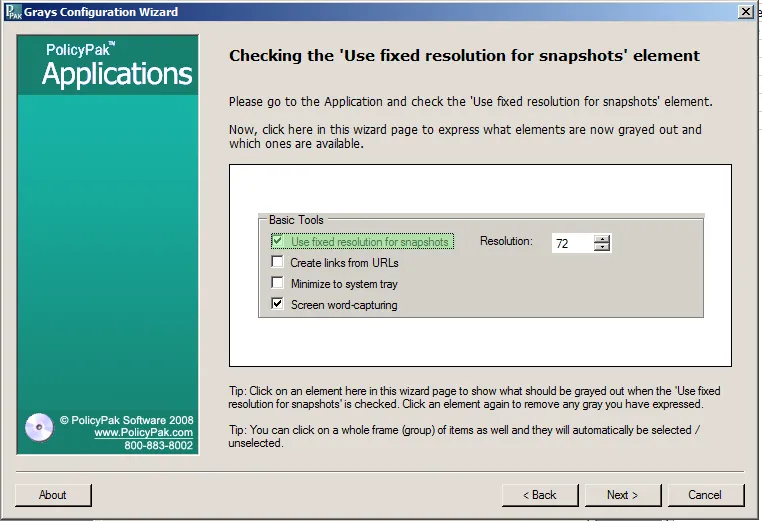
Figure 188. Using the Grays Wizard.
However, on the next page of the Grays Wizard, you are asked what happens when the checkbox is unchecked. We learned that the "Resolution:" item is grayed out. So, in this screen, click the "Resolution:" item to make it grayed out, as shown in Figure 189.

Figure 189. Graying out the element.
As shown in Figure 190, select the item or items that should be grayed out when the checkbox is unchecked. You'll see the Grays Wizard gray it out for demonstration purposes.
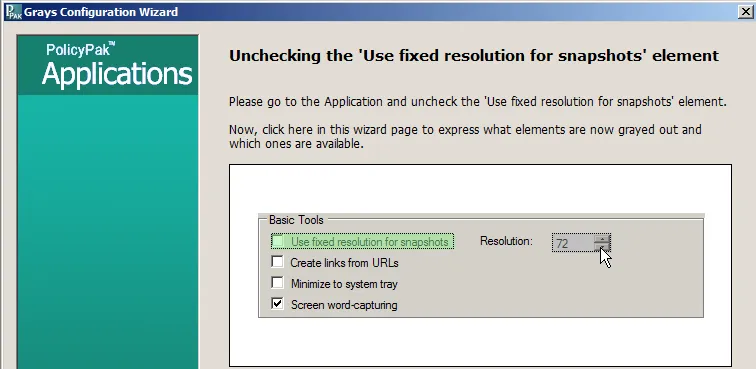
Figure 190. Selecting the item to gray out.
Let's go through another, somewhat more complex example. In this application, a checkbox and radio button set control a series of items that will be grayed out when checked and unselected. For instance, in Figure 191, we can see all the items are available when the "Replace Document Colors" checkbox is checked and the "Custom Color:" radio button is checked.
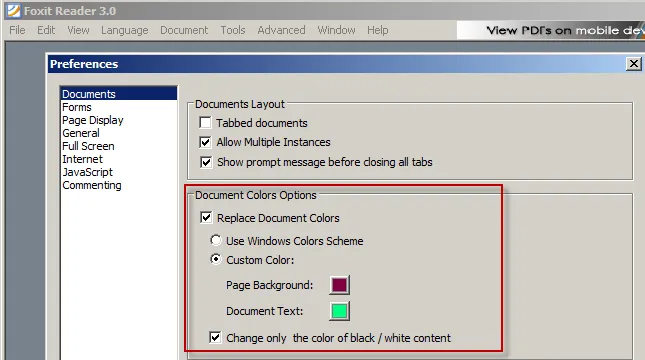
Figure 191. All the items are available when the "Replace Document Colors" checkbox is checked and the "Custom Color:" radio button is checked.
However, if we select the "Use Windows Colors Scheme" radio button, we can see that the "Custom Colors" radio button is grayed out (see Figure 192). If we uncheck the "Replace Document Colors" checkbox, then all areas ("Use Windows Colors Scheme," "Custom Color," and "Change only the color of black / white content") are all grayed out, as shown in Figure 193.
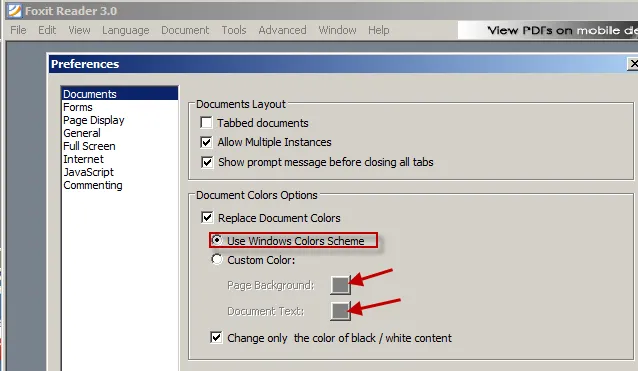
Figure 192. Selecting the "Use Windows Colors Scheme" radio button makes the "Custom Colors" radio button grayed out.
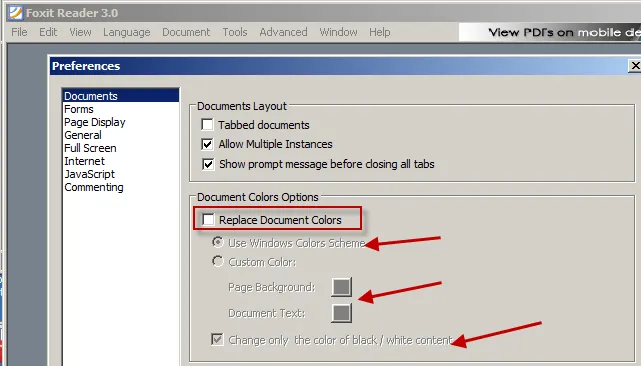
Figure 193. All areas are grayed out when the "Replace Document Colors" checkbox is unchecked.
To set up the correct behavior inside this application, you must first at least configure the "Replace Document Colors" checkbox with the Configuration Wizard. Then, select the whole "Document Colors Options" frame. Right-click and select "Grays Wizard," as shown in Figure 194.
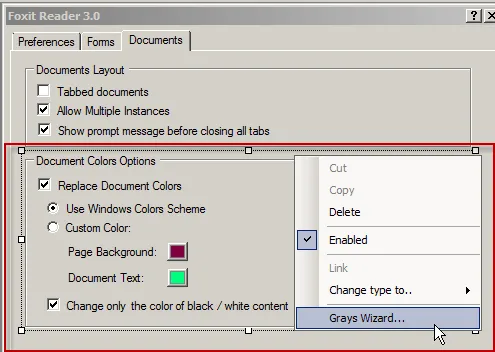
Figure 194. Selecting the Grays Wizard.
By selecting the whole frame, the Grays Wizard will ask you about each element in the frame. The first page requires you to express what happens when the "Replace Document Colors" is selected (checked). In Figure 195, there are no changes, and everything is available.
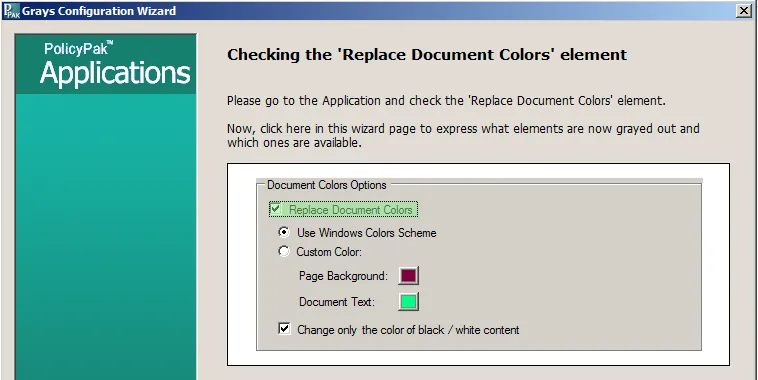
Figure 195. The first page of the wizard does not require any changes.
On the next page, you are asked what happens when the "Replace Document Colors" is unchecked. In that case, all items are grayed out. Select all items as grayed out if the Grays Wizard does not do this already for you (see Figure 196).
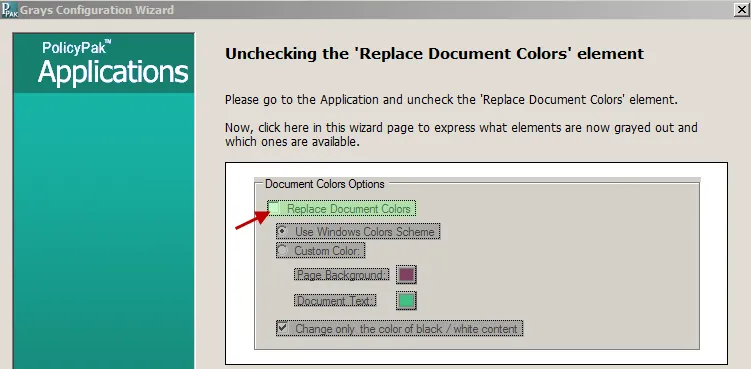
Figure 196. Selecting all items to be grayed out.
The next screen asks what happens when the "Use Windows Color Scheme" is selected. In this case, the "Custom Color" block is grayed out, but the "Change only the color of black / white content" is available. Click on the elements in the Grays Wizard, and click "Next," as shown in Figure 197.
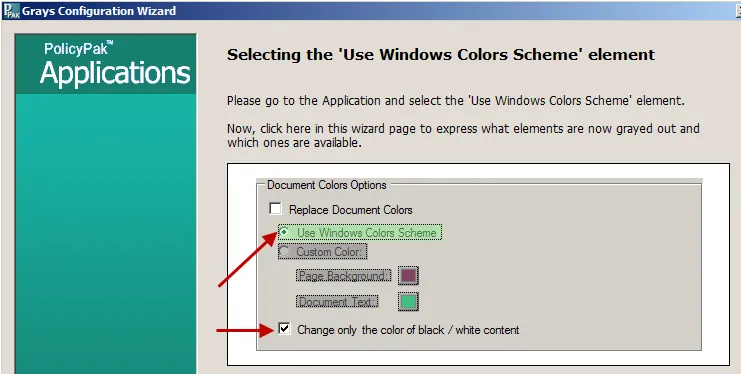
Figure 197. Choosing which elements are grayed out and which are editable.
Next you will be asked about "Custom Color." Be sure to clear out any gray items that will operate when "Custom color" is selected, as shown in Figure 198.
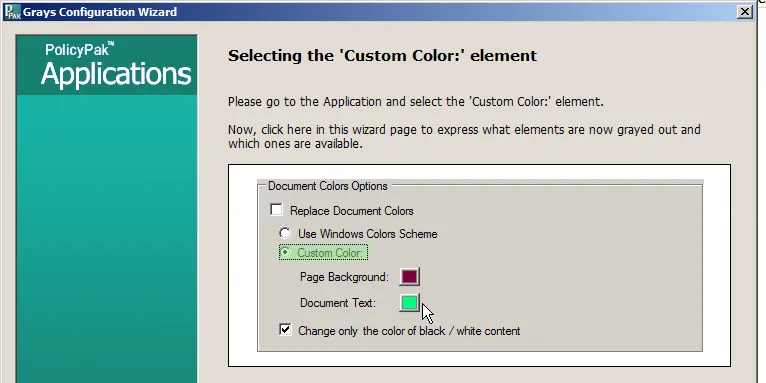
Figure 198. Choosing which elements are grayed out and which are editable.
Finally, you are asked about the last element "Change only the color of black / white content." There is no change when this is checked or unchecked.