Extras Tab
Video: For a quick overview of how to manage certificates in IE using Endpoint Policy Manager Application Settings Manager see the following video: http://www.endpointpolicymanager.com/video/endpointpolicymanager-manage-ie-certificates.html.
The Extras tab in the IE AppSet enables you to do the following:
- Set Menu bar icons
- Set custom support page URL (versions of IE prior to IE 10)
- Set custom title bar (versions of IE prior to IE 10)
- Manage certificates
NOTE: Endpoint Policy Manager can only deploy binary/DER type certificates. If you need to convert an existing certificate to DER format, please see the section, "Exporting Certificates to the Binary-Encoded DER Format."
Examples of IE certificates are shown in Figure 29.
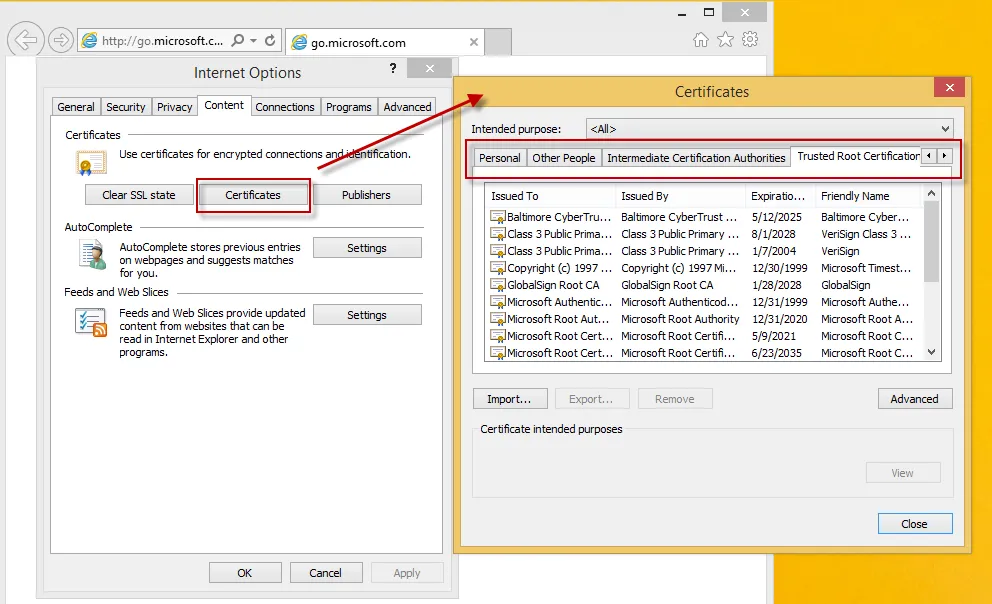
Figure 29. IE Certificates.
IE has the following locations to specify certificates:
- Personal
- Other people
- Intermediate certification authorities
- Trusted root certification authorities
- Trusted publishers
- Untrusted publishers
You can use the IE AppSet to add or remove certificates from those locations using the following format, as shown in Figure 30:
File Location, Certificate Store, add
or
Thumbprint, Certificate Store, remove
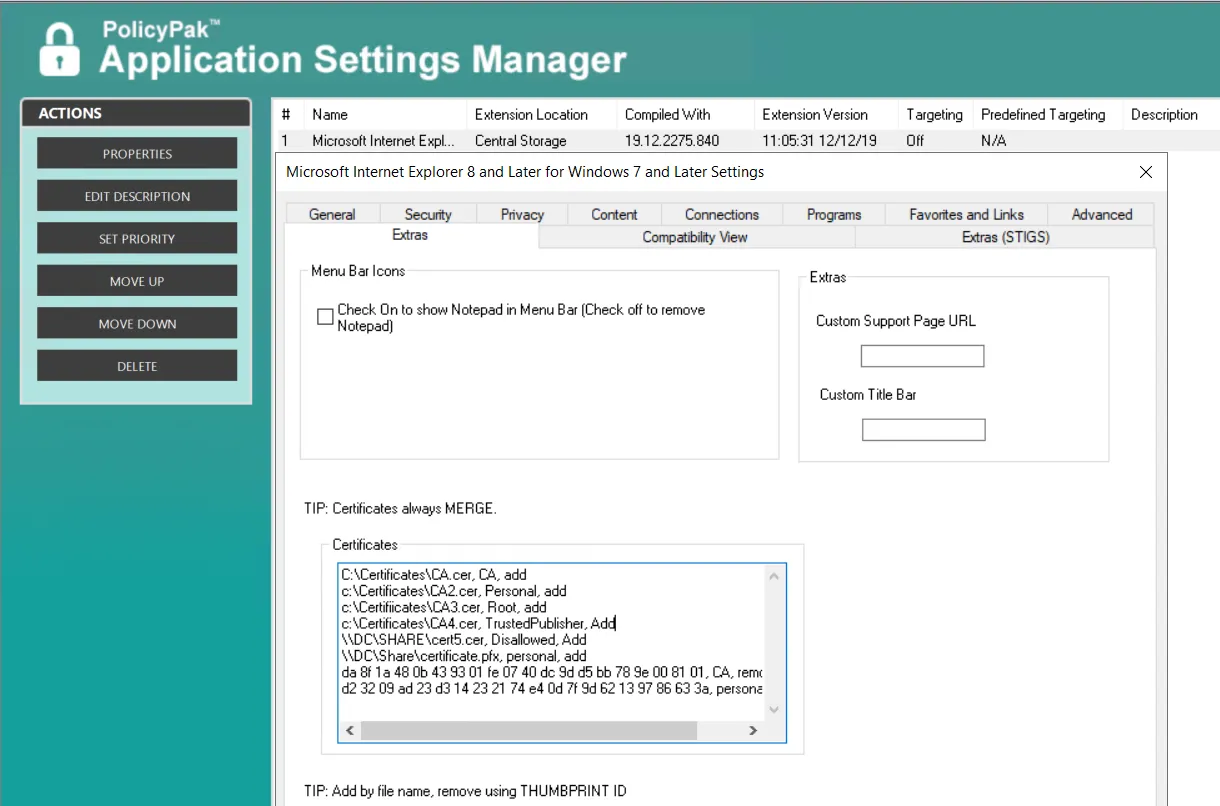
Figure 30. Adding or removing IE certificates.
Adding Certificates using the IE AppSet
To add a certificate using the IE AppSet, the file must be located at \\server\share or a local
location like c:\Certificates. Endpoint Policy Manager then accesses the file in that location and
determines which certificate store you want to put it in. The available stores and the corresponding
word to specify within Endpoint Policy Manager can be seen in Table 1.
Table 1: Certificate stores and corresponding terms.
| IE Certificate Store | Word to specify in Endpoint Policy Manager AppSet | |
|---|---|---|
| User store | Machine Store | |
| Personal | Personal | Machine\Personal |
| Other People | AddressBook | Machine\AddressBook |
| Intermediate Certification Authorities | CA | Machine\CA |
| Trusted Root Certification Authorities | Root | Machine\Root |
| Trusted Publishers | TrustedPublisher | Machine\TrustedPublisher |
| Untrusted Publishers | Disallowed | Machine\Disallowed |
CAUTION: Not all certificate types will work in all locations for IE certificates.
The following line would look for a file named certificate.pfx on \\DC\Share and add it to the
Personal certificate store: \\DC\Share\certificate.pfx, personal, add.
By default, certificates are added to and removed from the certificate store of the current user.
Prepend any store name with Machine\ if you want to add or remove a certificate from the machine
store. For example, the following line would would add a certificate to Intermediate Certification
Authorities of the current user: \\DC\Share\CA.cer, CA, add, while the next line would add a
certificate to Intermediate Certification Authorities of the machine, meaning that all users on the
machine will get it: \\DC\Share\CA.cer, Machine\CA, add.
NOTE: Non-elevated users are not allowed to remove certificates from the machine store, so you
can use Machine\{Store Name} to ensure certificates are delivered to everyone and cannot be
removed by users.
Removing Certificates using the IE AppSet
To remove certificates using the IE AppSet, you must know the thumbprint for the certificate you want to remove. You can find the thumbprint within IE by viewing the details for a certificate and selecting the thumbprint, as shown in Figure 31. Then, you can copy and paste it into the AppSet.
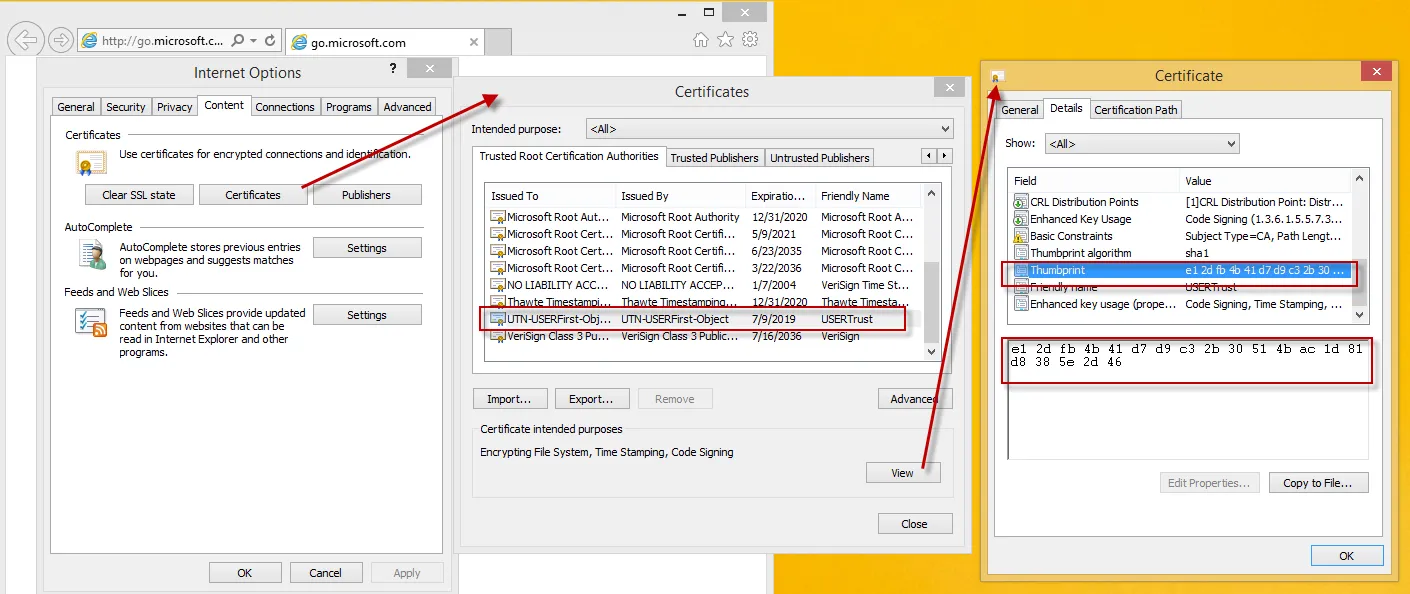
Figure 31. Details and thumbprints of certificates in IE.
The format of the text to remove the certificate should include the thumbprint with spaces, a comma, the certificate store word from the table above, and the word remove:
da 8f 1a 48 0b 43 93 01 fe 07 40 dc 9d d5 bb 78 9e 00 81 01, CA, remove
As with adding a certificate, you can prepend the store word with Machine\ to remove a certificate
from the machine store:
da 8f 1a 48 0b 43 93 01 fe 07 40 dc 9d d5 bb 78 9e 00 81 01, Machine\CA, remove
Exporting Certificates to the Binary-Encoded DER Format
Endpoint Policy Manager can only work with binary-formatted/DER certificates. If you have a certificate of another type, you may import it first into Internet Explorer. Then you can immediately export it as a DER file, as shown in Figure 32.
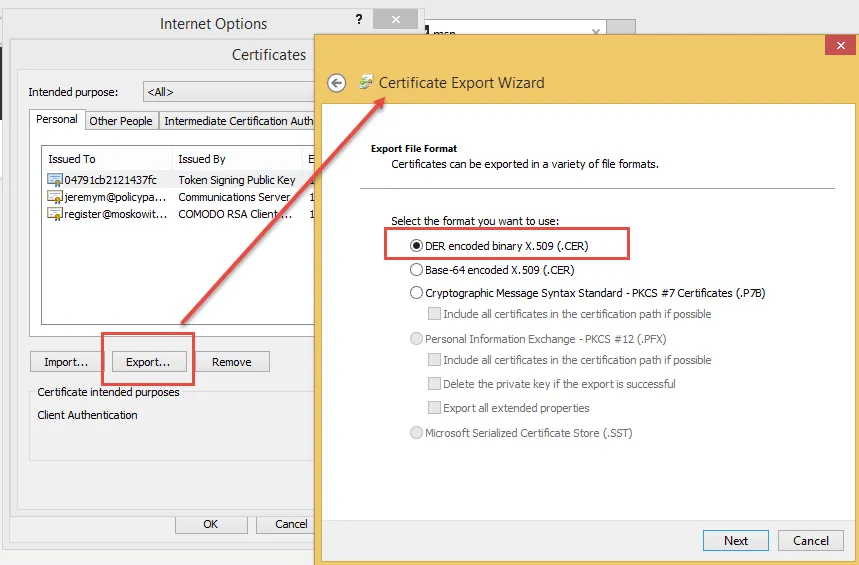
Figure 32. Exporting a certificate as a DER file.
You can optionally perform the same type of export by finding the file itself in Explorer,
navigating to the Details tab, and then clicking on the "Copy to File..." button and selecting
"DER encoded binary X.509 (CER)," as shown in Figure 33.
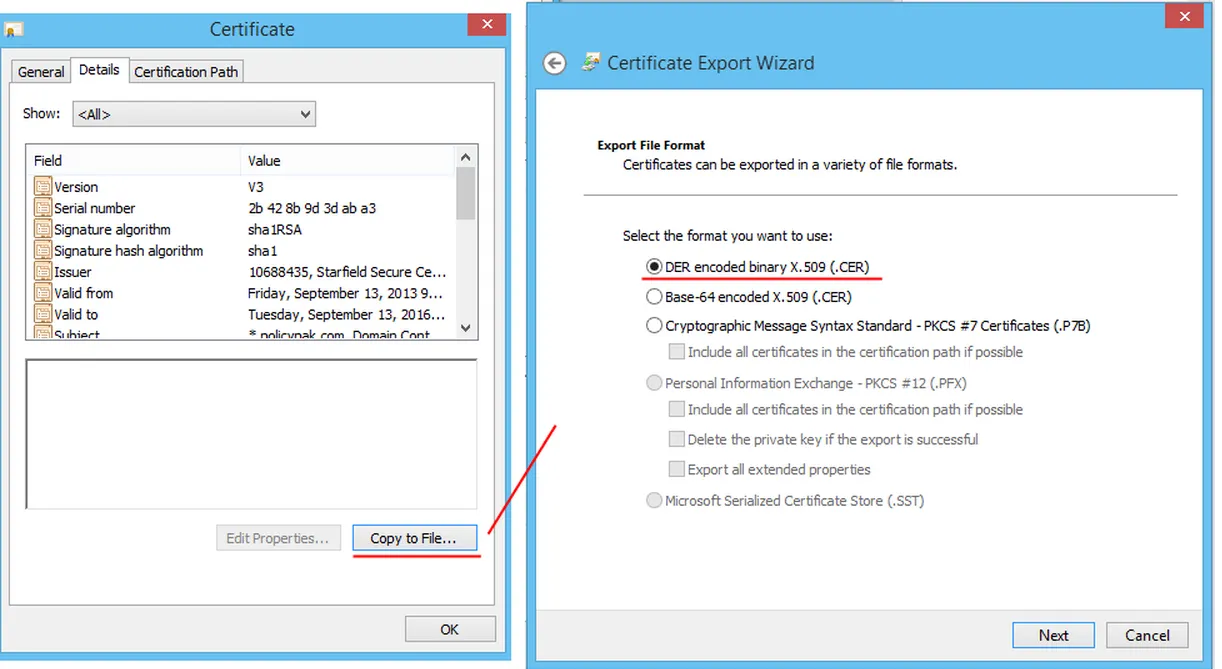
Figure 33. Exporting a certificate using the "Copy to File..." button.