How To deploy a TCP/IP Printer using Endpoint Policy Manager Remote Work Delivery Manager
Step 1 – Zip up the Printer setup files and store on a network share that is accessible to the users that need to have the printer installed.
For Example:

This zip should contain the driver INF file for the printer to be installed.

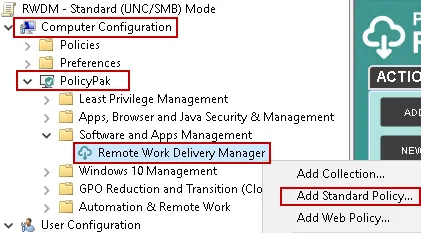
Step 2 – Using the Microsoft Group Policy Management Console (GPMC), create a new Netwrix Endpoint Policy Manager (formerly PolicyPak) RWDM Standard Policy on either the Computer side (using Switched-Mode), or the User side.
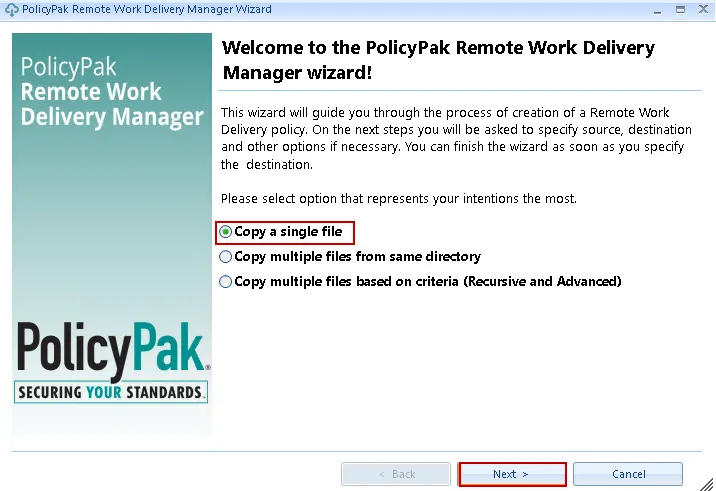
Step 3 – At the Welcome screen select Copy a single file, and click Next.
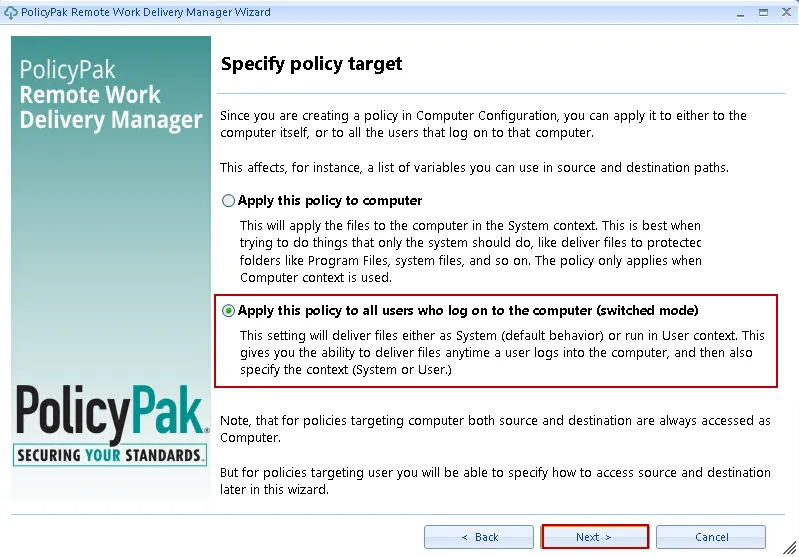
Step 4 – Select Apply this policy to all users who log on to the computer (switched mode), then click Next.
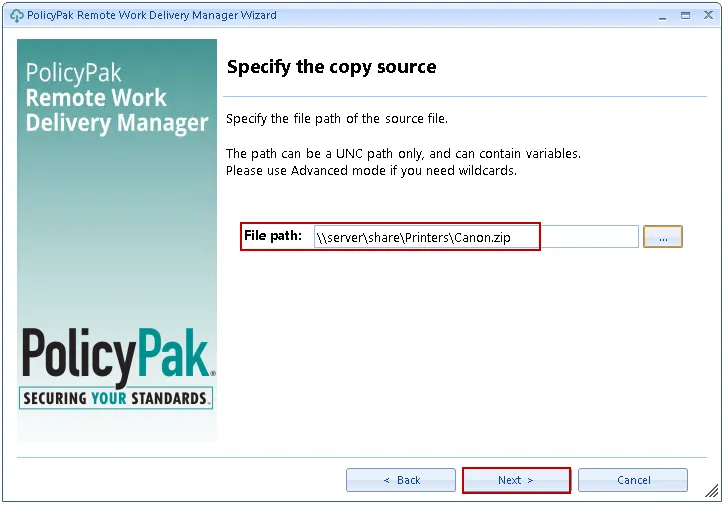
Step 5 – Enter the UNC path to the printer zip file from step 1 above, then click Next.
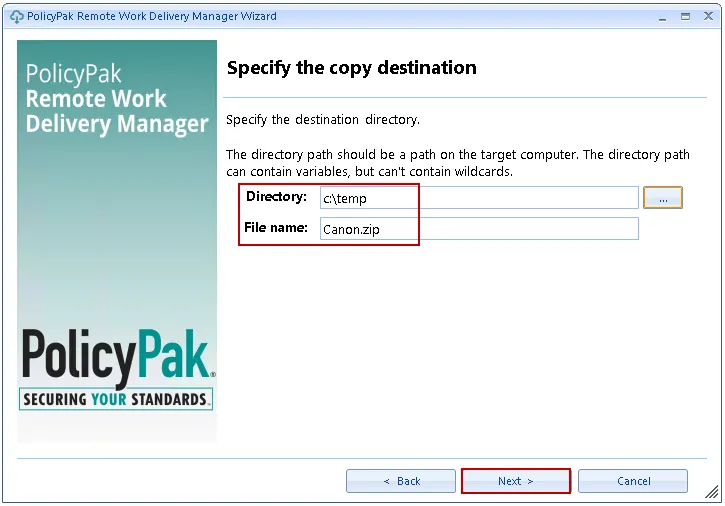
Step 6 – Specify the target folder on the endpoint(s) where you would like the zip to be downloaded to, provide the file name for the destination, then click Next.
The target folder will be created if it does not exist
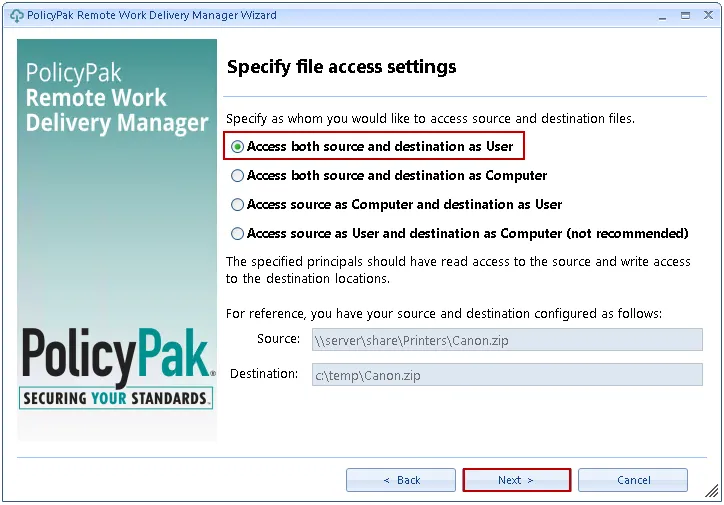
Step 7 – Accept the default values and click Next.
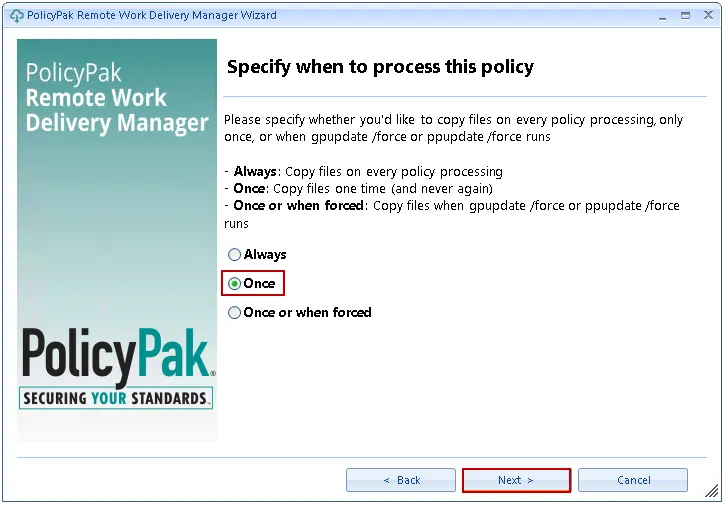
Step 8 – Select Once then click Next.
At the Post-copy actions screen select the Run PowerShell script, and Run process or script as user options, then add/edit the command lines below as needed to reflect what is needed for your specific printer model, then click Next.
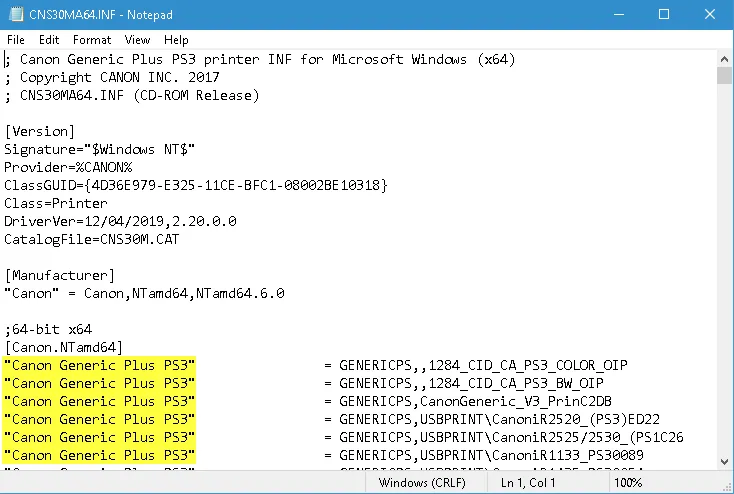
Expand-Archive -LiteralPath 'c:\temp\canon.zip' -DestinationPath C:\Temp pnputil.exe /a "C:\Temp\Canon\Driver\CNS30MA64.INF" Start-Sleep -s 10 Add-PrinterDriver -Name "Canon Generic Plus PS3" Add-PrinterPort -Name "IP Port" -PrinterHostAddress "192.168.1.27" Add-Printer -DriverName "Canon Generic Plus PS3" -Name "Canon Generic Plus PS3" -PortName "IP Port"
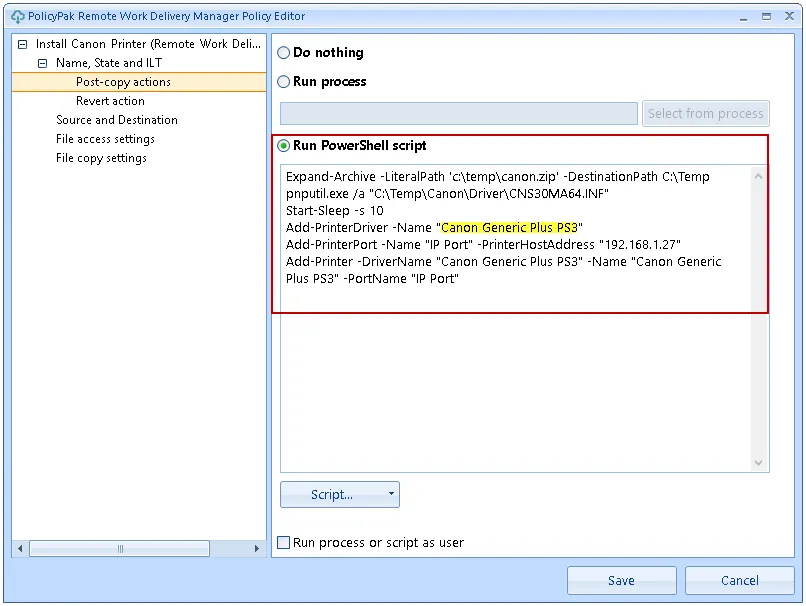
Important: The Add-PrinterDriver -Name section above the name specified (i.e., "Canon Generic Plus PS3" in this example) must match one of the names in the INF file!
Step 9 – Skip the Revert actions screen unless you wish to add a revert action.
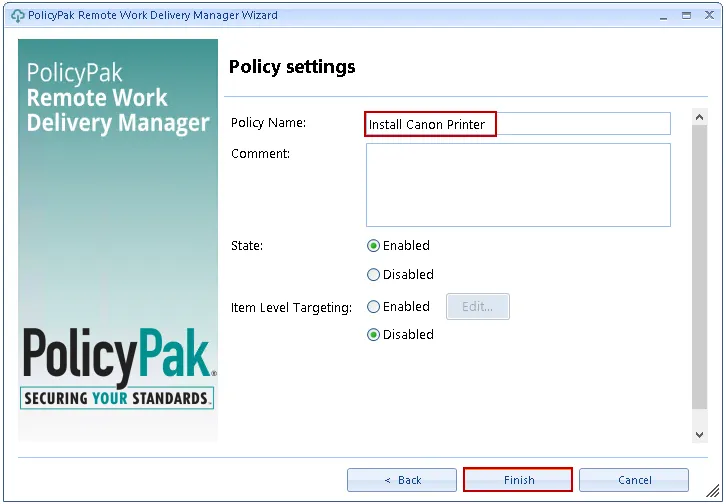
Step 10 – At the Policy settings screen give the policy a descriptive name, then click Finish.
Step 11 – Run GPUPDATE on an endpoint that receives this policy to test, then verify under Printers & Scanners that you see the printer installed.
The printer may take around 30 seconds to install.
