Results Pane
The Results pane can be a little daunting initially but becomes easier after you have the opportunity to use it once or twice. On this pane you can do the following (see Figure 24):
- Select a previously created test
- Order tests by conflict
- Select a previously created snapshot
- Generate results
- Review historical results
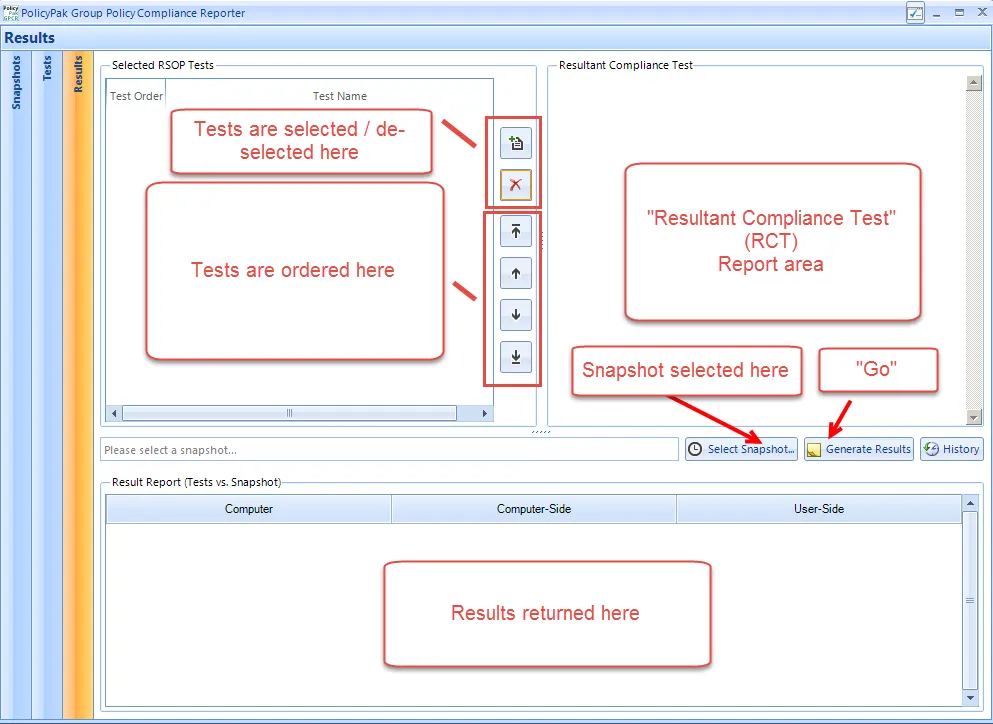
Figure 24. The GPCR Results pane.
To start using the Results pane, add a test, as shown in Figure 25.
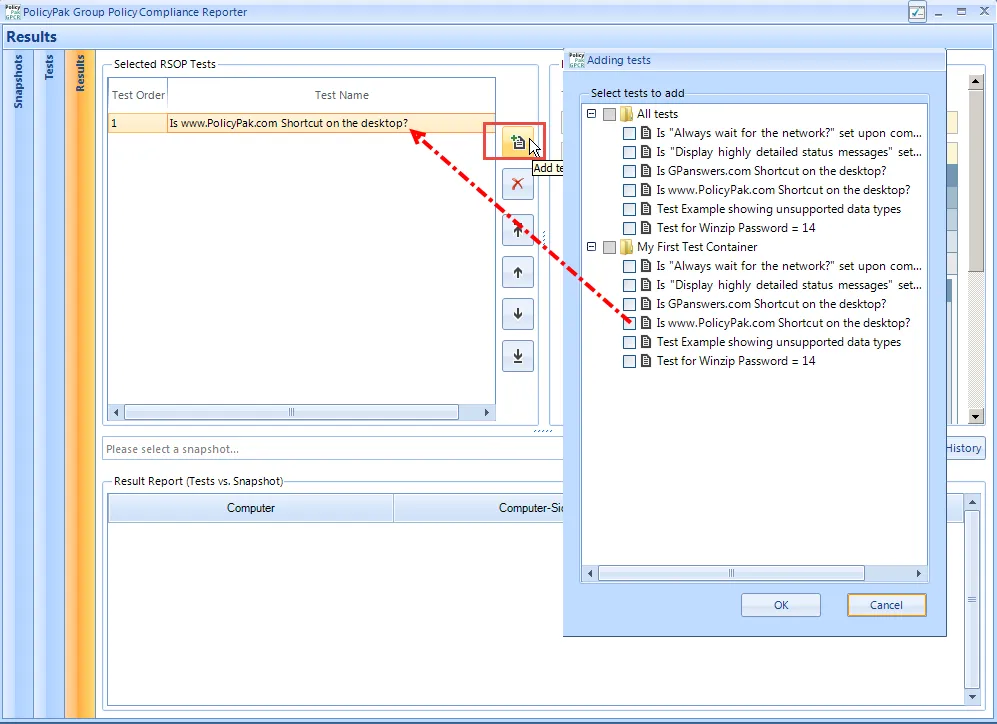
Figure 25. Adding a test.
The test's report will appear in the Resultant Compliance Test (RCT) report window, as shown in Figure 26. There you will see the test name and the various elements that will be tested for in the RCT.
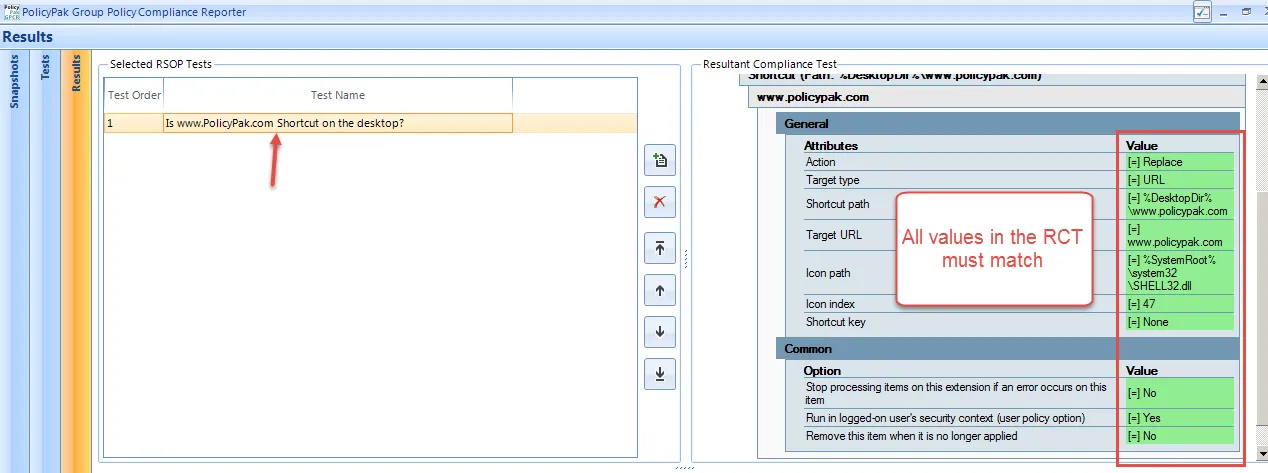
Figure 26. The test name appears in the Resultant Compliance Test (RCT).
All elements in the RCT are combined for the test. They are listed with an "=" and green highlighting in the RCT report.
Next, you can click "Select Snapshot…" and select the snapshot you created earlier.
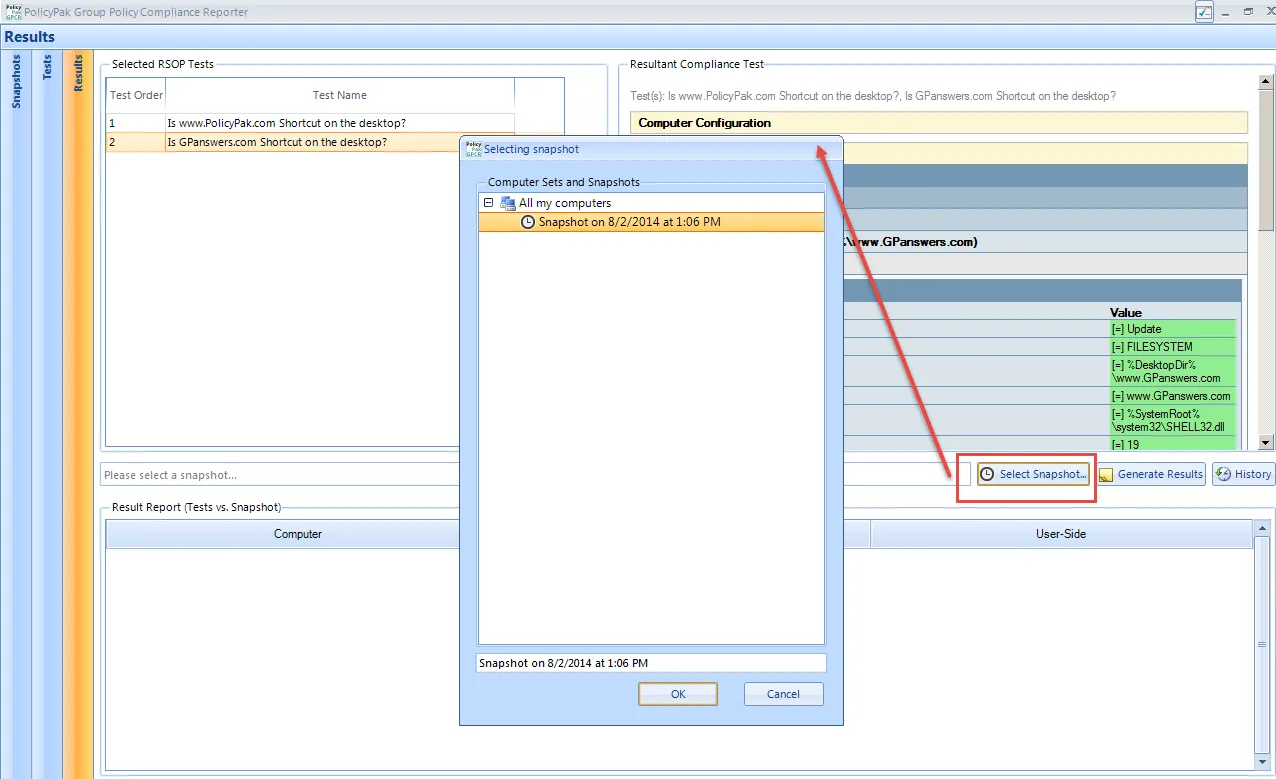
Figure 27. Selecting the snapshot.
Then select "Generate Results." This process typically takes only moments because the RSOP data was already received from computers when the snapshot was taken. Each computer in the snapshot is evaluated based on the RCT (the single or multiple tests in the specific order). Each computer's results can be different than another computer's results which is precisely what Endpoint Policy Manager GPCR helps you to discover. In Figure 28, we can see that the computer named "Win7Computer-32" has a warning on the User side, and is OK on the Computer side. This means that something specified in the RCT did not match. Double-clicking either the user-side warning status or the computer-side OK status will indicate which part is out of compliance.
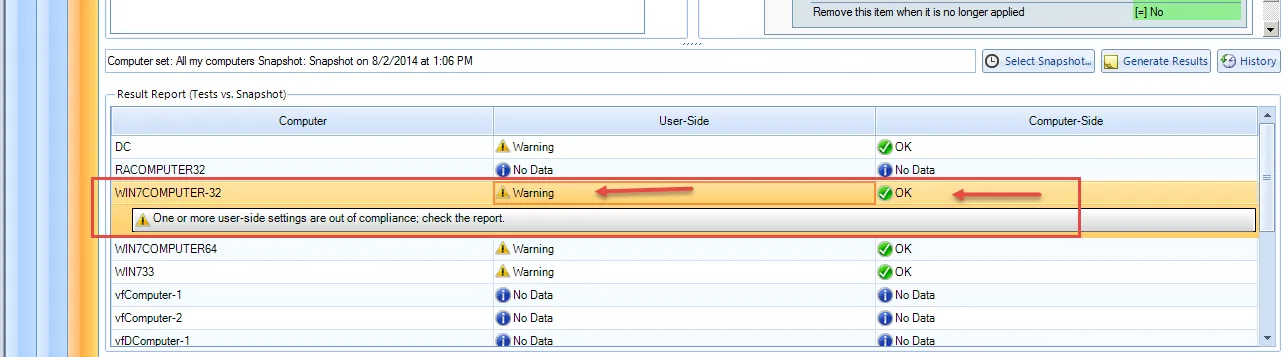
Figure 28. Checking the status of a particular computer.
On this computer, the www.endpointpolicymanager.com URL was delivered to the Desktop; however, two of the settings in the Group Policy Preferences shortcut item were different than those that were tested for. Specifically, the Group Policy Preferences "Action" and "Icon index" types were different on the computer than what was desired in the test. These values are expressed with a "#" and blue highlighting in the compliance report, as shown in Figure 29.

Figure 29. Values that don't match are expressed with a "#" and blue highlighting in the compliance report.
If you click on "Show all settings in test," you will be able to see all the values in the RCT test, that is, everything you are testing for, and compare it to what is on the machine. Everything that matches will be in green with an "=." Everything that is present, but does not match will be in blue with a "#," as shown in Figure 30.
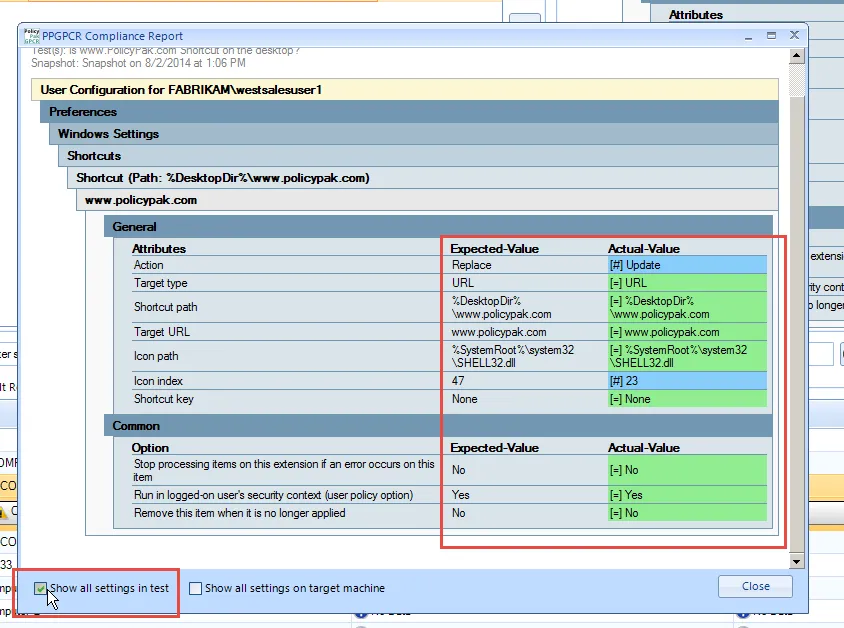
Figure 30. Values that match appear in green and values that don't match appear in blue.
Anything that is in the test, but is completely absent on the machine, will be expressed in red with a "–" and declared as "Missing." Figure 31 shows an example of a test for www.GPanswers.com, which isn't present on Win7Computer-32.
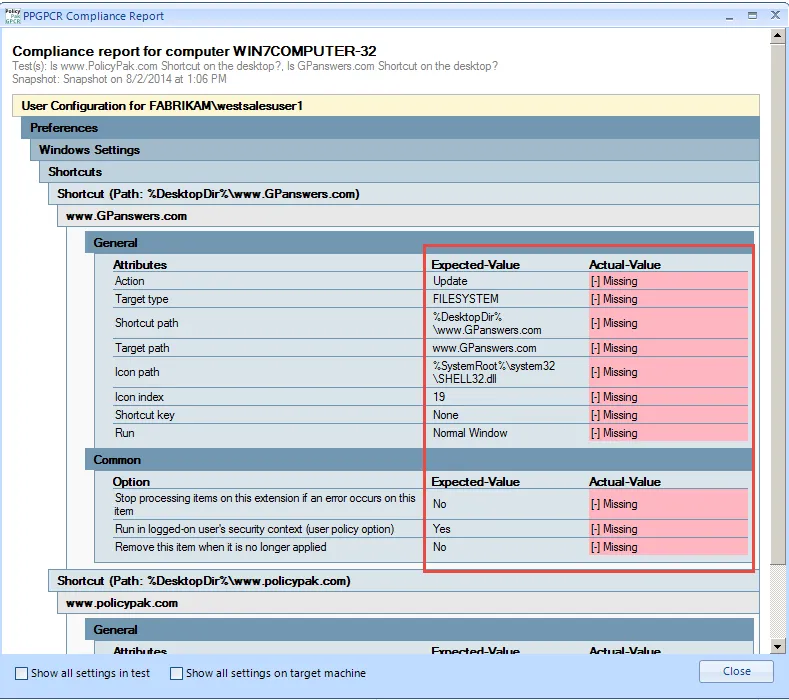
Figure 31. Anything completely absent from the computer appears in red.
Using the Results pane in this way, you can know what Group Policy settings are on a machine, and you can take action to correct it.