Deploying the Client-Side Extension to Multiple Clients
The Netwrix Endpoint Policy Manager (formerly PolicyPak) directives you create are not performed on clients unless the Endpoint Policy Manager client-side extension (CSE) is on the target machine and the CSE is licensed. You may use any of the following methods to install the CSE for the first time on your target machines:
- One-by-one installation (good for test labs)
- Group Policy Software Installation (not recommended)
- Third-party software delivery mechanism (such as PDQ Deploy)
- Microsoft Endpoint Configuration Manager (MEMCM) software delivery
- Microsoft Endpoint Manager Intune software delivery
- Installation with startup scripts
- Building the Endpoint Policy Manager CSE into your virtual desktop infrastructure (VDI), desktop, or laptop image
- Bootstrapping the CSE via RMM or another mobile device management (MDM) tool
There's not a single right way to do this, but to make the installation as painless as possible, we have included a few suggestions in the sections below to help you through the process.
The Endpoint Policy Manager CSE ships as an MSI file and, as such, is very flexible in the initial deployment and upkeep.
In the next section, we will discuss the following three main ideas:
- Using our recommended tool, PDQ Deploy
- Deploying the CSE using Group Policy Software Installation and upgrading an older version using Group Policy Software Installation (not recommended)
- Using the PolicyPak's built-in CSE auto-update feature (which allows the programs to silently download, update, and report on performing updates)
PDQ Deploy
Our recommended tool of choice to get the Endpoint Policy Manager CSE deployed to multiple machines is PDQ Deploy. PDQ Deploy has a free mode and a paid mode, which is reasonably priced. You can see how to deploy a package with PDQ Deploy please see the Managing Group Policy using Endpoint Policy Manager and PDQ Deploy topic for additional information.
MDM, UEM, or RMM Tools
Because the Endpoint Policy Manager CSE ships as an MSI file, you can quickly get this deployed using Microsoft Endpoint Configuration Manager (MEMCM) software delivery, Microsoft Endpoint Manager Intune software delivery, KACE, LANDesk, or anything else that deploys an MSI. Consult your tool's documentation for MSI deployment best practices.
Group Policy Software Installation
NOTE: You can also use Microsoft Group Policy Software Installation to deploy the Endpoint Policy Manager CSE. However, software delivery (and removal) by Group Policy Software Installation can be unreliable, and this method is not recommended.
If you do choose to use it, the process can usually done in four steps:
Step 1 – Set up a share or DFS point for which all clients have Read access. In our examples, we've set up a share named Endpoint Policy Manager.
Step 2 – Copy the Endpoint Policy Manager Client-Side Extension x32.msi for 32-bit systems or Endpoint Policy Manager Client-Side Extension x64.msi for 64-bit systems to that share.
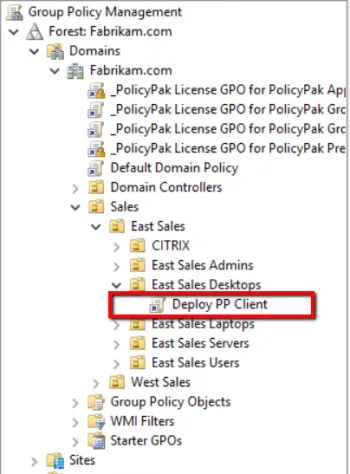
Step 3 – Create a Group Policy Object (GPO) and link it to the organizational unit (OU) containing the target computers.
Step 4 – Use Group Policy Software Installation to deploy that file to all target computers.
NOTE: To see a demonstration of this section, please watch these two tutorial videos: Mass Deploy the Endpoint Policy Manager CSE using GPSI and Upgrading the CSE using GPSI. In this example, we've created a GPO named Deploy PP Client and linked it to East Sales Desktops.
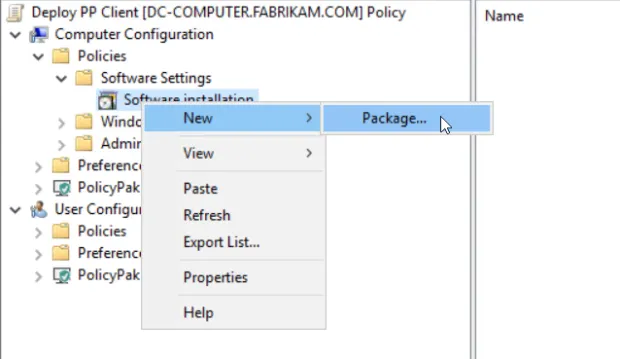
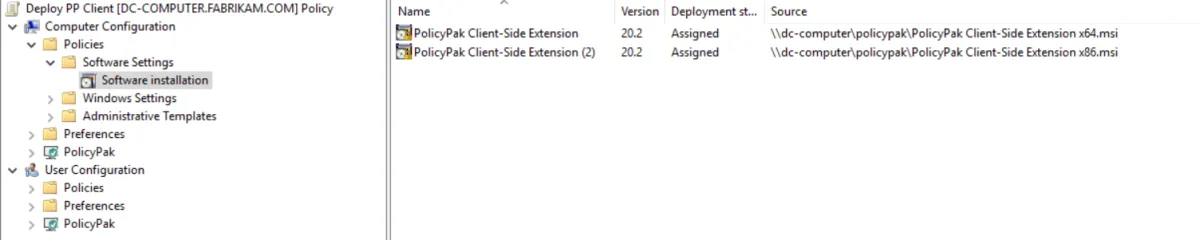
Step 5 – Next, right-click the GPO and select Edit. Once you're inside the Group Policy Editor, scroll down to Computer > Configuration > Software Settings > Software Installation. Right-click, and select New > Package.
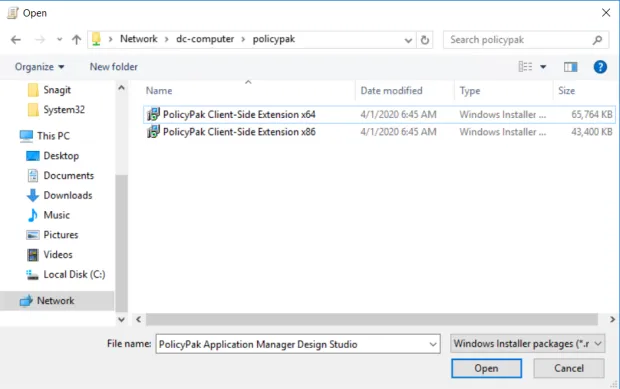
Step 6 – Once this is complete, type in the server and share names you used. In our example, our
server is \\DC-Computer and our share is Endpoint Policy Manager. Then select the Endpoint Policy
Manager CSE Setup x64.msi file, and click Open. Next, choose Assigned, and select OK.

When you're done, the GPO should look like this:.
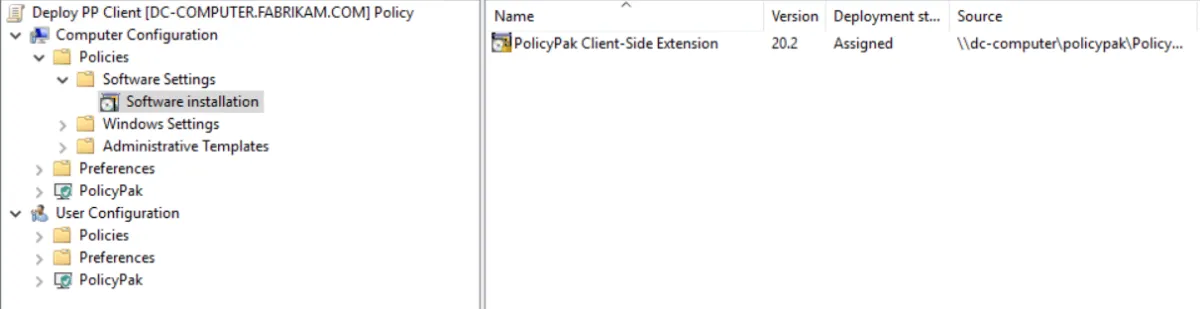
Step 7 – Repeat this process until both the x86 and x64 MSIs appear.
NOTE: Be sure that the source field is pointing to a network path (e.g., \\server\share) and
not a local path (e.g., c:\something\).
If you have an older version of the Endpoint Policy Manager CSE and wish to update it using Group Policy Software Installation, it's easy to do.
For more information on how to perform an upgrade using Group Policy Software Installation. See the Upgrading the CSE using GPSI topic for additional information.