Logging guide for Endpoint Privilege Manager for Mac Clients
This guide will help you understand local Mac logging and also how to send those logs to Netwrix Endpoint Policy Manager (formerly PolicyPak) Cloud if desired.
Understanding log files on the client
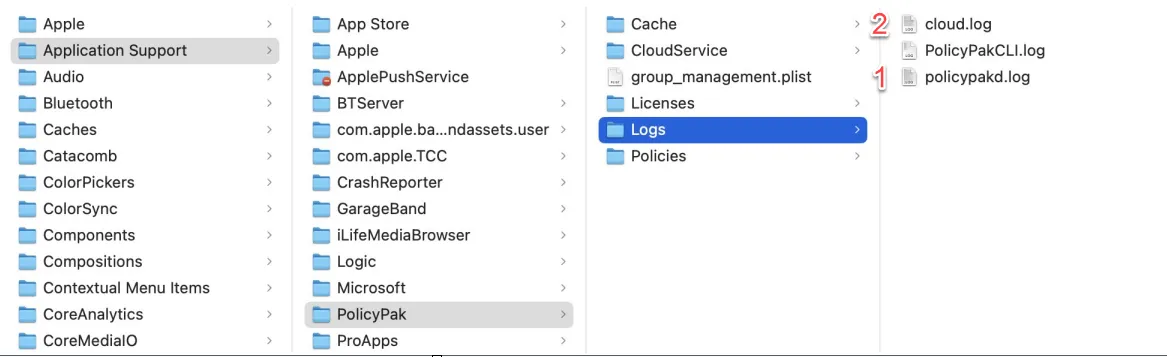
The Endpoint Policy Manager logs are located in /Library/Application Support/PolicyPak/Logs. If requested by Support, zip up these three logs. As the customer, you can find useful information within endpointpolicymanagerd.log and cloud.log (details below).
Understanding Endpoint Policy ManagerD.Log
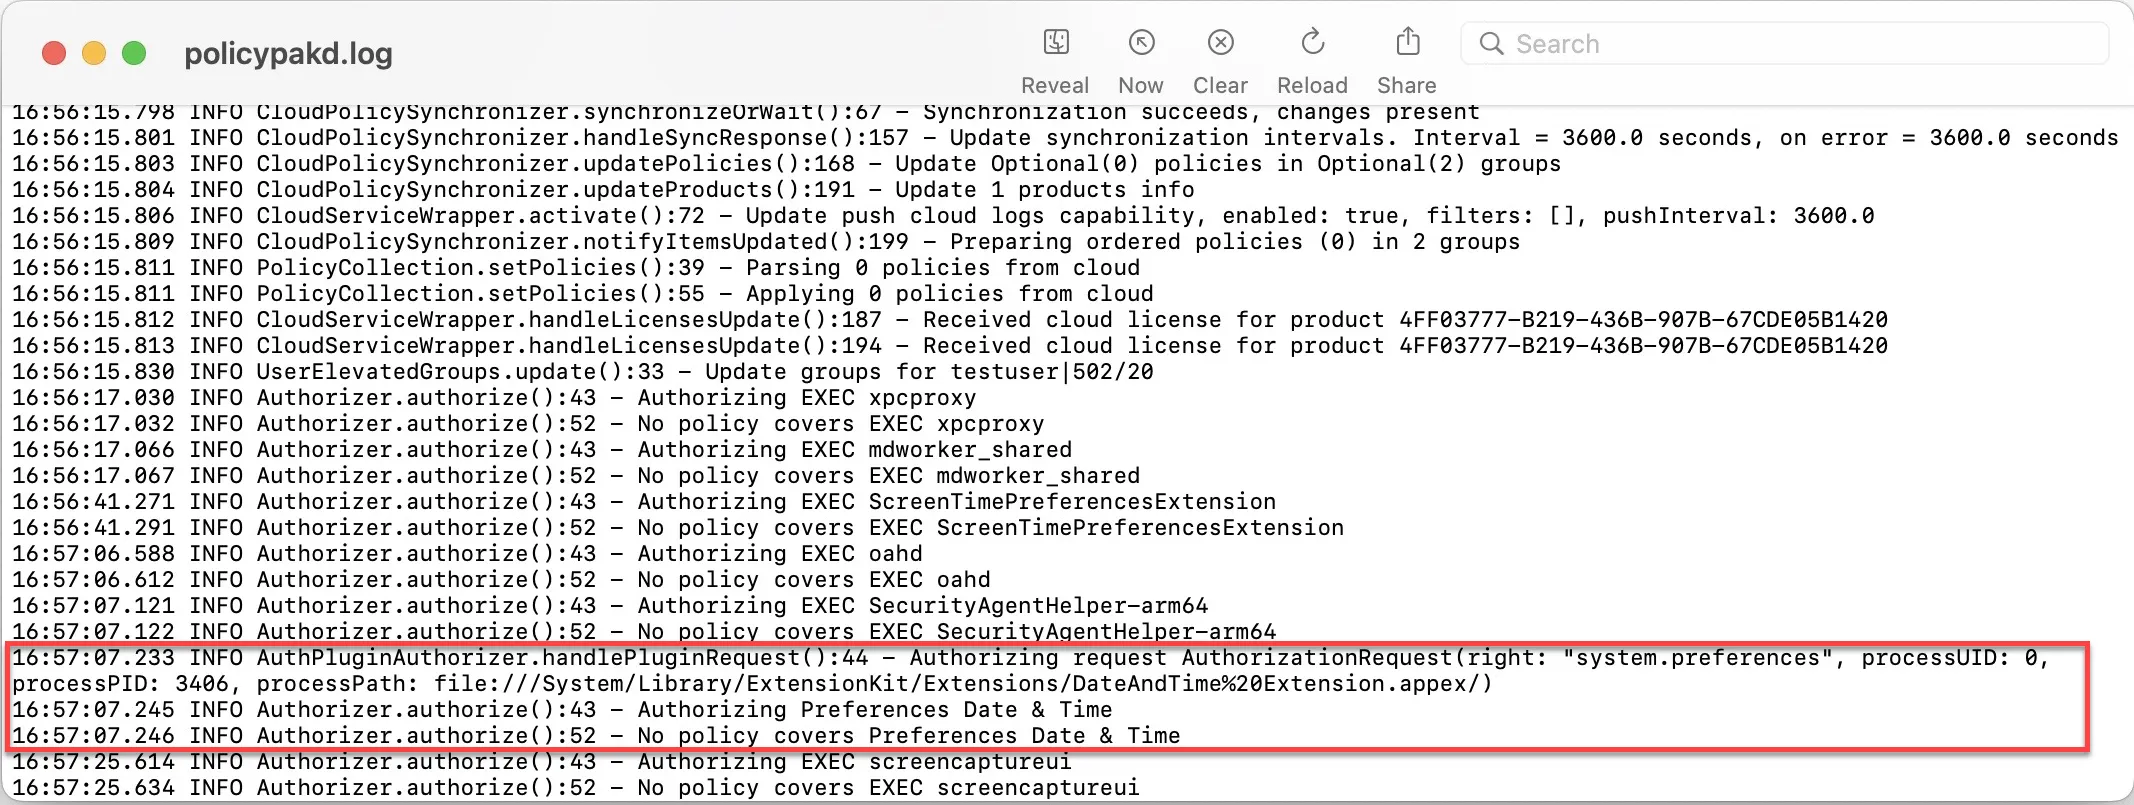
This log shows every process that ran on the computer. When installed, Endpoint Policy Manager needs to monitor all processes on the endpoint to determine if there is a policy against that process and then acts upon it if necessary. This log shows those processes and the policy information, if there is a policy.
No Existing Policy
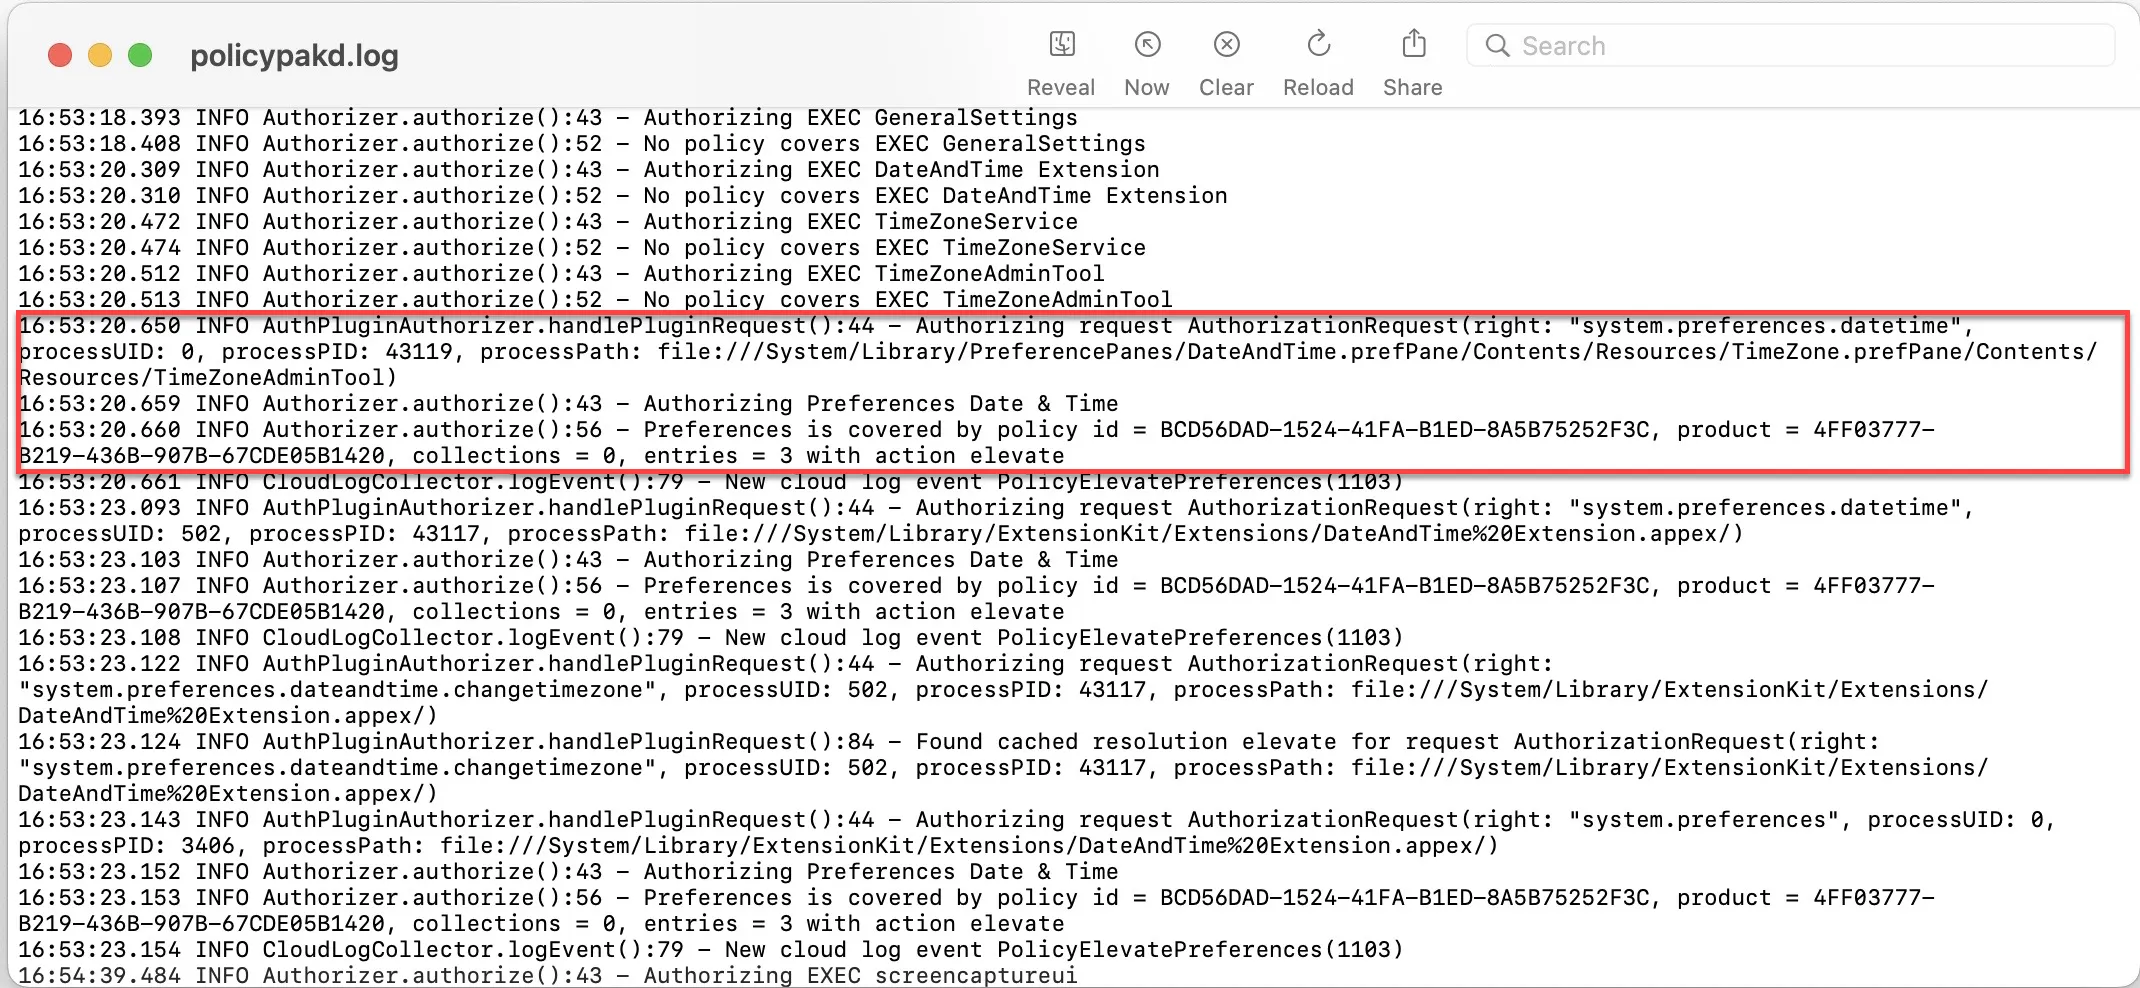
Policy Exists
Understanding Cloud.log
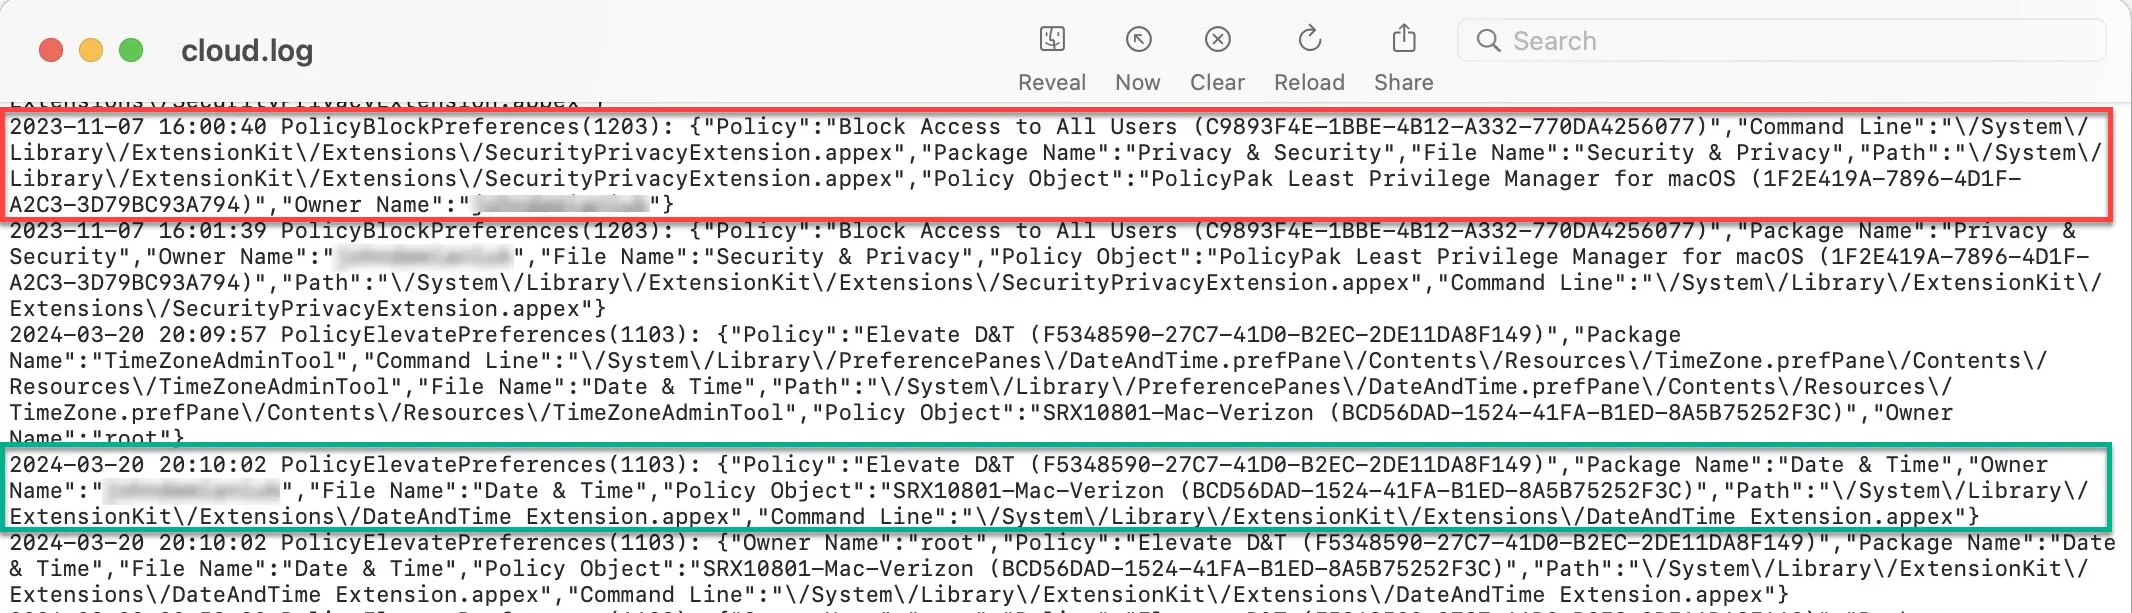
Cloud.log contains actioned items from the endpointpolicymanagerd.log file, processes that ran by the user and were either Allowed, Elevated or Blocked by Endpoint Policy Manager policies.
NOTE: To get a better understanding of how you policies are working, or not working, endpointpolicymanagerd.log will tell not only what processes were affected by policies, but also what processes weren’t – and maybe should have been.
Setting up Endpoint Policy Manager Cloud Groups for Event Collection
Having these logs locally is all well and good, but we also have the ability to centrally store these logs and present the data in a more readable format.
Our Event Collector in the cloud can take these events, upload them to your Endpoint Policy Manager cloud instance, and allow you to pull reports based on this data.
NOTE: This is a paid, extra service that is not enabled by default.
Event collection is part of the Group configuration. There are two types of groups that your endpoints can be a part of: Built-in and Company.
Built-in
Without going into too many details here (there are KB articles where you can get more information on this topic), the main Built-in Group is the Allgroup. Every endpoint that has an account will automatically be a member of Windows or, in this case, MacOSs All group. If this group is configured with Event Collection, all endpoints will send their cloud.log data up to the cloud.
Computer
Computer groups are created and configured by you, the Endpoint Policy Manager cloud instance administrator. You specify what computer accounts are members here, and thereby only those endpoints will upload the data you specify in that group Event Collection configuration.
There are a few ways to add a computer to a group, but the most common way is directly through the group.
Step 1 – Highlight the group you want to add the computer(s) to.
Step 2 – Click on Add/Remove Computer from Group (under Actions).
![]()
Step 3 – Click Available Computers.
![]()
Step 4 – Check the ones to add and click Add.
Event Collection Configuration
To configure Event Collection, highlight the group and click Edit Group under Actions. On the resulting pop-up window, click on the Event Collector tab.
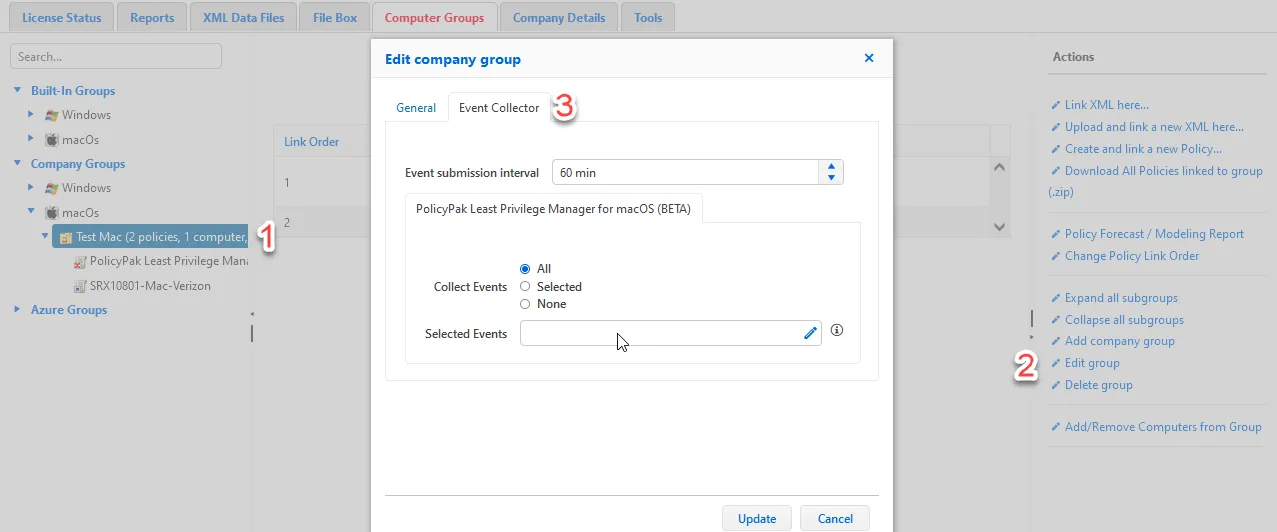
The Event submission interval dictates how often the logs get uploaded to the cloud. This is separate and distinct from the Refresh interval for computers on the previous tab, which dictates how often the endpoint synchronizes the policies with the cloud.
You can also choose which events are collected and stored in the cloud. On large networks, this will save you from a lot of noise when looking for specific things. We generally recommend starting will All events until you figure out what it is you want to see, and then just select the ones you want.
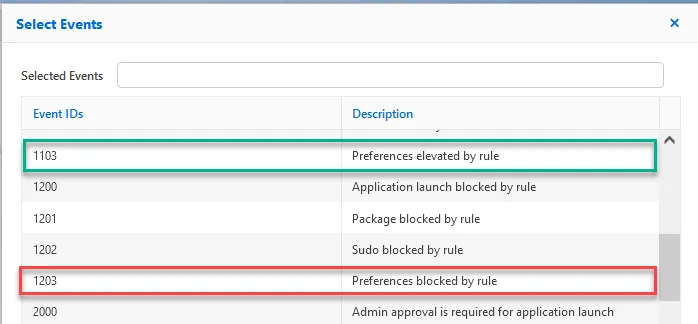
When Selected Events is selected, clicking on the Info icon brings up a list of Event IDs that can be selected. In the image below are highlighted the two Event types that shown in the cloud.log example above.
Notes on Collection configuration:
- When the Allgroup is configured, all endpoints will receive the configuration.
- When a Parent group is configured, all child groups will, by default, inherit the configuration as well. This behavior, however, can be altered to block inheritance.
- If a computer is a member of multiple groups, the behavior is essentially accumulative. That is, all selected IDs will be included and uploaded in the shortest interval set.
See the How can I keep the same or specify different parameters for Event Collection for child groups? How does a computer behave if a member of multiple groups? topic for additional information.
Forcing Event submission
If you are testing, or just want to upload the data immediately, you can force the upload of the cloud.log file with the following command:
policypak cloud-push-logs
![]()
NOTE: This command can be run by a standard user. It does not require elevated or administrative rights to perform.
Reporting on Collected Events
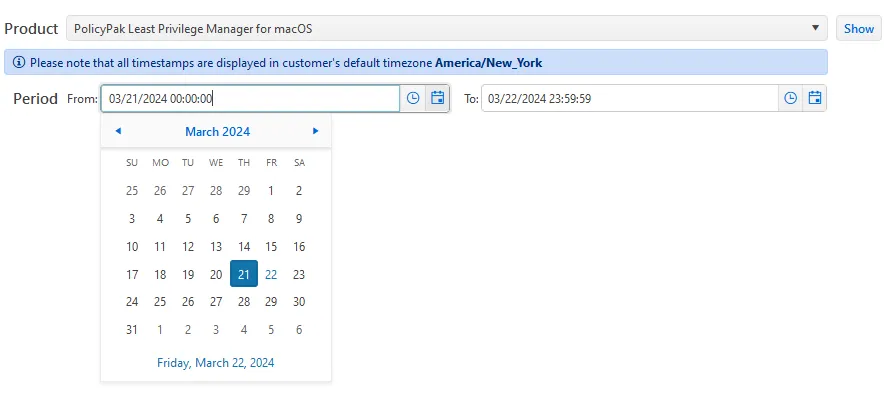
All the collected events can be accessed through the Computers (Collected Events) report on the Reports tab and selecting Endpoint Policy Manager Least Privilege Manager for macOS.

Next, configure the time period you want to report on. The default is the beginning of the day, but this can be altered to the desired start and stop time and date. Click Show to see the results.
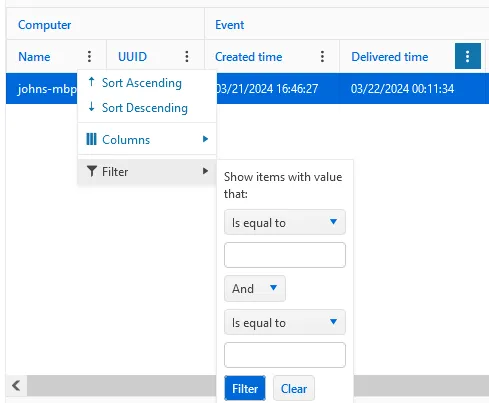
The results can be filtered to show only the desired information. For example, show only specific computers or only Elevation events. Every column can be filtered by clicking on the ellipsis within the column header.
For offline analysis, the report can be exported to either Excel or, if very large, CSV format. This can be done before or after filtering.
