How To deploy a TCP/IP Printer using Endpoint Policy Manager Remote Work Delivery Manager
Step 1 – Zip up the Printer setup files and store on a network share that is accessible to the users that need to have the printer installed.
For Example:

NOTE: This zip should contain the driver INF file for the printer to be installed.

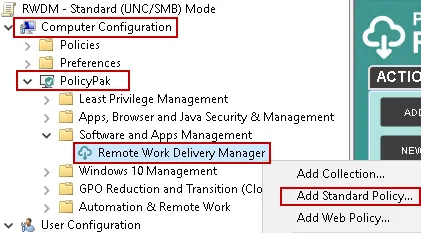
Step 2 – Using the Microsoft Group Policy Management Console (GPMC), create a new Netwrix Endpoint Policy Manager (formerly PolicyPak) RWDM Standard Policy on either the Computer side (using Switched-Mode), or the User side.
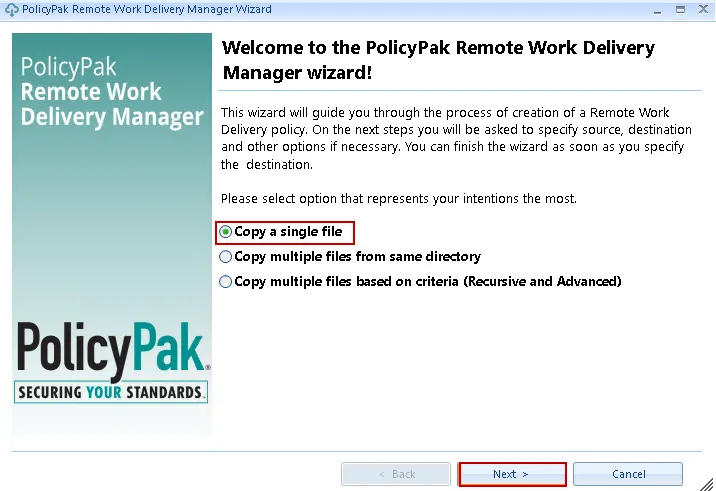
Step 3 – At the Welcome screen select Copy a single file, and click Next.
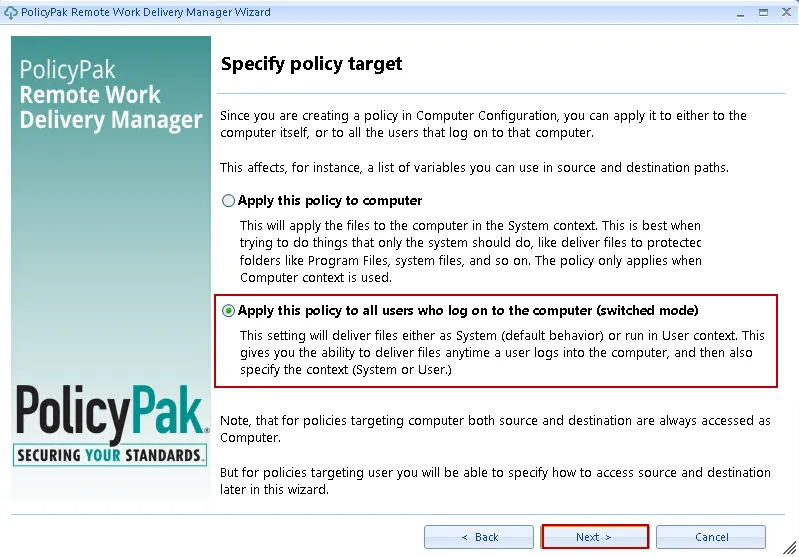
Step 4 – Select Apply this policy to all users who log on to the computer (switched mode), then click Next.
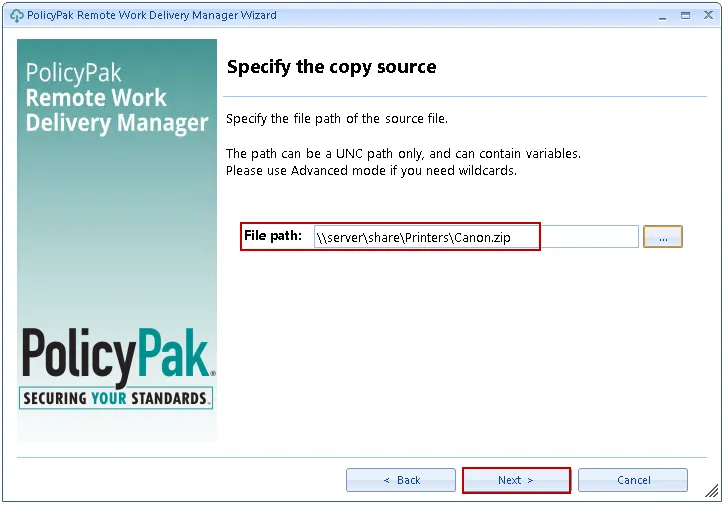
Step 5 – Enter the UNC path to the printer zip file from step 1 above, then click Next.
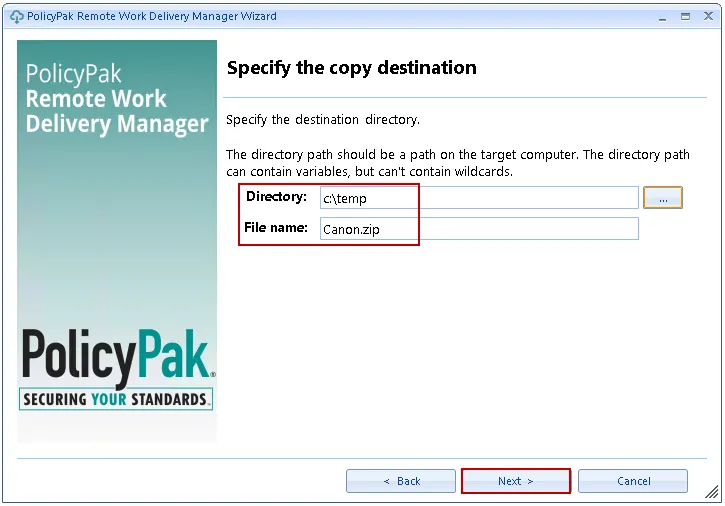
Step 6 – Specify the target folder on the endpoint(s) where you would like the zip to be downloaded to, provide the file name for the destination, then click Next.
NOTE: The target folder will be created if it does not exist
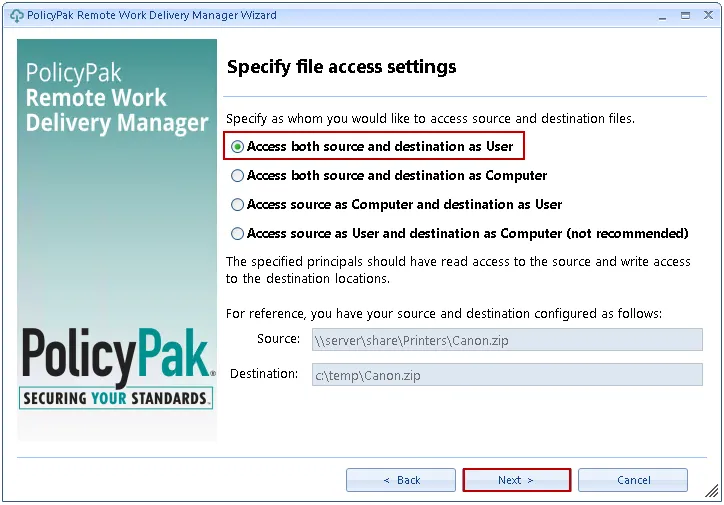
Step 7 – Accept the default values and click Next.
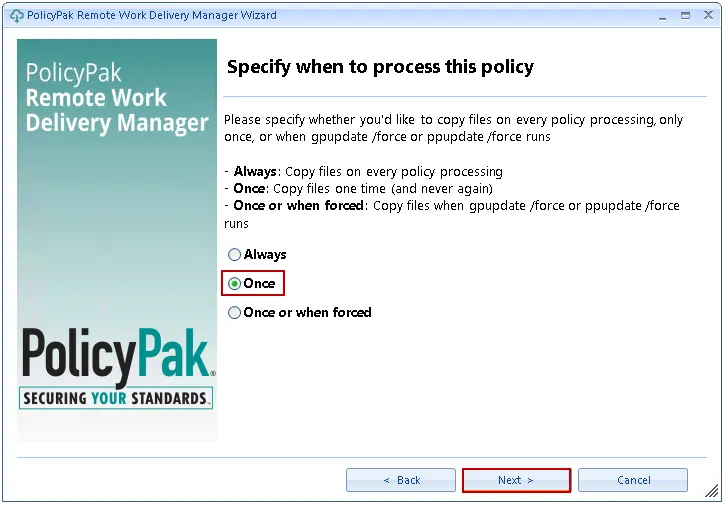
Step 8 – Select Once then click Next.
At the Post-copy actions screen select the Run PowerShell script, and Run process or script as user options, then add/edit the command lines below as needed to reflect what is needed for your specific printer model, then click Next.
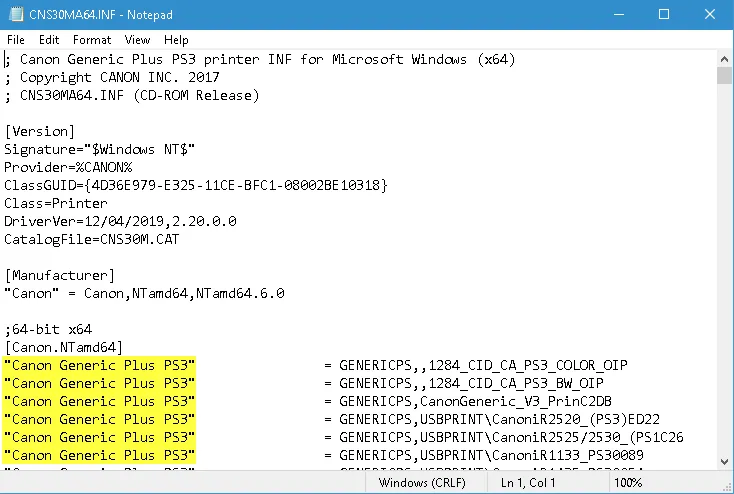
Expand-Archive -LiteralPath 'c:\temp\canon.zip' -DestinationPath C:\Temp pnputil.exe /a "C:\Temp\Canon\Driver\CNS30MA64.INF" Start-Sleep -s 10 Add-PrinterDriver -Name "Canon Generic Plus PS3" Add-PrinterPort -Name "IP Port" -PrinterHostAddress "192.168.1.27" Add-Printer -DriverName "Canon Generic Plus PS3" -Name "Canon Generic Plus PS3" -PortName "IP Port"
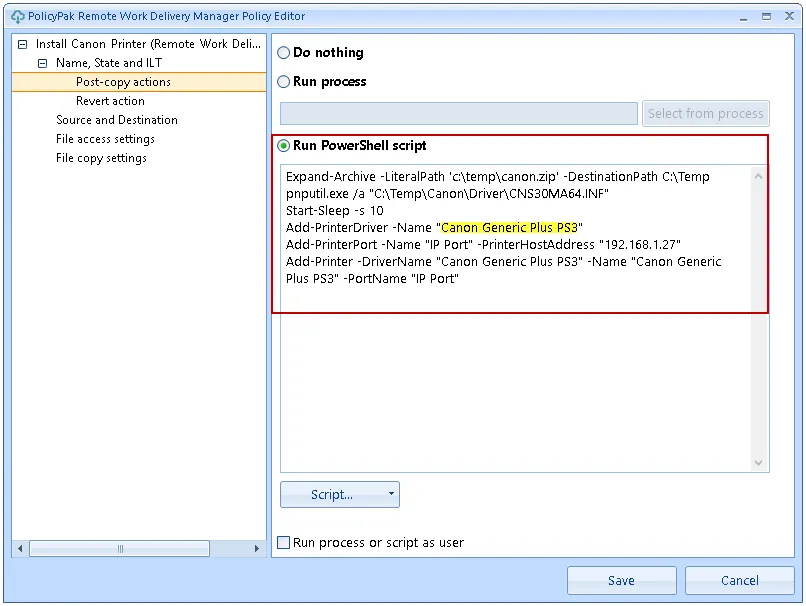
Important: The Add-PrinterDriver -Name section above the name specified (i.e., "Canon Generic Plus PS3" in this example) must match one of the names in the INF file!
Step 9 – Skip the Revert actions screen unless you wish to add a revert action.
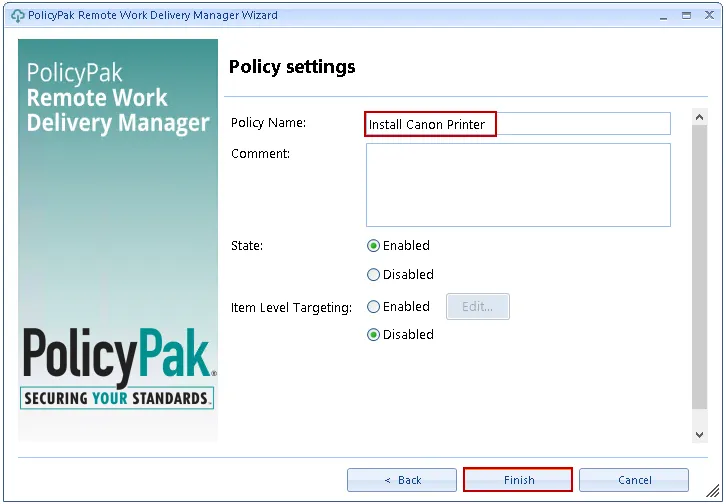
Step 10 – At the Policy settings screen give the policy a descriptive name, then click Finish.
Step 11 – Run GPUPDATE on an endpoint that receives this policy to test, then verify under Printers & Scanners that you see the printer installed.
NOTE: The printer may take around 30 seconds to install.
