What must I send to Endpoint Policy Manager support in order to get the FASTEST support?
Follow theses steps in order for support to troubleshoot most issues.
Step 1 – Reproduce the issue on the latest Client Side Extension (CSE). Support only tests concerns and issues on the latest CSE. If you haven’t verified your problem exists with the latest CSE (and latest MMC or with Cloud), ensure to download the latest CSE before opening a support ticket. See the Using Rings to Test and Update the Endpoint Policy Manager Client-Side Extension and/or Cloud Client (And How to Stay Supported) topic for additional information.
Step 2 – After the problem is reproduced on the latest CSE, open a support ticket and register for an account if necessary. Be sure to choose Endpoint Policy Manager to ensure your case is routed properly.
Step 3 – Provide a detailed problem statement, including screenshots. Include the following in the problem statement:
- A description of the problem, and what are you trying to do
- Explain if you are using Endpoint Policy Manager alongside Group Policy, Cloud or with an MDM service
- Specific screenshots of what you did in Endpoint Policy Manager
- The result on the endpoint
Step 4 – Provide the logs from the affected machine.
CAUTION: Support cannot assist without the correctly generated logs. See the Gathering and Uploading Logs topic on how to gather logs properly and use the ticket ID generated in Step 2.
Gathering and Uploading Logs
This section provides a summary of the steps for gathering and uploading logs. See the Gathering and Uploading Logs topic for additional information.
NOTE: If you do not see the GUI version of pplogs, you are not using the latest CSE. Endpoint Policy Manager support only accepts logs from machines with the latest CSE and latest pplogs zip files.
Follow the steps for gathering and uploading logs.
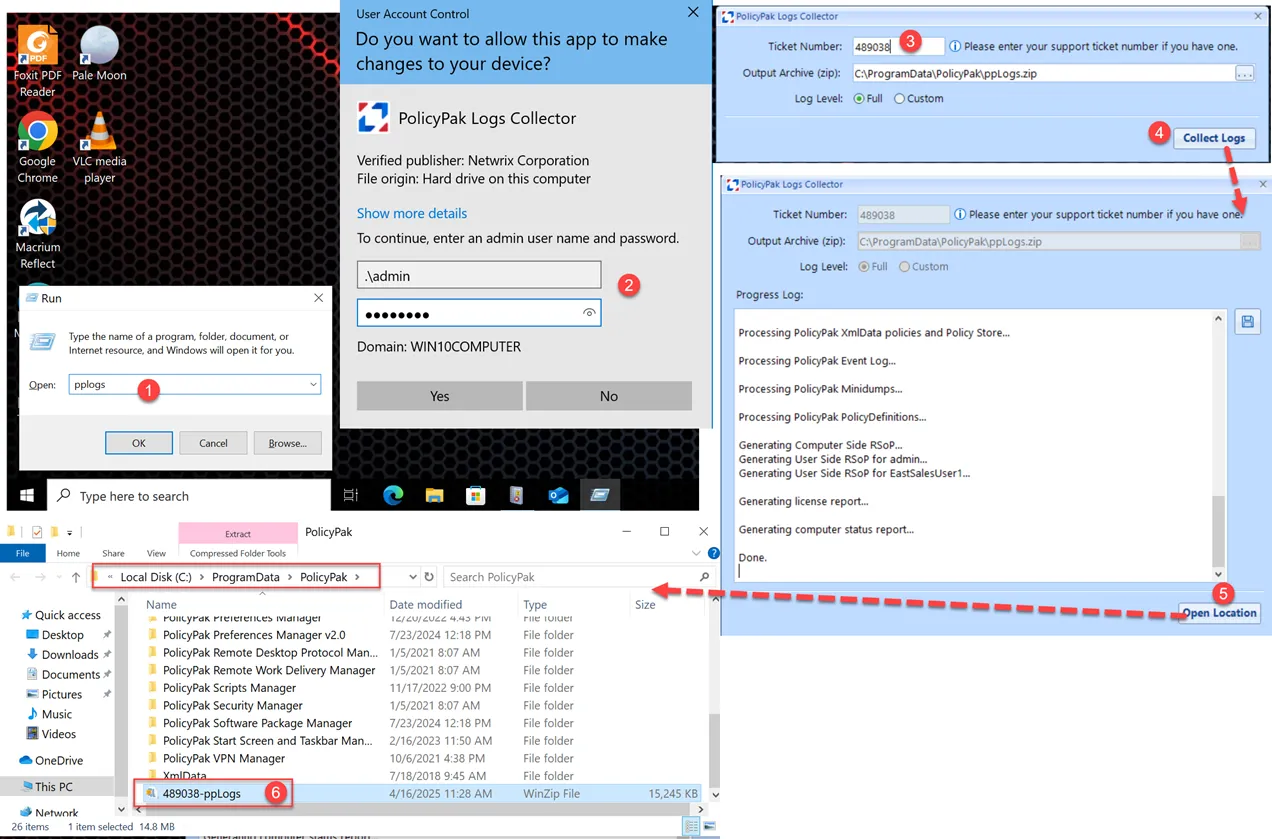
Step 1 – On an affected endpoint, run pplogs tool with local admin rights.
Step 2 – Create a support ticket before gathering the logs.
Step 3 – Collect the logs.
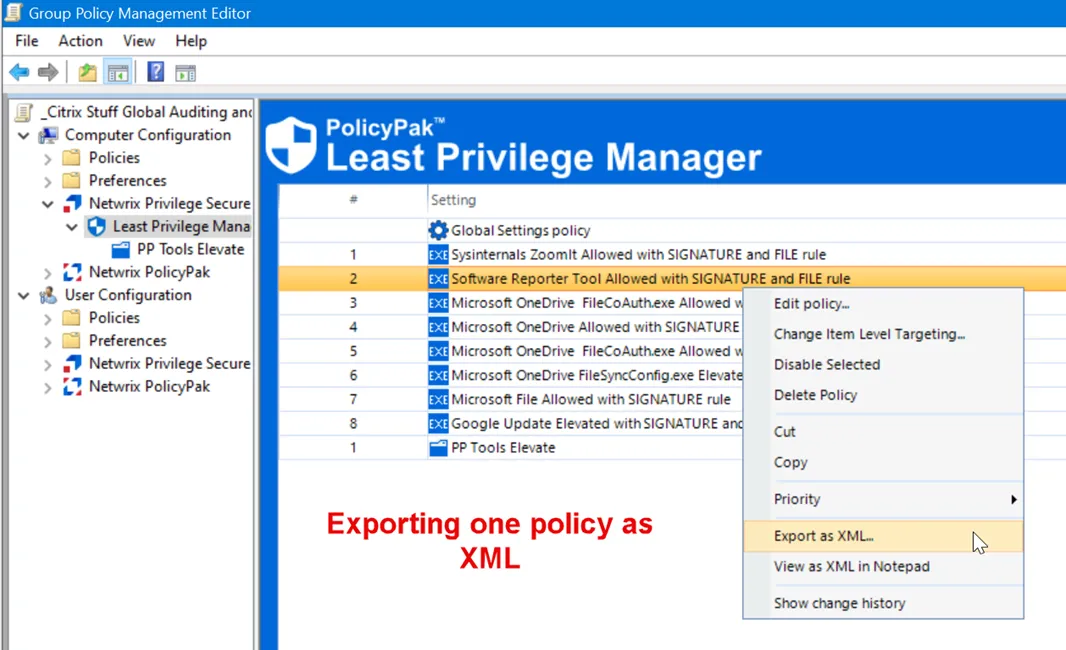
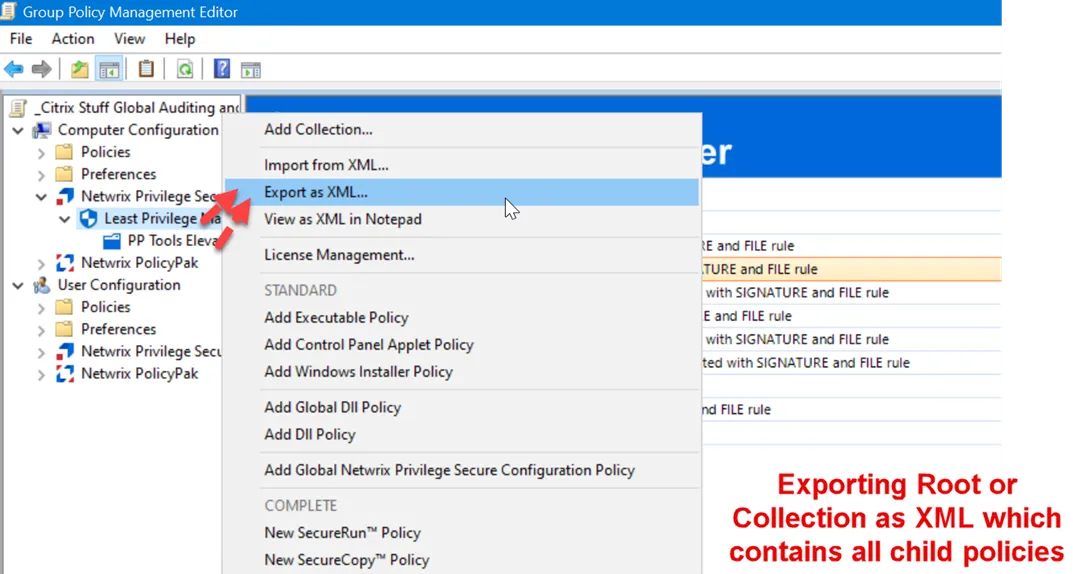
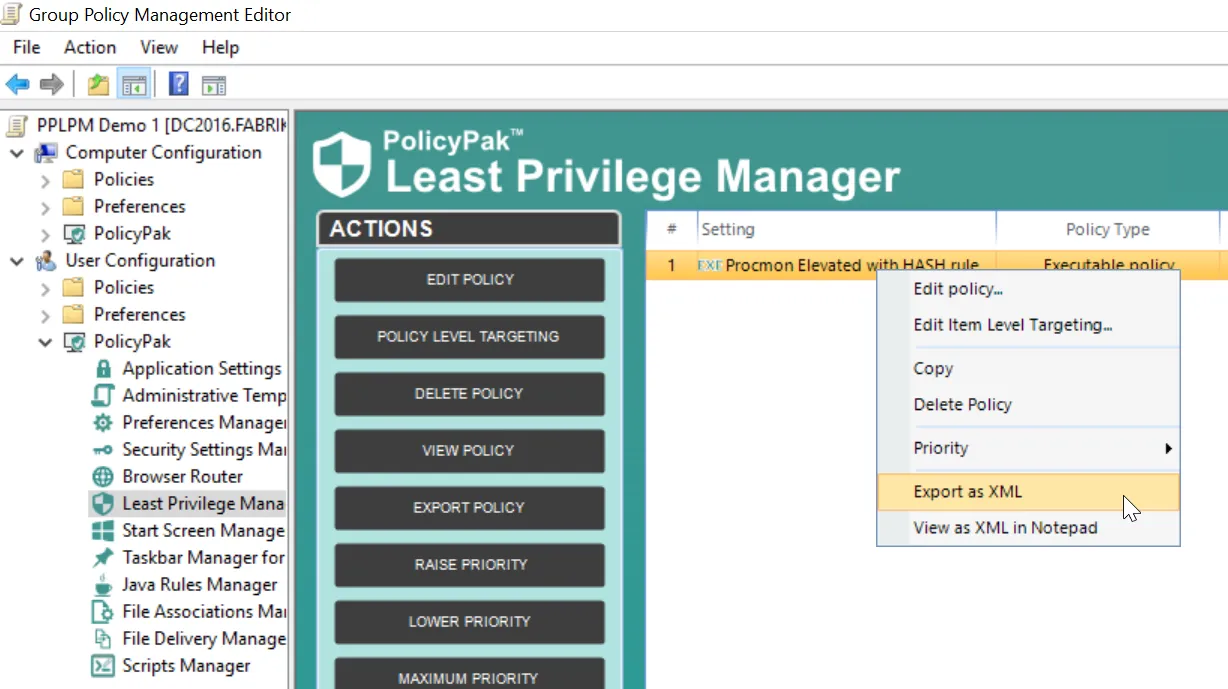
Step 4 – If using the Group Policy Method, export policies and/or collections as XML files.
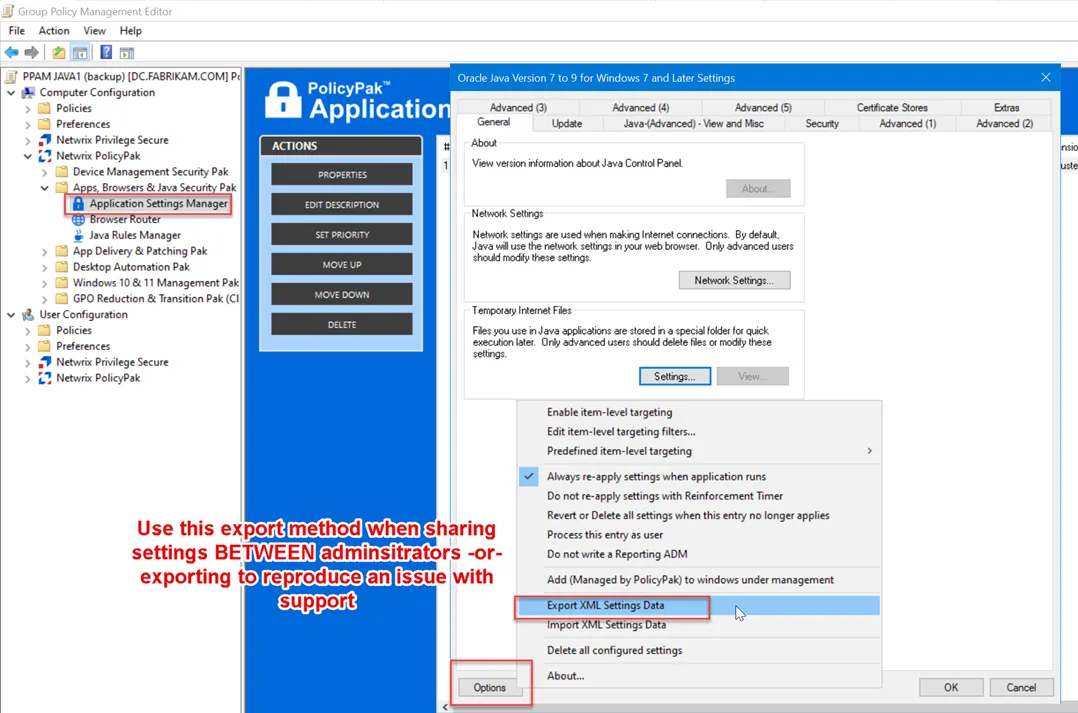
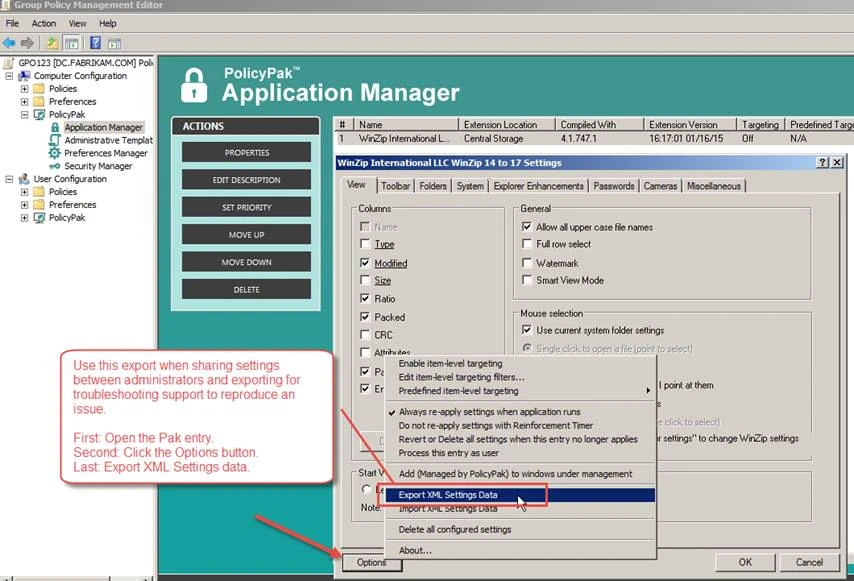
Step 5 – If using Application Manager, export the XML settings data of the AppSet.
Step 6 – Upload logs and exported XML files using the Netwrix ticketing portal.
Gathering and uploading the logs is now complete. Support will use this XML file to reproduce the issue and work on a resolution.
Troubleshooting Previous Versions of Endpoint Policy Manager
Use these steps for gathering and uploading logs for versions previous to Endpoint Policy Manager v25.4.
Follow theses steps in order for support to troubleshoot most issues.
NOTE:
- Everything around your case involves the SRX number. Support case emails have SRX IDs like SRX01234. It is very important to include this SRX case number on the subject line.
- In these examples, you will also collect log files and rename them and pre-pend file names with the case number as shown in the examples below.
- Do not attach the log files to your email. Log files are uploaded to our support system. The URL is provided when you initiate a case.
Step 1 – Provide a detailed problem statement, including screenshots. Include the following in the problem statement:
- The PAK name and compiled with value.
- The Client Side Extension (CSE) version you are using.
- A description of the issue, where the GPO is (user or computer side) and what it is doing and where it is linked.
Step 2 – Specific screenshots of:
- What you did in Netwrix Endpoint Policy Manager (formerly PolicyPak)
- The result on the endpoint
Step 3 – Your PPLOGS from an affected machine.
CAUTION: Support cannot assist without the correctly generated logs. See the Gathering and Uploading Logs topic on how to gather logs properly.
Gathering and Uploading Logs
This section provides a summary of the steps for gathering and uploading logs. See the Gathering and Uploading Logs topic for additional information.
Step 1 – On an affected endpoint, run PPLogs twice.
Example how to:
- Use an admin command prompt and run
PPLOGS. Rename toSRX01234-ppLogs-as-Admin.zip - Use a normal command prompt and run
PPLOGS. Rename toSRX01234-ppLogs-as-USER.zip

Step 2 – Run GPRESULT to get the following results:
- Use an admin command prompt and run
GPRESULT /h SRX01234-gpresult-as-ADMIN.html - Use a normal command prompt and run
GPRESULT /h SRX01234-gpresult-as-USER.html
Step 3 – Export the XML settings:
- Your export of any relevant settings
- Most Endpoint Policy Manager settings are simply right-click > Export as XML. See the examples below for exporting as a collection and an individual policy.

Step 4 – For Endpoint Policy Manager Application Manager (most common) this is what you want to do: There are two ways to export settings but the following is the type of export the support team requires. Select the Options button within the Pak, then select Export XML Settings Data.
Step 5 – Rename your XML file(s) to not only include the SRX number but to also contain hints as to their content. For example:
SRX01234-PPAM-Export.XMLfor App ManagerSRX01234-PPBR.Export.XMLfor Browser RouterSRX01234-PPLPM.Export.XMLfor Least Privilege Manager
Step 6 – Now you need to wrap up all the items you collected:
- ZIP them up, and name the file for example:
SRX-01234.zip(using your SRX number and not 1234)
Step 7 – Finally, upload them to support with the link you get in the bounceback.
Do not attach in your email, they will be automatically dumped by the email system.
SRX01234-ppLogs-as-Admin.zipSRX01234-ppLogs-as-USER.zipSRX01234-gpresult-as-ADMIN.htmlSRX01234-gpresult-as-USER.html- XMLs, like:
SRX01234-PPAM-Export.XML,SRX01234-PPBR.Export.XML,SRX01234-PPLPM.Export.XML