How to use ProcMon to track changes over time to specific registry keys
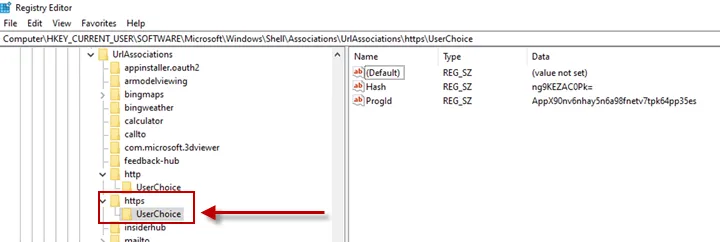
For this example, we will be monitoring the following Registry Key and values.
Step 1 – Download and install ProcMon from:
https://docs.microsoft.com/en-us/sysinternals/downloads/procmon
Step 2 – Run ProcMon elevated.
Step 3 – Run Regedit (does not need to be run elevated).
Step 4 – Next, in the Regedit window go to the path you wish to monitor, highlight the desired path in the address bar and copy the text.

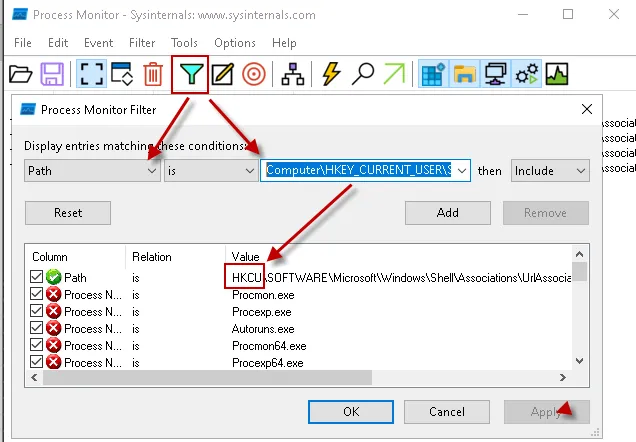
Step 5 – Back in ProcMon click on the filter icon, select the values "Path" and "is" as shown in the screenshot below, then paste in the registry path you saved to your clipboard earlier in step 4 above. Edit the path to correct for HKCU or HKLM (see note directly below), then click "Add", and then "Ok" to save and apply the filter.
NOTE: Edit the reg path and replace the text "Computer\HKEY_CURRENT_USER" with "HKCU", or
"Computer\HKEY_LOCAL_MACHINE" with "HKLM" as needed. See screenshots below for examples.

Step 6 – Test that the filter is working by click clear results in ProcMon, then selecting the reg key in regedit window, you should see read events in the ProcMon capture window.
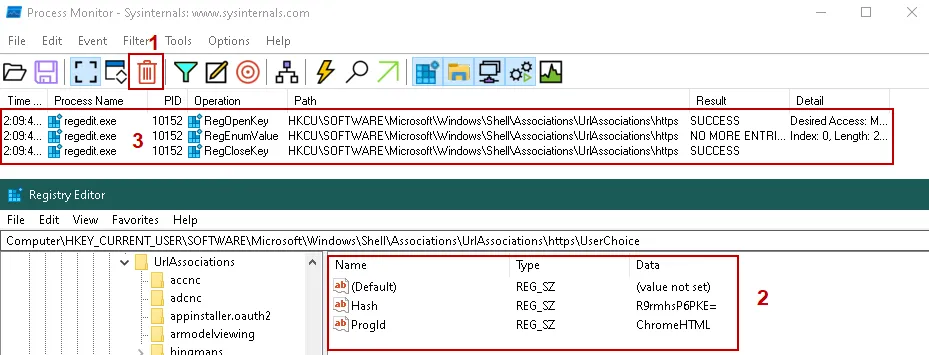
Note for this example I used the following path:
HKCU\SOFTWARE\Microsoft\Windows\Shell\Associations\UrlAssociations\https\UserChoice
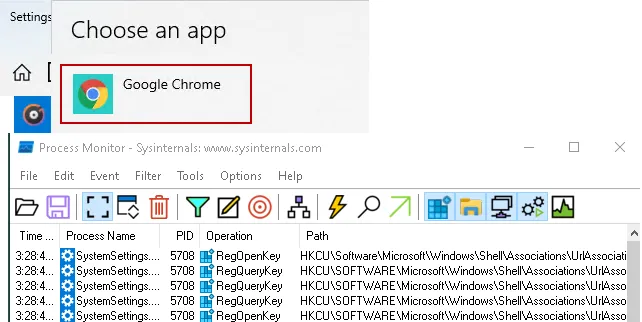
Alternatively, you can test that the filter is working by making a change using the Windows System Preferences.
Default Browser Selection via System Preferences.
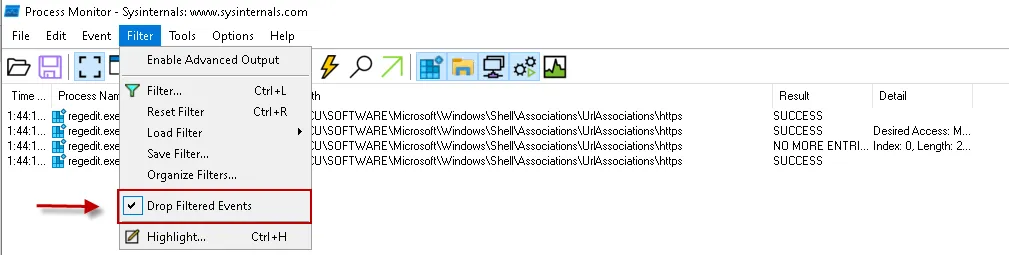
Step 7 – Next, and most importantly enable the "Drop Filtered Events" option on the Filter menu.
Step 8 – Now all that is left, is to wait until the issue reoccurs.
Step 9 – Once it does, whether it's 6 hours, 24 hours, or days later you will need to collect the Netwrix Endpoint Policy Manager (formerly PolicyPak) logs (pplogs) by following the steps below, and then upload them to Endpoint Policy Manager Support.
GATHER PPLOGS: You're going to run PPLOGS from CMD TWICE, once as USER and once as ADMIN, give the
files a descriptive name, pplogs_as_user.zip, pplogs_as_admin.zip etc. Example screenshot:
https://www.screencast.com/t/Y988r1u7P5B
PLACE LOGS (and anything else gathered) into a SINGLE ZIP upload as SRXxxxx.ZIP to the SUPPORT INBOX on SHAREFILE: https://endpointpolicymanager.sharefile.com/share/getinfo/rc857a57f16b4d4b9
And remember to click the UPLOAD button!
Video KB:Gathering and Uploading Logs