Microsoft Azure
This section explores the integration of Endpoint Protector into your Azure environment. Although Endpoint Protector is not readily found in the Azure Marketplace; we will walk you through the process of acquiring the specialized Virtual Machine (VM) tailored for your Azure setup. From creating the Storage Account and Container to configuring the Disk and Virtual Machine, we have got your Azure deployment covered.
Launching VM for Azure Deployment
To have access to the Virtual Machine, contact your Endpoint Protector Representative and provide information such as the access keys to a Container specifically created for the Endpoint Protector Virtual Machine.
NOTE: We will upload the Endpoint Protector Virtual Machine to your Container as soon as possible. Once this step is done, we advise regenerating the access key.
Creating the Storage Account and Container
This part of the process is similar to creating any other Storage Account and Container on Azure. If you are already familiar with it or have created a dedicated Container already, proceed to the next steps.
To obtain the Azure Endpoint Protector Virtual Machine, you need to create a dedicated Storage account / Container, following these steps:
Step 1 – Open the Azure portal;
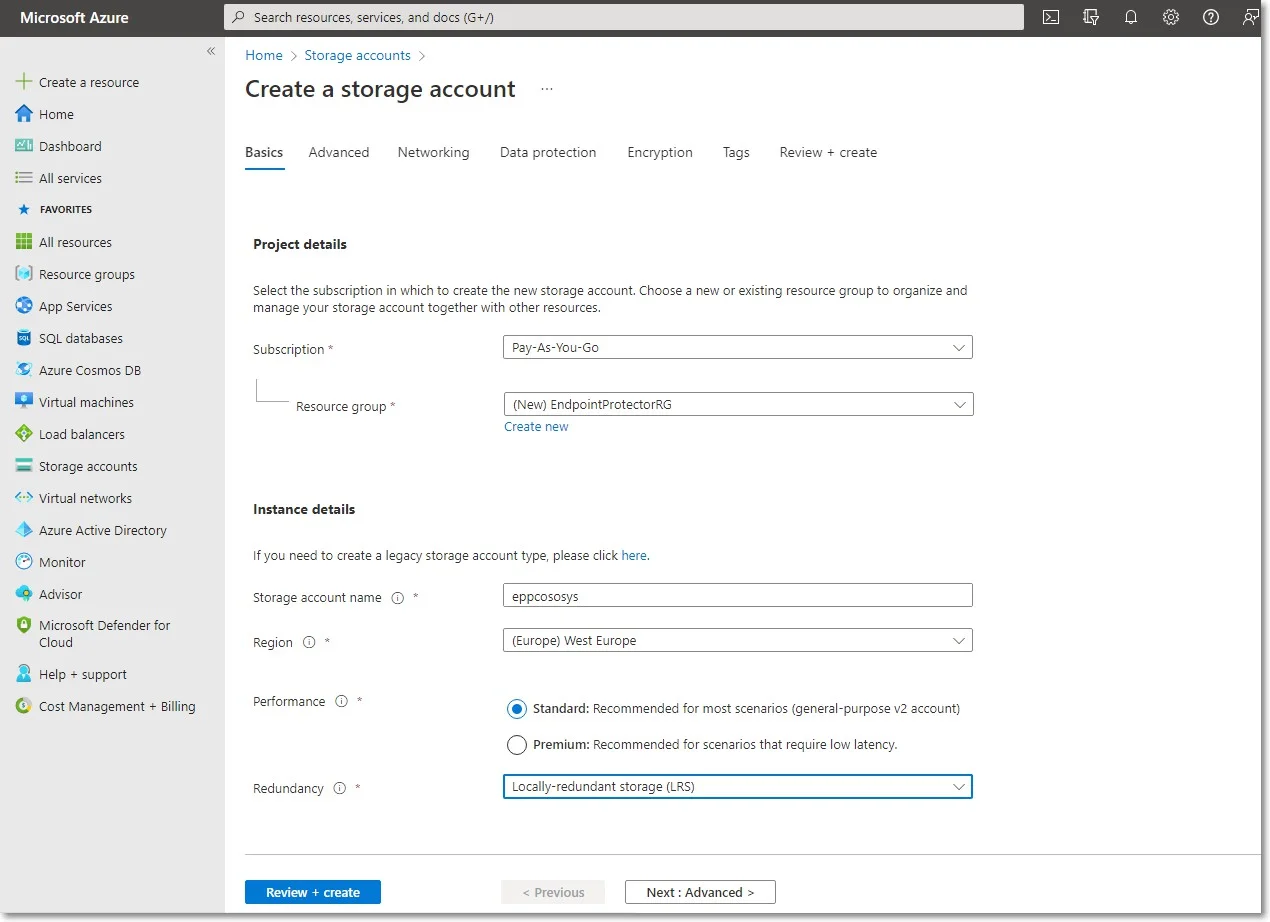
Step 2 – Go to Storage accounts and click +Create;
Step 3 – To create a storage account, provide the following information:
- Subscription – select Pay-As-You-Go
- Resource group – select a group from the available list or create a new one
- Storage account name – add a name for the storage account
- Region – select the nearest the location of the computers that will be protected by Endpoint Protector
- Performance – select Standard performance
- Redundancy – select Locally-redundant storage (LRS)
Step 4 – Click Review + create;
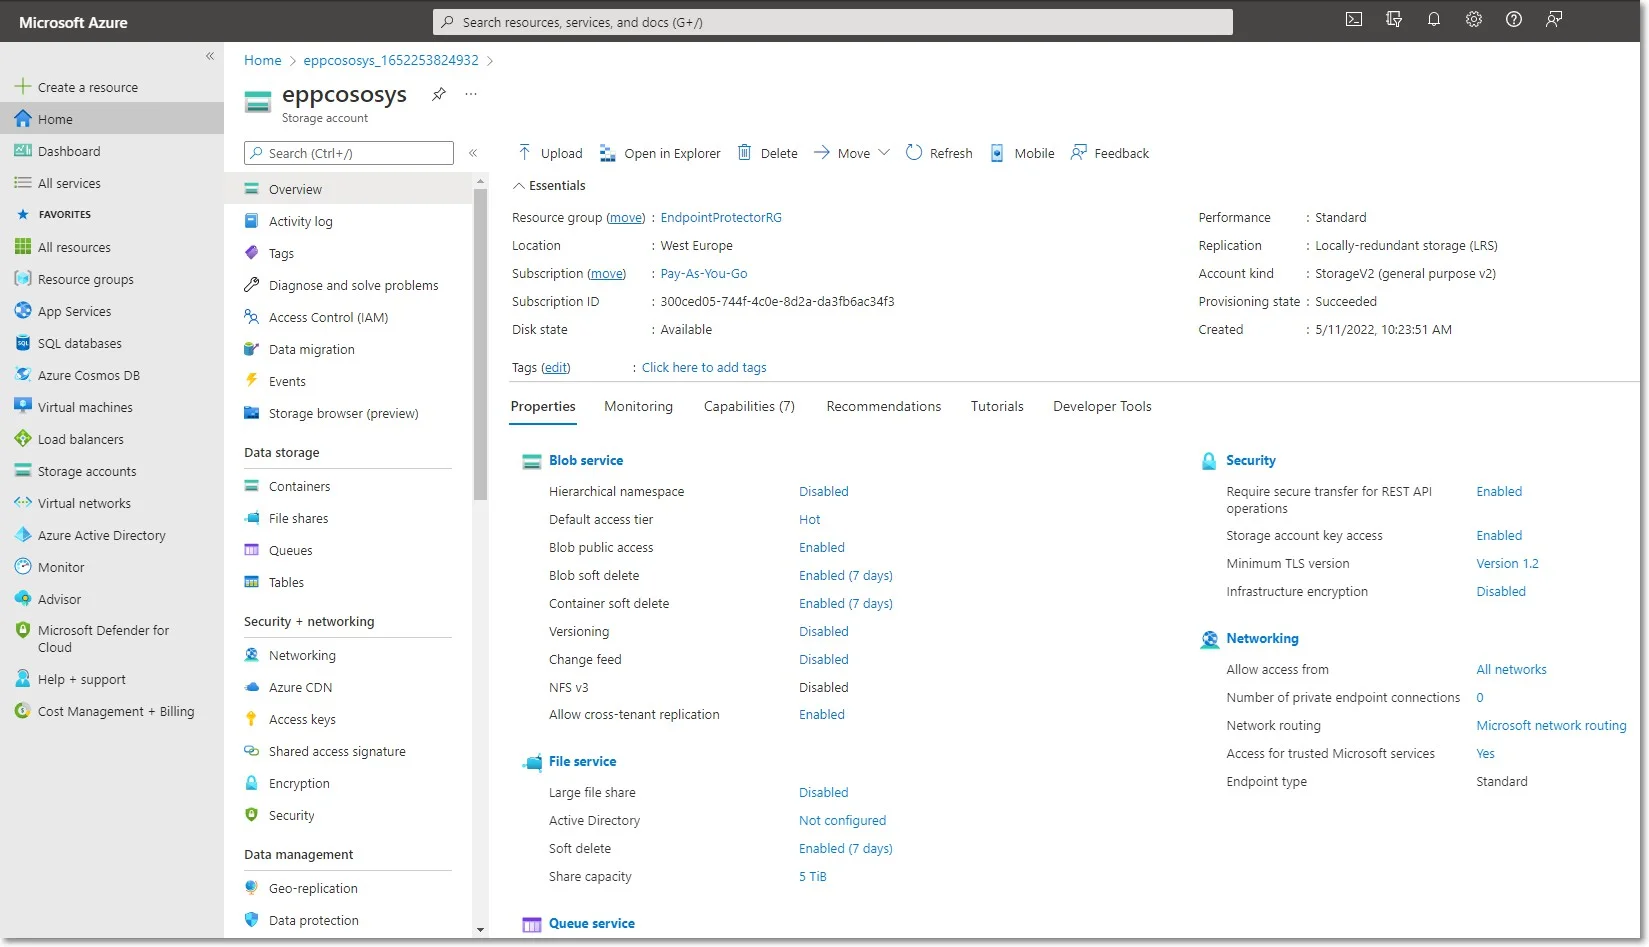
Step 5 – Go to Storage accounts and click the newly created account;
Step 6 – Go to Containers and click +Container;
Step 7 – Give the container the same name as you did to the storage account and for the Public access level select Container (anonymous read access for containers and blobs);
Step 8 – Select the container you created, and then click Shared access tokens.
CAUTION: Make sure you are creating a token on the container level, not the storage account!
Step 9 – Configure the SAS token with Create, Write and Add Permissions with a 5-day window to allow the Netwrix team to copy the image;
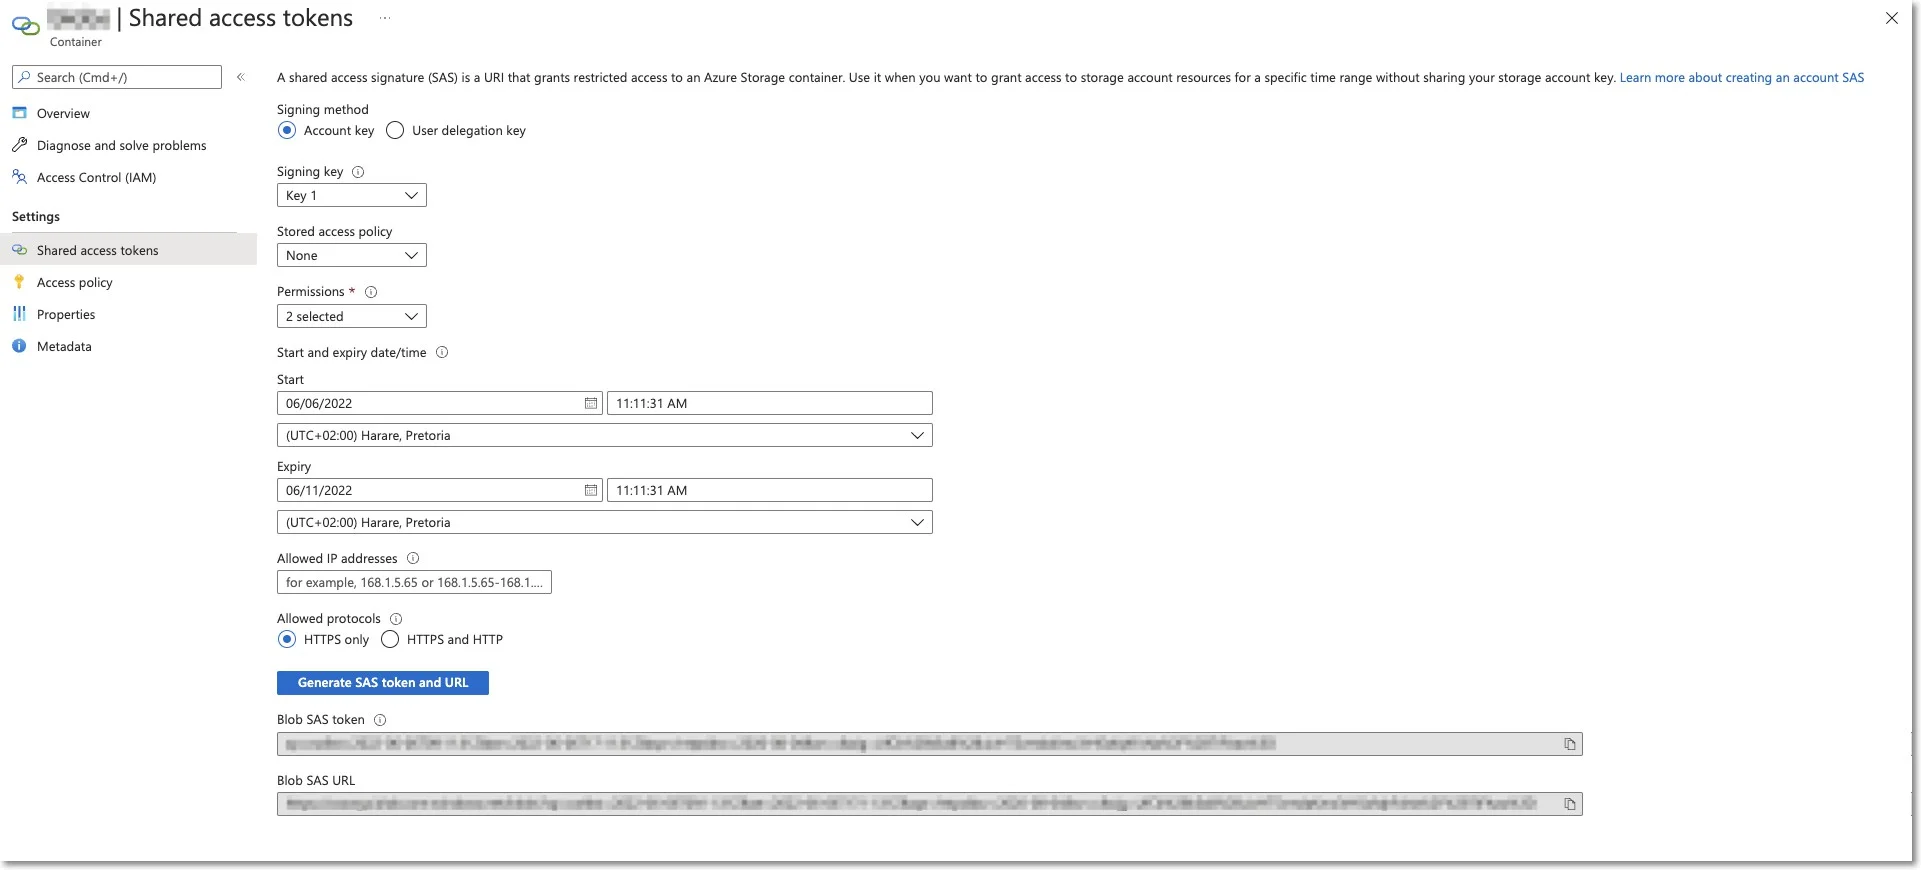
Step 10 – Copy the Blob SAS URL and send it to Netwrix.
NOTE: Netwrixwill copy the Endpoint Protector Virtual Machine to your storage account and notify you when the process is over.
Creating the Disk
Before starting the Endpoint Protector Virtual Machine, you have to prepare a disk and a Virtual Machine. To create a disk, follow these steps.
Step 1 – From the top right side of the page, go to All resources and click +Create;
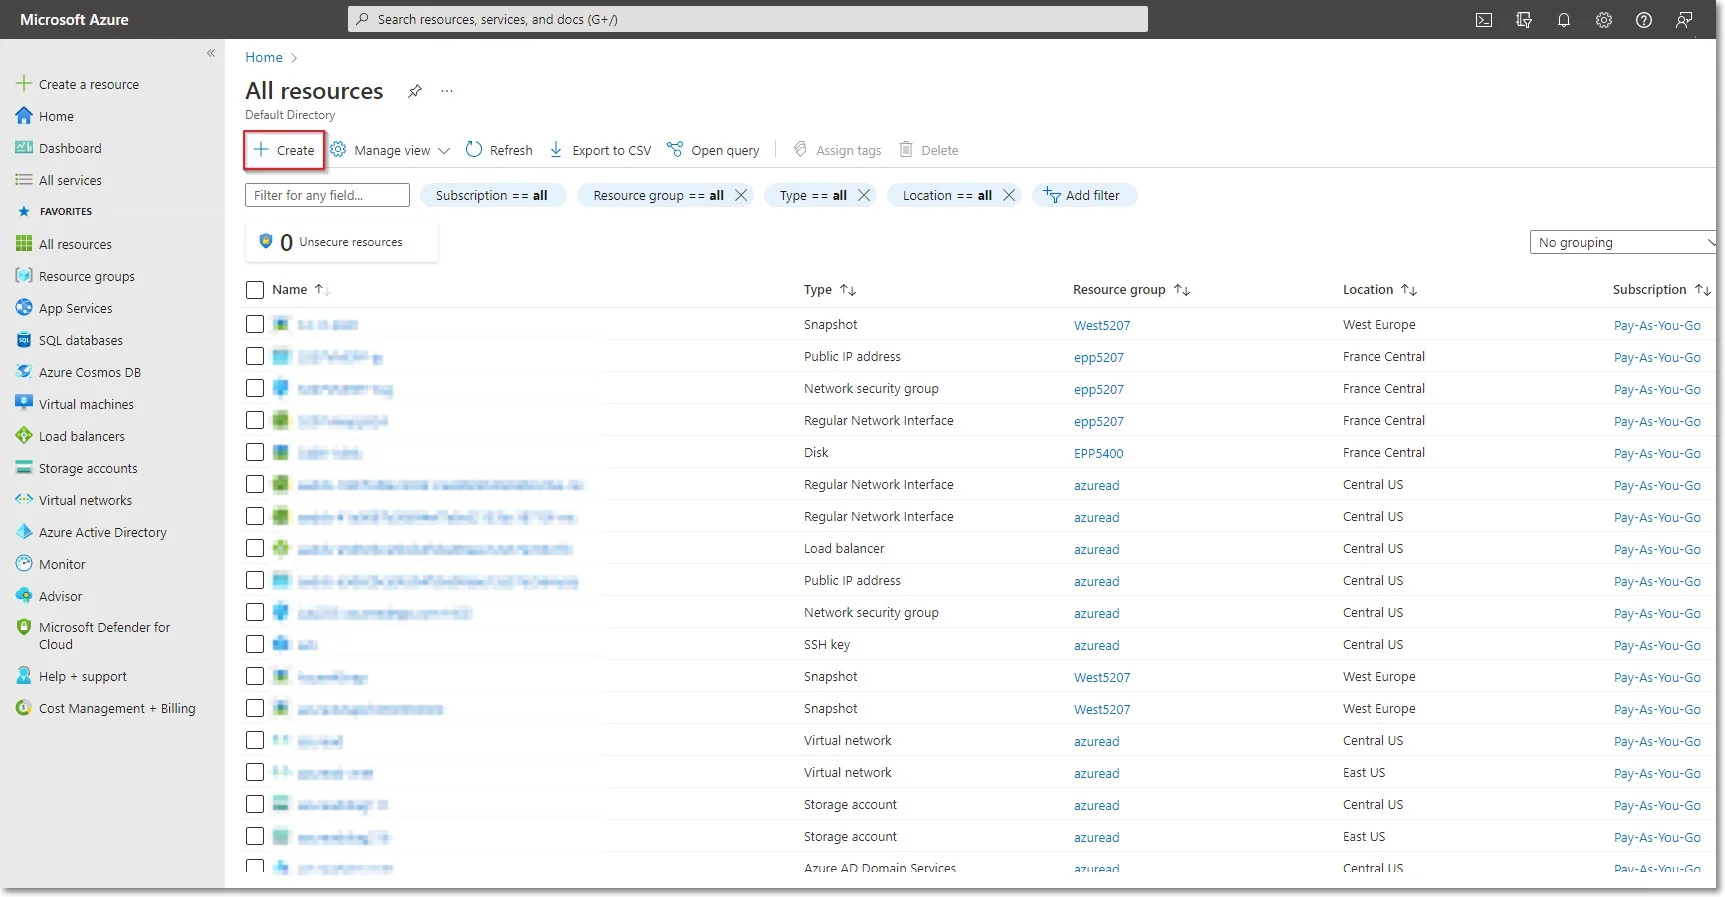
Step 2 – Search the marketplace for Managed Disks;
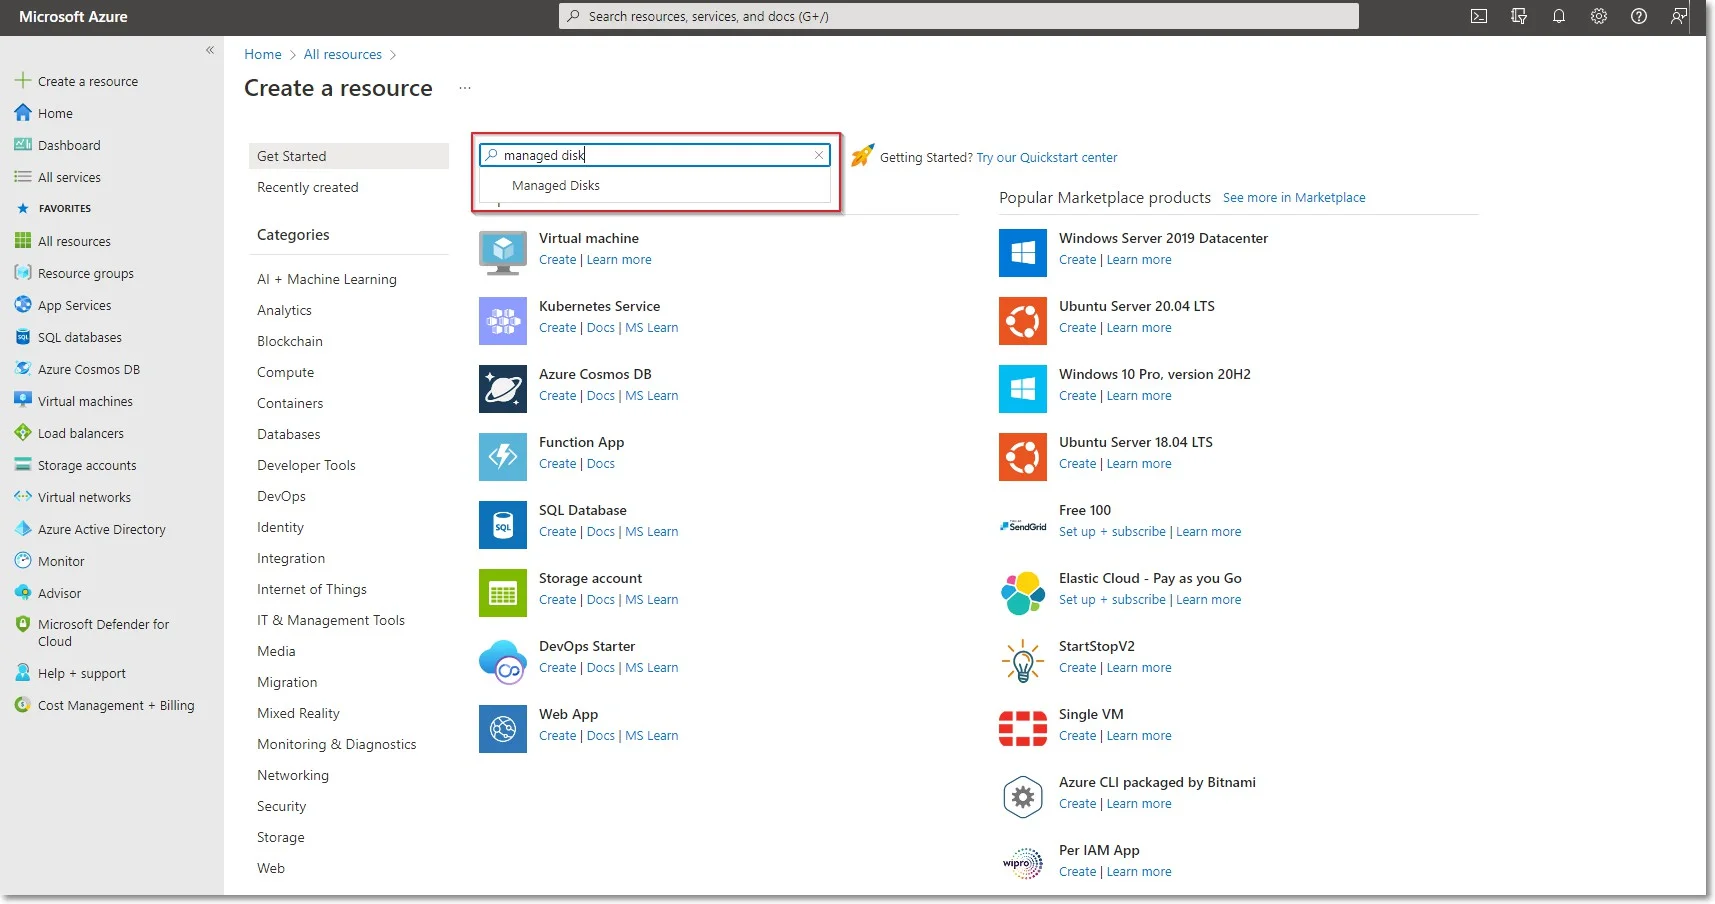
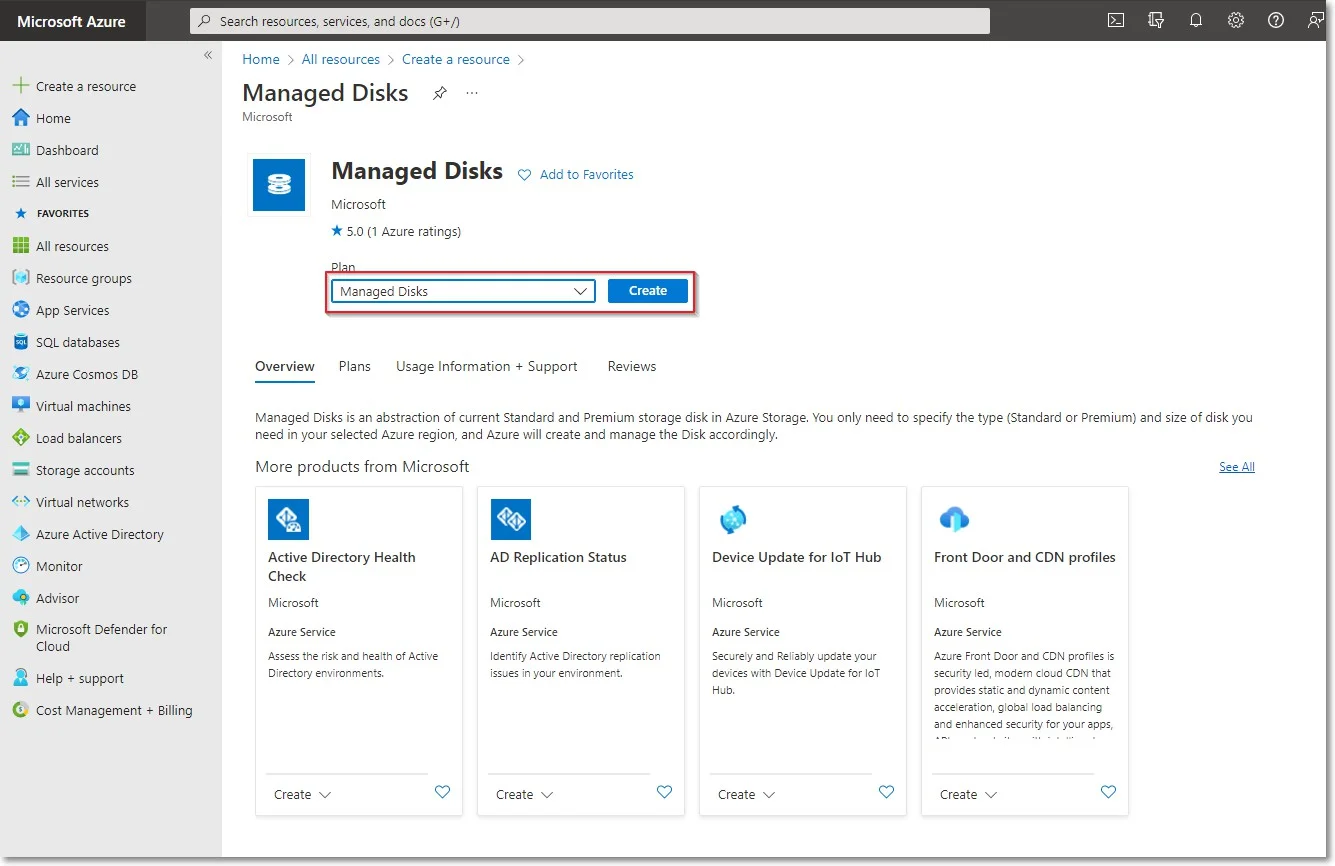
Step 3 – Go to Managed Disks and select Create;
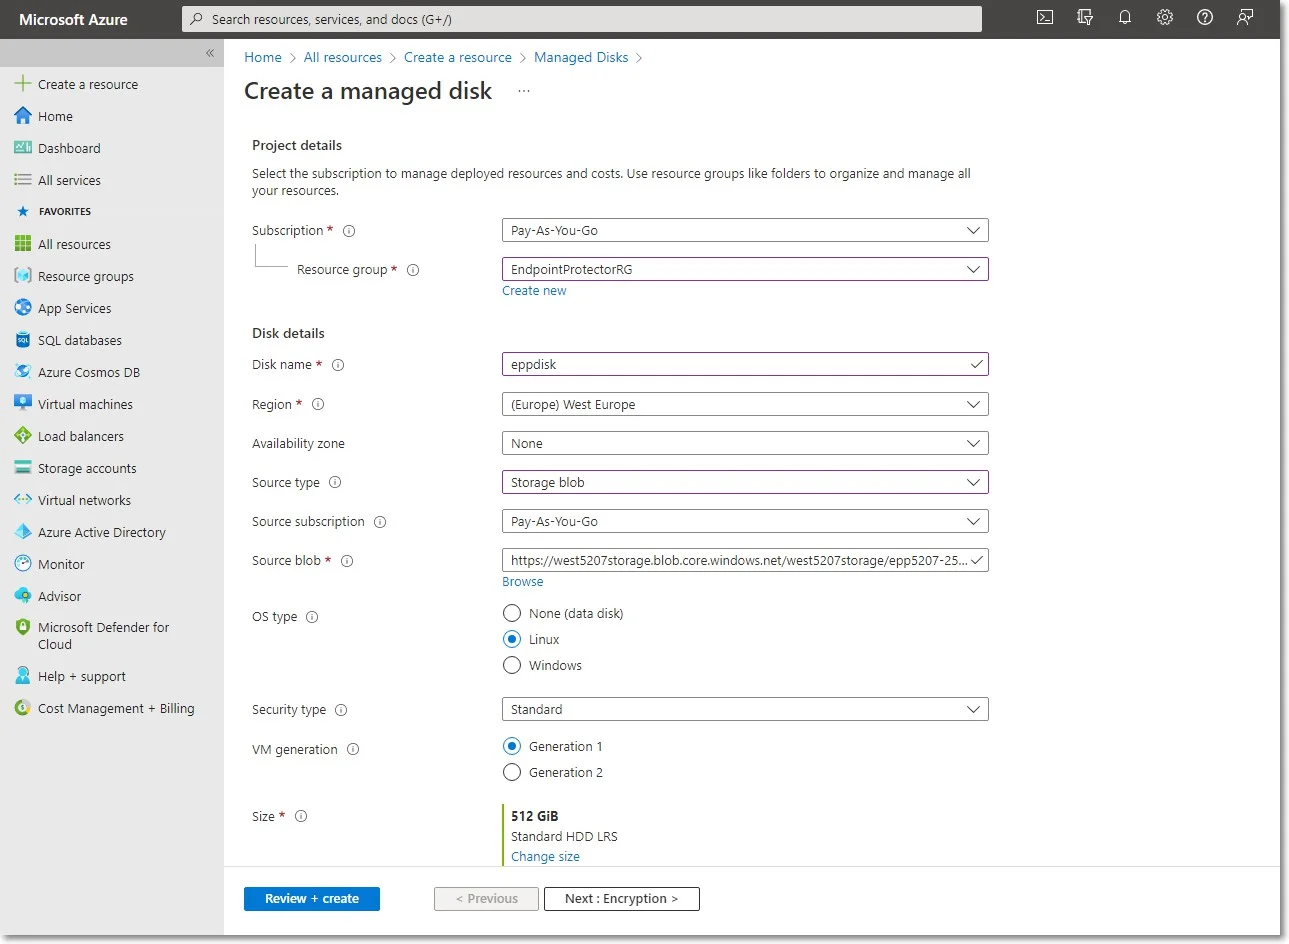
Step 4 – To create a managed disk, provide the following information
- Subscription - select Pay-As-You-Go
- Resource group – select the previously created one
- Disk name – add a name for the storage account
- Region – select the nearest the location of the computers that will be protected by Endpoint Protector
- Availability Zone
- Source type - select Storage Blob
- Source subscription - select Pay-As-You-Go
- Source blob – enter the URL received from Netwrix after providing the key and URL mentioned above.
- OS type - select Linux
- Security type – select Standard
- VM generation – select Generation 1
- Size - select 128 GB
Step 5 – Click Review + Create and wait for the Successfully created disk message to be displayed.
Creating the Virtual Machine
To start the Endpoint Protector Virtual Machine in Azure, follow these steps:
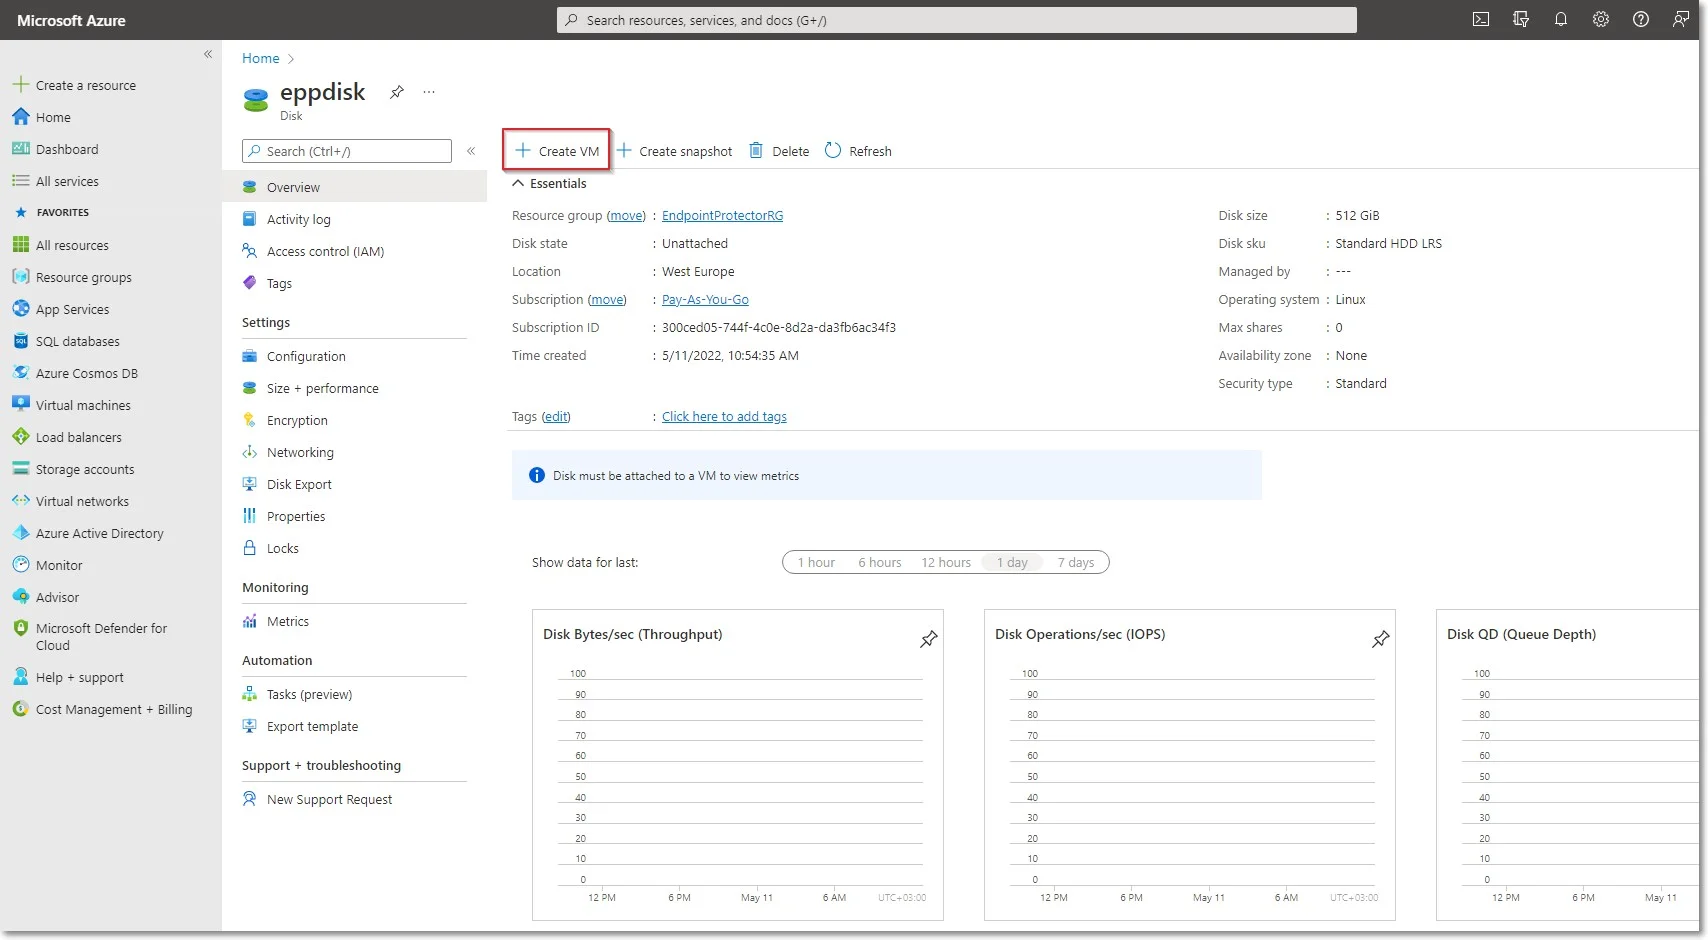
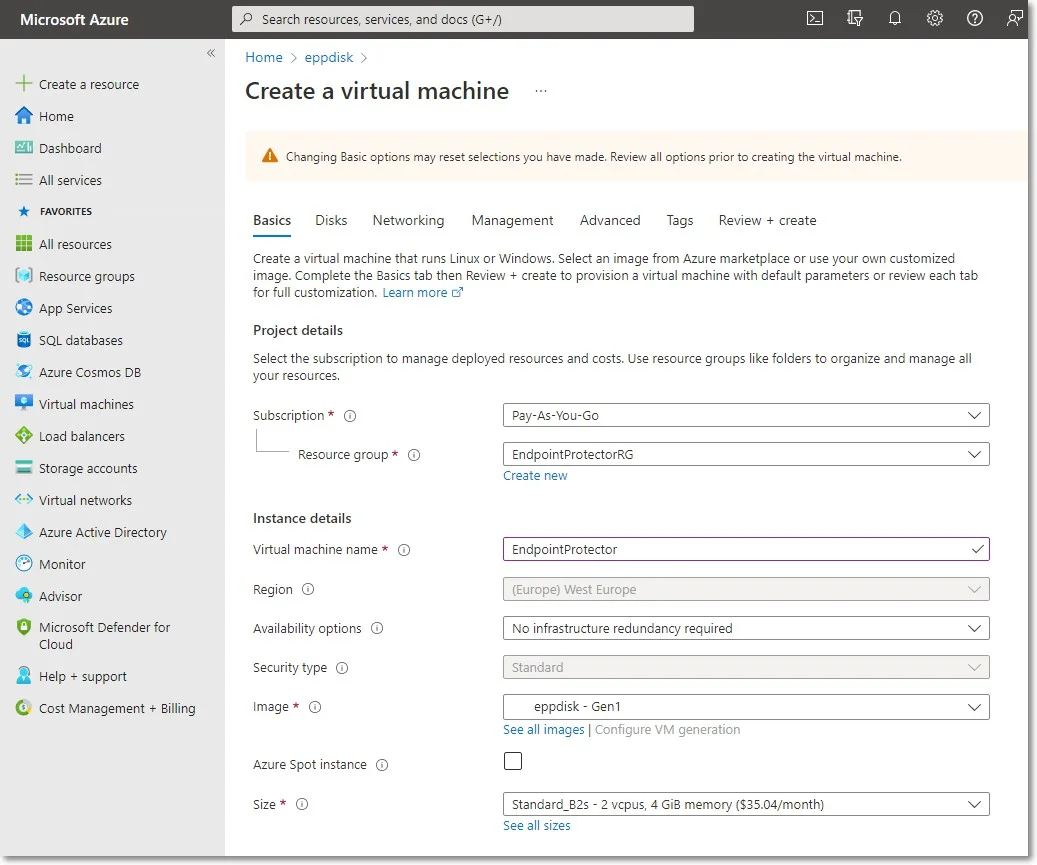
Step 6 – Go to the All resources page, select the newly created disks and then click Create VM
Step 7 – To create the Virtual Machine, provide the following information:
-
On the Basics tab, fill in the following:
- Subscription – select Pay-As-You-Go
- Resource group – select the group used when creating the disk
- Virtual Machine Name – enter a name for the Virtual Machine
- Size - select a virtual machine profile based closest to the recommended requirements for the disk file used

-
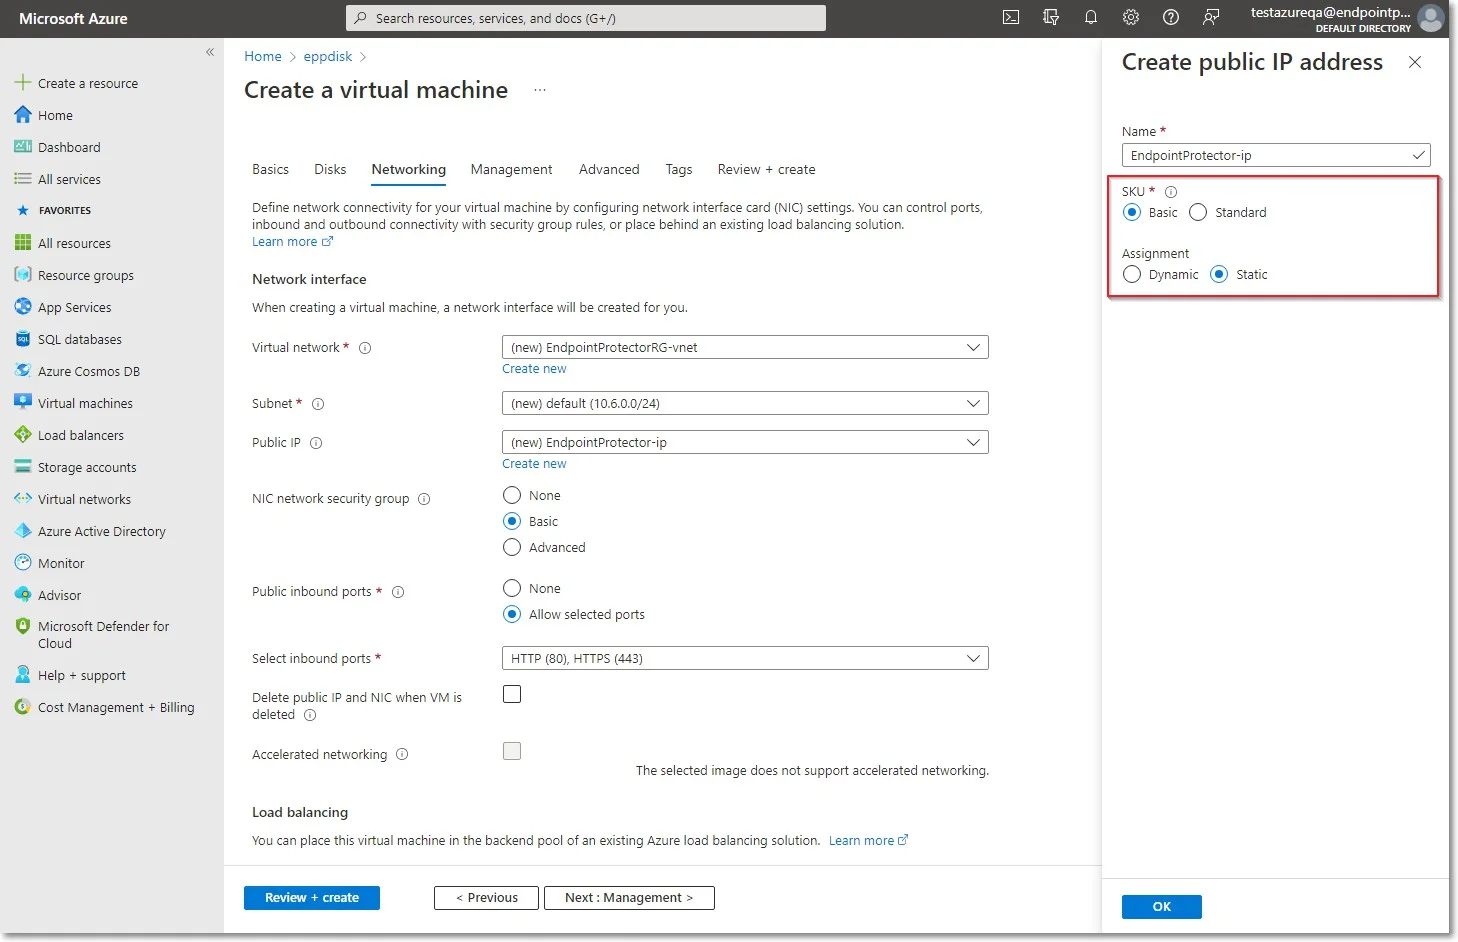
On the Networking tab, fill in the following:
- Public IP - click Create new and select Basic SKU and Static Assignment.
- Select inbound ports – add HTTP (80) and HTTPS (443)
Step 8 – Click Review + create and then Create.
NOTE: For Additional Features, we recommend selecting HDD instead of SSD to avoid unnecessary payments for an unused SSD attached to the Virtual Machine.

Step 9 – Once the deployment has finished, go to Virtual Machines on the right side and select the Endpoint Protector image.
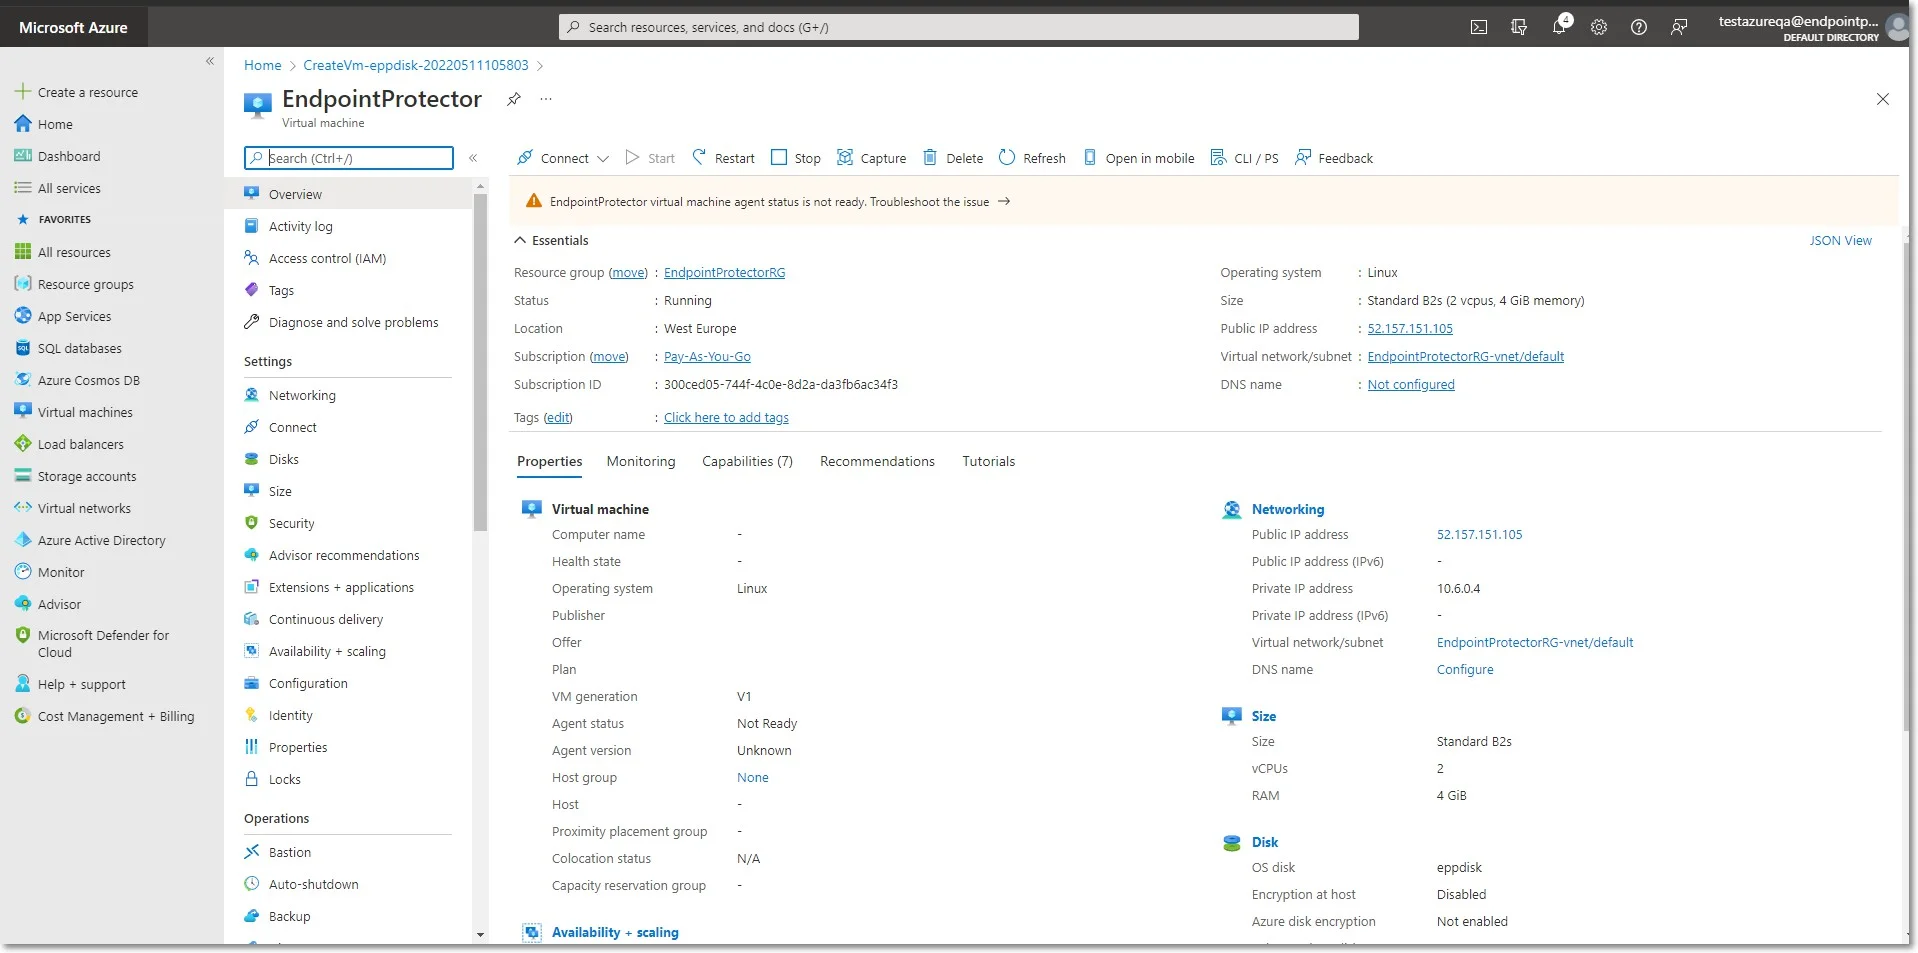
Step 10 – Open a web browser and connect to the Public IP address assigned to the Endpoint Protector image.
Creating the Virtual Machine
To start the Endpoint Protector Virtual Machine in Azure, follow these steps:
Step 1 – Go to the All resources page, select the newly created disks and then click Create VM
Step 2 – To create the Virtual Machine, provide the following information:
-
On the Basics tab, fill in the following:
- Subscription – select Pay-As-You-Go
- Resource group – select the group used when creating the disk
- Virtual Machine Name – enter a name for the Virtual Machine
- Size - select a virtual machine profile based closest to the recommended requirements for the disk file used
-
On the Networking tab, fill in the following:
- Public IP - click Create new and select Basic SKU and Static Assignment.
- Select inbound ports – add HTTP (80) and HTTPS (443)
Step 3 – Click Review + create and then Create.
NOTE: For Additional Features, we recommend selecting HDD instead of SSD to avoid unnecessary payments for an unused SSD attached to the Virtual Machine.
Step 4 – Once the deployment has finished, go to Virtual Machines on the right side and select the Endpoint Protector image.
Step 5 – Open a web browser and connect to the Public IP address assigned to the Endpoint Protector image.