System Settings
From this section, you can manage general settings that apply to the entire Endpoint Protector system. Some of these settings were pre-configured during the initial setup through the Endpoint Protector Configuration Wizard. You can adjust these settings to customize system behavior, security protocols, user access, and integrations to meet your organization’s needs.
Department Usage
Select an option to grant access for clients based on the Department Code. You can also view the Default Department code - defdep.
NOTE: See the System Settings topic for additional information.

Session Settings
You can modify the following session timeout settings:
- Session Timeout – set the amount of time the user is inactive until the session expires between 5 and 60 minutes
- Timeout counter – set the amount of time for the session timeout countdown between 5 seconds and Session Timeout minus one minute
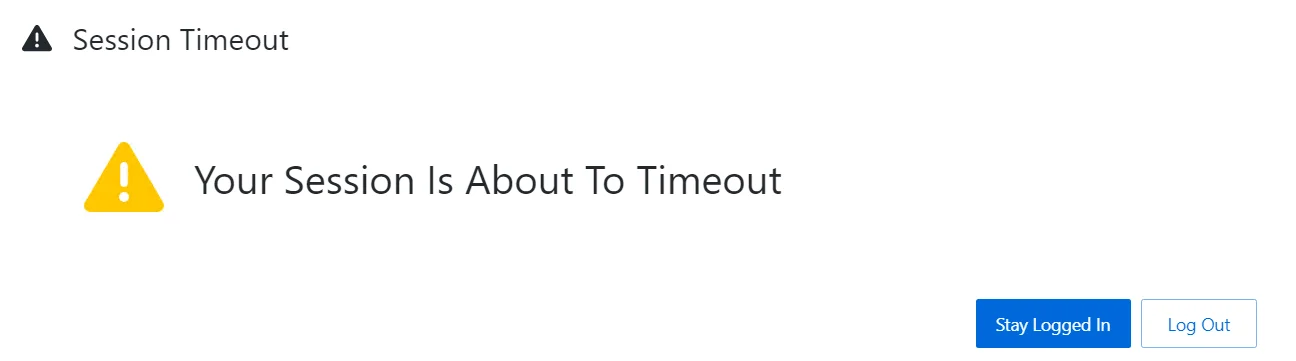
Example: If you define the Session Timeout to 5 minutes and the Timeout counter to 60 seconds, then after 4 minutes of inactivity you will be notified by the pop-up window that in 60 seconds you will be logged out.

If you remain idle for the defined amount of time, then Endpoint Protector stops responding and displays a message that indicates the session will expire in the predefined countdown.
You can choose to log out or continue your session, resetting the session timeout interval.
Endpoint Protector Rights Functionality
Set functionality rights for computer, user, or both, in which case you can prioritize user rights or computer rights.

Smart Groups
Manage settings related to Smart Groups, Default Groups for Computers or Users.
NOTE: Smart Groups are dynamic groups for which membership can be defined based on element name pattern.
- Enable Smart Groups – when this setting is disabled, it will convert Smart Groups to regular groups with no entities assigned and will remove the Default Group for Computers and the Default Group for Users.
- Enable Default Group for Computers – this will create a default group for computers containing all computers that are not part of a Smart Group.
NOTE: By disabling this setting, you will delete the Default Group for Computers.
- Enable Default Group for Users – this will create a default group for users containing all users that are not part of a Smart Group.
NOTE: By disabling this setting, you will delete the Default Group for Users.

Client Update Mechanism
Configure the client update settings to optimize update performance by specifying a custom hostname and port.
- Use custom hostname: Enter a custom hostname to tailor the client update URL as needed.
- Use custom port: Specify a custom port for generating the client update download link, instead of using the default port 443.
NOTE: Note: Ensure that your specified hostname and port settings comply with your network policies and any security requirements.

Custom Settings
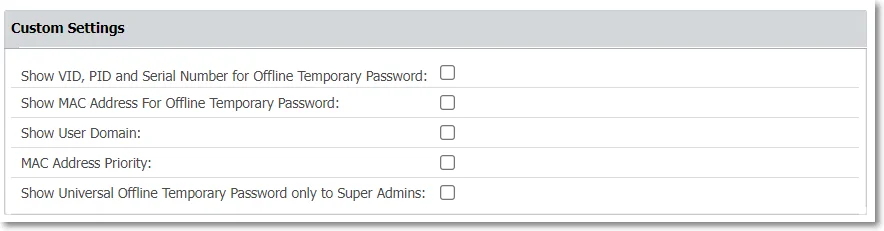
To display more information in Endpoint Protector, enable the following:
- Show VID, PID and Serial Number for Offline Temporary Password
- Show MAC Address for Offline Temporary Password
- Show User Domain
- MAC Address Priority
- Show Universal Offline Temporary Password only to Super Admins
Log Settings
Manage the following log settings:
- Set the Maximum number of rows in millions to export the Logs Report in .csv format.
NOTE: By setting the maximum number of rows to 1.0, you will export 1 million logs in the Logs Report .csv export as one row corresponds with one log.
When having partitions for logs on the server, make sure the dates are also selected when making the export.
- Reporting V2 – enabled by default, use this setting to modify the Content Aware Report log structure and display information in Destination details, Email sender, and Email subject columns.
NOTE: For Endpoint Protector Server versions older than 5.7.0.0, the Reporting V2 setting is not enabled by default.
The structure enabled by this setting will also be reflected in SIEM.
- NOTE: Set the Maximum number of reported threats per event that will be displayed in the Content Aware Report log structure, the expanded Log Details section, on the Count column.
NOTE: You can set a number of reported threats between 100 and 1000.

Log Settings Use Case and Terminology
- Log request - sent by the Endpoint Protector Client
- Event - scan result of a scanned document
- Threat - matched item (e.g. US SSN)
Log request:
- event1.0 (scan result of a scanned document) => 1000 threats before splitting events
- event1.1 => 500 threats
- event2.0 => 200 threats
- up to 100 events
Example: Value set to 500. 3 documents containing 1,500; 600; and 200 threats are subject to Content Aware Protection policies.
The Endpoint Protector Client will send a single log request.
Log request:
- event1.0 (scan result of a scanned document) => 500 threats => splitting event
- event1.1 (scan result of a scanned document) => 500 threats => splitting event (second log entry in the reports)
- event1.2 (scan result of a scanned document) => 500 threats (third log entry in the reports)
- event2.0 (scan result of a scanned document) => 500 threats => splitting event
- event2.1 (scan result of a scanned document) => 100 threats (second log entry in the reports)
- event3.0 (scan result of a scanned document) => 200 threats
- up to 100 events
Content Aware Protection – Ignore Thresholds
Enable the Ignore Thresholds setting to allow Endpoint Protector to log all sensitive information from scanned files from 1 to 100 000 threats limit set in the Maximum number of reported threats field, for the Content Aware Protection Block policies applied.
NOTE: This will increase the amount of logging and potentially affect client and server performance.
CAUTION: The Limit Reporting Content Aware Protection setting has priority over Ignore Thresholds setting. If Limit Reporting Content Aware Protection is enabled, the reporting will stop when the threshold is reached.
The maximum number of reported threats will be automatically modified as follows:
| User Input | Input Updated |
|---|---|
| 0 | 1 |

Limit Reporting Content Aware Protection refers to Report Only policies.
- If enabled, the Endpoint Protector client will stop reporting threats for a Report Only policy once it finds enough threats to conclude it is satisfied.
The "Content Aware Protection - Ignore Thresholds" toggle refers to Block & Report policies.
- When this toggle is On, scanning will not stop when a block verdict is determined, but will continue to report further threats found in a transfer.
- To limit the number of reported threats in this case, the value of the "Maximum number of reported threats" setting can be set to a value greater than zero. The set value is only indicative for the number of reported threats, the actual number reported can be slightly larger.
The ‘Global/Threat Threshold’ values in Content Aware Protection policies will be ignored/overridden by the setting ‘Ignore Thresholds’ when the Boolean logic of the Content Aware Protection policy contains at least one “AND” operator. A policy will be satisfied when the Boolean logic (example: see below) is met with one or more matches per identifier.
Eg. ( E-mail AND SSN US) OR CC Visa
Example - Scenario 1
-
Content Aware Protection Policy:
- Block & Report
- Threat Threshold: 4
- Content Detection Rule: (E-mail AND SSN US) OR CC Visa
-
Ignore Thresholds: ON
- Maximum number of reported threats: 10
-
Limit Reporting: OFF
-
Test File contains
- E-mail: 2
- SSN US: 3
- CC Visa: 6
- IBAN: 22
In our example, the policy will trigger when the policy is satisfied (Boolean logic), no matter if the ‘Threat Threshold’ is met or not due to the ‘AND’ operator in the policy. Depending on the data structure in our test file, Endpoint Protector Client may report different 10 threats to Endpoint Protector Server
- 2 E-mails + 2 SSN US + 6 CC Visa
- or 1 E-mail + 3 SSN US + 6 CC Visa
- Etc.
NOTE: Identifiers which are not part of the Boolean logic in a Content Aware Protection policy will not be reported!
Generally, a Content Aware Protection policy (Block & Report) will trigger when the Boolean logic of the policy is satisfied. However, with ‘Ignore Thresholds’ enabled and with 1+ ‘AND’ operator(s) in the policy, the scan engine will ignore the ‘Threat Threshold’ setting and continue the scan until the total threat of 10 is reached, no matter if “Limit Reporting” (under DEVICE CONTROL - Global Settings) is being enabled or disabled.
Generally, a Content Aware Protection policy (Report only) will trigger when the Boolean logic of the policy is satisfied. However, with ‘Ignore Thresholds’ enabled and with 1+ ‘AND’ operator(s) in the policy, the scan engine will ignore the ‘Threat Threshold’ setting. If “Limit Reporting” (under DEVICE CONTROL - Global Settings) is enabled, the scan continues until the total threat of 10 from setting ‘Maximum number of reported threats’ under ‘Ignore Thresholds’ is reached.
Generally, a Content Aware Protection policy (Report only) will trigger when the Boolean logic of the policy is satisfied. However, with ‘Ignore Thresholds’ enabled and with 1+ ‘AND’ operator(s) in the policy, the scan engine will ignore the ‘Threat Threshold’ setting. If “Limit Reporting” (under DEVICE CONTROL - Global Settings) is disabled, the scan engine will continue the scan until the entire file is scanned, but will only report 10 threats, set with ‘Maximum number of reported threats’ under ‘Ignore Thresholds’.
Example - Scenario 2
-
Content Aware Protection Policy:
- Block & Report
- Threat Threshold: 4
- Content Detection Rule: (E-mail AND SSN US) OR CC Visa
-
Ignore Thresholds: ON
- Maximum number of reported threats: 4
-
Limit Reporting: OFF
-
Test File contains
- E-mail: 2
- SSN US: 3
- CC Visa: 6
- IBAN: 22
In our example, the policy will trigger when the policy is satisfied (Boolean logic), no matter if the ‘Threat Threshold’ is met or not due to the ‘AND’ operator in the policy. Depending on the data structure in our test file, Endpoint Protector Client may report different 4 threats to Endpoint Protector Server
- 1 E-mail + 1 SSN US + 2 CC Visa
- or 2 E-mails + 1 SSN US + 1 CC Visa
- Or 1 E-mail + 2 SSN US + 1 CC Visa
Generally, a Content Aware Protection policy (Block & Report) will trigger when the Boolean logic of the policy is satisfied. However, with ‘Ignore Thresholds’ enabled and with 1+ ‘AND’ operator(s) in the policy, the scan engine will ignore the ‘Threat Threshold’ setting and continue the scan until the total threat of 4 from setting ‘Maximum number of reported threats’ is reached, no matter if “Limit Reporting” (under DEVICE CONTROL - Global Settings) is being enabled or disabled.
Generally, a Content Aware Protection policy (Report only) will trigger when the Boolean logic of the policy is satisfied. However, with ‘Ignore Thresholds’ enabled and with 1+ ‘AND’ operator(s) in the policy, the scan engine will ignore the ‘Threat Threshold’ setting. If “Limit Reporting” (under DEVICE CONTROL - Global Settings) is enabled, the scan continues until the total threat of 4 from setting ‘Maximum number of reported threats’ under ‘Ignore Thresholds’ is reached.
Generally, a Content Aware Protection policy (Report only) will trigger when the Boolean logic of the policy is satisfied. However, with ‘Ignore Thresholds’ enabled and with 1+ ‘AND’ operator(s) in the policy, the scan engine will ignore the ‘Threat Threshold’ setting. If “Limit Reporting” (under DEVICE CONTROL - Global Settings) is disabled, the scan engine will continue the scan until the entire file is scanned, but will only report 4 threats, set with ‘Maximum number of reported threats’ under ‘Ignore Thresholds’.
Example - Scenario 3
-
Content Aware Protection Policy:
- Report Only
- Threat Threshold: 4
- Content Detection Rule: (E-mail AND SSN US) OR CC Visa
-
Ignore Thresholds: ON
- Maximum number of reported threats: 10
-
Limit Reporting: ON
-
Test File contains
- E-mail: 2
- SSN US: 3
- CC Visa: 6
- IBAN: 22
In our example, the policy will trigger when the policy is satisfied (Boolean logic), meaning that all identifiers reach a ‘Threat Threshold’ of at least 1, ignoring setting ‘Maximum number of reported threats’ under ‘Ignore Thresholds’. Depending on the data structure in our test file, Endpoint Protector Client may report the single threats to Endpoint Protector Server differently
- 1 E-mails + 1 SSN US
- or 1 CC Visa
Generally, a Content Aware Protection policy (Report only) will trigger when the Boolean logic of the policy is satisfied, meaning that all identifiers reach a ‘Threat Threshold’ of at least 1. The scan engine will ignore the ‘Maximum number of reported threats’ under ‘Ignore Thresholds’, when “Limit Reporting” (under DEVICE CONTROL - Global Settings) is enabled. Reporting stops as soon as the policy is satisfied.
Generally, a Content Aware Protection policy (Report only) will trigger when the Boolean logic of the policy is satisfied, meaning that all identifiers reach a ‘Threat Threshold’ of at least 1. The scan engine will consider the ‘Maximum number of reported threats’ under ‘Ignore Thresholds’, when “Limit Reporting” (under DEVICE CONTROL - Global Settings) is disabled. Reporting stops when 10 threats are found.
Example - Scenario 4
-
Content Aware Protection Policy:
- Block & Report
- Threat Threshold: 4
- Content Detection Rule: E-mail OR SSN US OR CC Visa
-
Ignore Thresholds: ON
- Maximum number of reported threats: 10
-
Limit Reporting: OFF
-
Test File contains
- E-mail: 2
- SSN US: 3
- CC Visa: 6
- IBAN: 22
In our example, the policy will trigger when the policy is satisfied (Boolean logic), meaning when at least one identifier (eg. E-mail) reaches a ‘Threat Threshold’ of 4, but the scan engine will continue to scan until the total threat of 10 from setting ‘Maximum number of reported threats’ under ‘Ignore Thresholds’ is reached. Depending on the data structure in our test file, Endpoint Protector Client may report different 10 threats to Endpoint Protector Server
- 2 E-mails + 2 SSN US + 6 CC Visa
- or 1 E-mail + 3 SSN US + 6 CC Visa
- Etc.
Generally, a Content Aware Protection policy (Block & Report) will trigger when the Boolean logic of the policy is satisfied. However, with ‘Ignore Thresholds’ enabled and no ‘AND’ operator(s) in the policy, the scan engine will search until the total threat of 10 from setting ‘Maximum number of reported threats’ under ‘Ignore Thresholds’ is reached.
Virtual Desktop Clones
Enable the Virtual Desktop Clones Support setting to allow the Endpoint Protector server to identify the virtual desktop clone and interact accordingly with the Endpoint Protector client.

Deep Packet Inspection Certificate
Disable the Deep Packet Inspection certificate download to require the Endpoint Protector clients to use the legacy certificate. You can also download the Client CA Certificate.

Server Certificate Stack
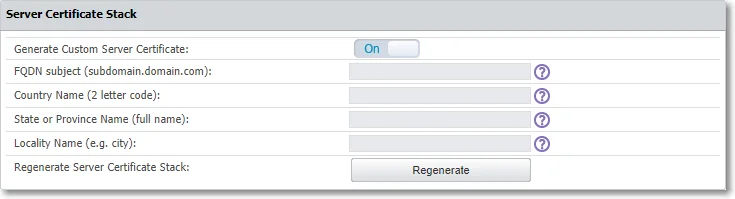
Use this section to regenerate a custom server certificate. Enable the option and then provide the following information:
- FQDN (Fully Qualified Domain Name) – used in certificates and Regenerate Server Certificate Stack and CA Certificate used for Deep Packet Inspection on macOS
- Country name – add the first two letters of the country
- State or Province name – add the state or province name
- Locality Name – add locality name
Once you’ve set all the mandatory information, scroll to the bottom of the settings page, click Save and then return to the Server Certificate Stack section and click Regenerate Server Certificate Stack.
The Server certificate will be regenerated in a couple of minutes, and the user will be logged out.
NOTE: Please download the Deep Packet Inspection certificate again on both macOS and Linux, and ensure that it is trusted in the respective keychain on each system.
NOTE: Regenerating the CA certificate requires manually adding it to the macOS keychain, as well as to Linux systems.
CAUTION: Do not use this setting if no instance of macOS 12.0 (or higher) is registered on the Endpoint Protector server.
Single Sign On
Enable the Single Sign On Login setting to log into Endpoint Protector and then select a Failover Login User to use when single sign on is not functional.

NOTE: See the Single Sign On topic for additional information.
Active Directory Authentication
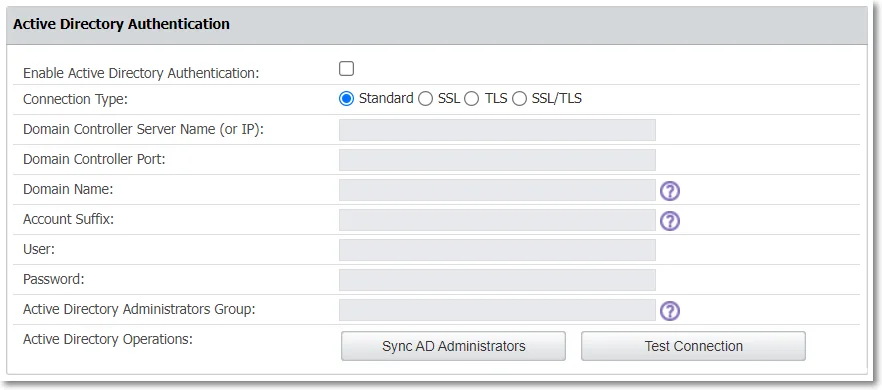
Enable the Active Directory Authentication setting to import an Active Directory group of administrators into Endpoint Protector as Super Administrators.
NOTE: By enabling the Active Directory Authentication, you allow the administrators to use their Active Directory credentials to log into Endpoint Protector.
To import an Active Directory group of administrators, follow these steps:
Step 1 – Fill in the fields with the required information, considering:
- In some cases, you need to add the domain in front of the username (domain\username)
- Active Directory Administrators Group can be synchronized with any other groups of users except for "primary groups" which is limited from this action by Microsoft
Step 2 – Scroll to the bottom of the page and save the changes. You will view a successful message at the top of the page.
Step 3 – Return to the Active Directory Authentication section and click Test Connection to confirm the process was successful.
Step 4 – Click Sync AD Administrators.
CAUTION: Once the Active Directory Administrators Group has been defined, only users that are part of this AD group will be synced and imported as Super Administrators for Endpoint Protector. Any additional administrators (with different access control levels) can be created manually from the System Administrators section.
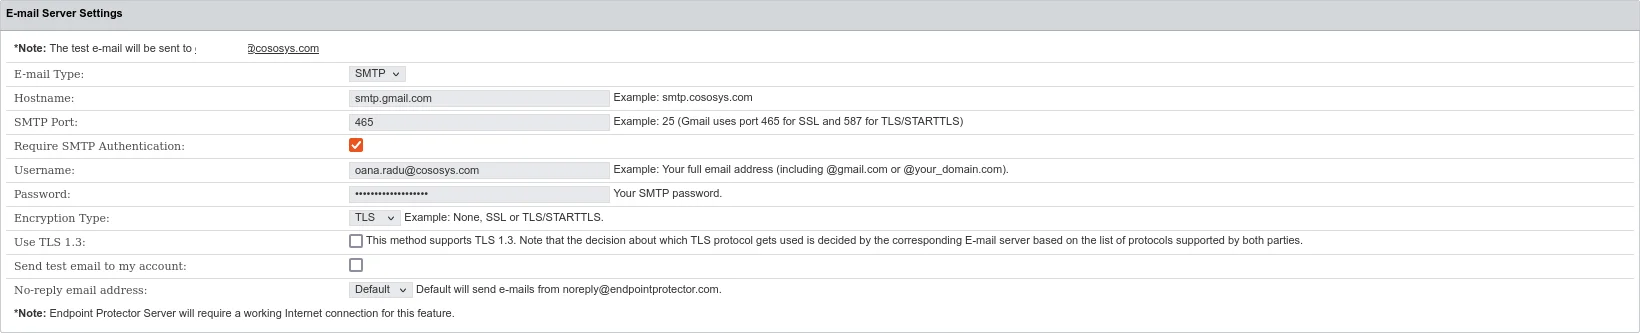
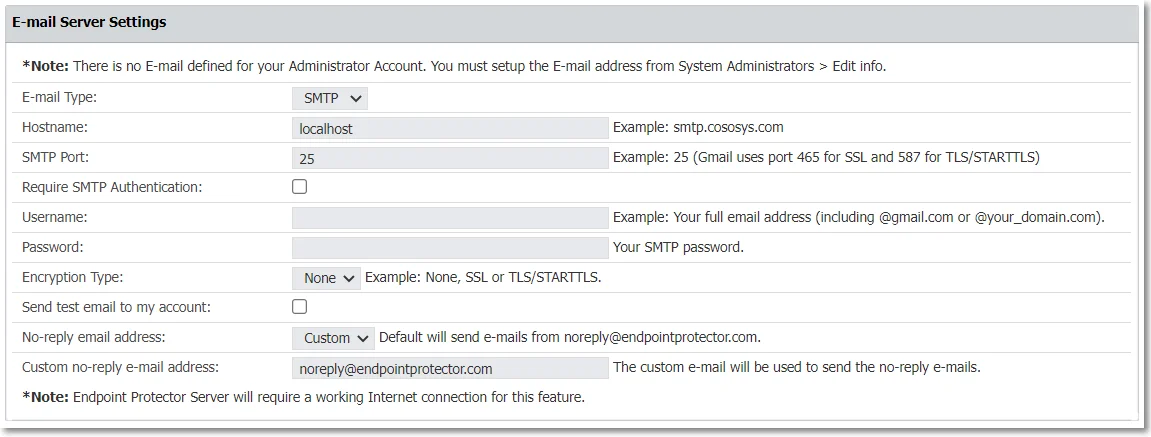
E-mail Server Settings
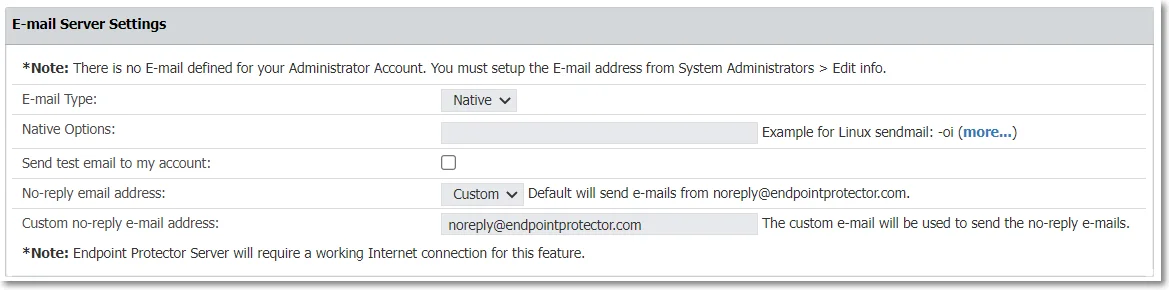
Manage Email server settings based on the email type you use - native or SMTP.
NOTE: To enable this feature, you need an Internet connection.
Manage email server settings based on your email type—native or SMTP, with support for TLS 1.3.
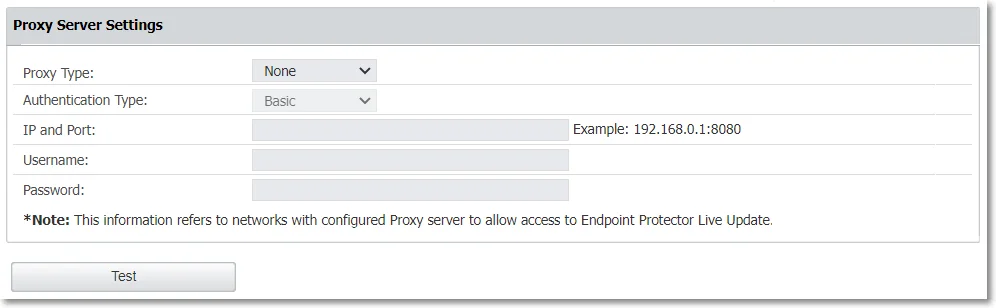
Proxy Server Settings
Configure Proxy server settings by managing the following:
- Proxy Type
- Authentication Type
- IP and Port
- Proxy access credentials (username/password)
Once you provide all the information, click Test to confirm the settings are working successfully.
NOTE: If a Proxy Server is not configured, Endpoint Protector will connect directly to liveupdate.endpointprotector.com.
Main Administrator Contact Details
Edit contact details for the main administrator and then click Save to keep all modifications.

Server Display Name
Endpoint Protector users have the capability to visually differentiate environments within the Endpoint Protector console. This feature enables users to add custom text above the Endpoint Protector logo on the login page and alongside the logo in the Endpoint Protector header. You can customize text and upload a custom logo for further personalization. These visual cues are designed to prevent incidents like unintentional modifications on the wrong environment
