Users and Groups
Users
From this section, you can manage all the users in the system. Users are defined as the end-users who are logged on a computer on which the Endpoint Protector Client software is installed. Any new user will be automatically added to the database, thus making them manageable.
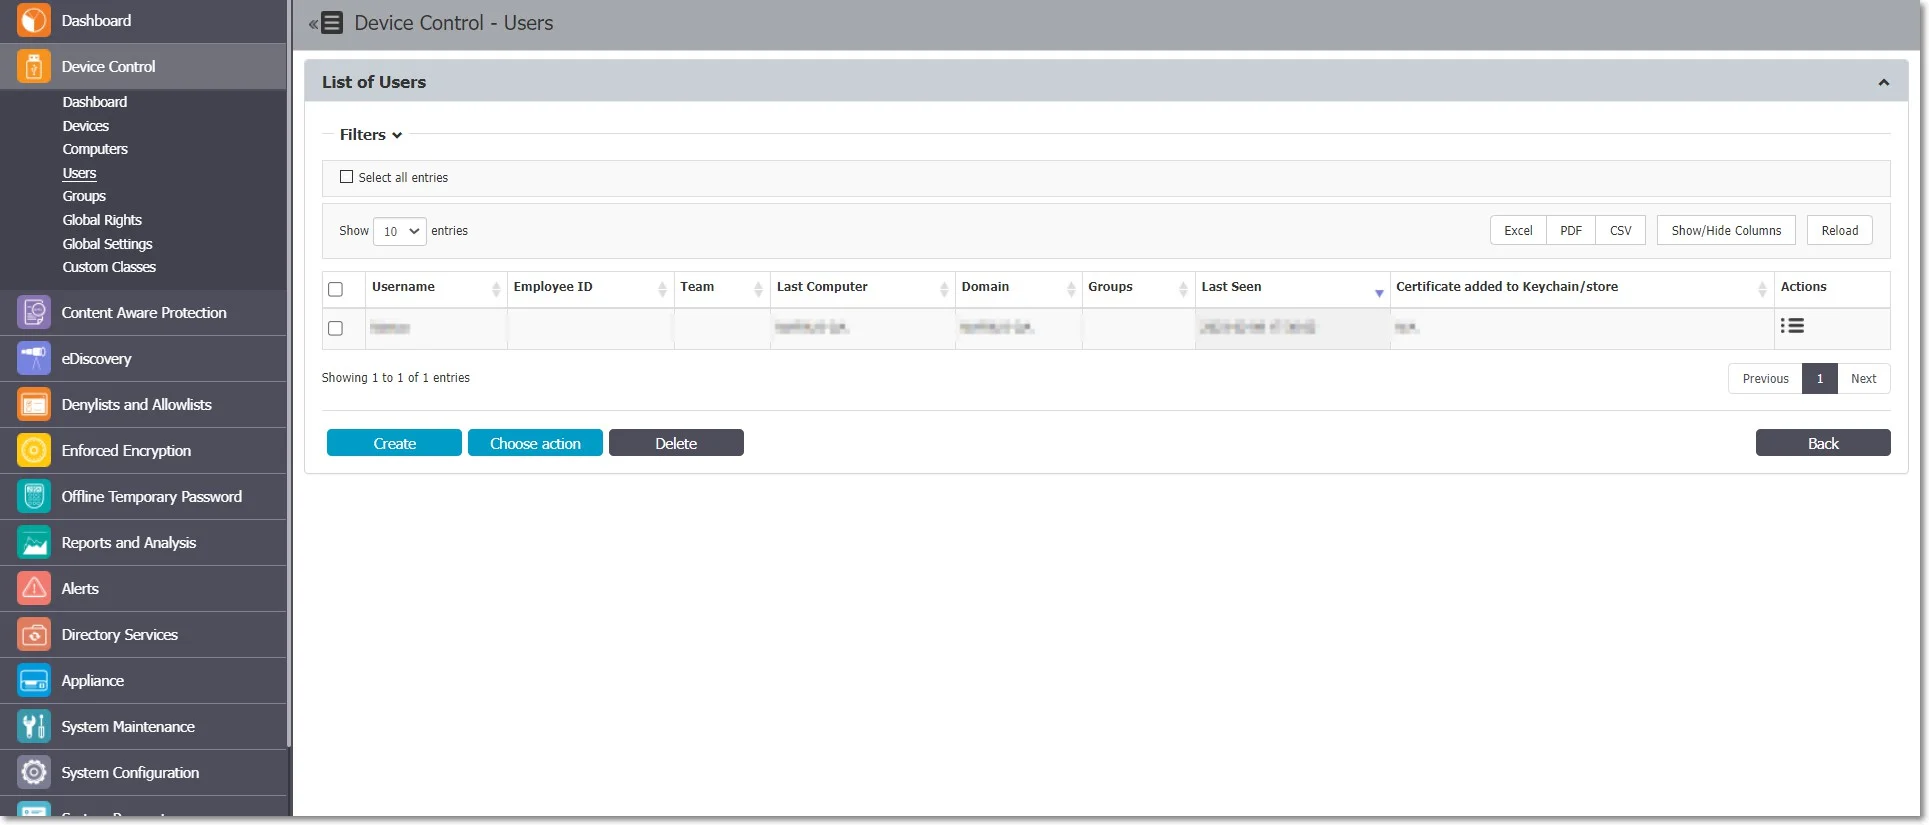
A user is identified by information like Name (Username, First Name, Last Name), Department, Contact Details (Phone, E-mail), and others and is also automatically assigned to a computer.
The Administrator can manually create a new user at any time by providing the user’s parameters and information mentioned above. Users can also be imported into Endpoint Protector from Active Directory.
For detailed information on Active Directory, refer to the Directory Services chapter.
There are two users created by default during the installation process of Endpoint Protector:
- noUser is the user linked to all events performed while no user was logged into the computer. Remote users’ names who log into the computer will not be logged and their events will be stored as events of noUser. Another occurrence of noUser events would be to have an automated script/software which accesses a device when no user is logged in to the specific computer.
- autorunUser indicates that an installer has been launched by Windows from a specific device. It is the user attached to all events generated by the programs launched from the specific device when Autoplay is enabled in the Operating System.
CAUTION: Depending on the OS, additional system users can appear:
- _mbsetupuser (for macOS, during updates)
- 65535, 62624, etc. (for Linux, during locked screens)
The Actions column offers multiple options related to user management like Edit, Manage Rights, History, and Delete.
User Rights
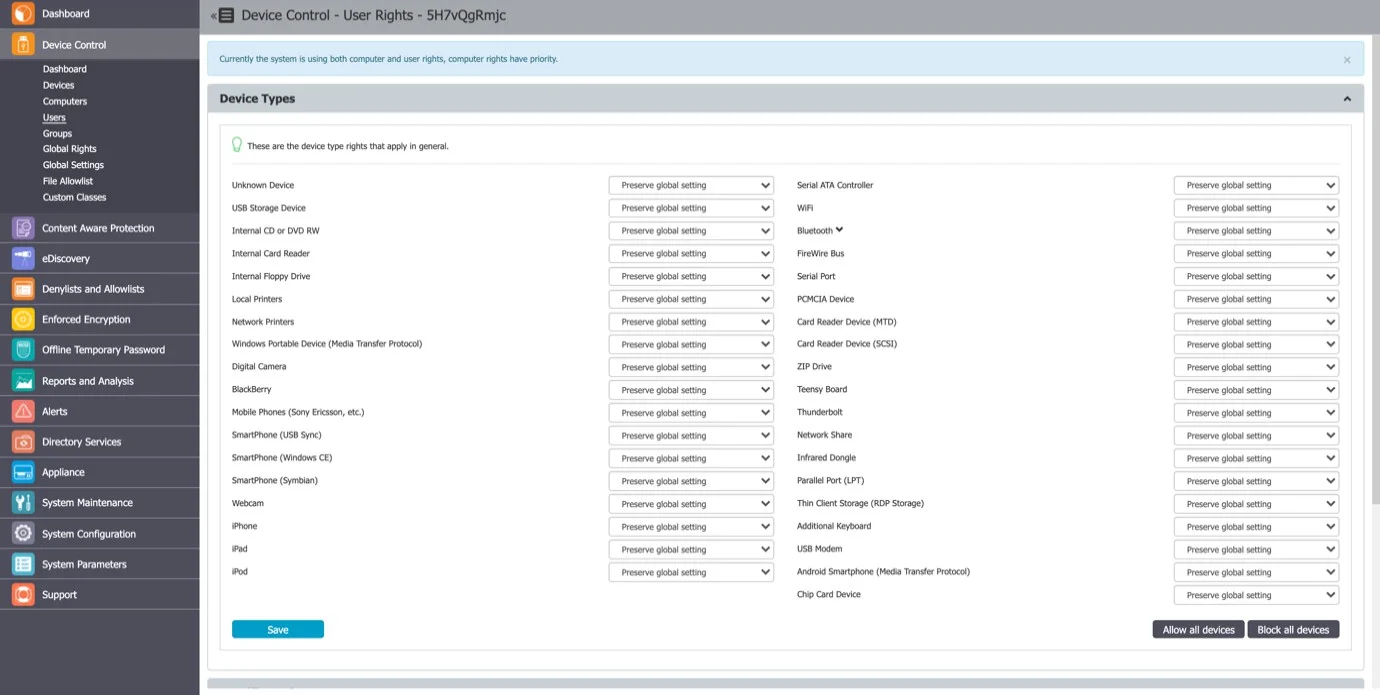
The User Rights can be accessed by going to the Actions column for the specific user and selecting Manage Rights.
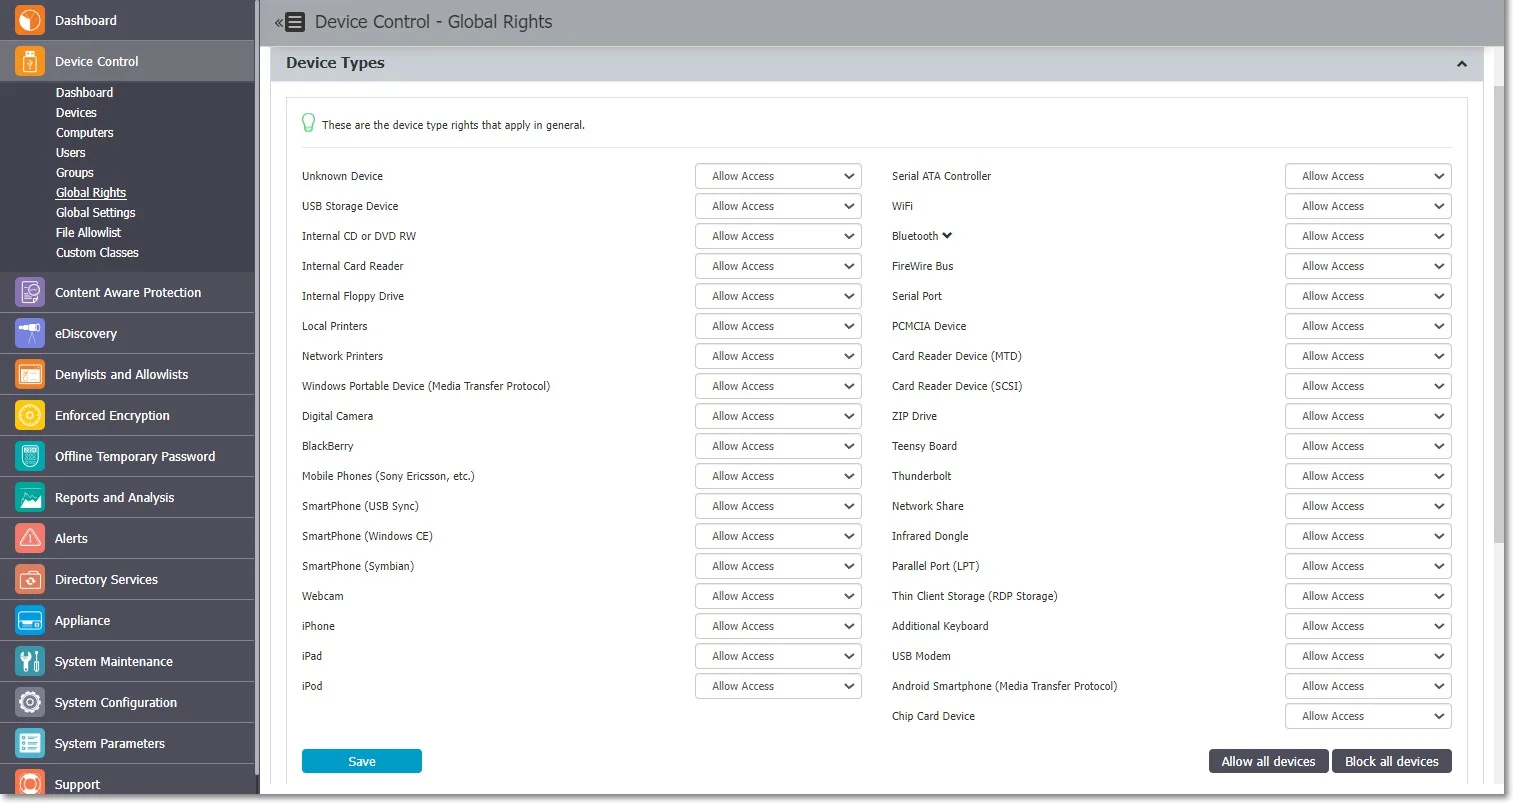
This section is built around the users, allowing the Administrator to specify what Device Types and also what Specific Devices can be accessible.
The Standard device control rights includes the Device Types and Already Existing Devices sections. These are generally the only device rights used.
In addition to the Standard device control rights, if enabled from the Global Settings, the administrator can create fallback policies for Outside Network and Outside Hours circumstances.
NOTE: The Restore Global Rights button can be used to revert to a lower level of rights. Once this button is pushed all rights on that level will be set to preserve global settings and the system will use the next level of rights.
All Existing Devices that were added on that level will be deleted when the restore is used.
User Settings
From this section, you can edit the settings for each user.
Defining custom settings for all users is not necessary since a user is perfectly capable of functioning correctly without any manual settings defined. It will do this by either inheriting the settings from the group it belongs to or, if not possible, the global settings, which are mandatory and exist in the system with default values from installation.
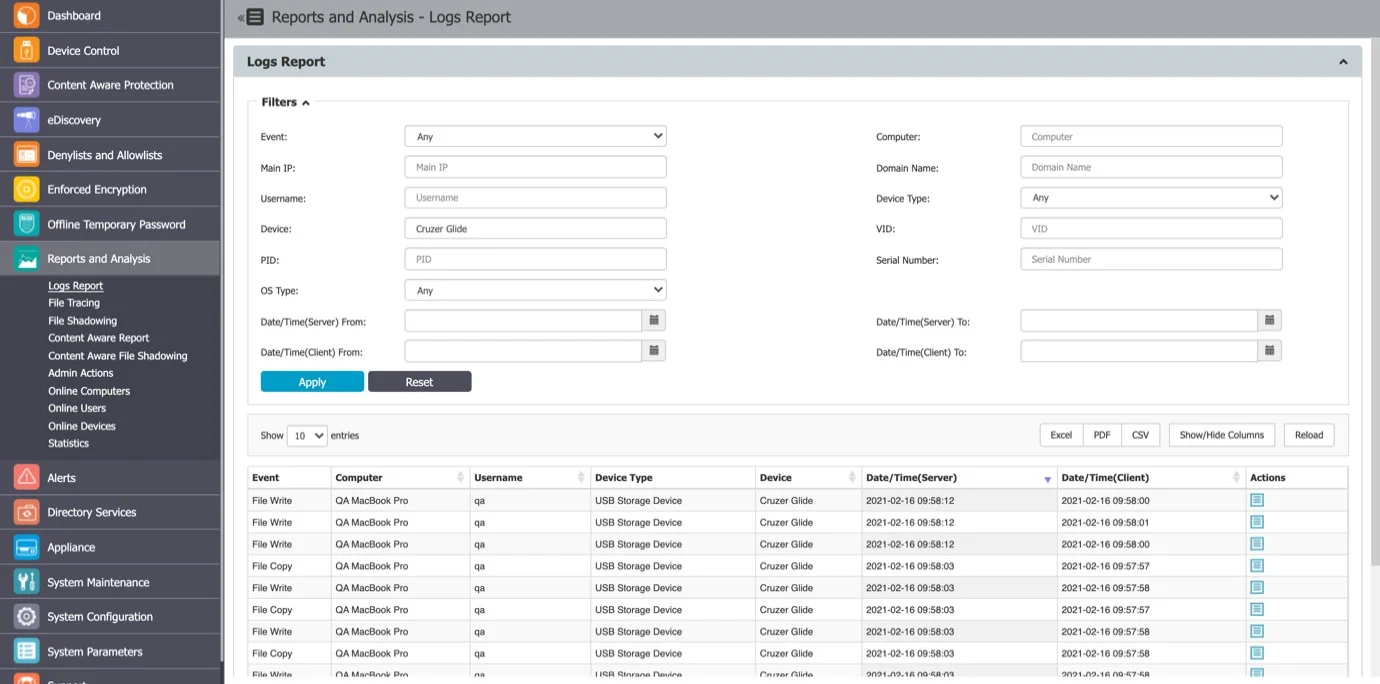
User History
From this section, you can view the user history by selecting the View User History action. This will display the Logs Report page filtered for the respective user.
Groups
From this section, you can manage all the groups in the system. Grouping computers and users will help the Administrator manage rights or settings for these entities in a more efficient way.
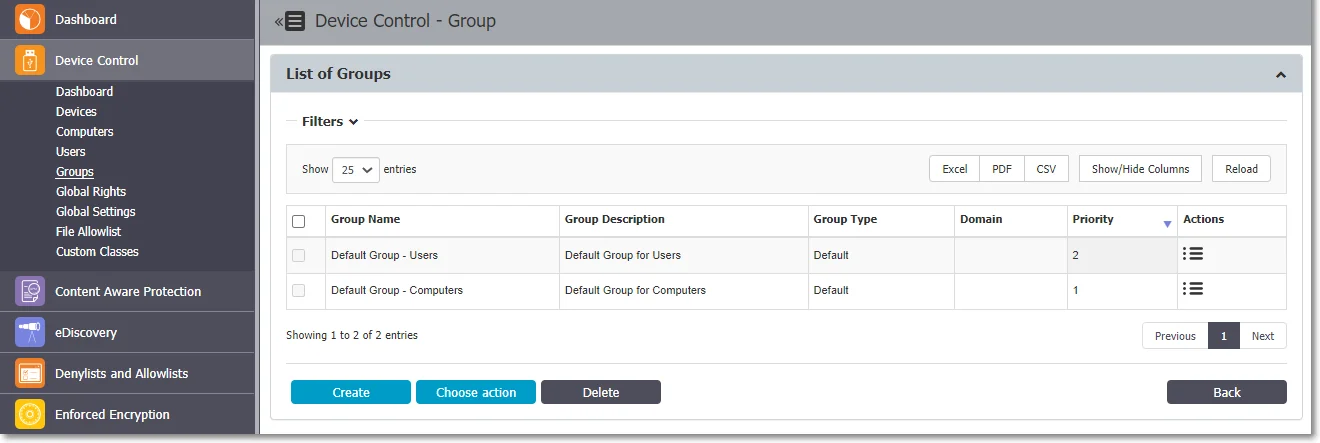
A group is identified by information like Name and Description, as well as based on the entities (Computers and Users).
You can manually create a new group at any time by providing the group information mentioned above. Groups can also be imported into Endpoint Protector from Active Directory.
NOTE: For detailed information on Active Directory, refer to the Directory Services topic.
The Actions column offers multiple options related to the group’s management like Edit, Manage Rights, Manage Settings, History, and Delete.
Group Types
Regular Groups
Regular Groups are the groups created by the Administrator or are imported from AD and are not created based on a rule. From this section you can add or remove Computers or Users.
Smart Groups
Smart Groups are a dynamic category of computers and user groups for which membership can be defined based on element name patterns.
To use Smart Groups, follow these steps:
Step 1 – Enable Smart Groups from System Configuration, System Settings, on the Smart Groups section, scroll to the bottom of the page and click Save.
NOTE: By enabling the Smart Group feature, Computers and Users will not be automatically assigned to the Default Group unless you create a Smart Group.

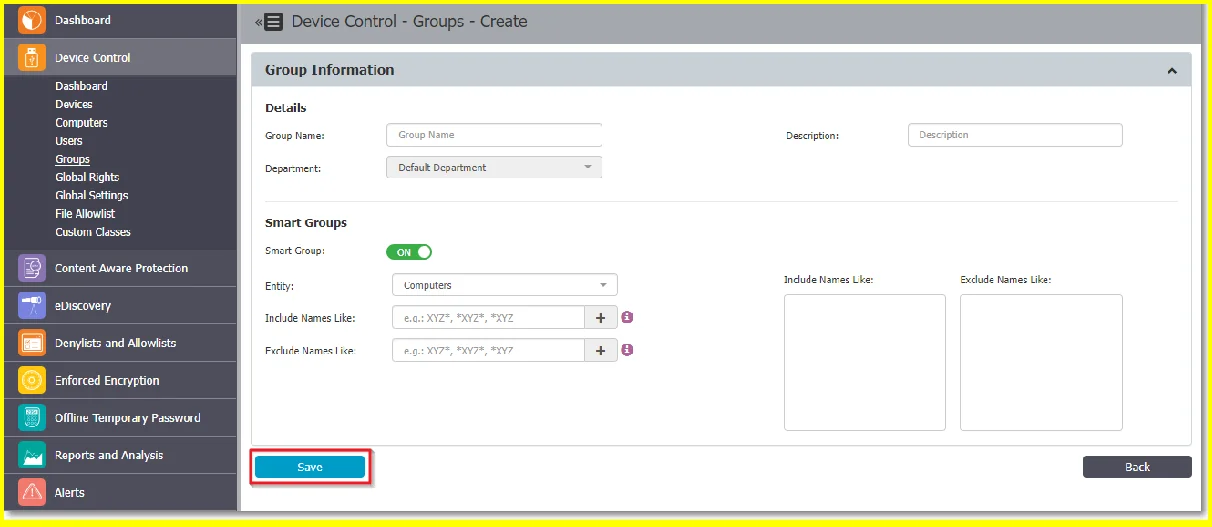
Step 2 – Create a Smart Groups from Device Control, Groups section. Click Create, provide the following and then click Save:
- Group name, description and Department
- Enable the Smart Group setting
- Select the Entity, Computers or Users
- Set rules for the Computers or Users by inclusion and exclusion.
Define the rules Computers or Users are added to the Smart Groups based on the naming pattern rules: XYZ*, *XYZ*,*XYZ.
CAUTION: The rules set are key-sensitive!
NOTE: Once created, you can manage the group's priority by drag and drop actions.
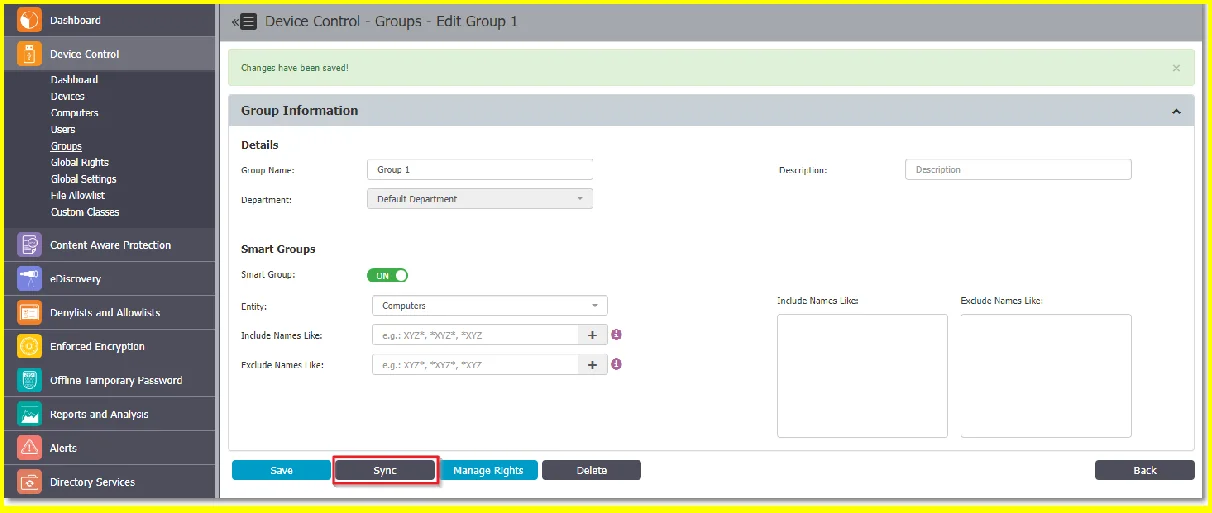
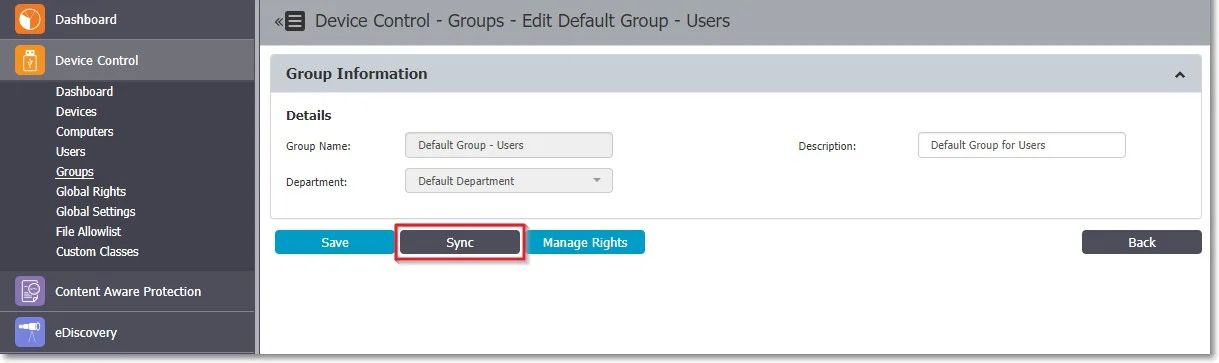
Step 3 – Synchronize entities to the Smart Groups.
The Smart Groups rule will not remove items from the regular groups to assign them to smart groups. Entities are added to the Smart group through the synchronization process. After you created the Smart Group, click Sync to start the synchronization at a given interval every 1 minute.
NOTE: The Synchronization process will not change settings for the regular groups.
If a new Computer is registered and matches one of the rules, the Computer will automatically be assigned to that Group.
If the new Computer does not match the rule, it will be added to the Default Group, if Default Groups are enabled from System Configuration, System Settings, and the Smart Groups section.
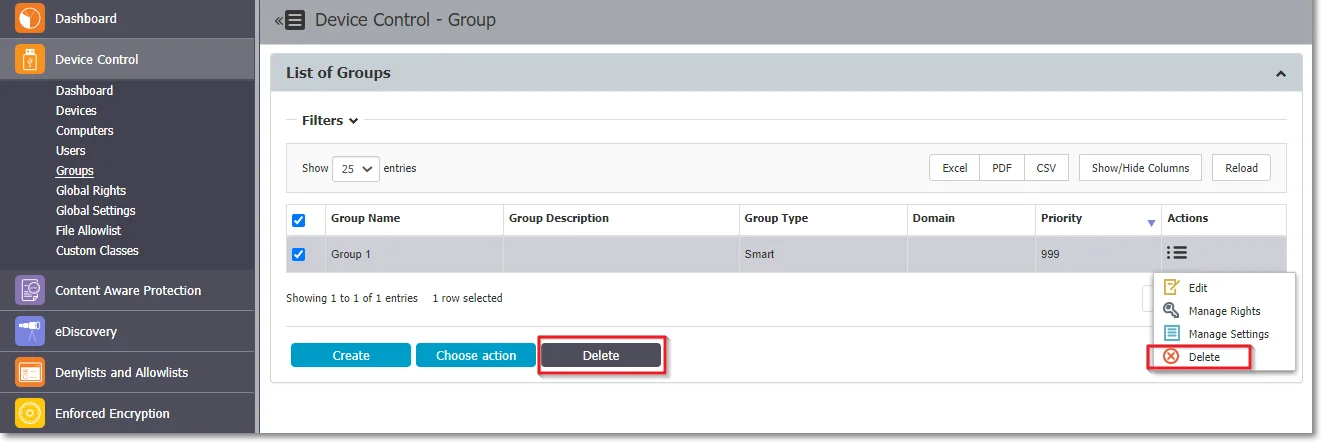
Step 4 – Delete a Smart Group from the Actions column or select the group from the list and then click Delete.
Smart Groups have the following limitations:
- Smart Groups do not display assigned computers or users
- You cannot manually add an entity to a Smart Group
- Smart Groups are part of the Default Department but do not use Departments
If you disable Smart Group from System Settings, the Smart Group will be converted into a Regular Group. This will preserve its settings, rights, and other settings but will lose its entities and will remove the Default Group for Computers and the Default Group for Users.
User entities can only be assigned to Smart Groups after the synchronization process, not when a computer is registered, based on how the Endpoint Protector Client relays the user information.
When a Computer is registered, Endpoint Protector only receives information on computers; User information is relayed through events (logs) or regular pings/reprovision requests. User information is volatile: it can change between requests (different users can log in or log out on the same computer; log out events/sleep can also result in default hard coded user entities being marked as active/online).
Default Groups
Default Groups are groups of Computers and Users that do not belong to Smart Groups. These are Computers and Users that do not follow the name pattern set for Smart Groups.
NOTE: Default Groups are available only if Smart Groups are enabled. To use Default Groups, follow these steps:
Step 1 – Enable Default Groups for Computers and Users from System Configuration > System Settings > on the Smart Groups section, scroll to the bottom of the page and click Save.

CAUTION: You are not required to manually create Default Groups – by enabling them, the Default Groups for Users and Computers will be automatically created.
Step 2 – Synchronize entities to the Default Groups. To assign Computers and Users to the Default Groups, navigate to the Device Control section and locate the Groups section. In the List of Groups section, find the Actions column, select Edit, and then click Sync.
Default Groups have the following limitations:
- You can only edit Default Groups description, not the Default Groups name
- The Default Groups cannot be deleted, but can be disabled from System Configuration, System Settings, on the Smart Groups section
- If Default Groups are disabled, they will be deleted with all their dependencies
Allowlists on Computer Groups
File Location, Network Share Allowlists, and File Location Denylist can be set for groups of Computers.
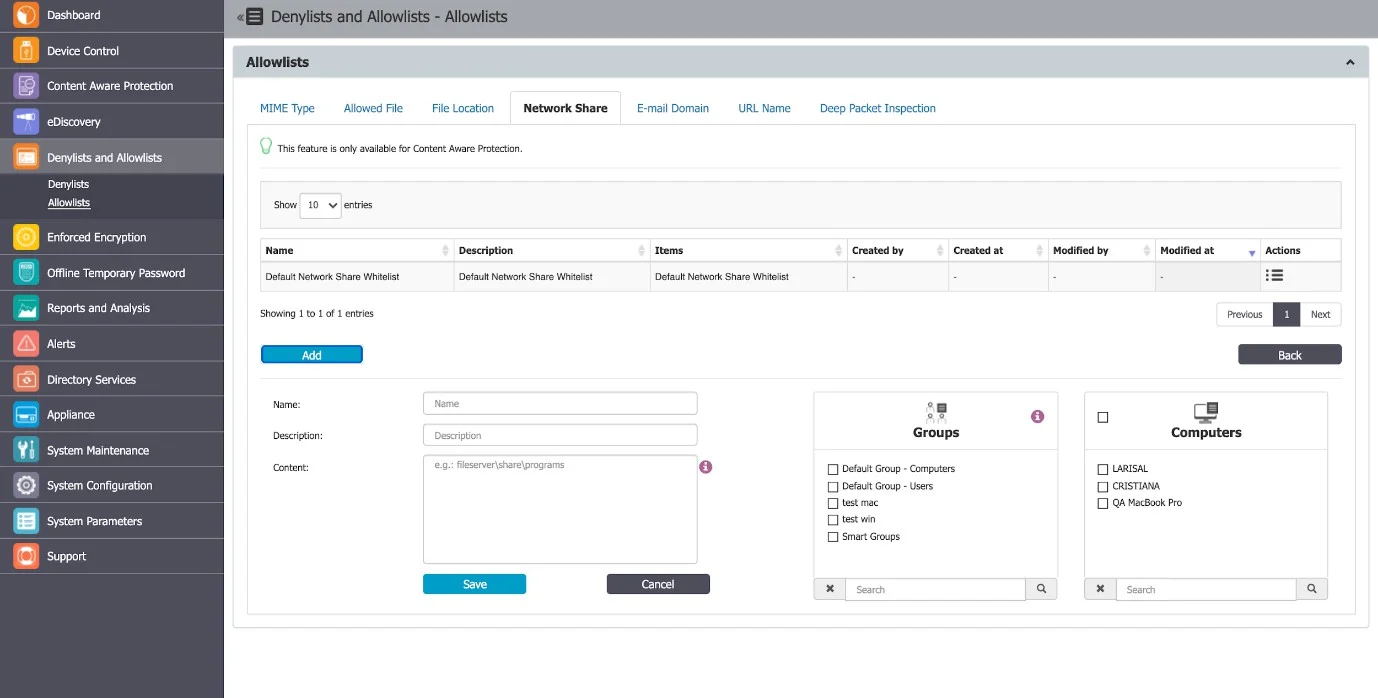
In the Groups select section, all groups will be displayed.
For a selected group the allowlist/denylist rule will apply only to computers from that group. If the group contains no computer, the rule won’t apply to anything. The Administrator can select additional computers from the select box.
Smart groups are always in sync with all the contained computers for denylists, just like they apply to a policy. Groups selected on allowlists or denylists will be synchronized every 15 minutes.
Group Rights
The Group Rights can be accessed from the Actions column for the specific group and selecting Manage Rights.
This section is built around the group, allowing you to specify what Device Types and also what Specific Devices can be accessible.
This section is similar to the Computer Rights section, the difference being that it applies to all the computers that are part of the group simultaneously.
The Standard device control rights include the Device Types and Already Existing Devices sections. These are generally the only device rights used.
In addition to the Standard device control rights, if enabled from the Global Settings, you can create fallback policies for Outside Network and Outside Hours circumstances.
For detailed information on Device Types and Specific Devices (Standard, Outside Network, and Outside Hours), refer to the Users and Groups topic.
NOTE: Use Restore Global Rights to revert to a lower level of rights. Once enabled, all rights on that level will be set to preserve global settings and the system will use the next level of rights.
NOTE: All Existing Devices that were added on that level will be deleted when the restore is used.
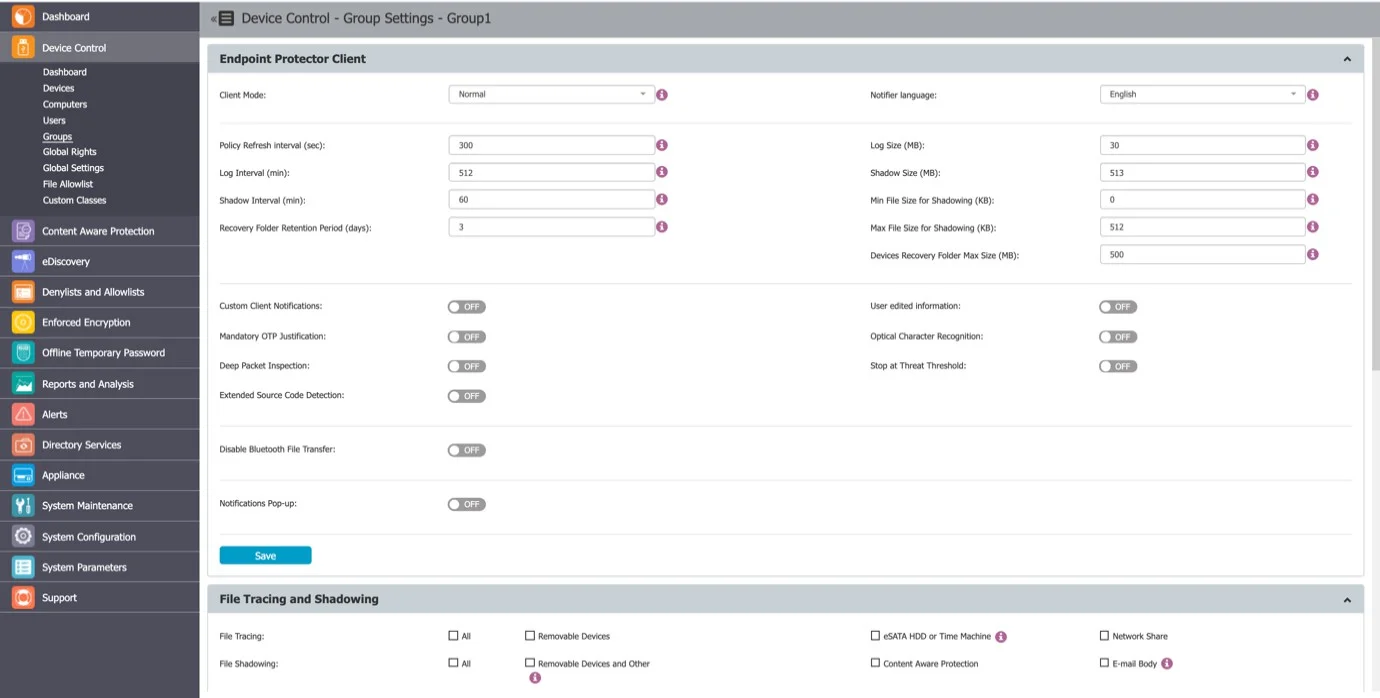
Group Settings
From this section, you can edit the settings for each group.
Computers and users can be grouped to make editing the settings easier and more logical. Defining custom settings for all groups is not necessary since a computer is perfectly capable of functioning correctly without any granular settings defined. It will do this by either inheriting the settings from the group it belongs to or, if not possible, the global settings, which are mandatory and exist in the system with default values from installation.