Hyper-V
Hyper-V Tools utilize the VHD format for virtualization, ensuring seamless integration with Microsoft environments.
Implementing Using Microsoft Hyper-V 2022
Follow the steps below to get started with your implementation.
Step 1 – Extract the downloaded Endpoint Protector Virtual Appliance .zip package.
Step 2 – Start Hyper-V Manager.
Step 3 – From the panel on the right, select the Import Virtual Machine option.
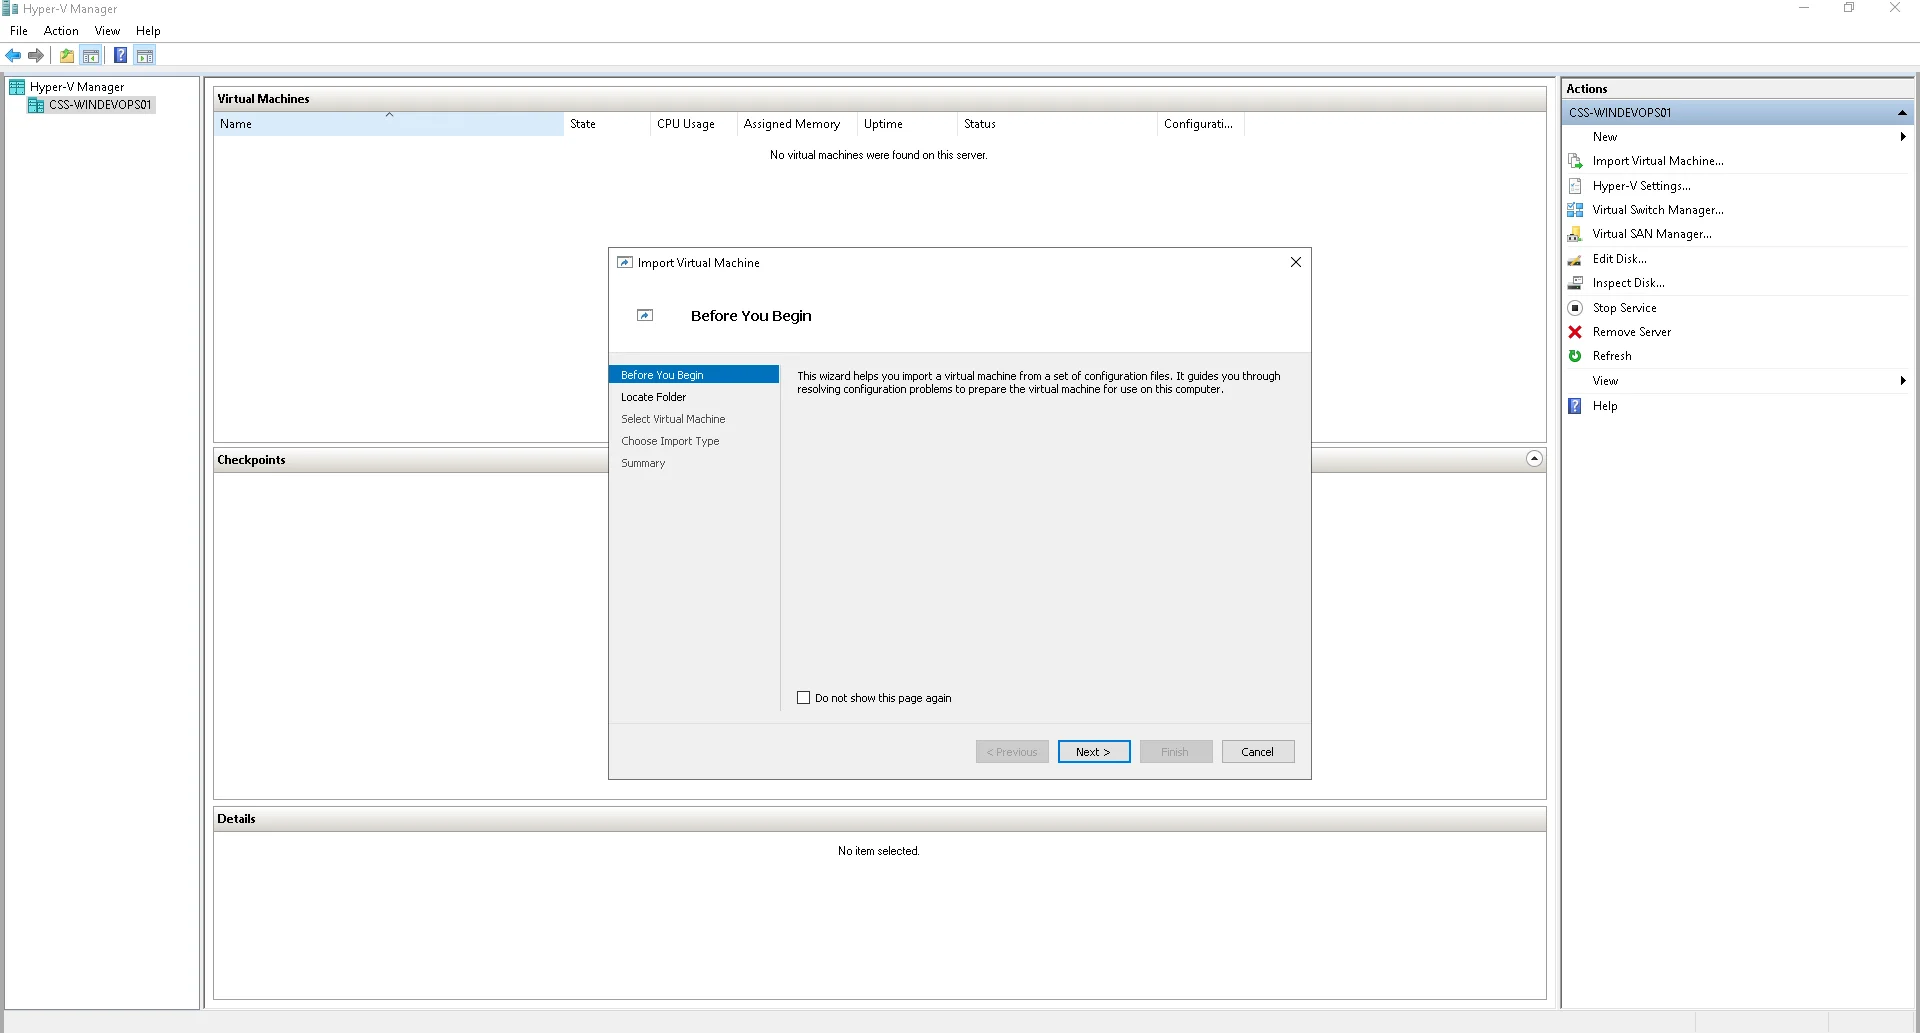
Step 4 – Click Next.
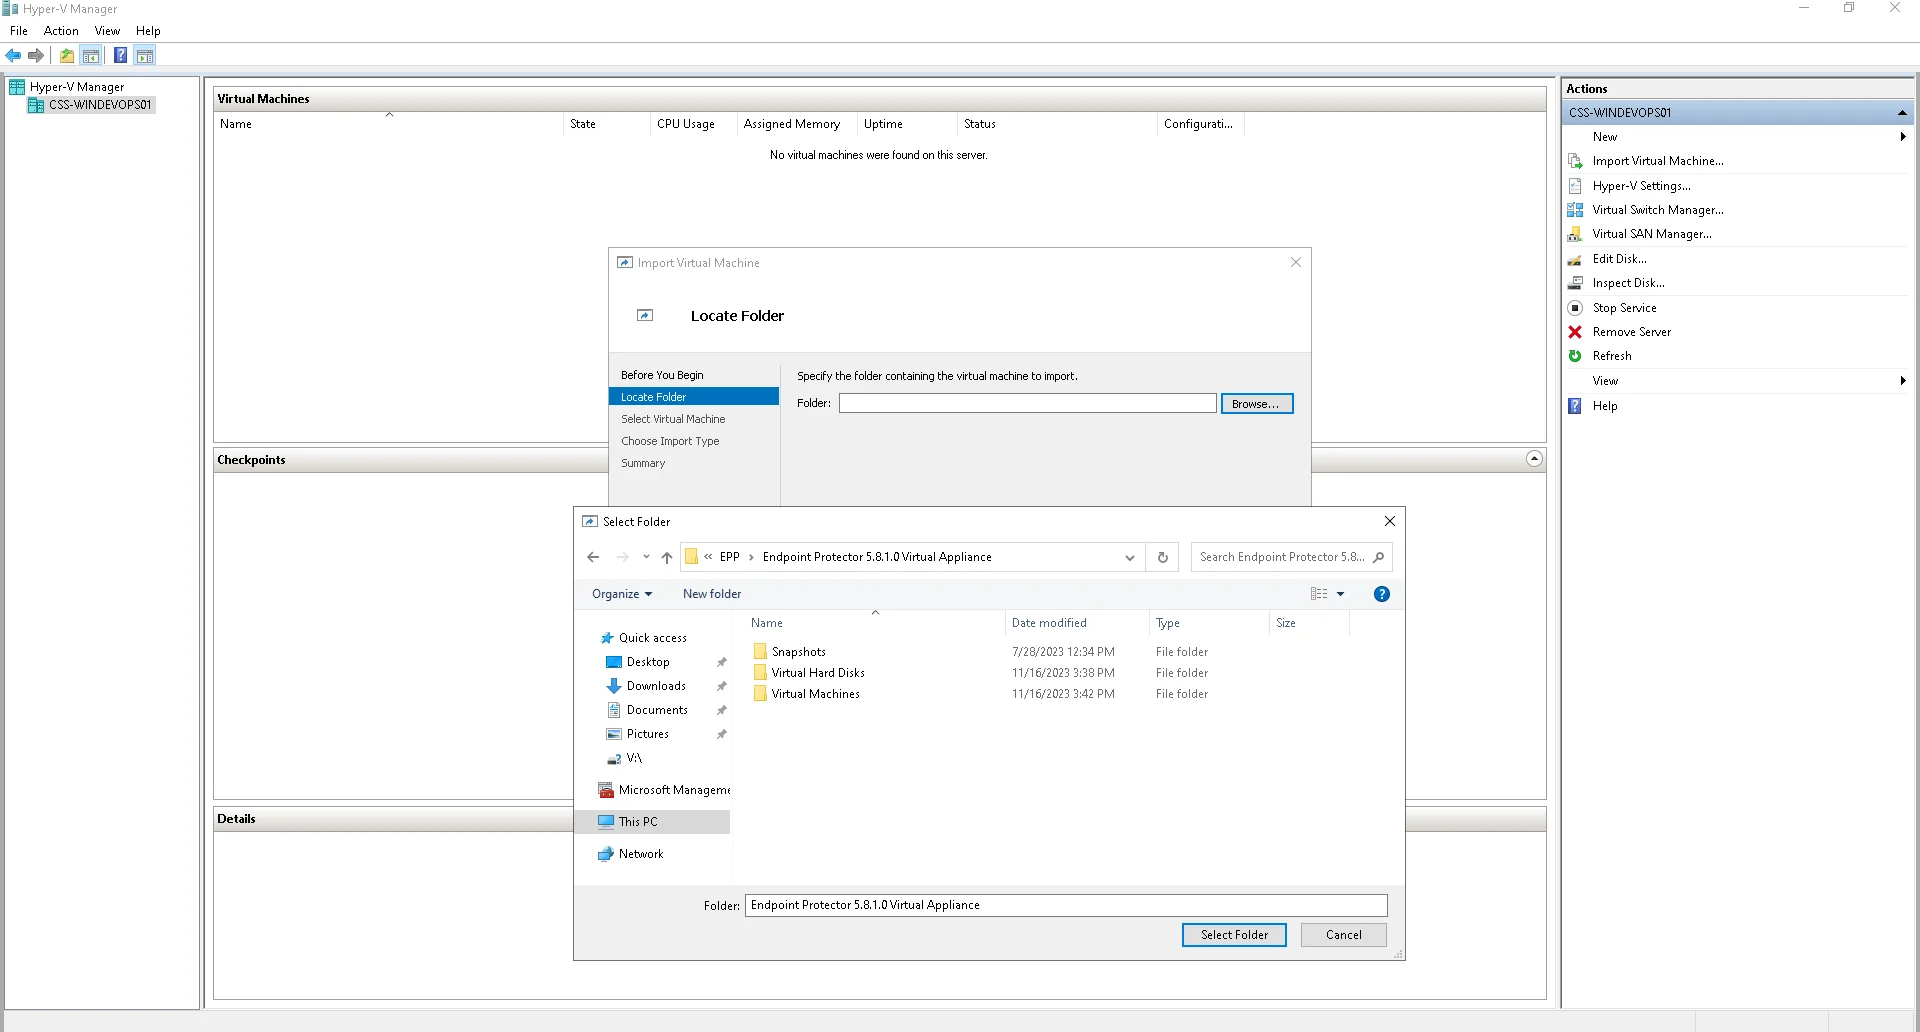
Step 5 – Browse and select the Endpoint Protector Virtual Appliance folder, containing.
- Snapshots
- Virtual Hard Disks
- Virtual Machines
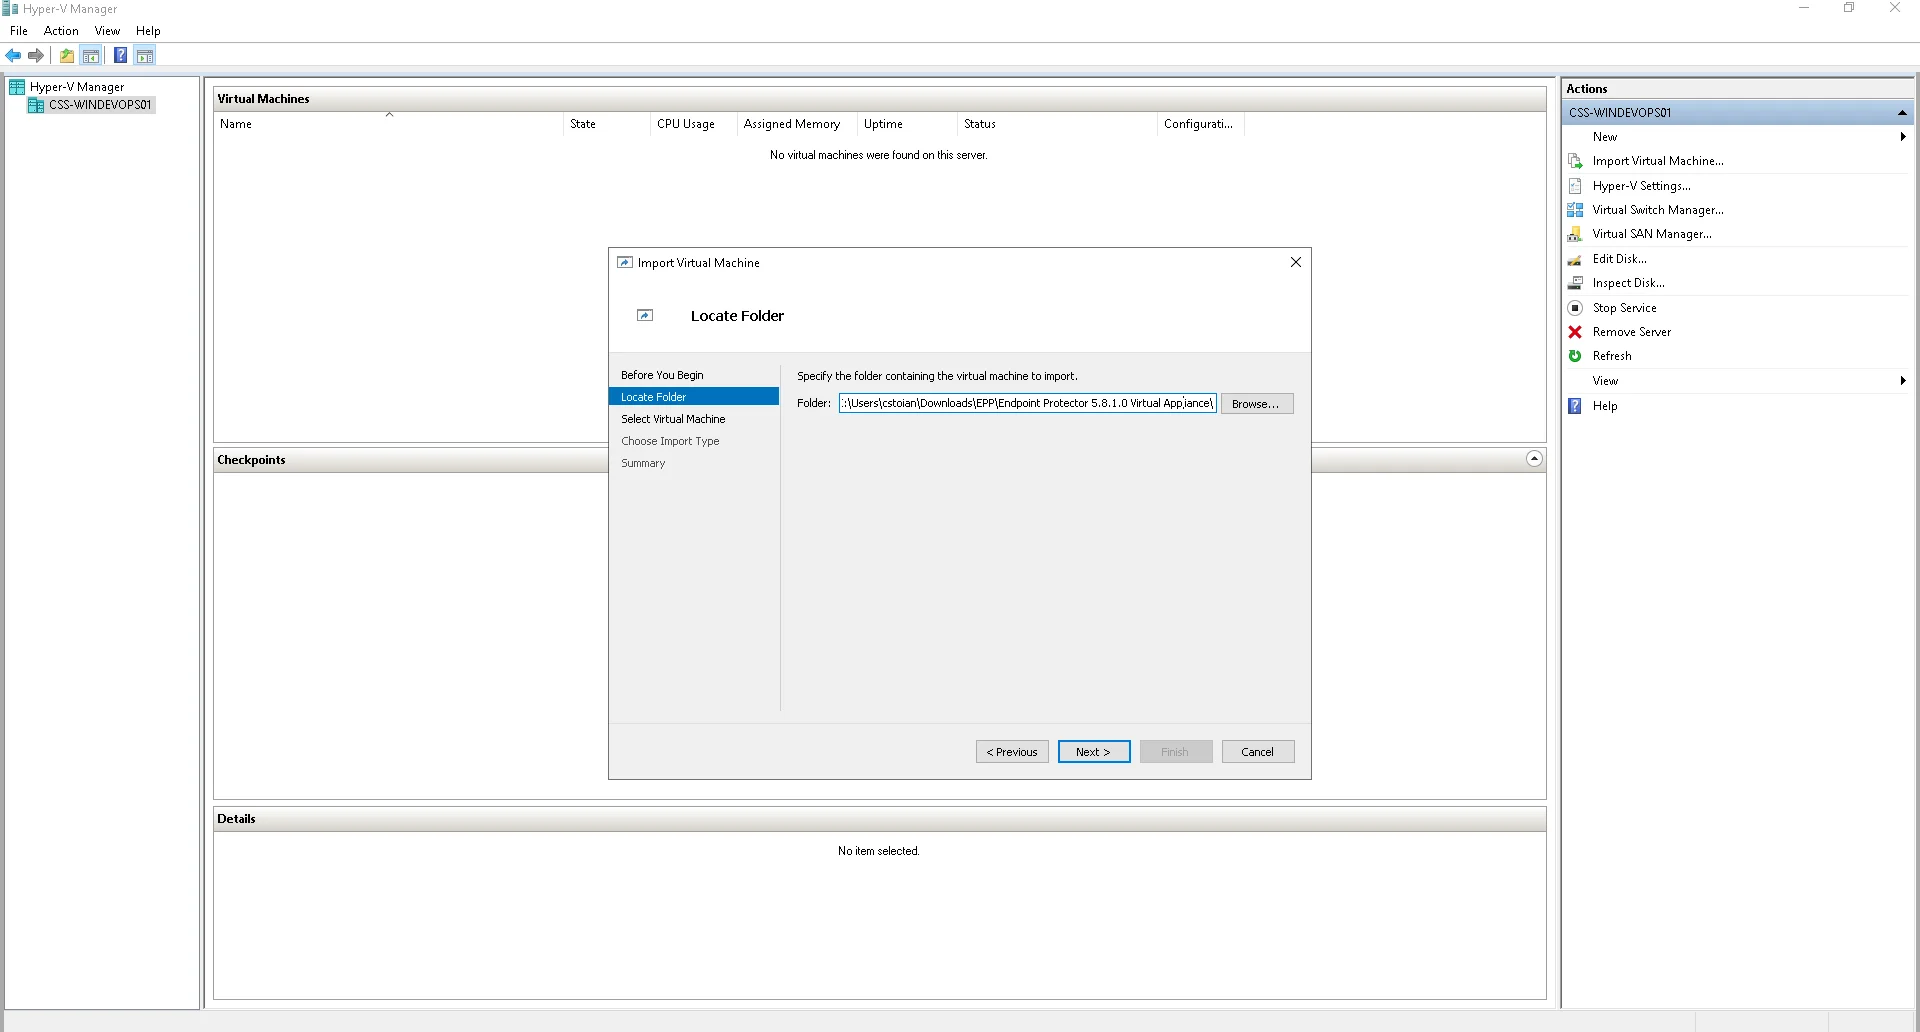
Step 6 – Click Next.
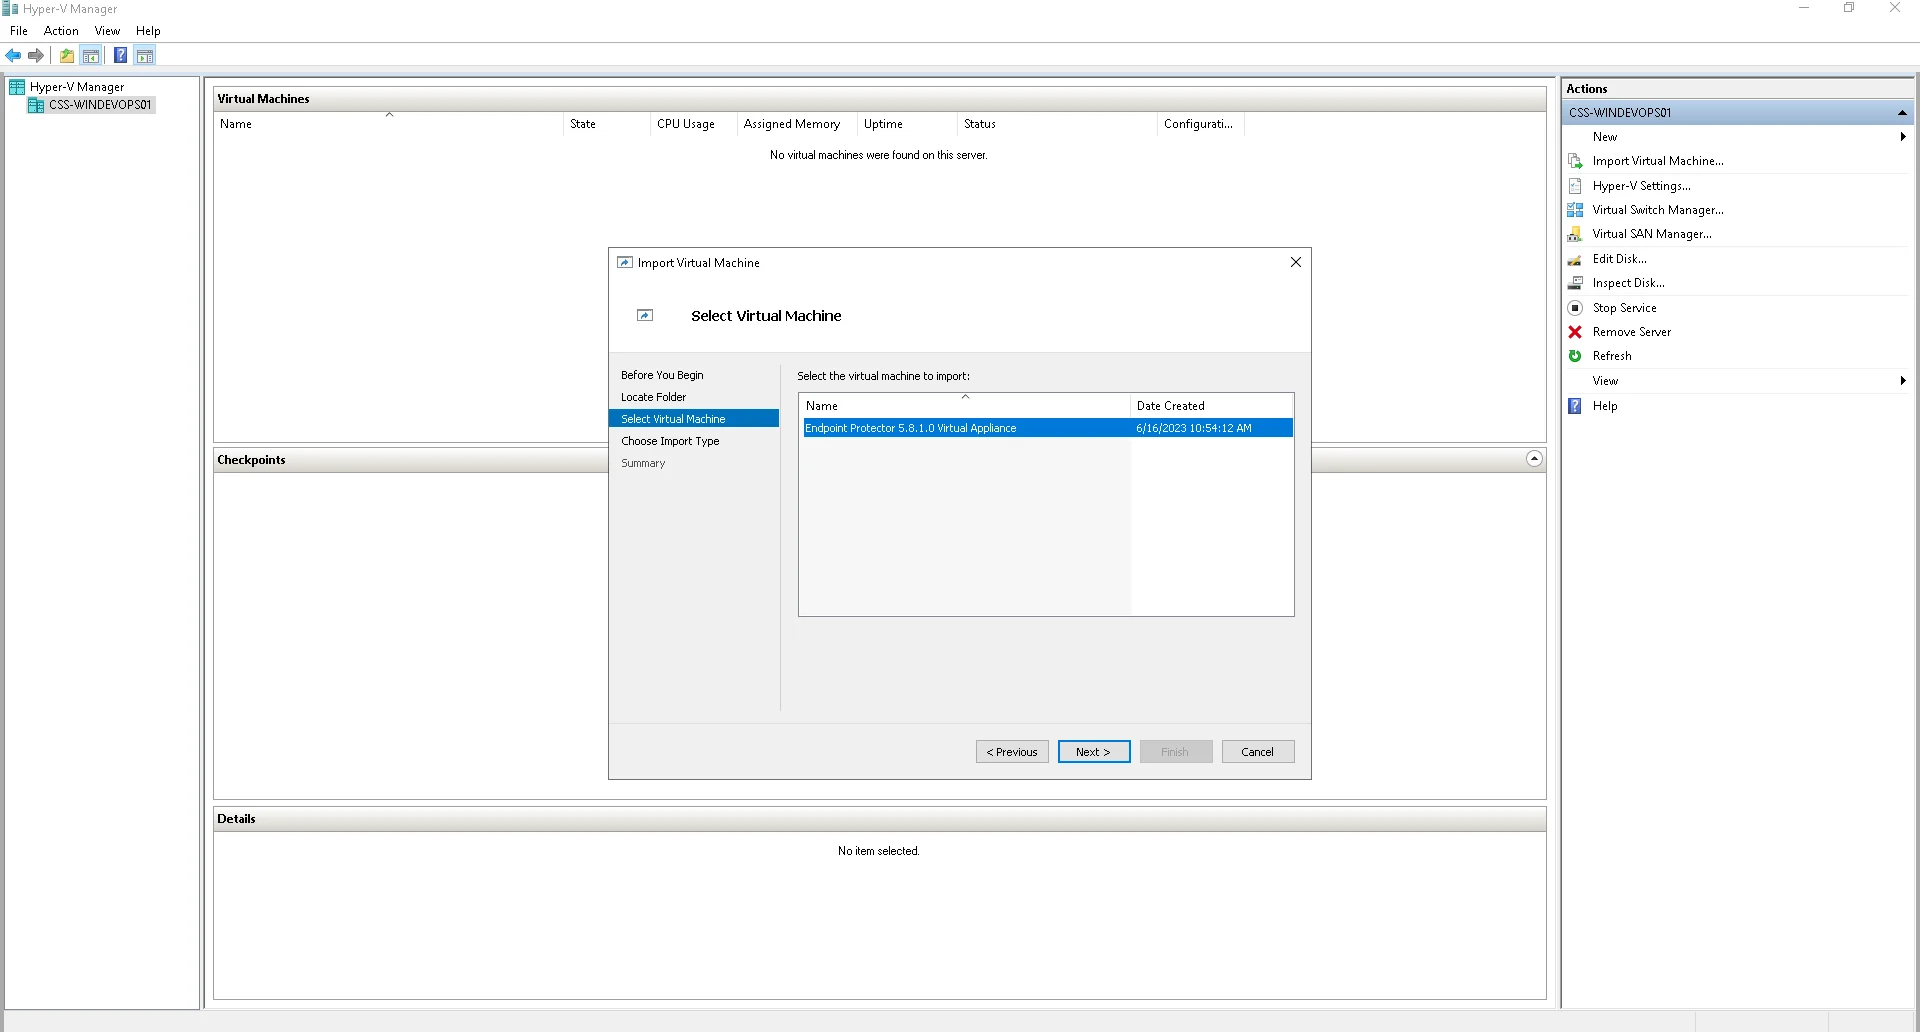
Step 7 – On the Select Virtual Machine section, select the Endpoint Protector Virtual Appliance, then click Next.
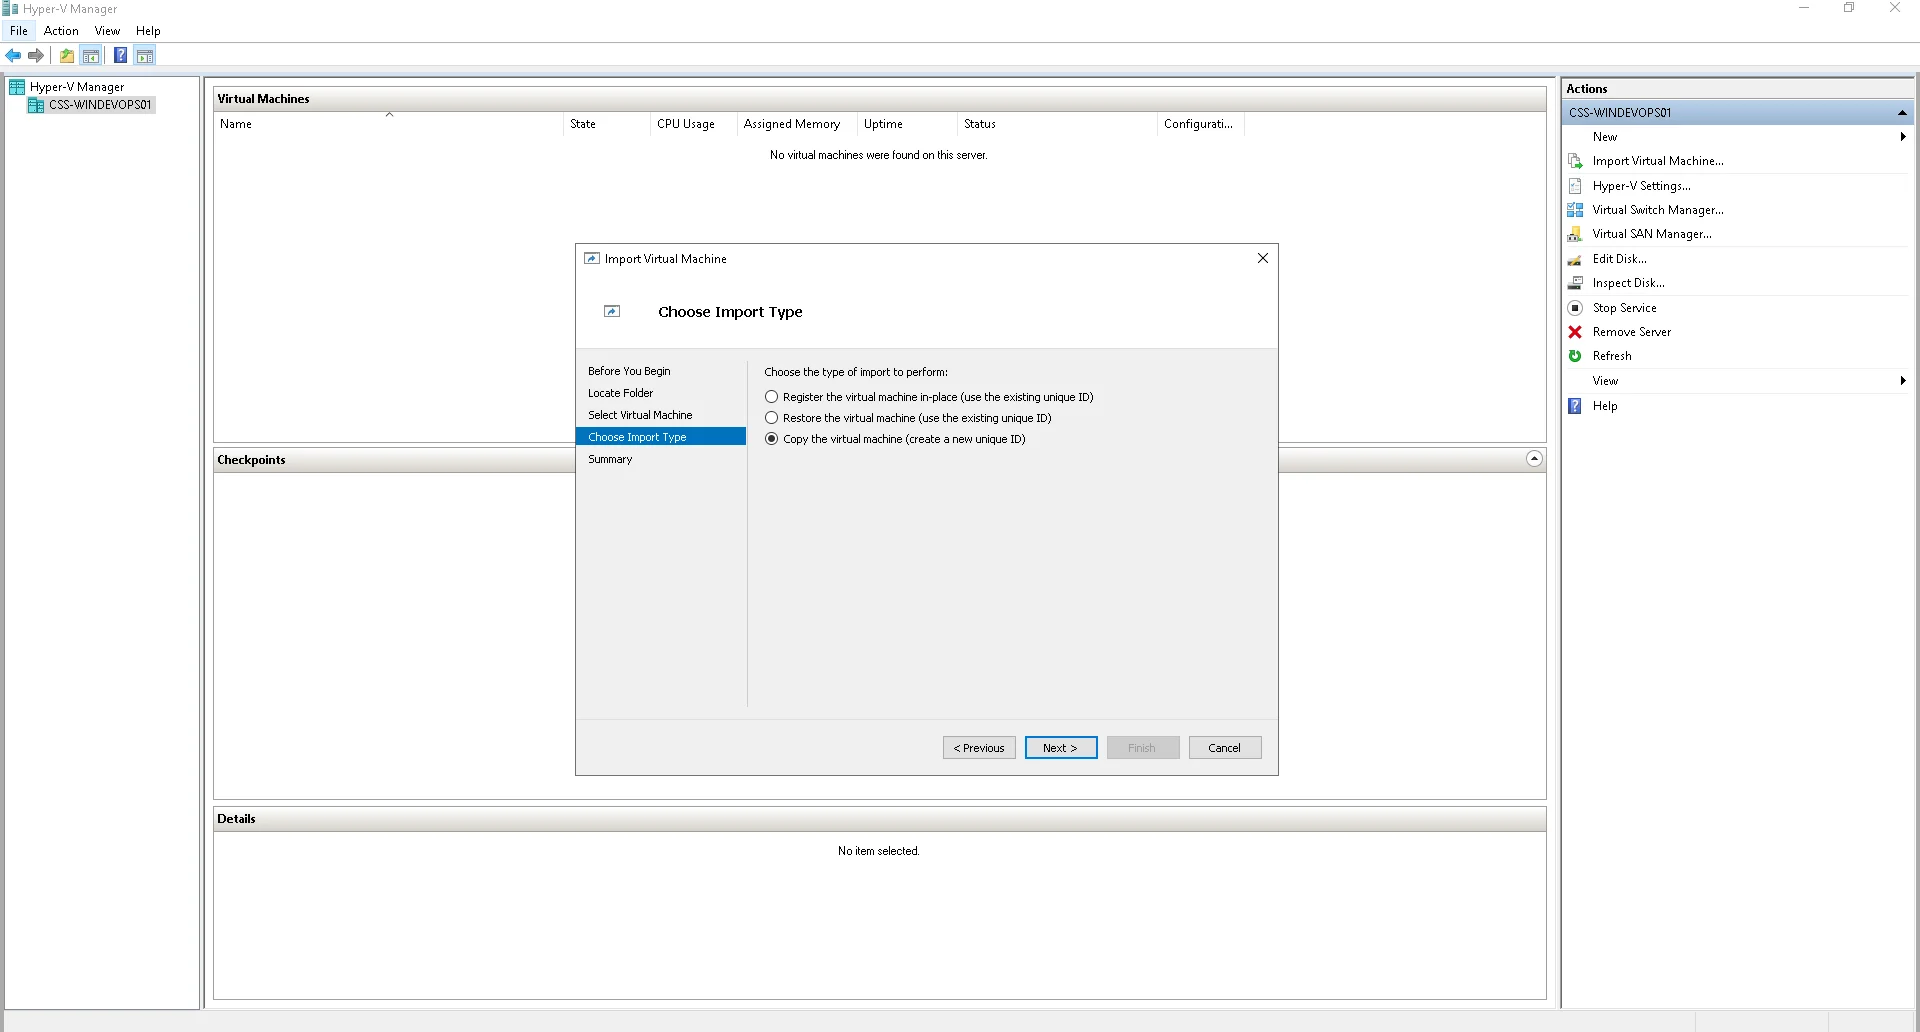
Step 8 – On the Choose Import Type section, select the Copy the virtual machine (create a new unique ID) option. Click Next.
Step 9 – In the 'Choose Folders for Virtual Machine Files' section, select Store the virtual machine in a different location, then specify the desired paths in the three input fields. Click Next to proceed.
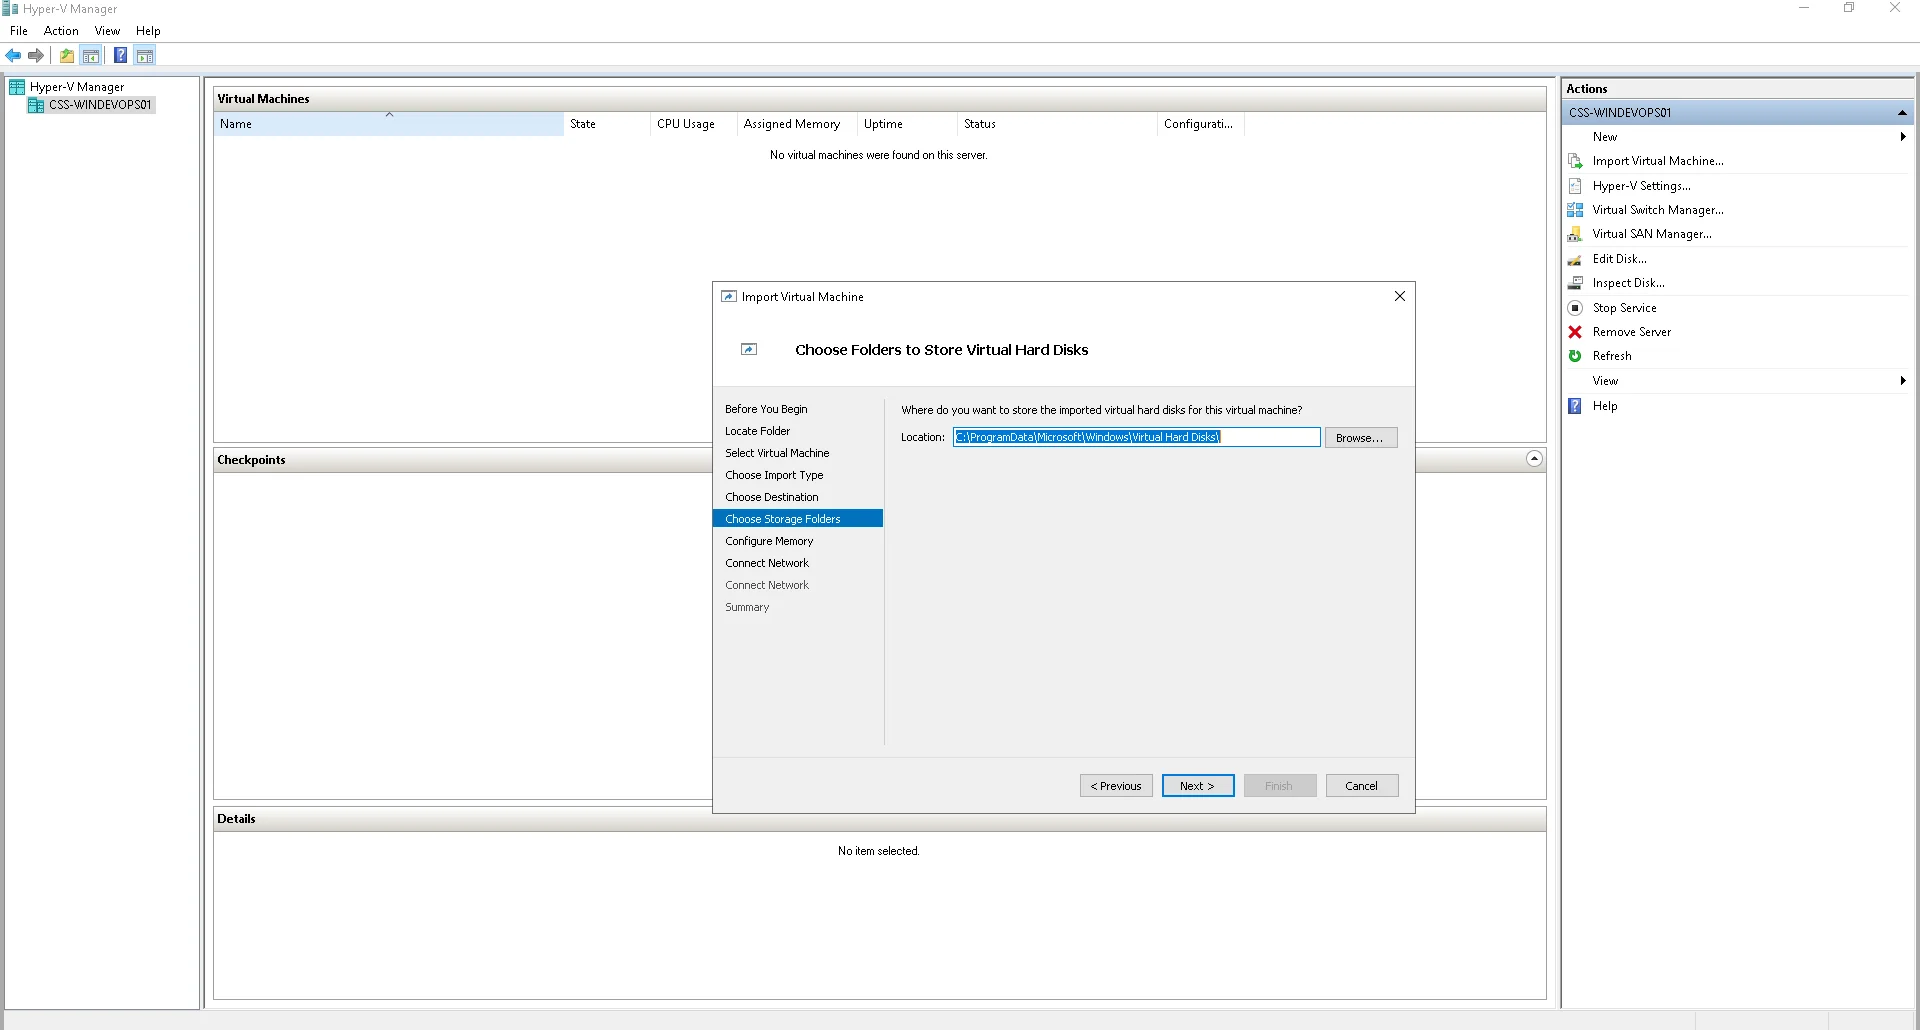
Step 10 – On the Choose Folders to Store Virtual Hard Disks section, set the desired path for storing imported virtual hard disk. Click Next.
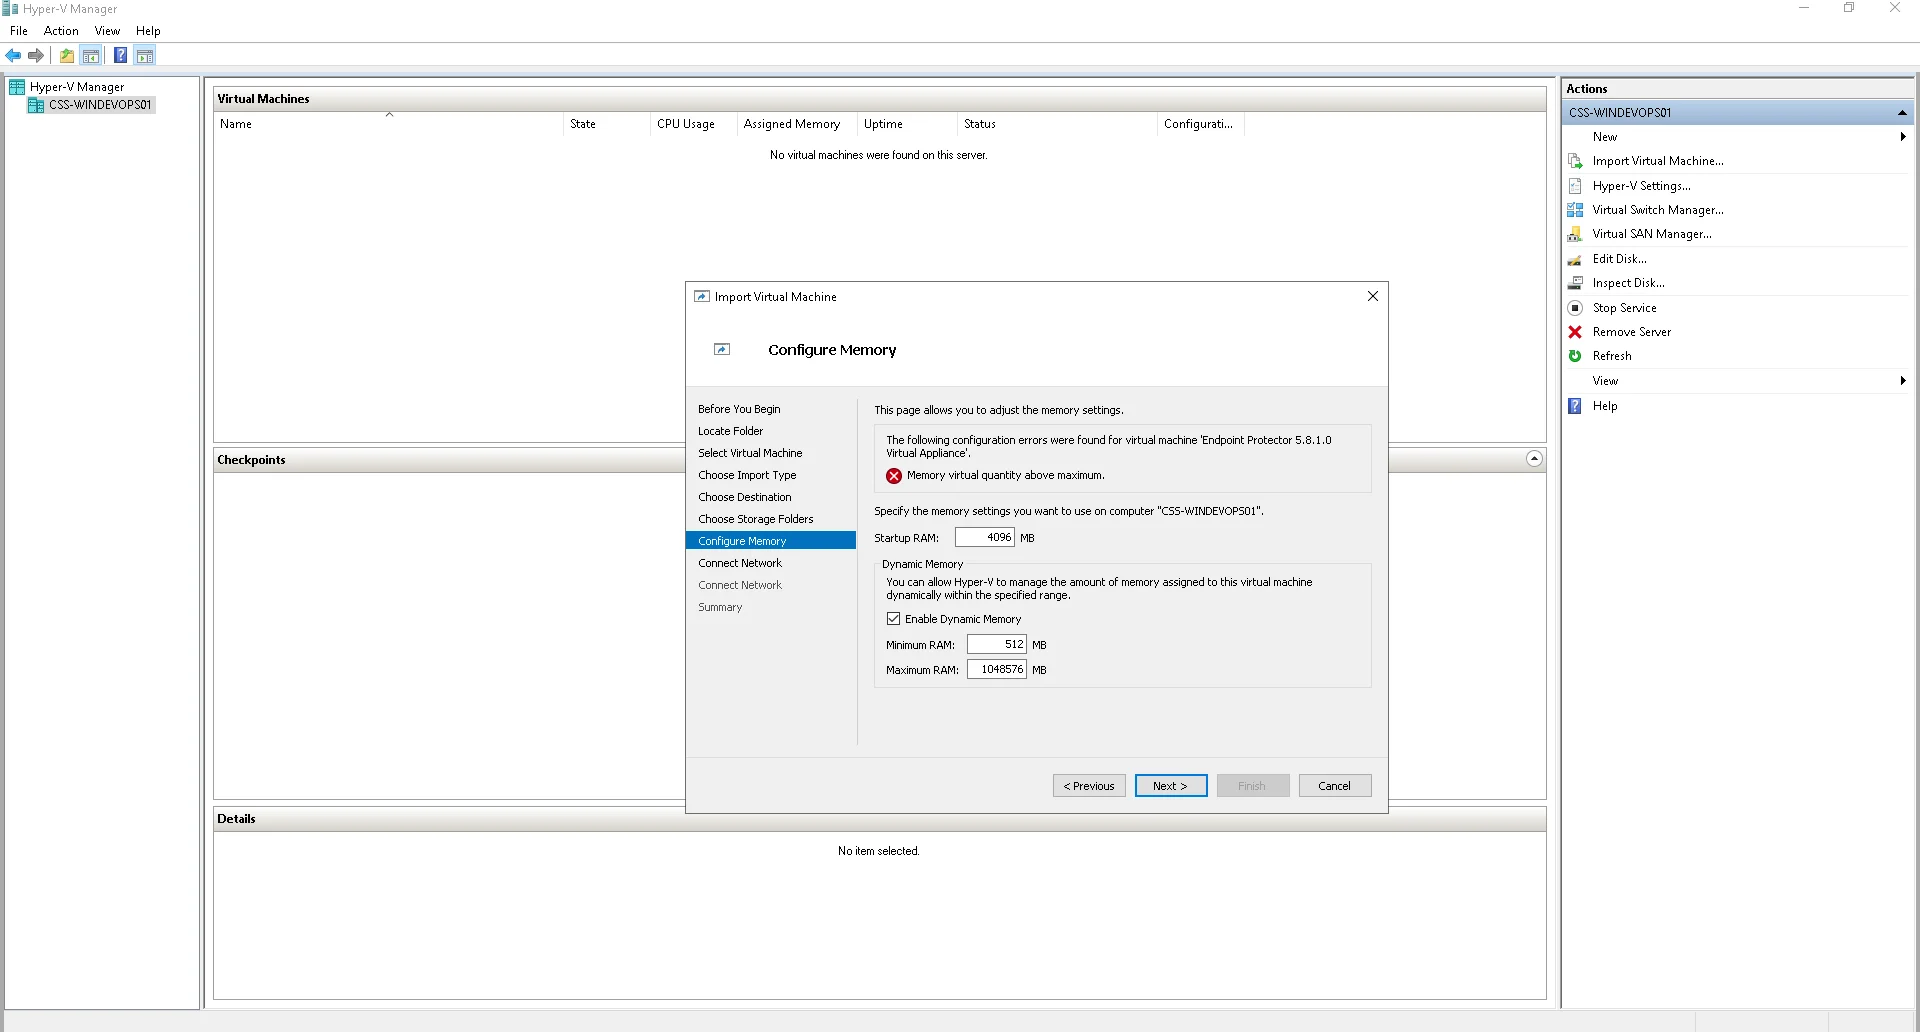
CAUTION: If you get to the Get Memory step, it means you have insufficient memory on the Hyper-V Host. Please abort the process here and either increase memory on the Host or choose another Host to import the Endpoint Protector Virtual Appliance on.
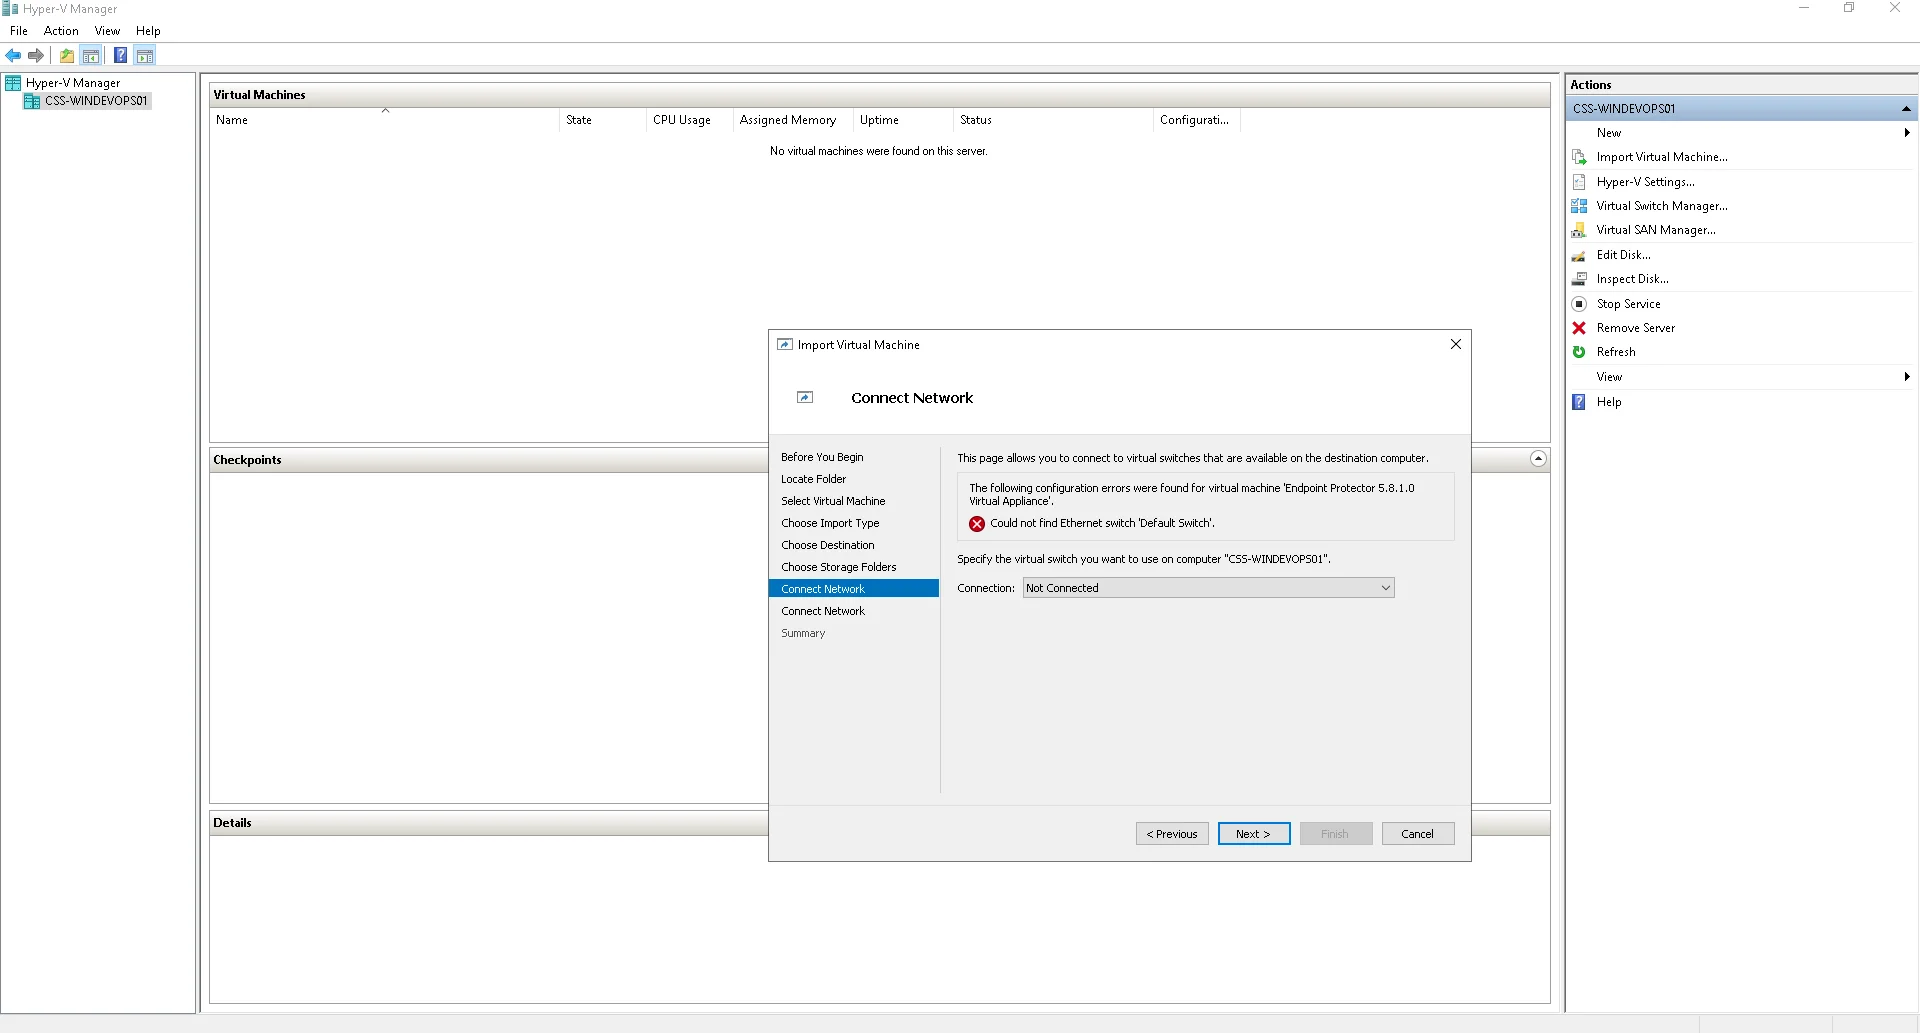
Step 11 – On the first Connect Network step, please mention the virtual switch you want to use for the first virtual network interface, changing it from ‘Not Connected’ to desired one. Click Next.
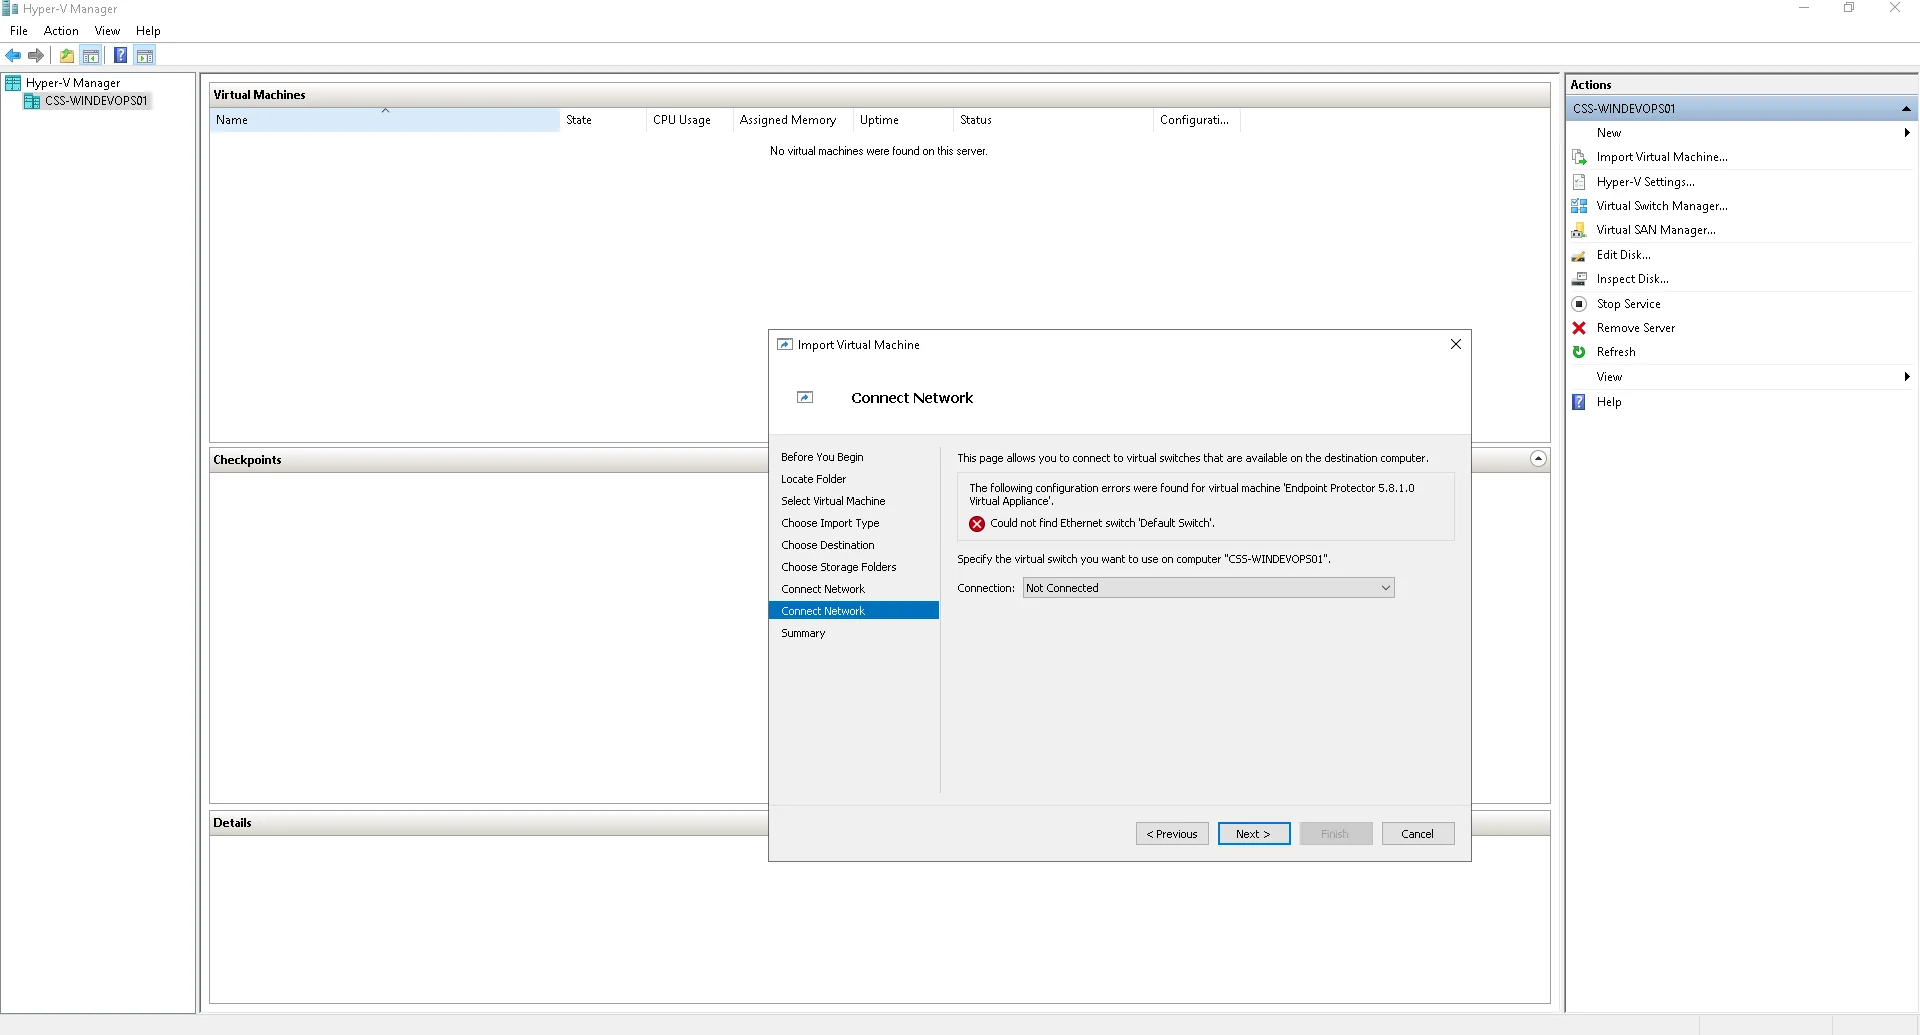
Step 12 – On the second Connect Network step, please mention the virtual switch you want to use for the second virtual network interface. You may use the same one you have used at the previous step. Click Next.
Step 13 – On the Completing Import Wizard step, check that the settings are the ones wanted. Click Finish.
The new Virtual Machine will display in the Virtual Machines list.